Stock withdrawals and customer complaints
Except for regular sales, orders, and stocktaking, there are two additional ways to manage goods in the storage where the inventory decreases. These include stock withdrawals via BackOffice and handling customer complaints from the cash register.
Stock withdrawal
When performing a stock withdrawal via BackOffice, you are withdrawing goods from a specific storage without simultaneously adding them to any other storage. It can be seen as the opposite of a delivery, where goods are added to the storage.
To make a stock withdrawal via BackOffice, follow the guide below.
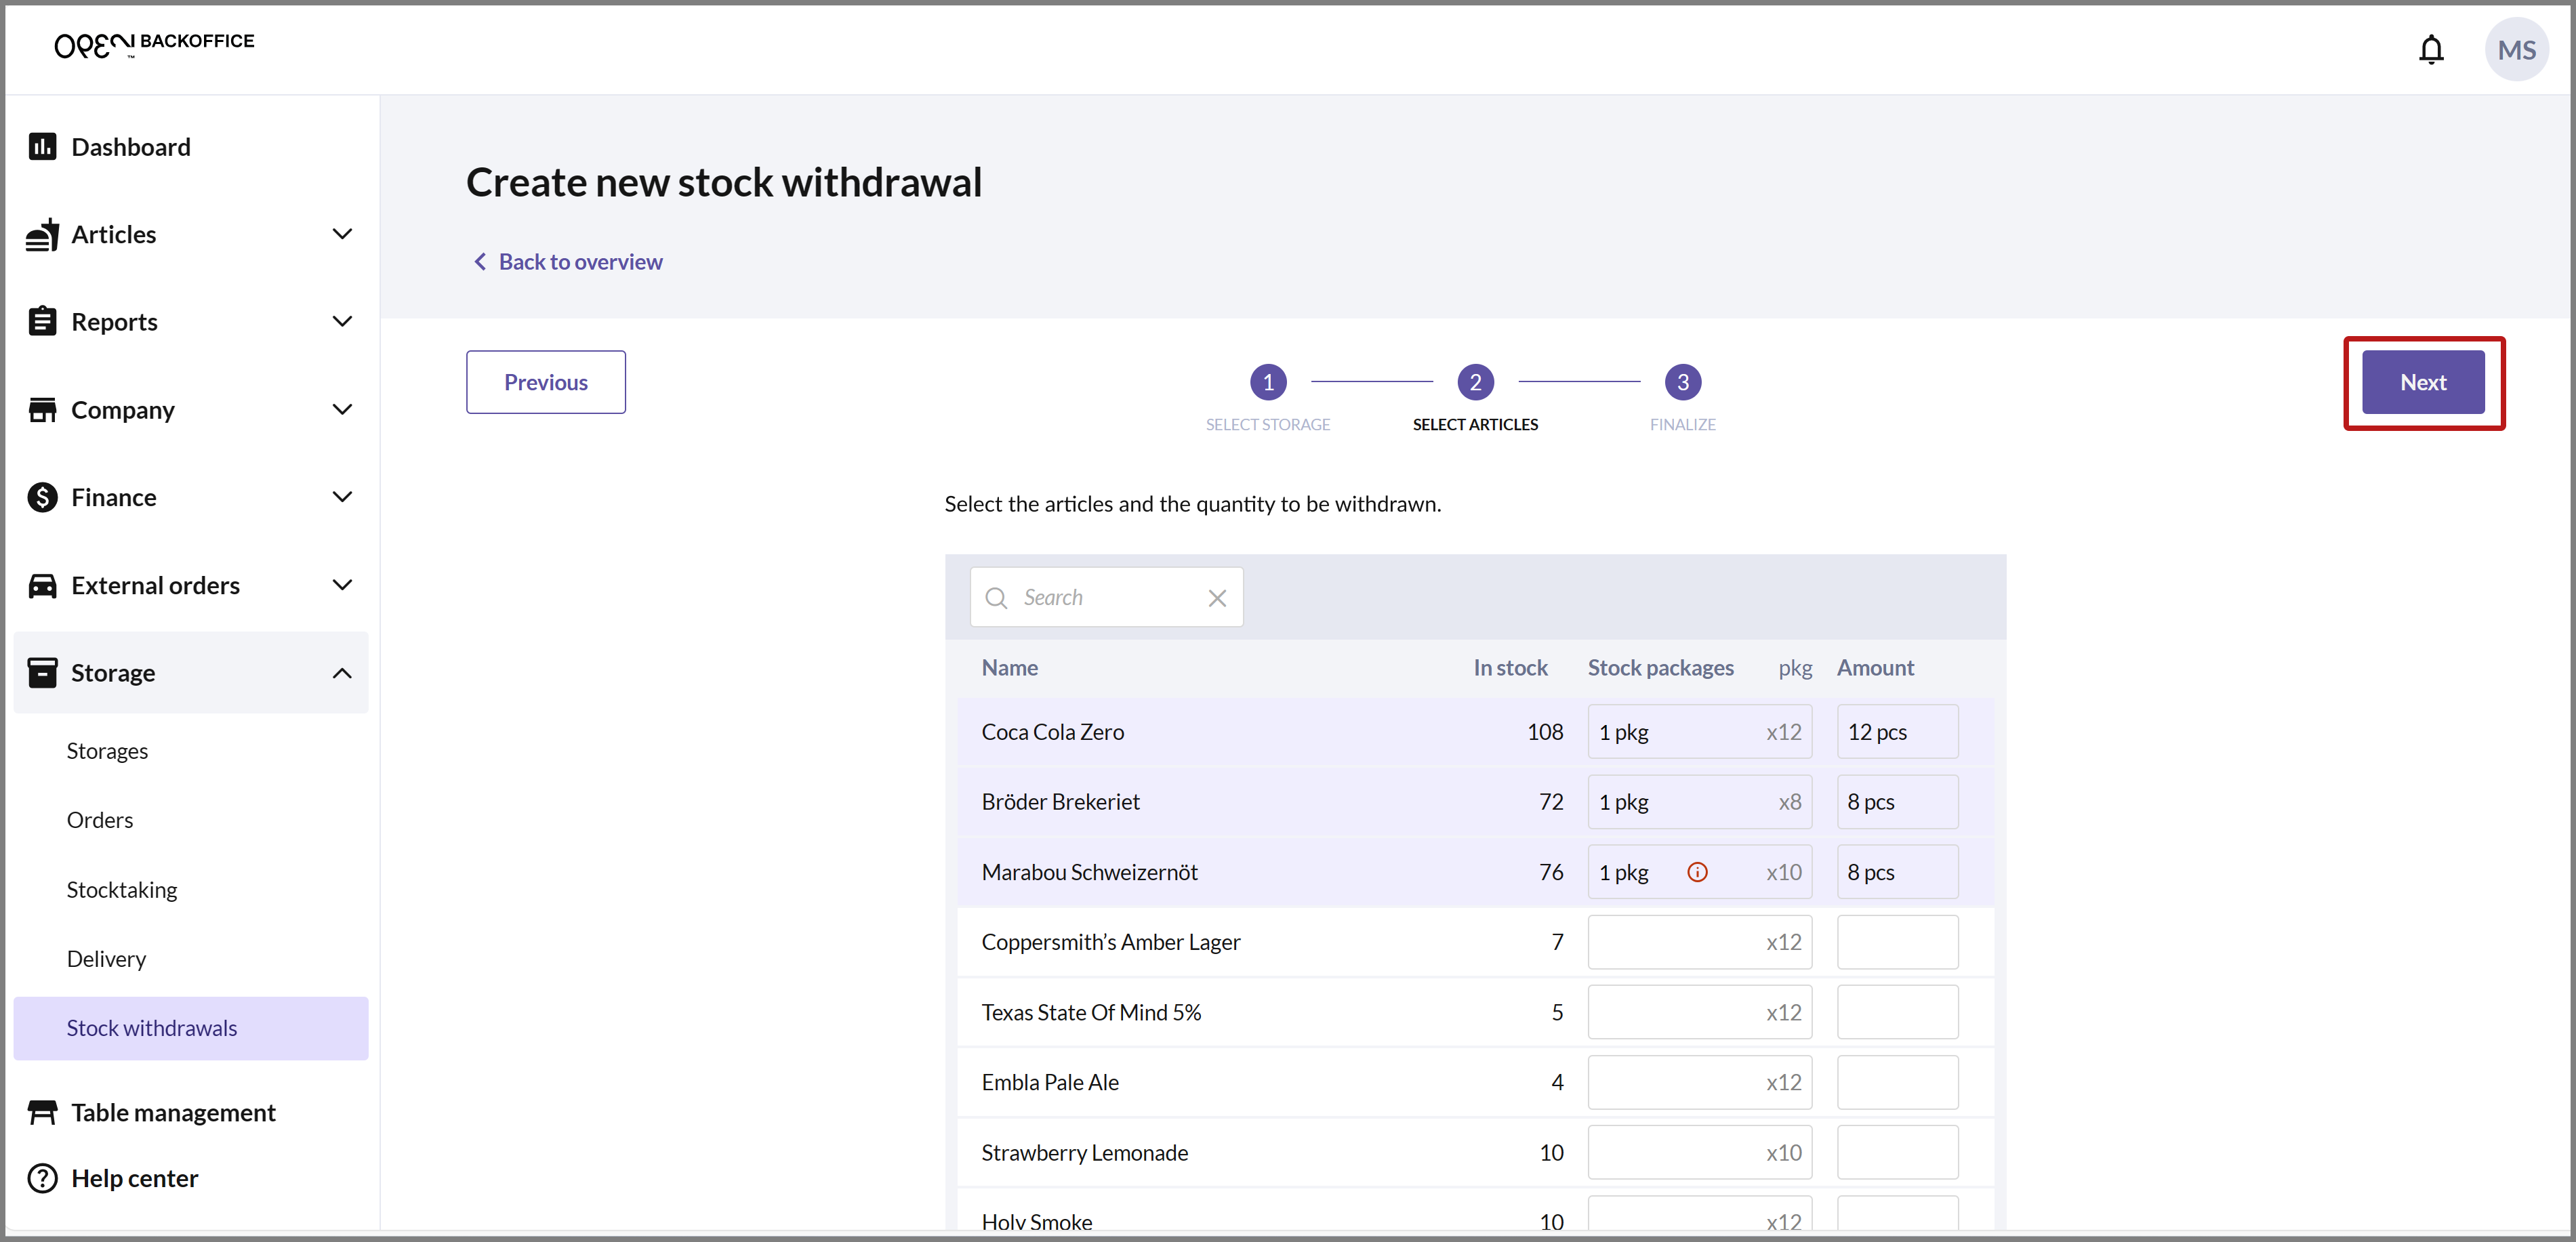
Select STORAGE in the menu and go to STOCK WITHDRAWAL. Here, you can see your previous withdrawals. Click on CREATE NEW to register a new withdrawal.

SELECT STORAGE
Choose the storage from which the goods will be withdrawn, then you will be automatically taken to step 2.

SELECT ARTICLES
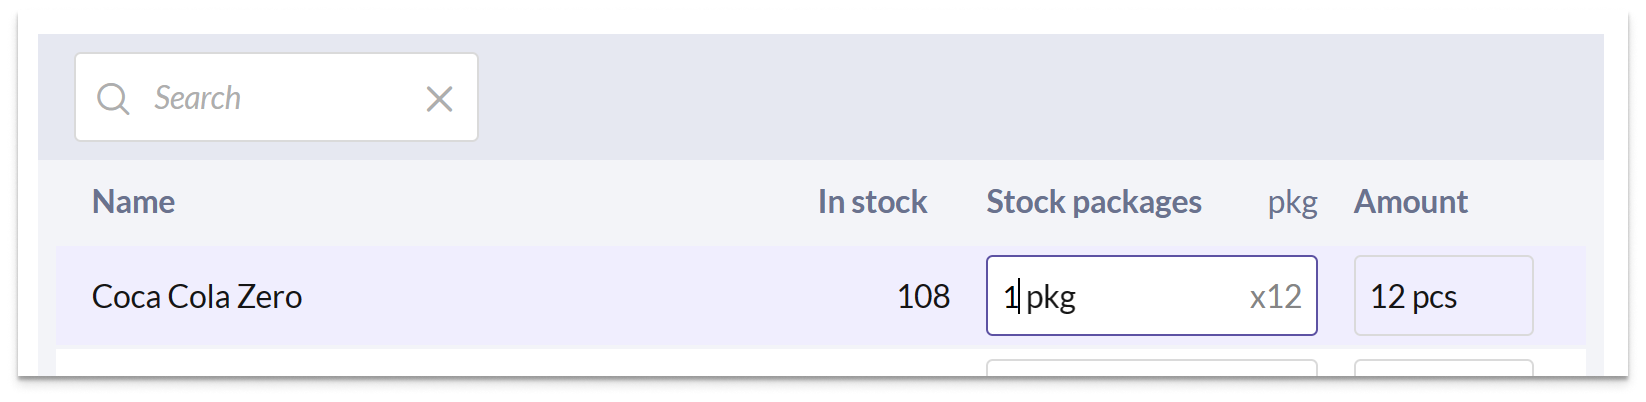
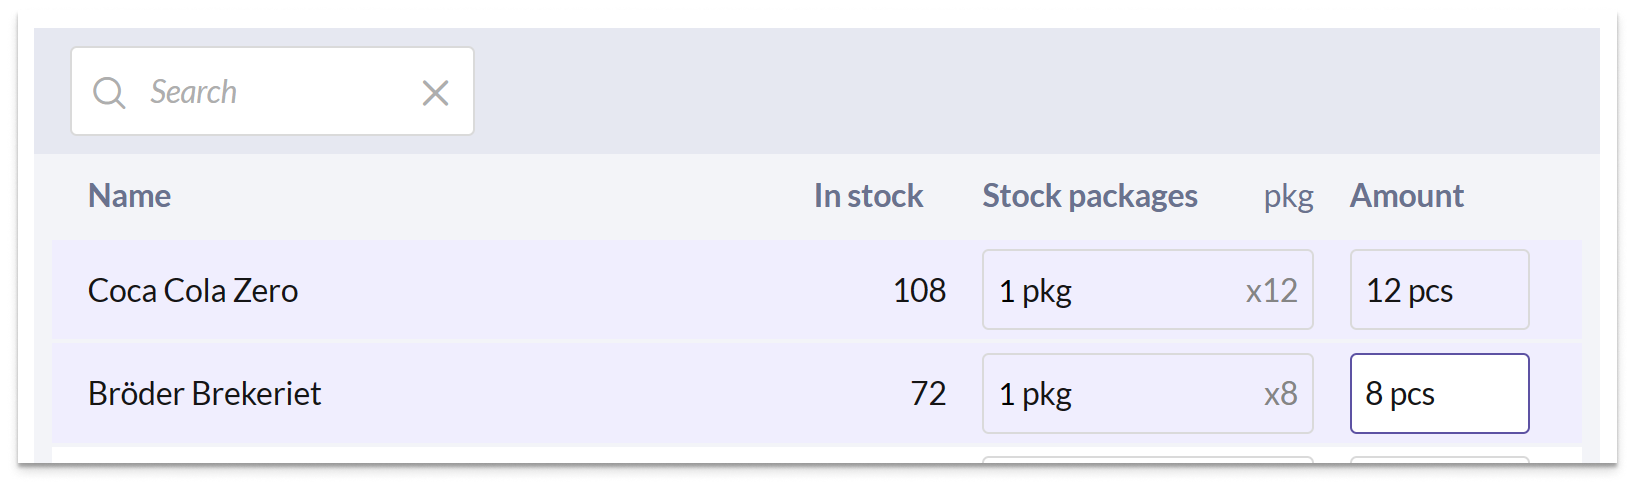
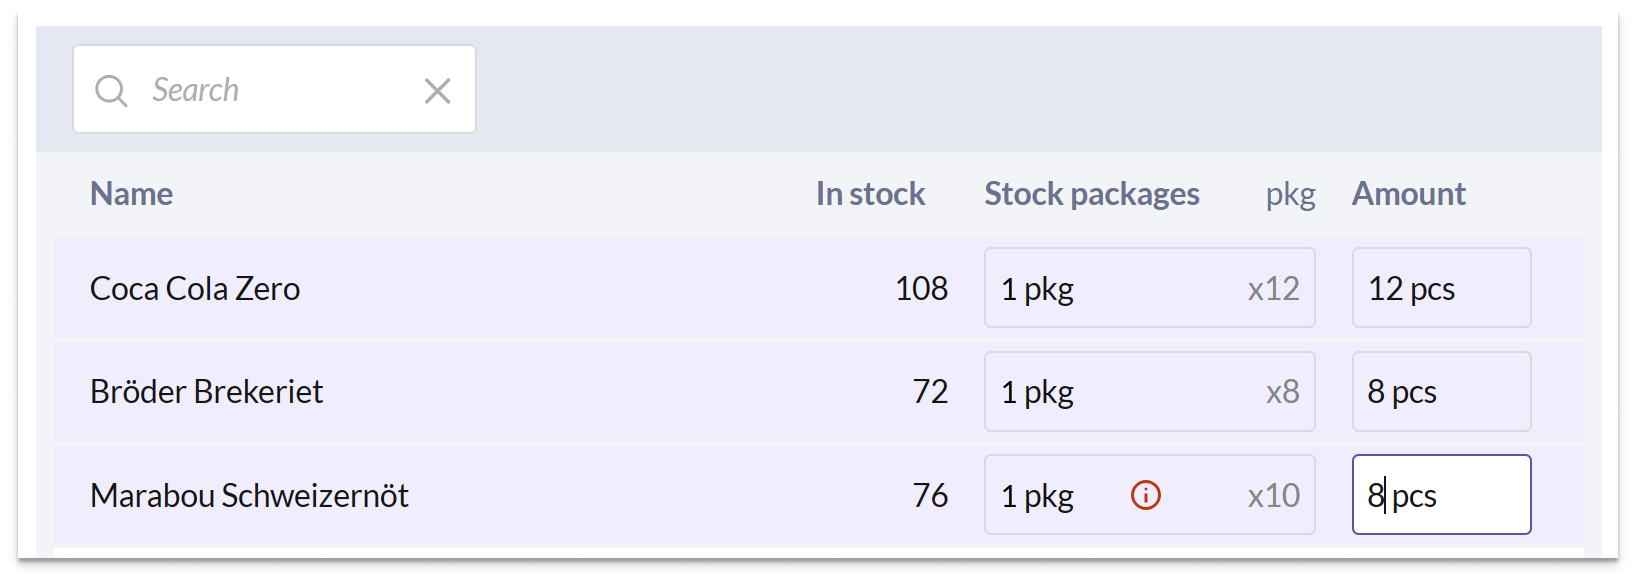
Select articles by specifying the quantity to be withdrawn for the respective articles.

You can specify the quantity in terms of the number of stock packages or in units (= customer packages, i.e., the packaging unit sold to customers).
If you enter 1 stock package in the Stock packages column, the Amount column will automatically be filled with the corresponding customer packages.
The same applies if you enter the quantity in the Amount column; the Stock packages column will be automatically filled in.
If you enter a quantity that does not divide evenly into whole stock packages, the Stock packages column will be rounded up and marked with a red information icon. However, this doesn't affect stock withdrawals, as only the quantity specified in the Amount column will be deducted from the stock balance.
If the Stock packages column is grayed out, it means that the stock package quantity is not specified for the article. In this case, specify the number of articles you received in the Amount column instead.

Once you have filled in the goods to be removed, click on NEXT to proceed.
COMPLETE WITHDRAWAL
In the final step, a summary of the withdrawal is displayed. Here, you can also see the total purchase value, based on the articles' purchase prices.
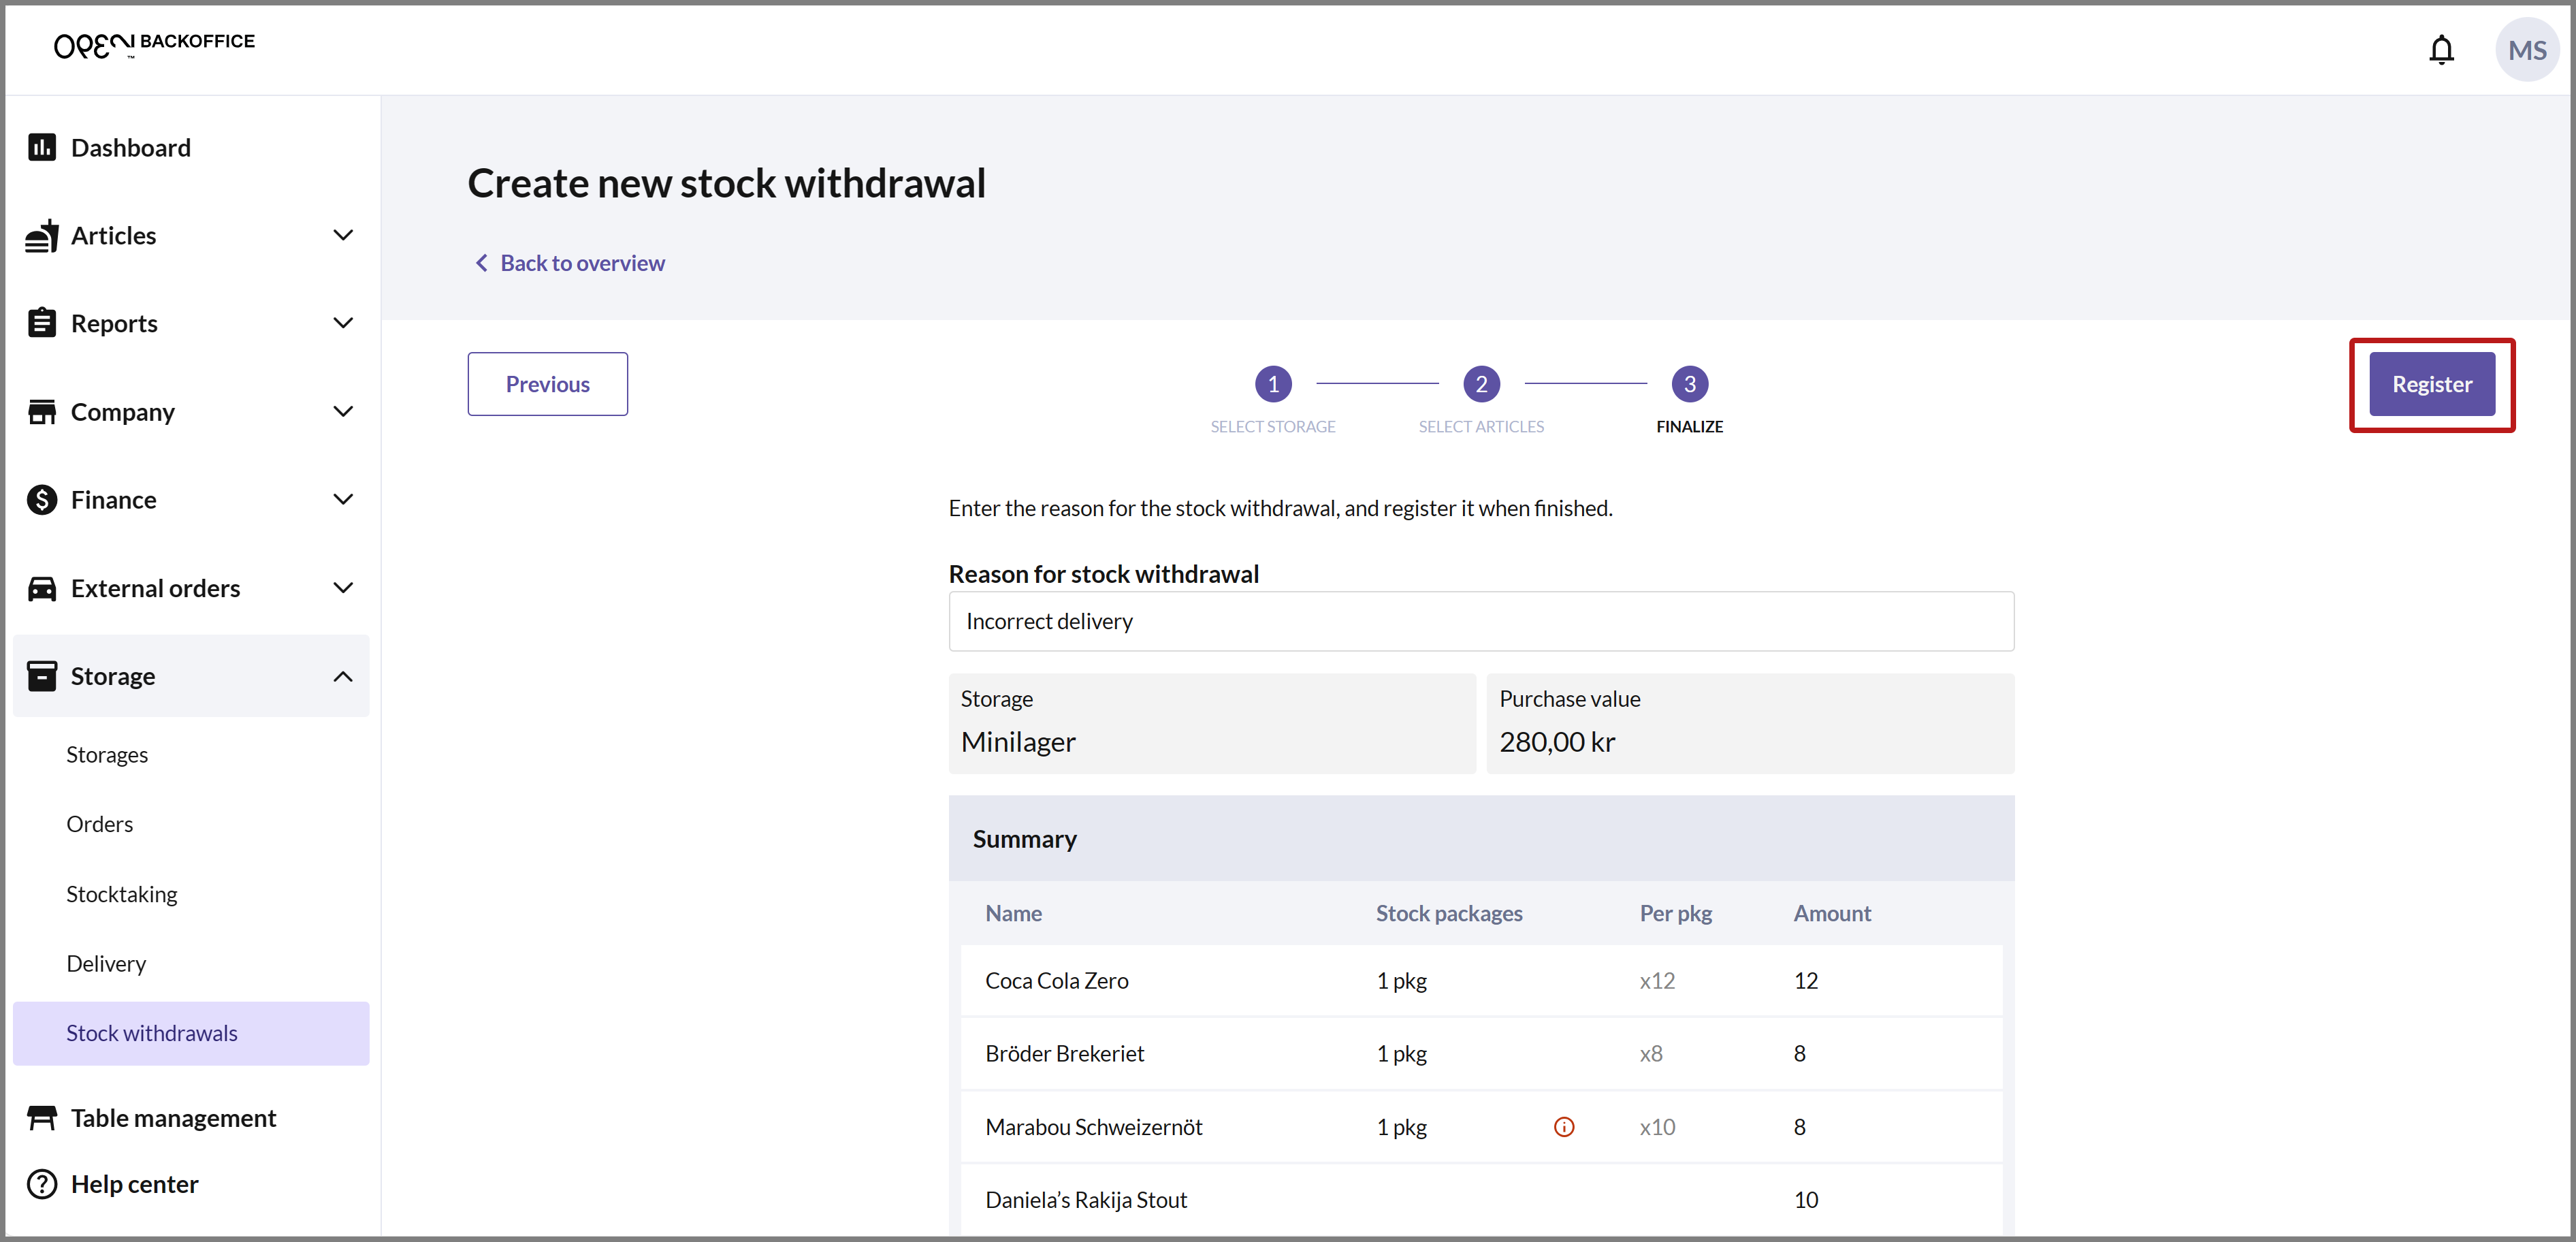
Fill in a reason for why the withdrawal is being made.
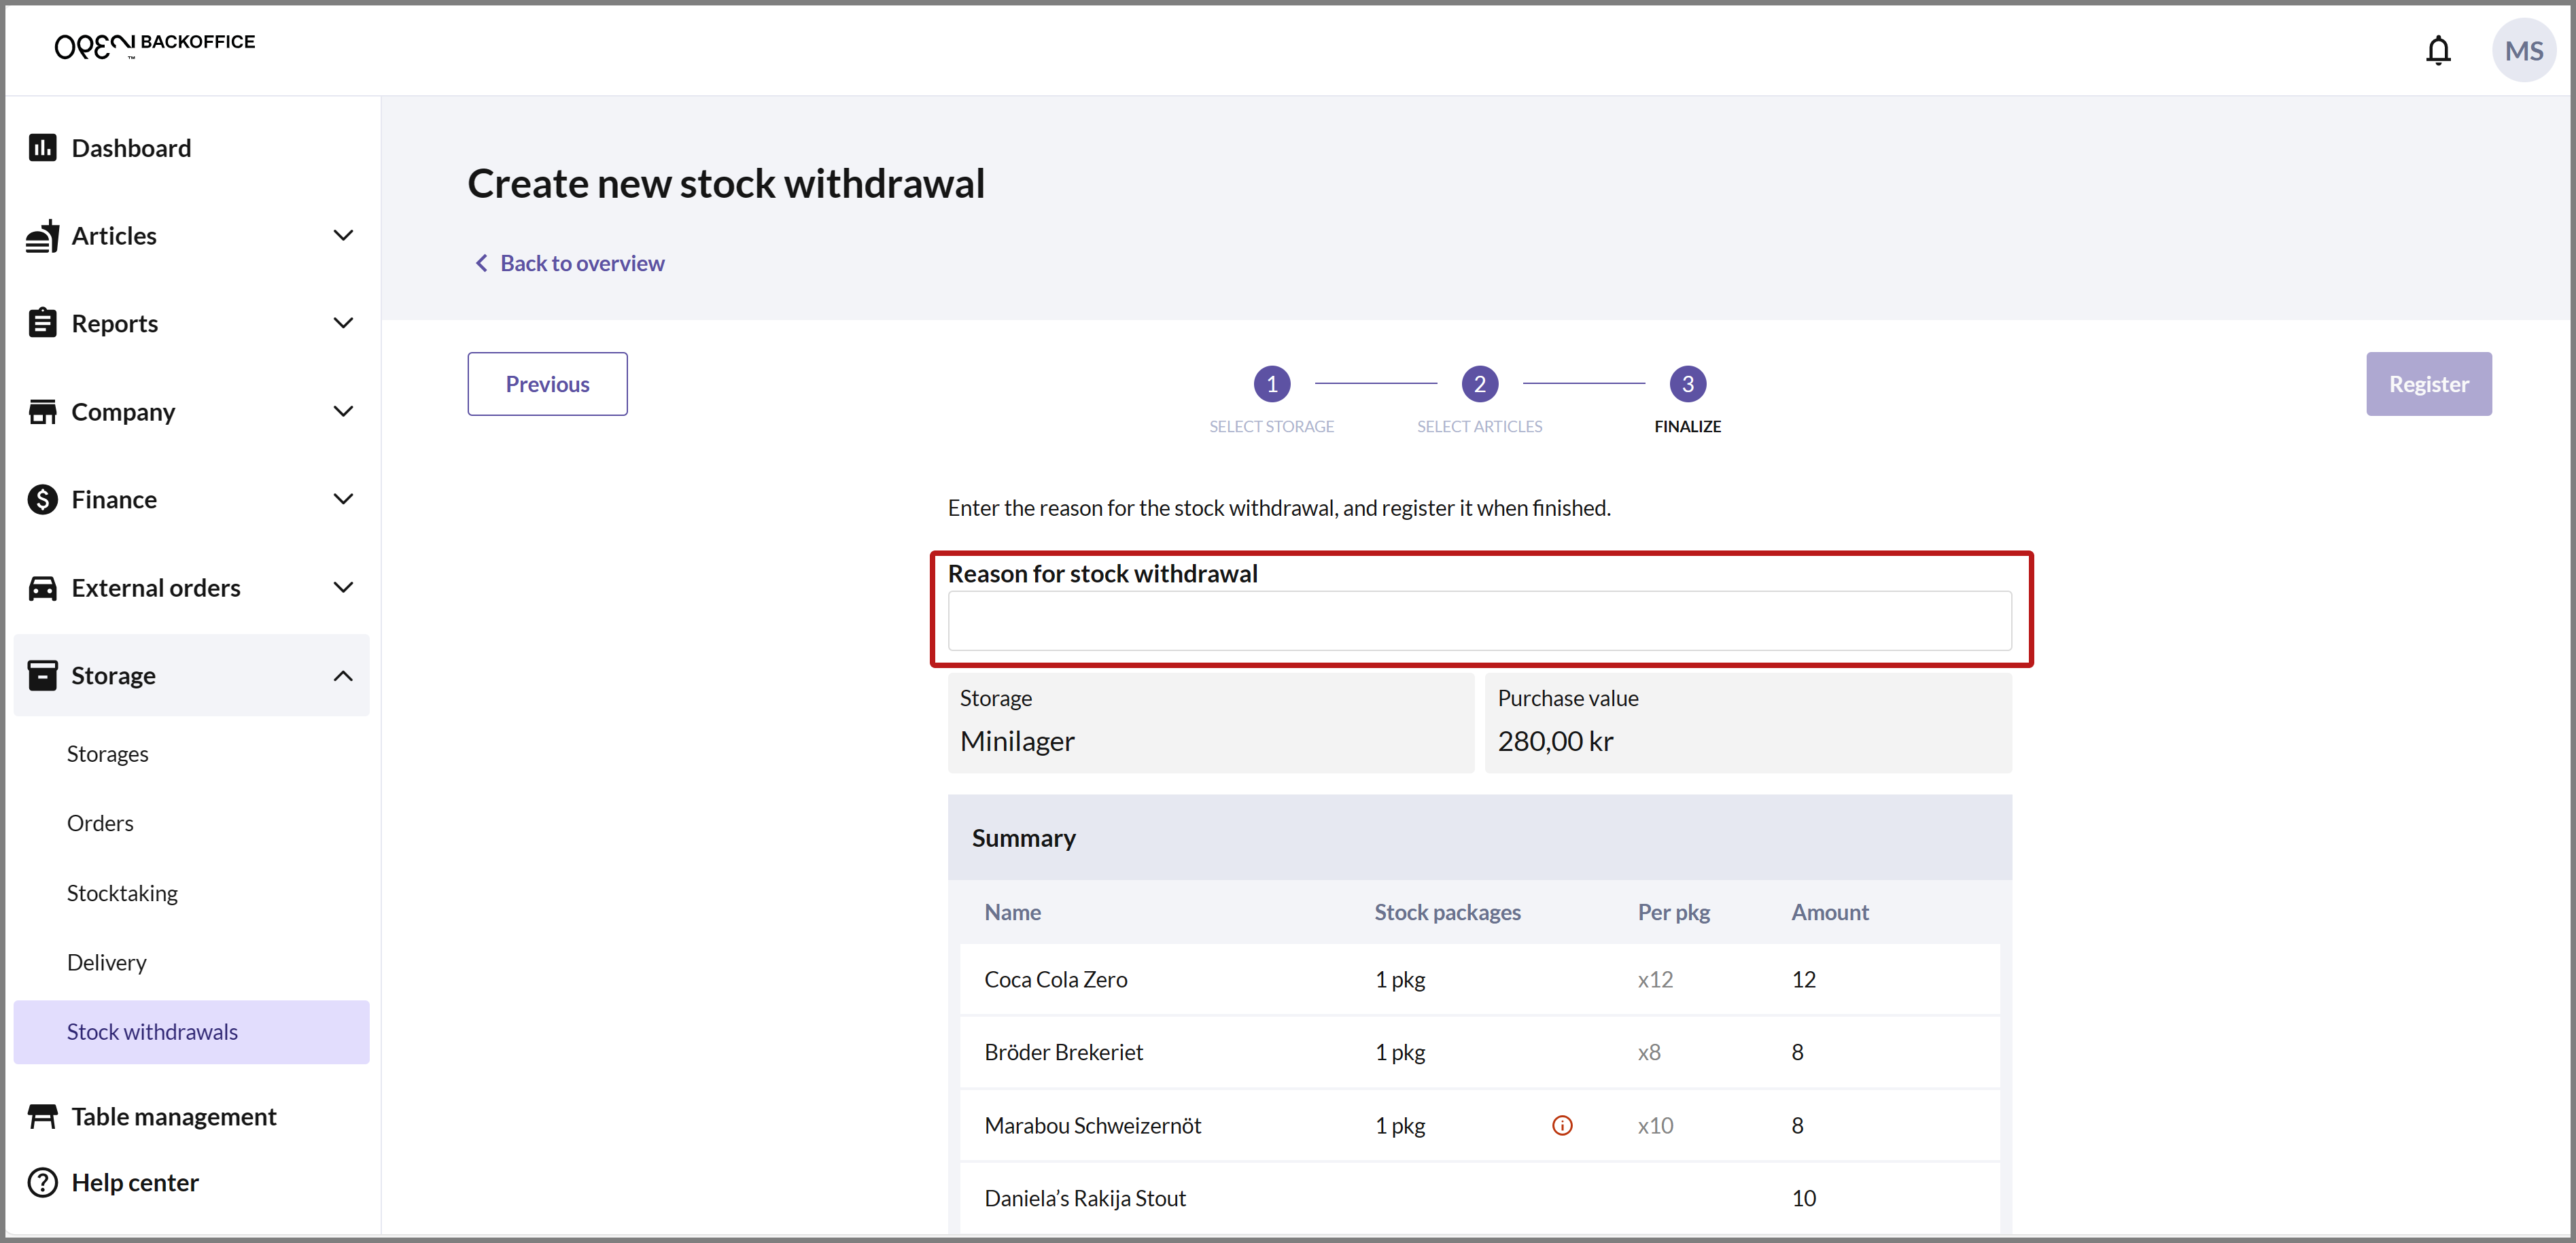
Press REGISTER to complete the withdrawal.
SUMMARY
You can now view the withdrawal in the list.
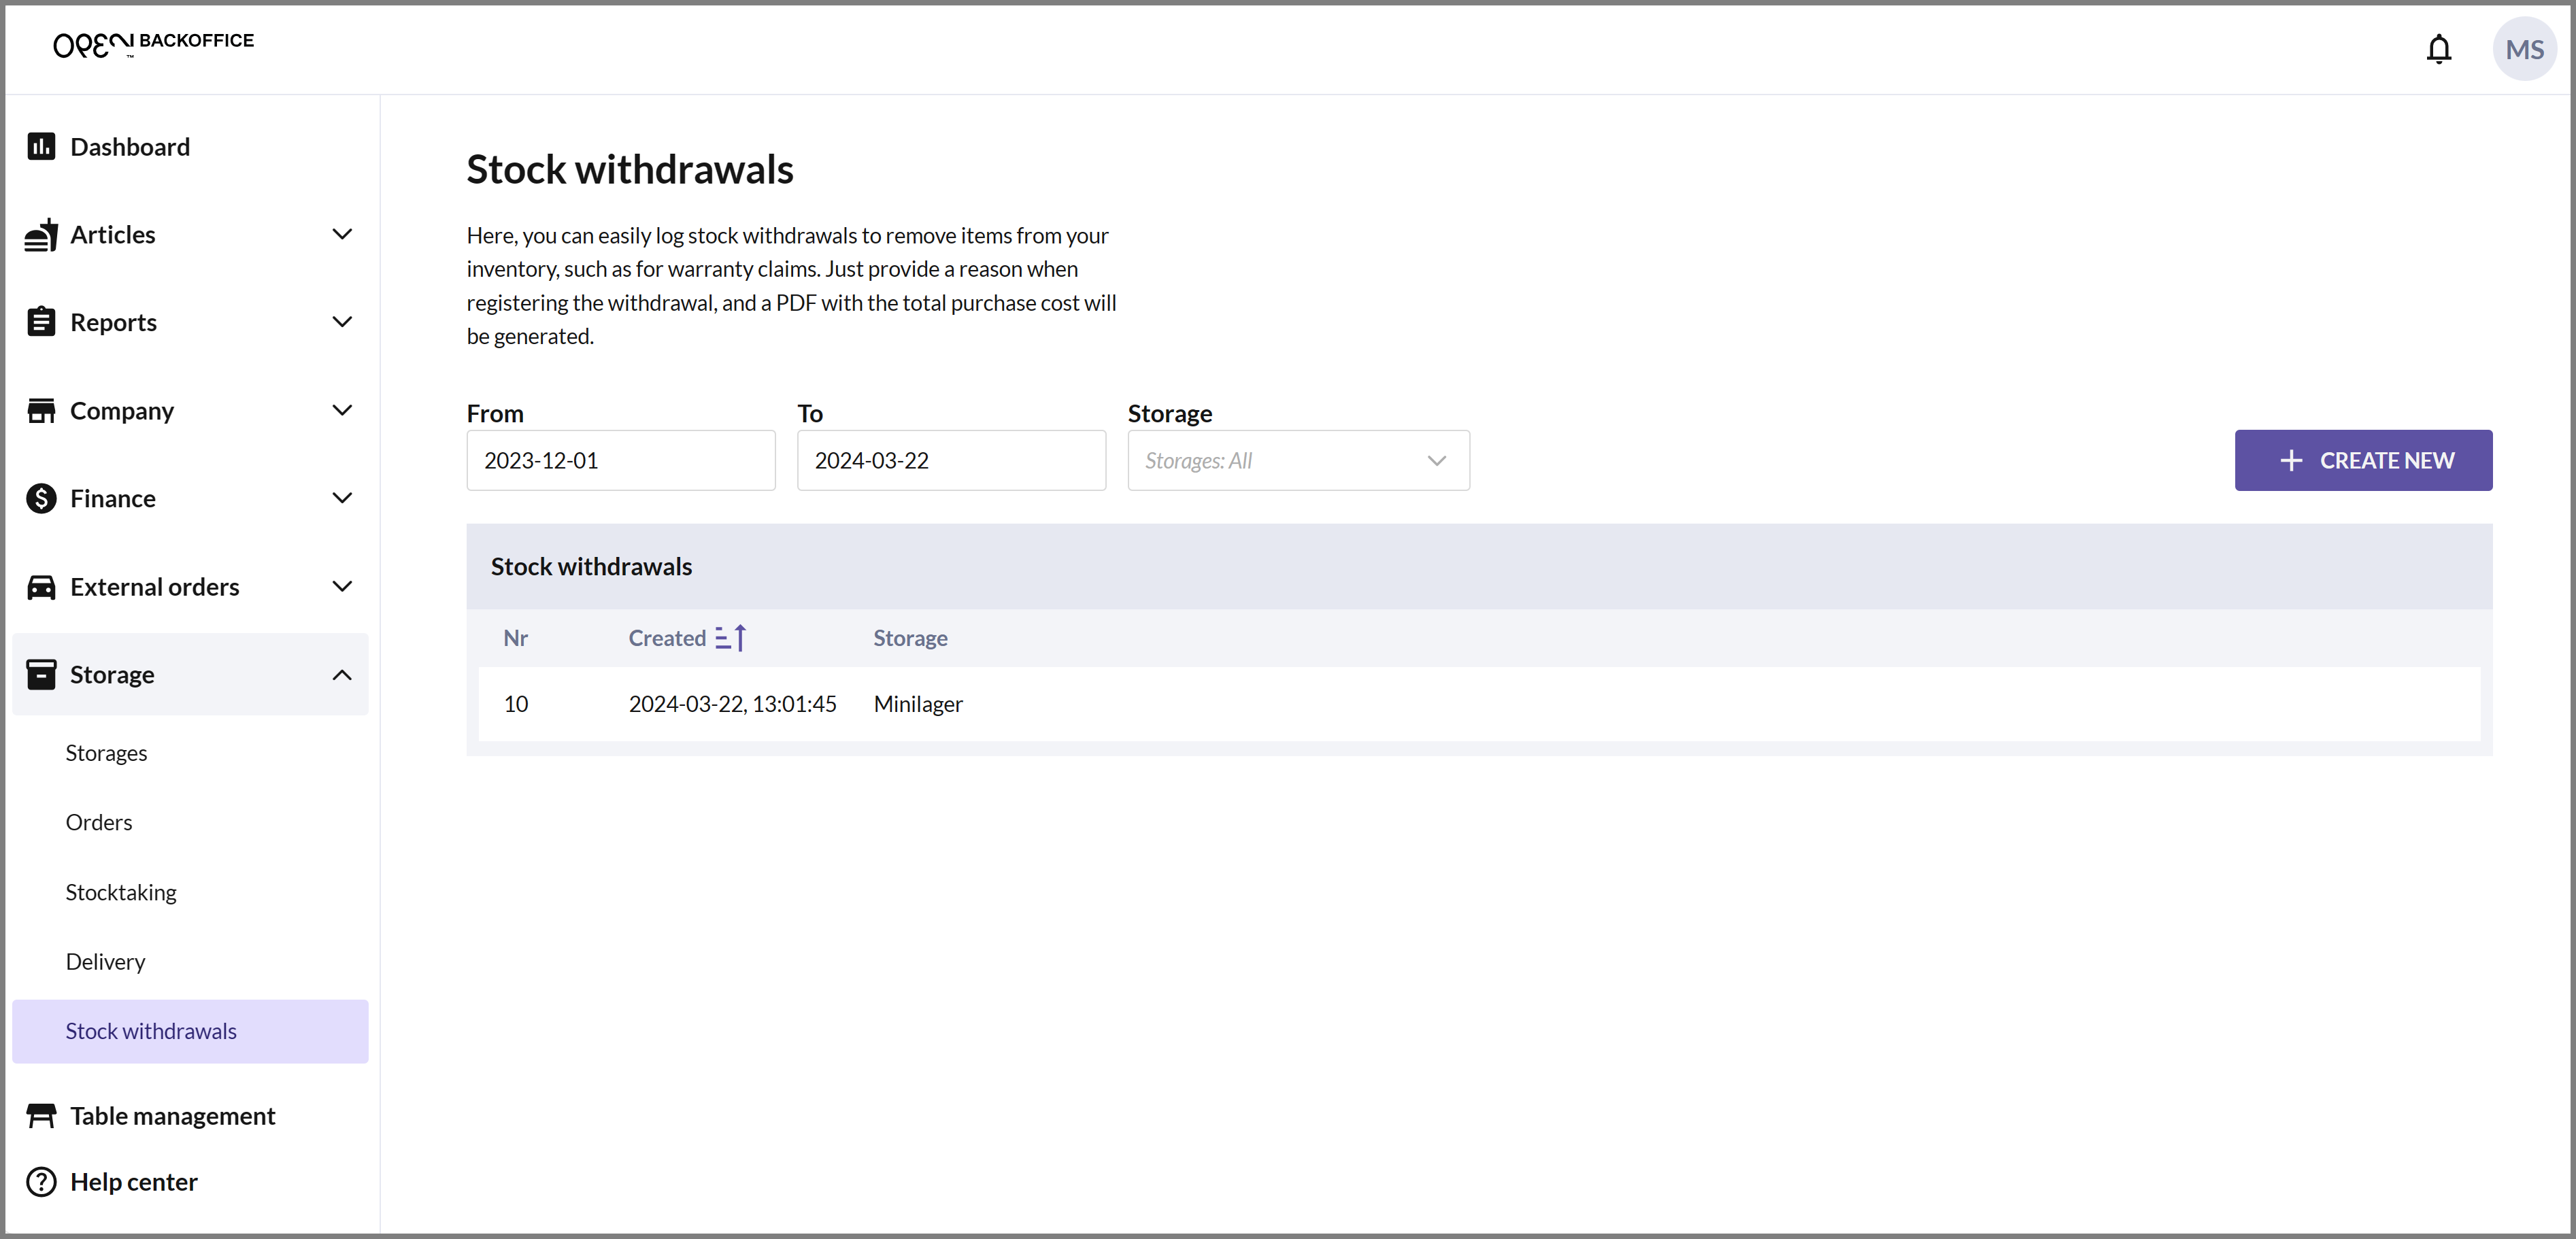
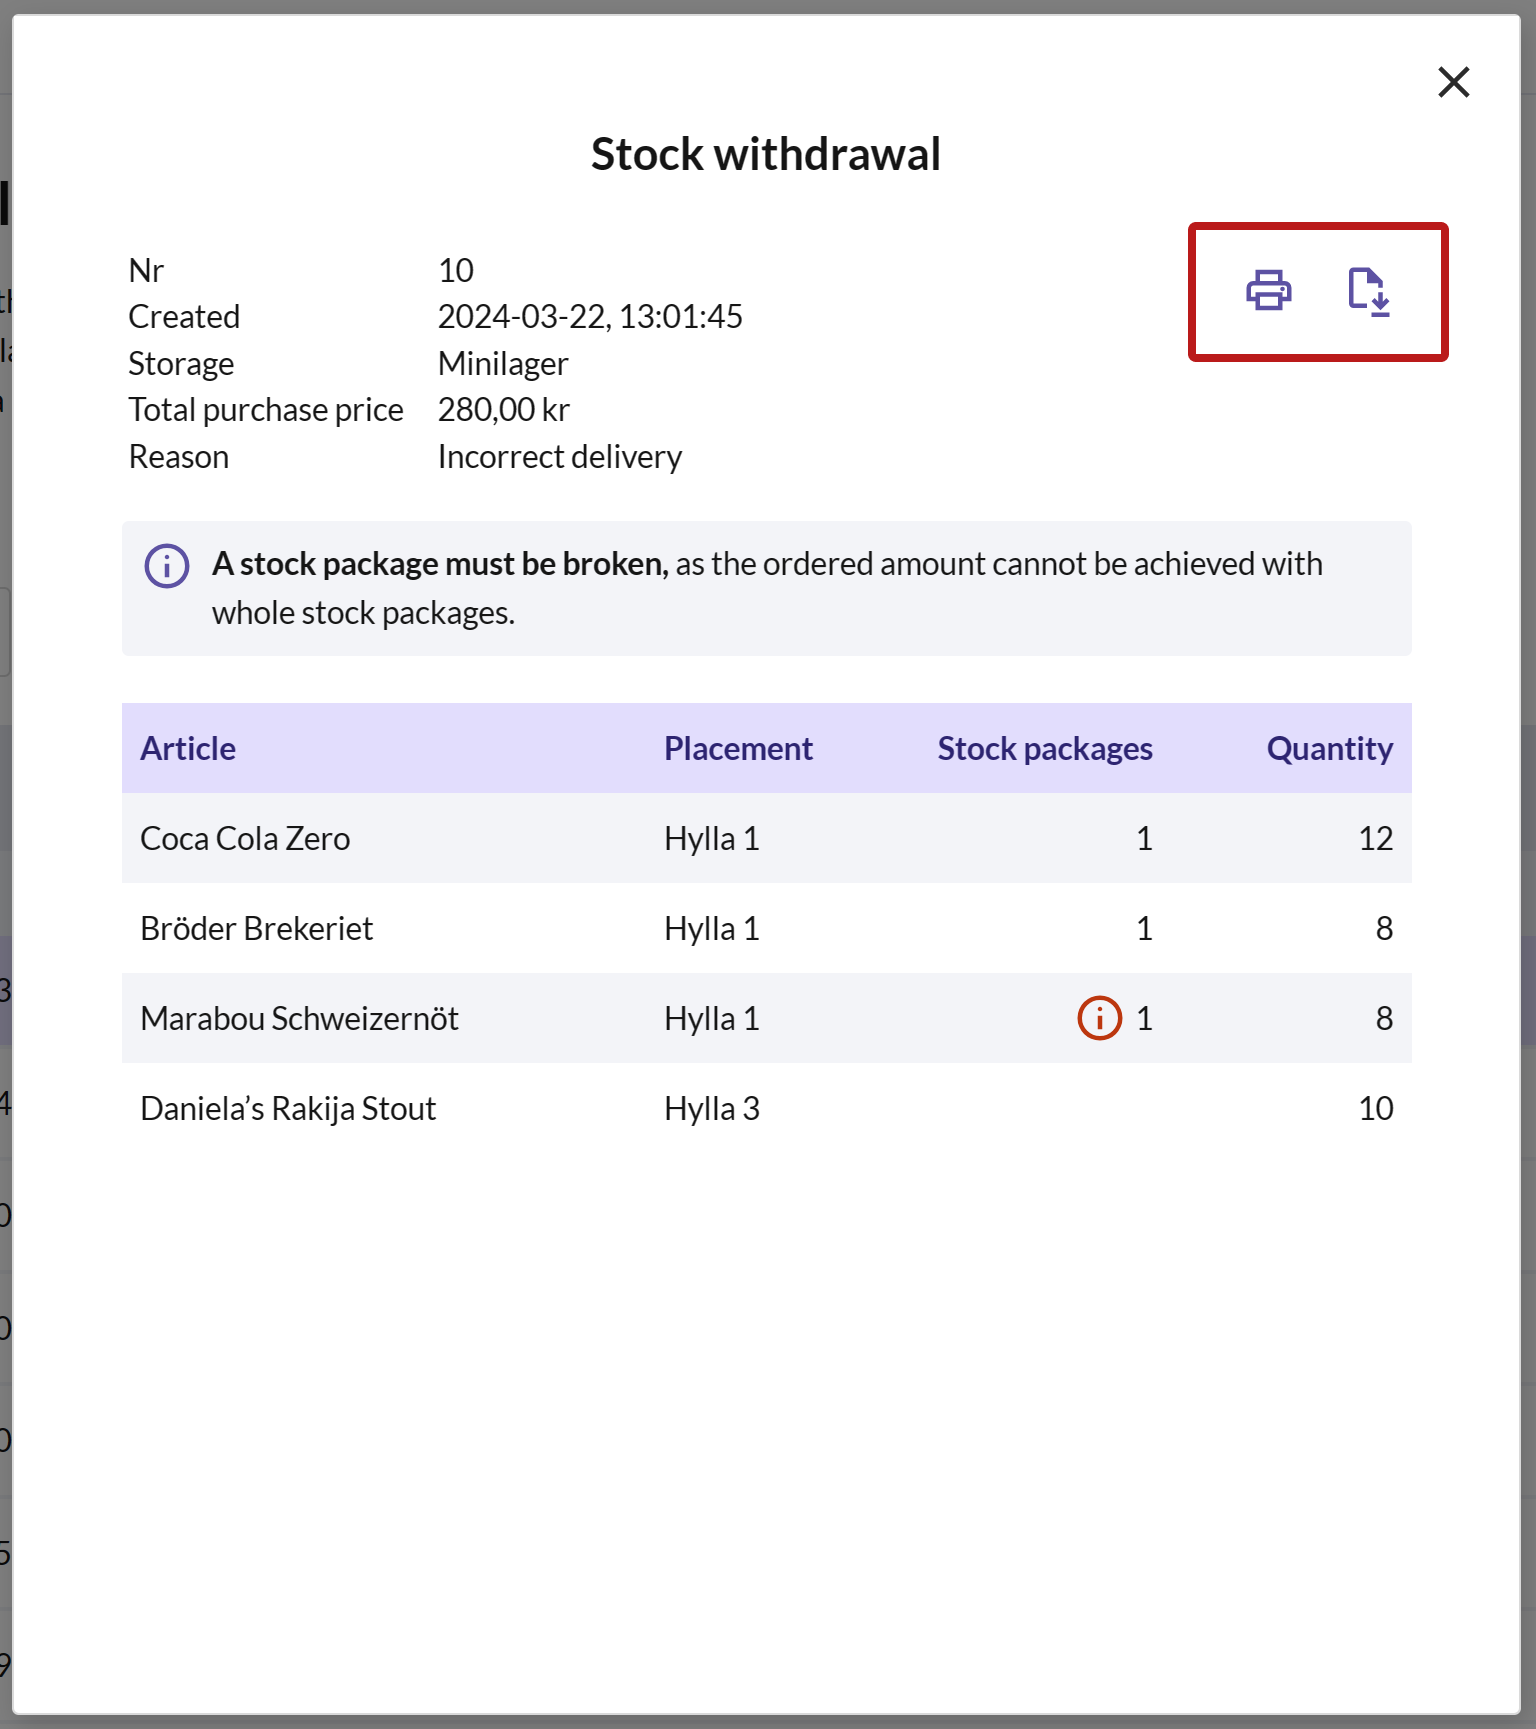
If you want to see a summary of the withdrawal, click on the withdrawal in the list, and a dialog will open.
Here, you can choose to print or download the withdrawal as a PDF.
Customer complaint
A customer complaint can be processed from the cash register if a customer, for example, has received a damaged or incorrect item and wants a replacement. When a complaint is registered, the stock balance decreases because the article that the customer may return is not added to the stock balance. It is important to note that the customer does not receive any refund for a customer complaint but can only be offered a replacement item. If a refund is desired, a return should be processed instead.
Once the complaint has been created, you can print a receipt that the customer can sign with their details.
To register a customer complaint from the cash register, follow the guide below.
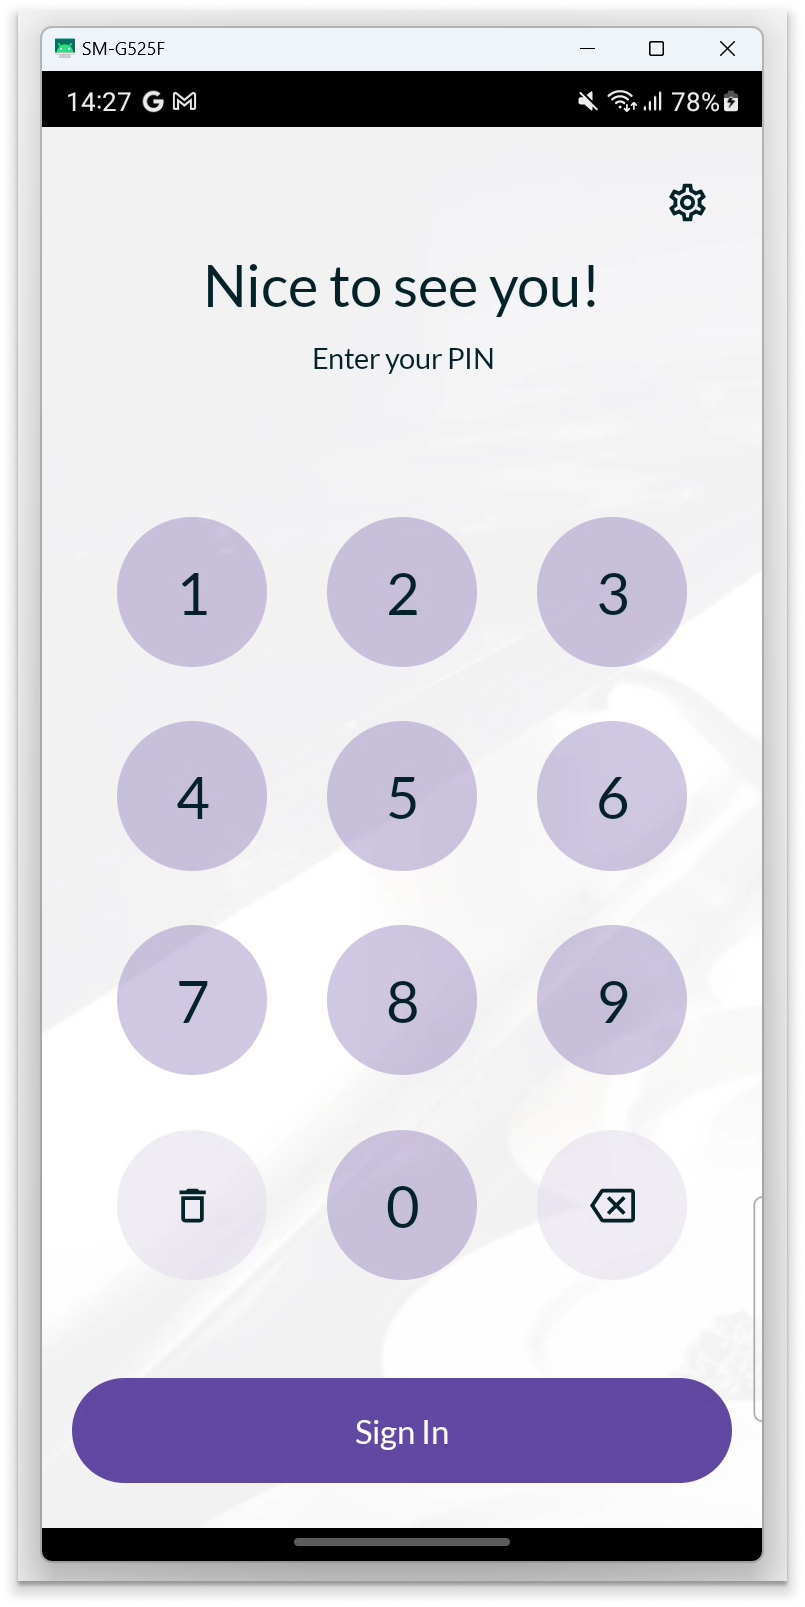
- Enter your PIN to log in to OPEN Two.

- Press the Menu button and navigate to STORAGE. Then, open CUSTOMER COMPLAINTS.
- Press CREATE COMPLAINT.
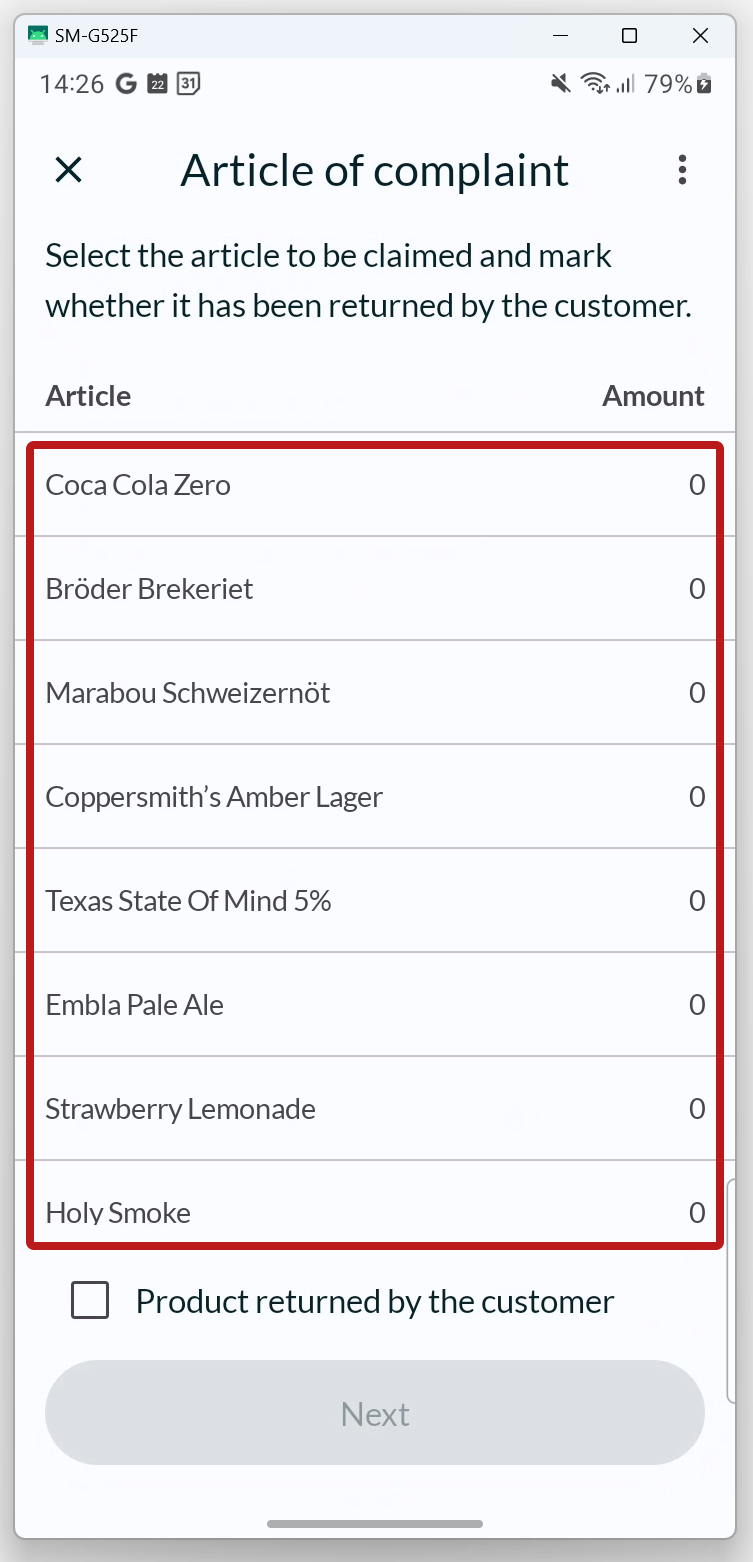
ARTICLE OF COMPLAINT
Select which article (and how many) the complaint concerns.
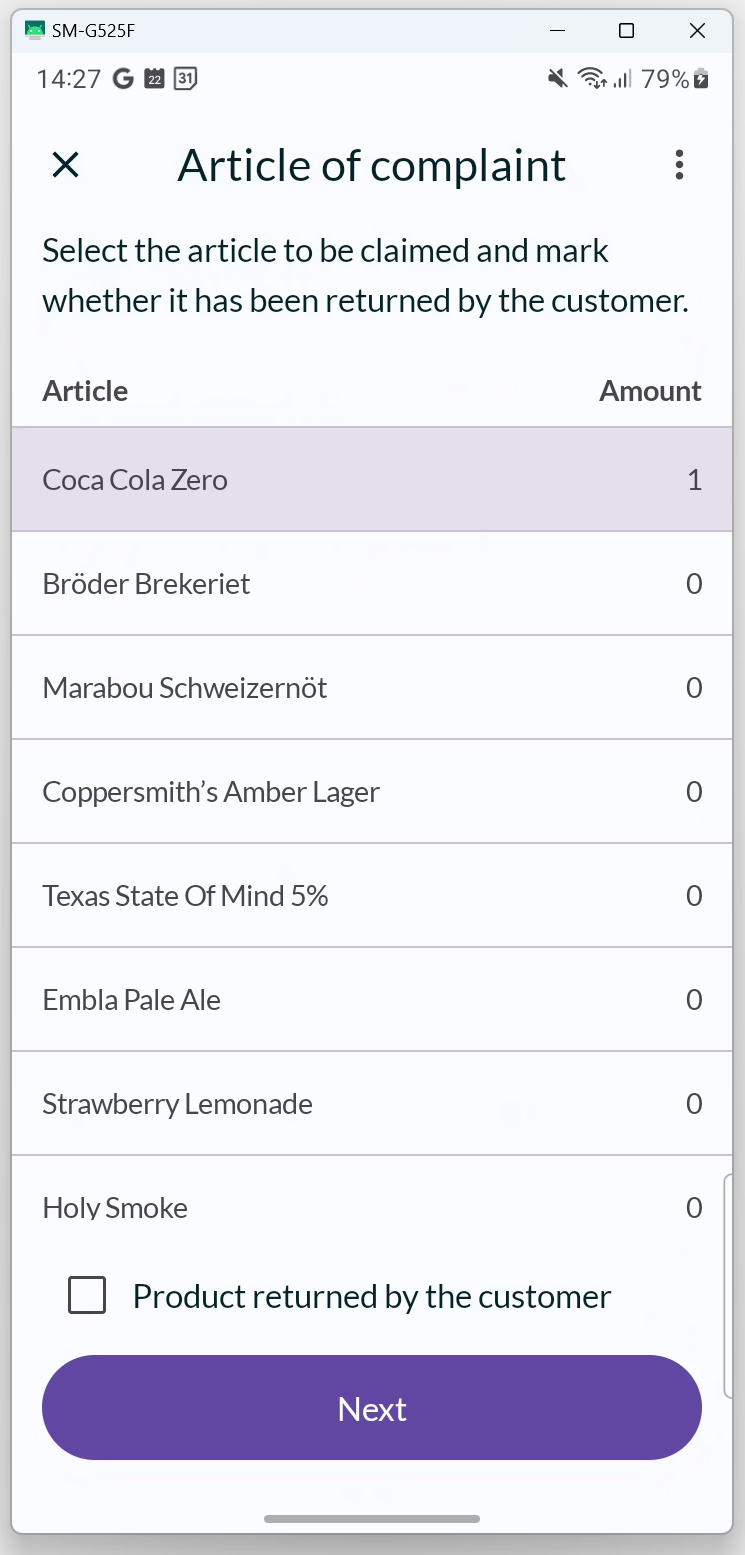
- By pressing on an article, the quantity increases by 1 customer package (= 1 article).
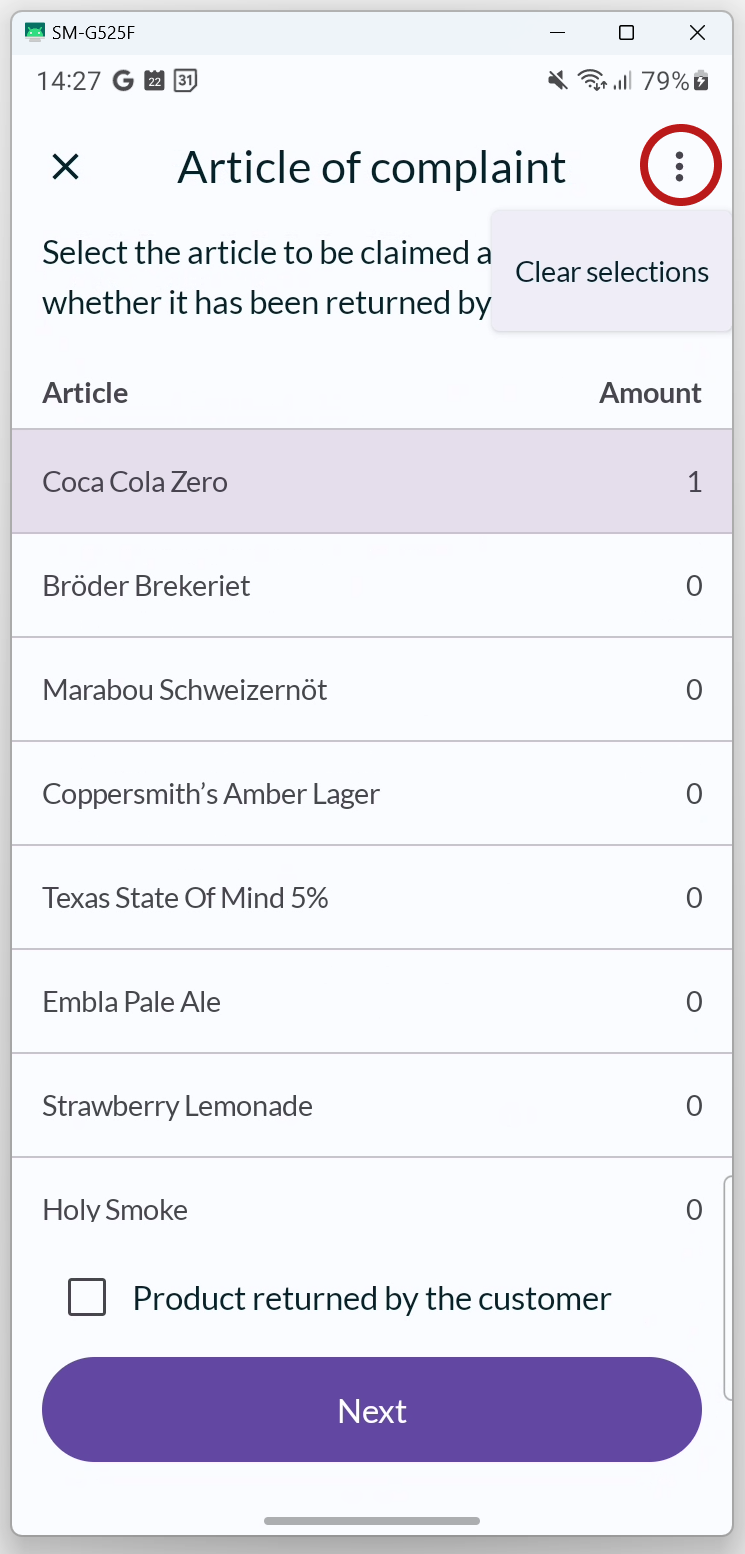
- You can easily clear your inputs by pressing the 3-DOT MENU in the top right corner.
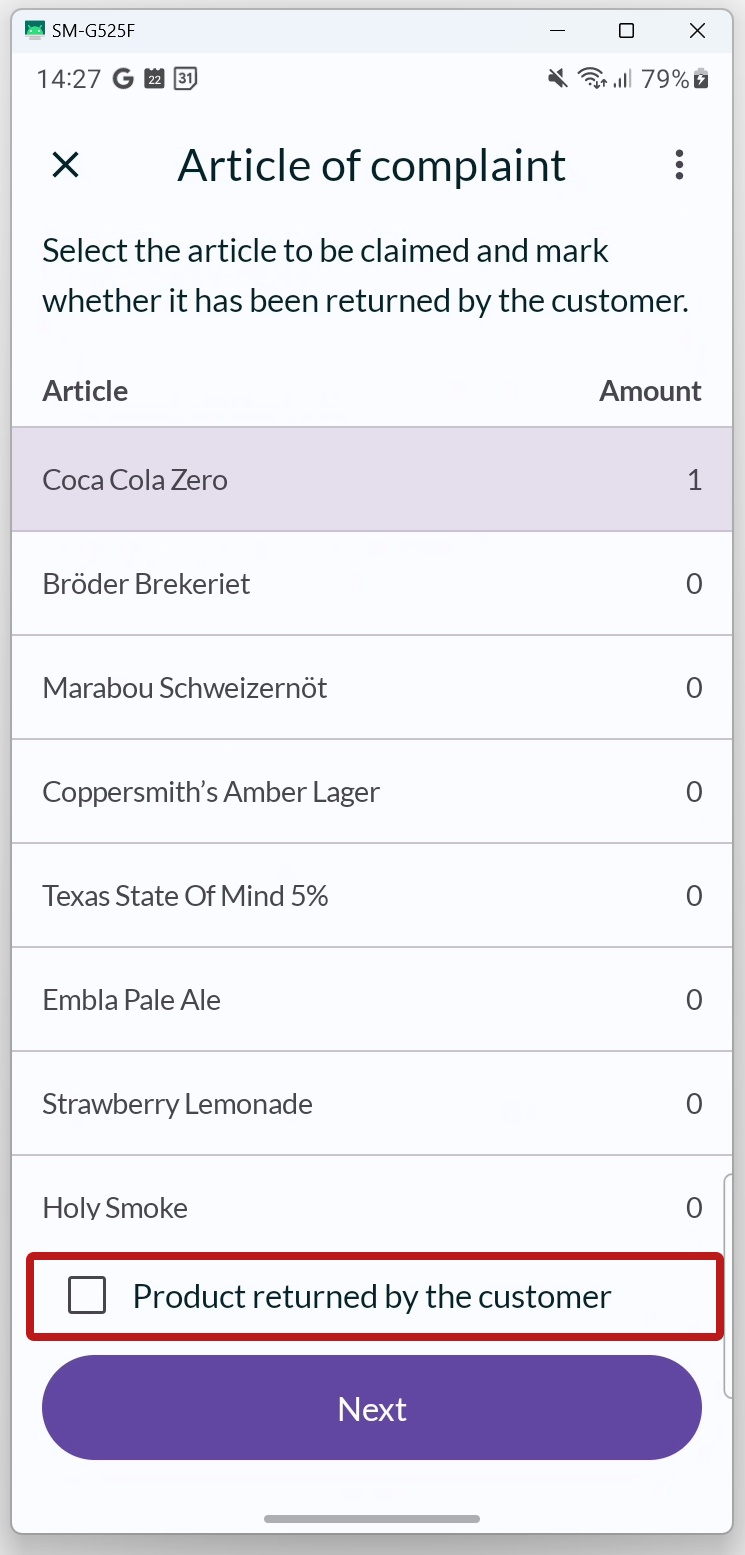
- If the customer has returned the article of complaint, check the box indicating that it has been returned at the bottom of the page. This will be reflected on the complaint receipt.

- Press NEXT to proceed to the next step.
REASON FOR COMPLAINT
Choose a reason for the complaint from the list.
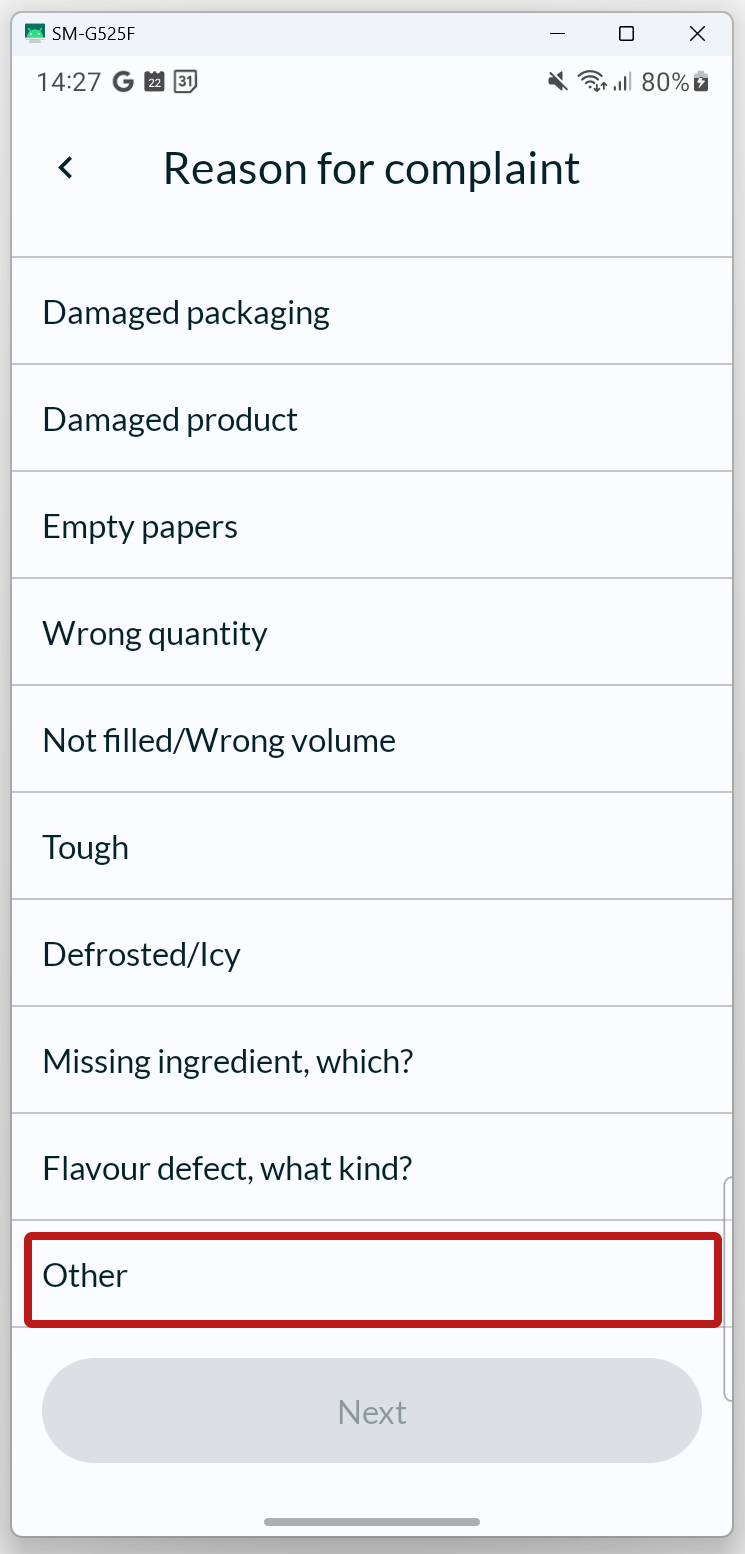
- If you cannot find a suitable option, you can select OTHER and provide a reason in the free text field. Scroll to the bottom of the list to find Other.
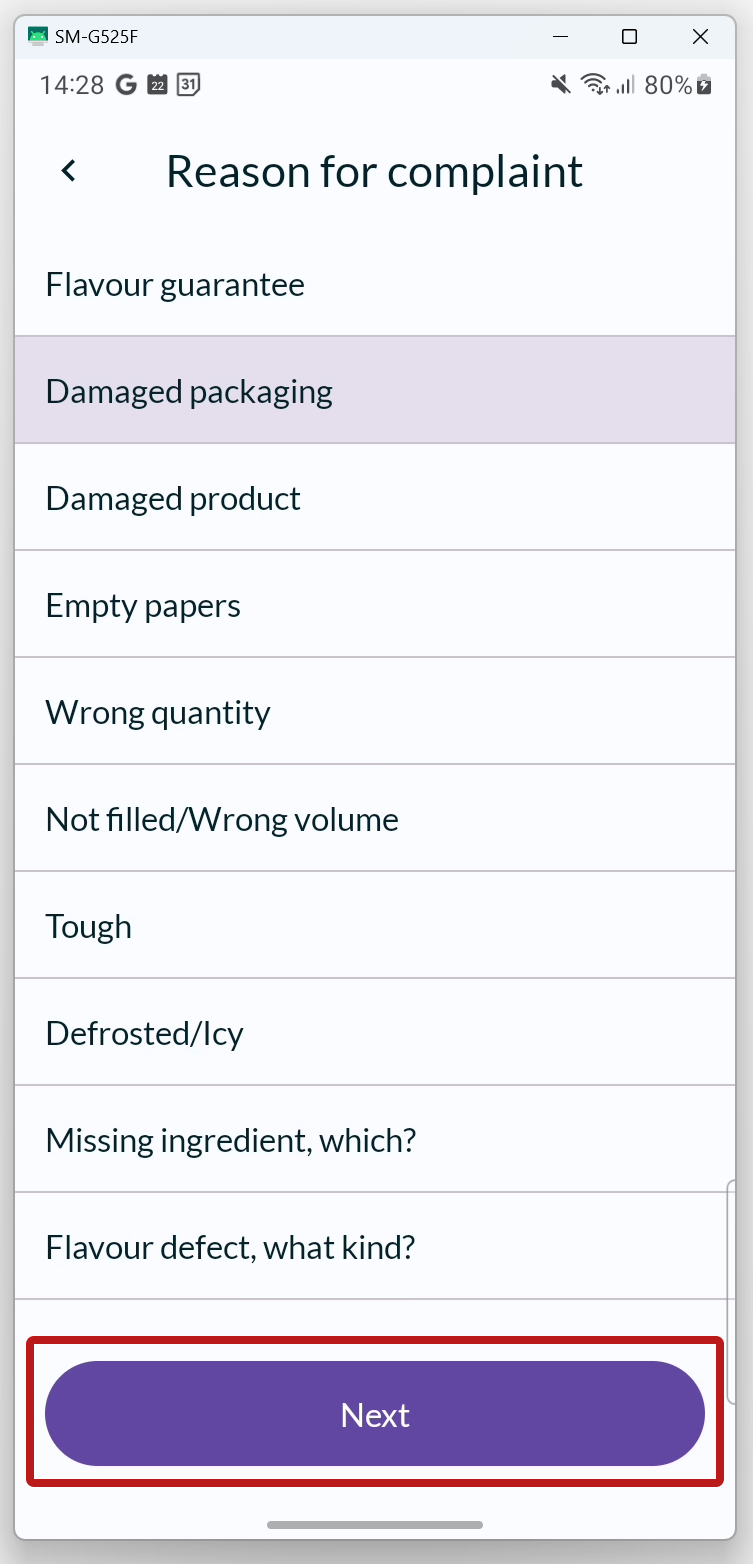
- Press NEXT to proceed to the next step.
NEW ARTICLE TO CUSTOMER
Choose which new article (and how many) the customer will receive.

- If you are going to provide the same product that the customer has complained about, you can check the option Same article as in the complaint at the top of the page. Then, the correct article (and quantity) will be automatically selected.
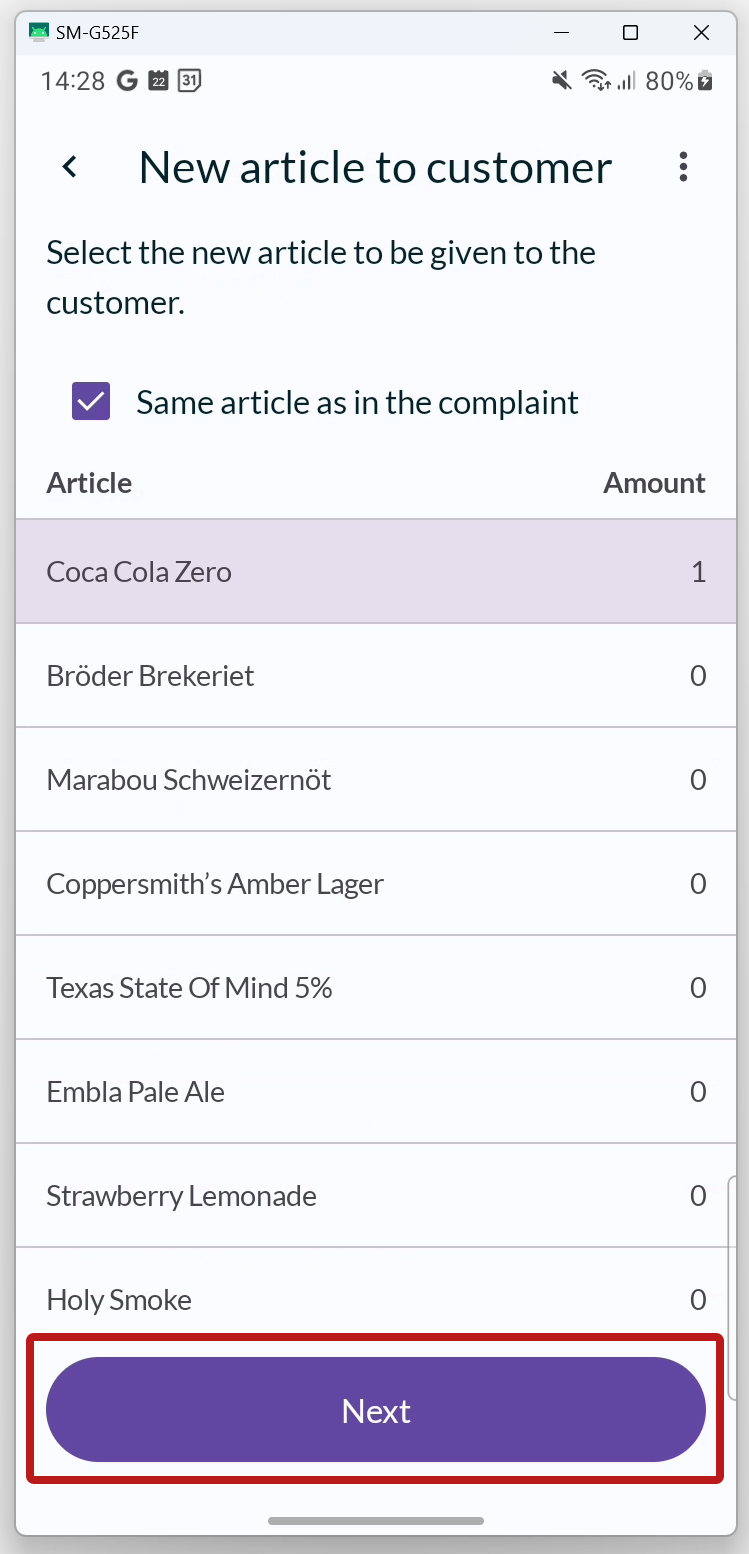
- Press NEXT to proceed to the next step.

REVIEW
In the final step, you can review the complaint before submitting it. If you wish, you can add your own comment here.
Press FINALIZE to register the complaint.
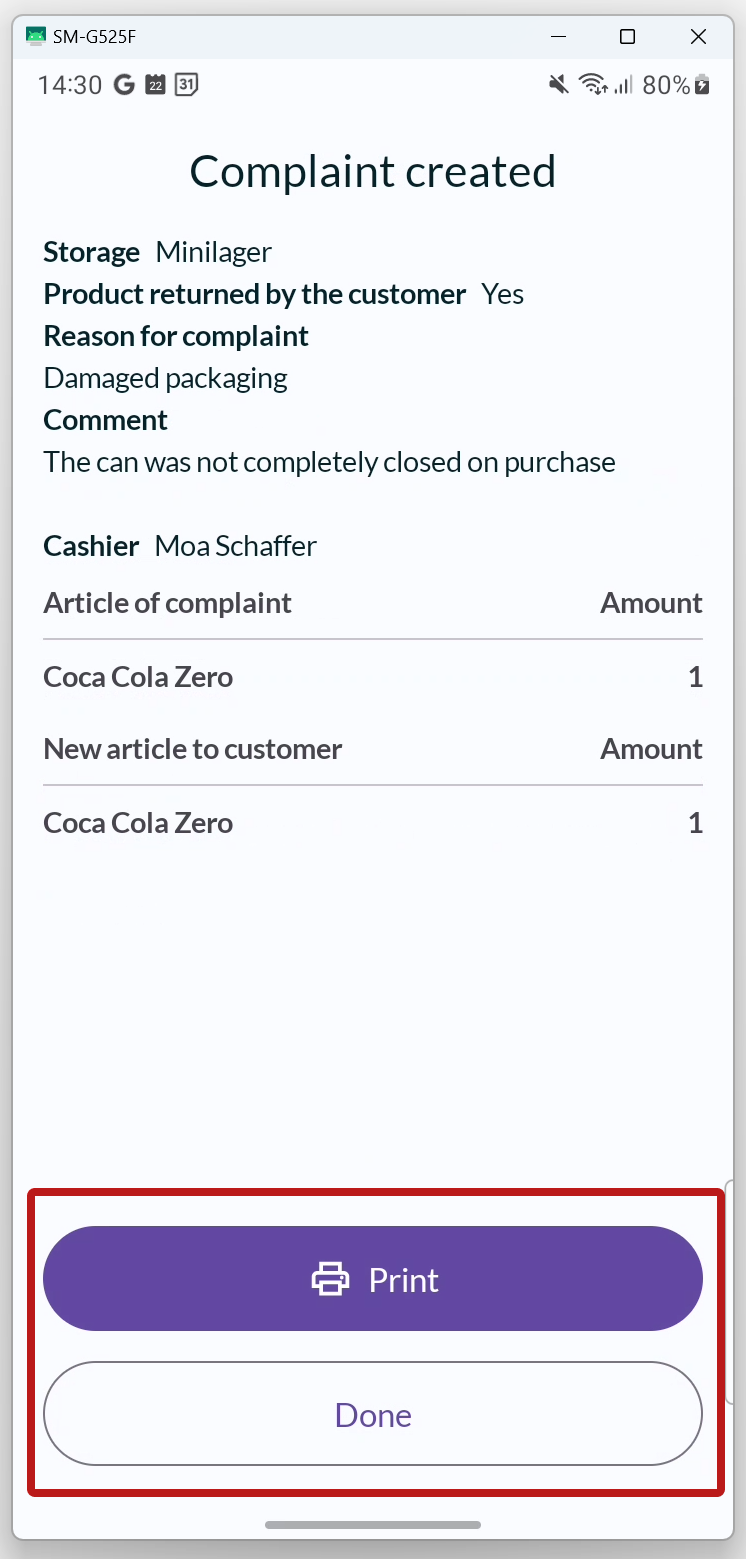
COMPLAINT CREATED
A summary of the complaint is now displayed, where you can print a receipt for the customer to sign with their contact information.
Press DONE to return to the list of your complaints.

To the right is an example of how the complaint receipt looks like.

The created complaint is now in the list of customer complaints, which can save up to 10 complaints at a time (when an 11th complaint is created, the first one is deleted). If you want to print a new receipt, just click on the complaint in the list, and the summary will open again.