How to set up your printer for both kitchen tickets and receipts


This guide will help you get your printer to handle both kitchen tickets and receipts efficiently. To accomplish this, you just need to configure a nearby cash register device to act as a 'cloud printer.' With this setup, whenever a kitchen ticket needs printing, the cash register sends a message to the printer, and voila, it prints!
For instance, imagine you have a tablet and a printer at the bar. With this setup, the printer can handle receipts from the cash register and also print kitchen tickets for drinks. Picture the tablet as the bridge linking the printer to any cash register in the restaurant. When these (mobile) cash registers fires drink orders, these will be sent to the cash register that you have configured as a 'cloud printer', which will instruct the connected printer to print the kitchen tickets.
What you'll need
- An OPEN Two cash register (tablet or smartphone)
- A stationary printer connected to the cash register via Bluetooth or USB
Preparations
- Install the printer and connect it to the cash register via Bluetooth or USB. OPEN Two supports Star and Epson printers.

- Ensure proper connection by printing a test receipt from the printer settings of the OPEN Two app.

- Make sure to enable always connected, as this is necessary for kitchen ticket printing in this specific setup.
Setting up your cash register device as a ‘cloud printer’ in BackOffice
- Navigate to the Devices page under Company in the BackOffice menu. Next, choose the 'Receipt & kitchen printers' tab.

- You should now be able to see your cash register device as an online device in the list of printers.


- Click on the device to access Printer Settings.

- Choose a name for the printer that indicates its location or otherwise helps you identify it. Otherwise, the cash register name will be used.

- Check the "Kitchen tickets" option to designate it for printing kitchen tickets.

- If you have several cost centers, make sure to to specify which cost center(s) the printer should be linked to. This way, kitchen tickets are only printed when sales are made from cash registers within these cost centers.

- Select which types of articles should prompt the printer to produce kitchen tickets from the 'Kitchen ticket' menu. If you don't choose any categories, the kitchen printer will print tickets for all articles with "Kitchen ticket" enabled.
- Save your settings and conduct a test sale to ensure proper functionality.
Ensuring articles print on kitchen tickets
There are two ways to make sure that your articles will be included on the kitchen tickets, from the Articles page and from the Devices page. Below, we'll guide you through both methods to ensure your articles are printed on the kitchen tickets.
Method 1: assign articles to printer categories from the Devices page
If you use printer categories due to multiple kitchen printers or shared printers in different kitchen areas, manage your printer categories and assign articles to each category from the Devices page in the Kitchen Printers tab. This setup ensures all your items are included on the kitchen tickets.
In BackOffice, select COMPANY in the menu and go to the DEVICES page.
Select the KITCHEN PRINTERS tab.

- To add a new printer category, simply press the + button in the top right corner.

In the new page that opens, name the category and select which articles should be included.
To select or deselect articles, simply press an article from the list.
When you add an article to the category, the "Print kitchen ticket" setting will be automatically enabled.
Once you're done, press SAVE.
You can now see your created category in the list to the right.

Make sure to assign the printer category to the appropriate kitchen printer from the printer settings.
Method 2: enable "Print kitchen ticket" option from the Articles page
For a simpler setup with a single kitchen printer, ensure the "Print kitchen ticket" option is enabled for your articles on the Articles page.
In BackOffice, select ARTICLES in the menu and go to the ARTICLES page.
Enable the Kitchen ticket option on the desired articles.
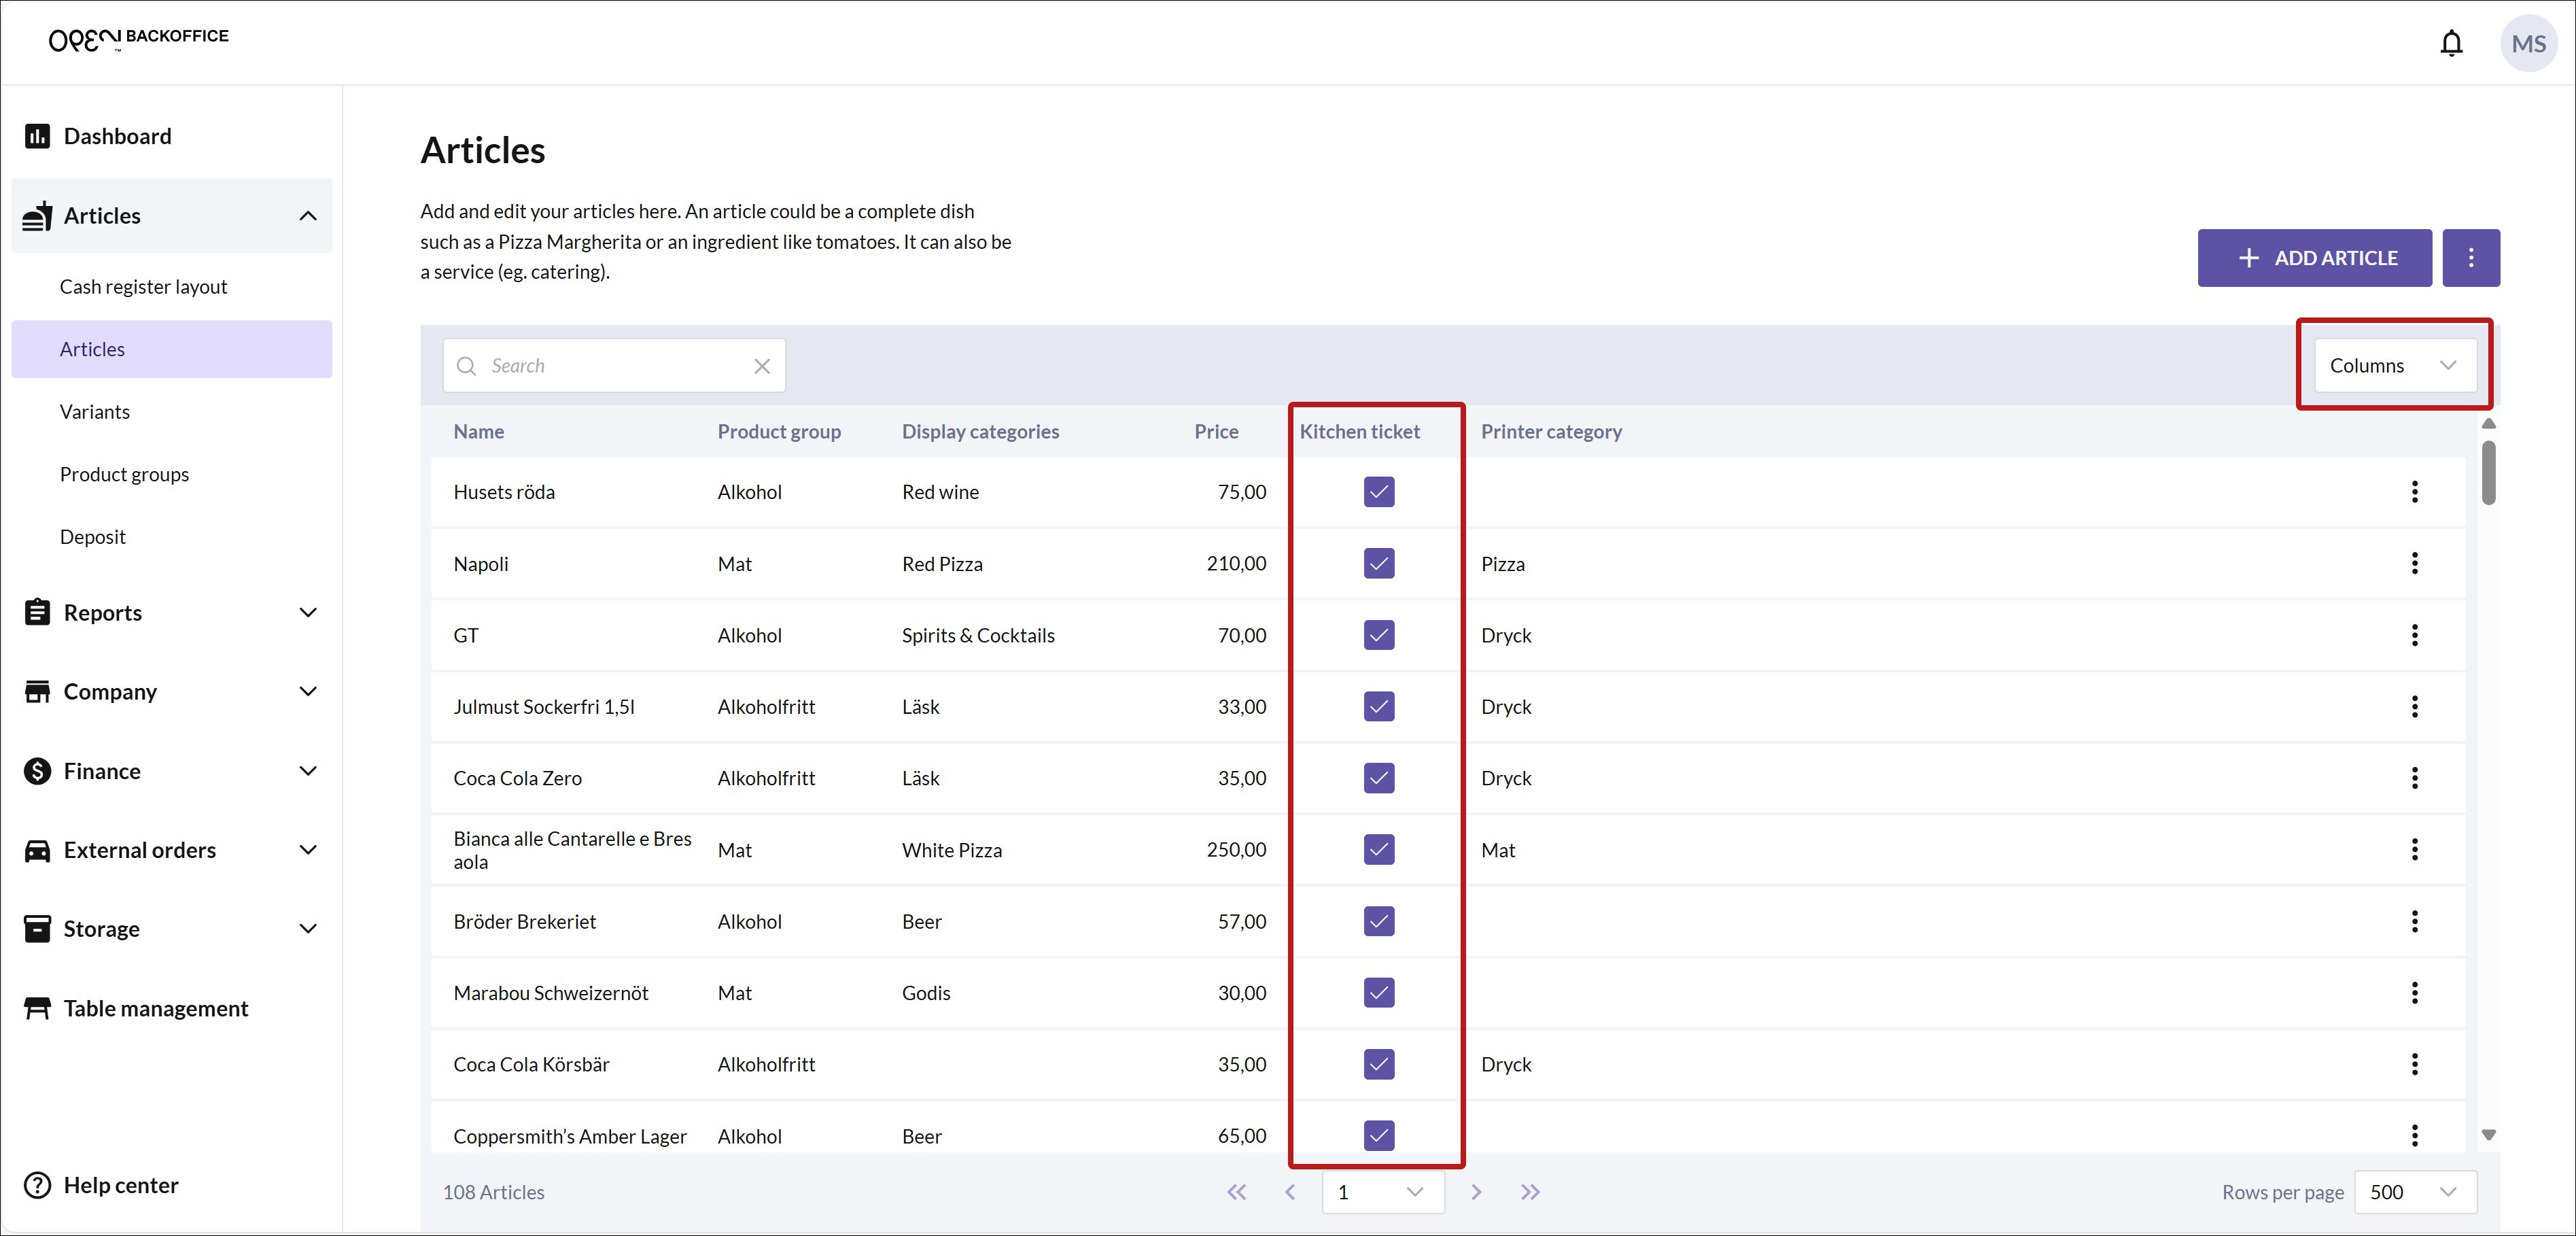
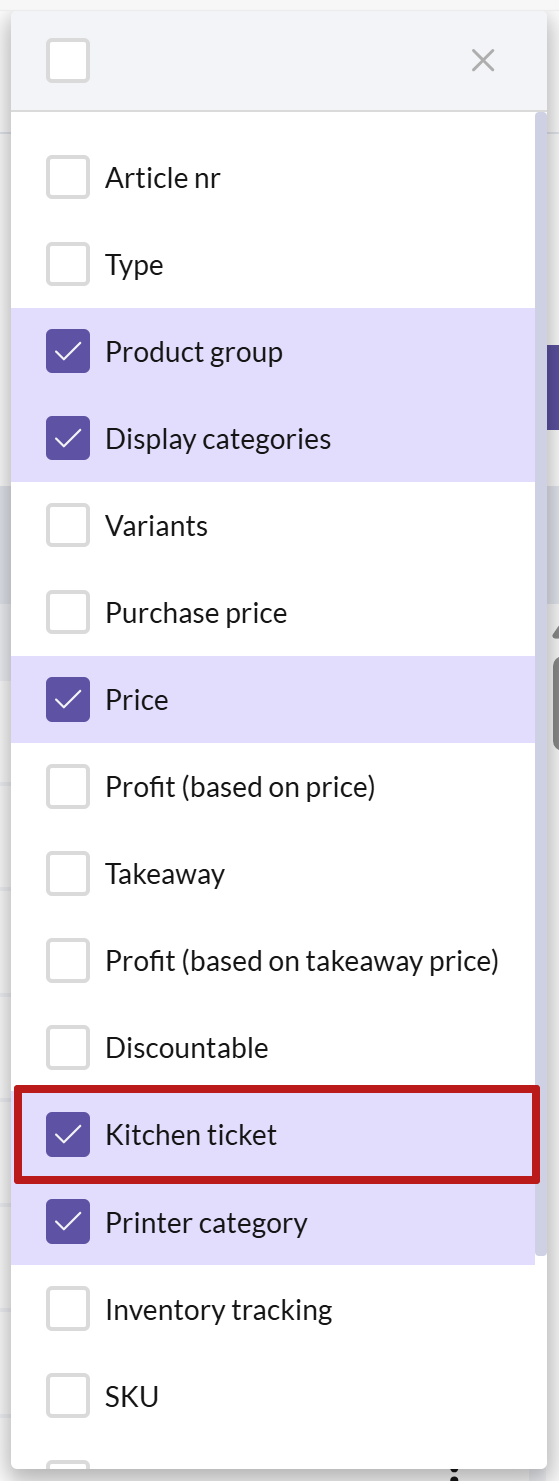
Make sure that the column is visible by selecting it from the Columns menu in the top right corner.
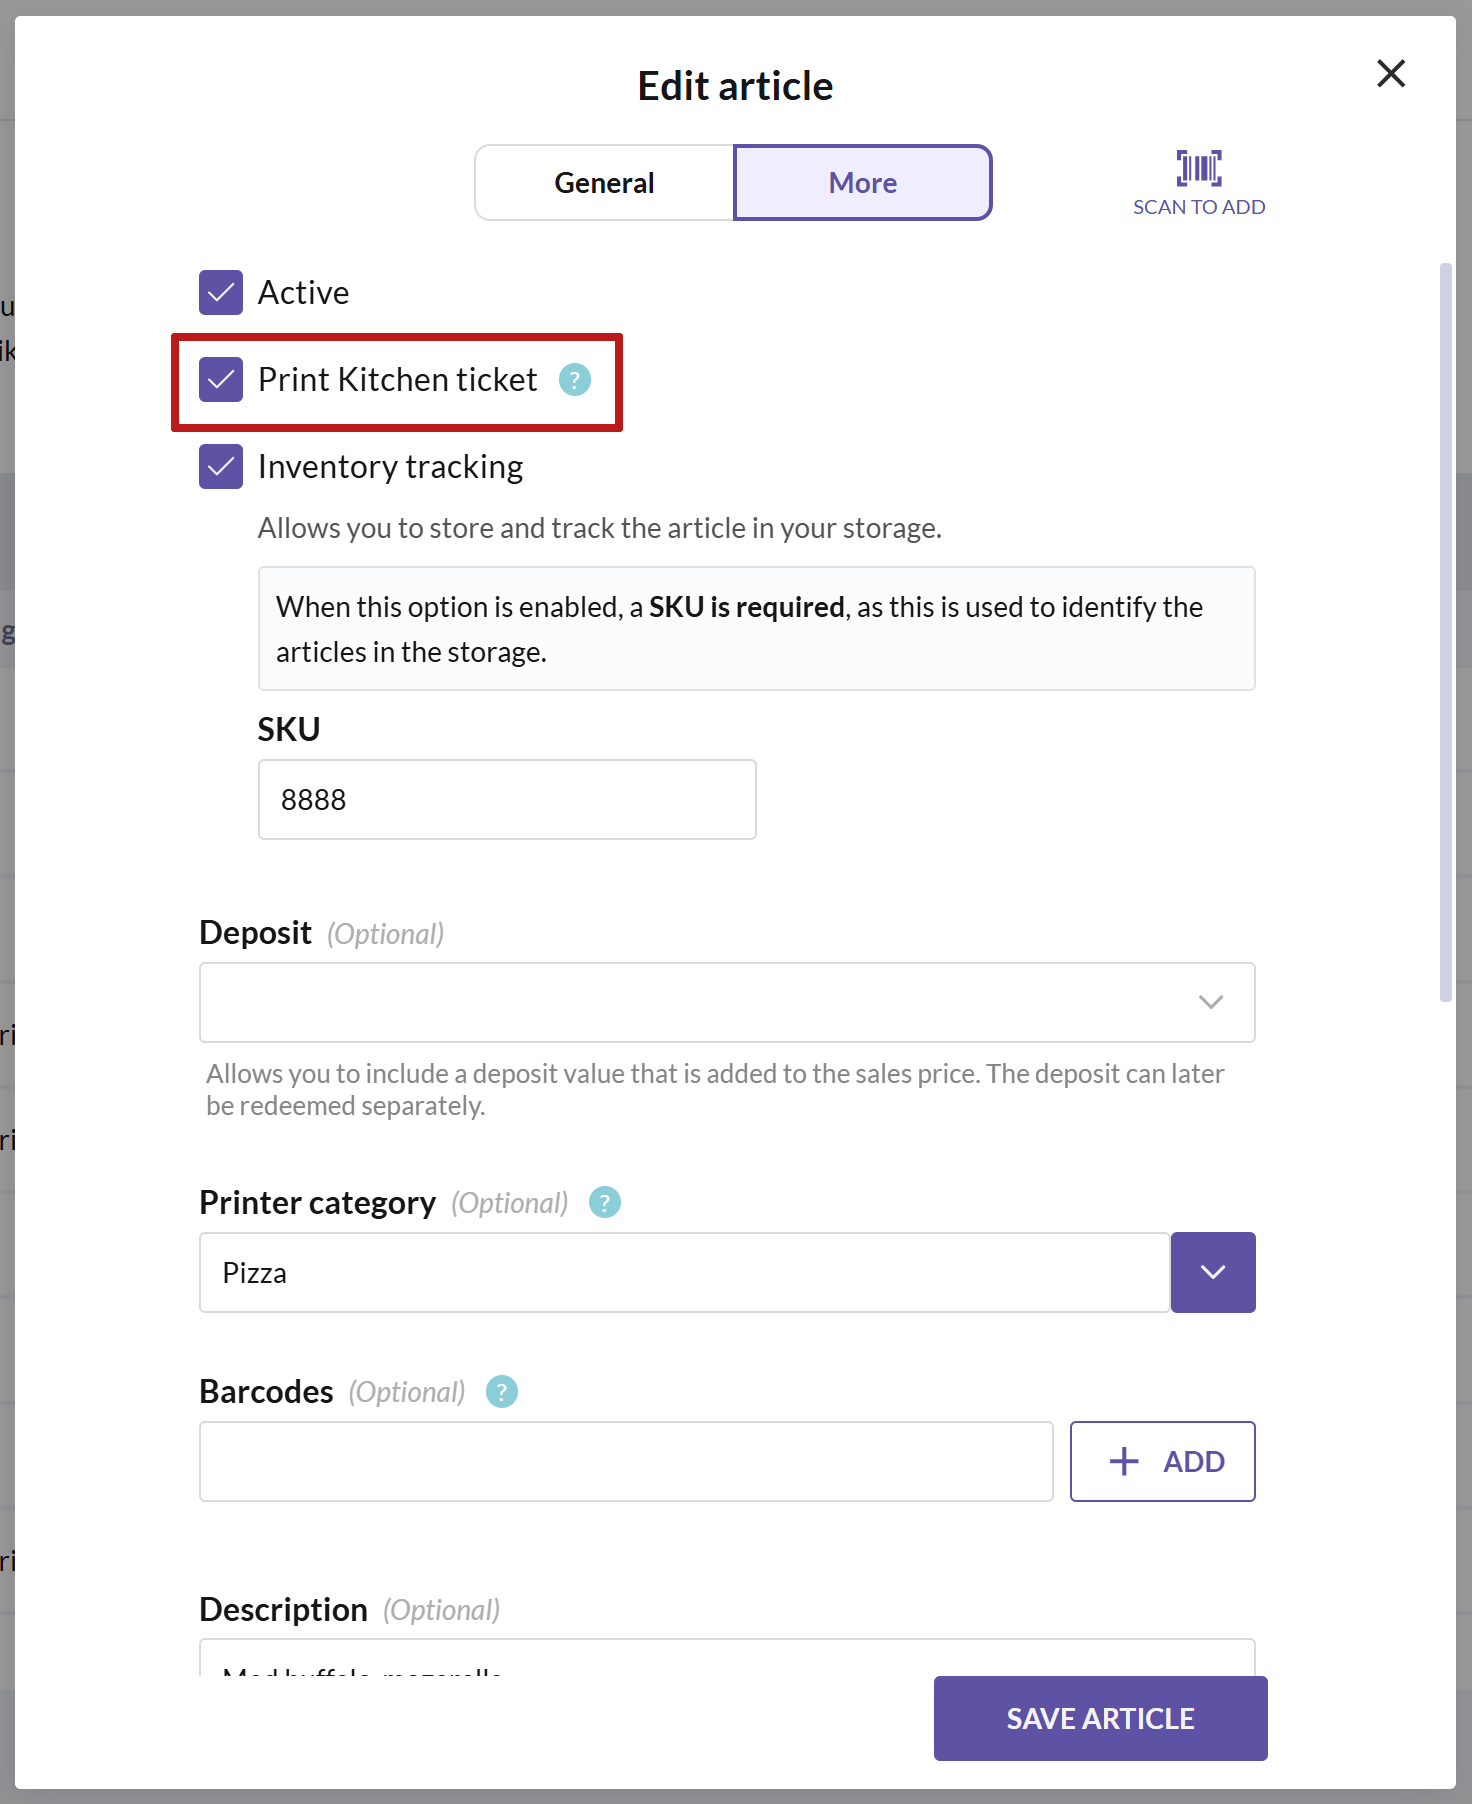
Note that you can also enable this option from the Edit article dialog, in the More tab.
As long as you don't specify certain printer categories for your kitchen printer, it will print all articles with the Kitchen ticket setting enabled.


