Install Star mc-Print3 printer (via Cloud)

This guide will help you setting up your Star mc-Print3 printer effortlessly through the Cloud! By following these steps, you'll be able to use your printer as a standalone kitchen printer in no time.
We'll walk you through configuring the printer in BackOffice so that it prints the correct categories of items. Additionally, we explain the meaning of the printer's LED lights, which can help with troubleshooting.
If you’re looking for a guide on how to connect the printer to the cash register via USB or Bluetooth, go to install via USB or install via Bluetooth.
What you'll need
- Star mC-Print3 receipt printer
- AC adapter/power cord
- LAN cable
- Router nearby the printer
- Receipt paper
- A QR code (attached on the inside lid of the printer)
- A phone with internet connection to scan a QR code
Install printer
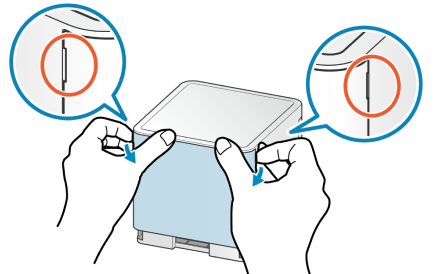
Unpack the printer
Unpack the printer and remove the cover on the back.
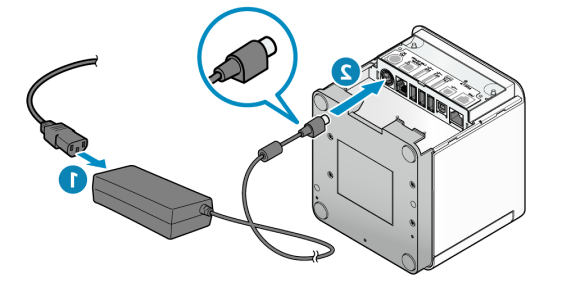
Connect power cable
Connect the power cable to the AC adapter port (1). Connect the power cable, with the correct vertical position, to the printer's input (2).
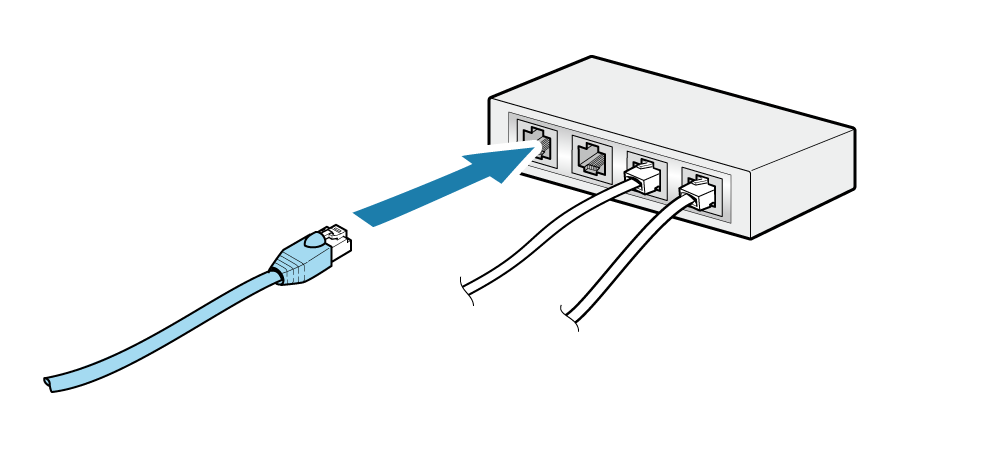
Connect LAN cable to network
Connect one side of the LAN cable to the hub/router.
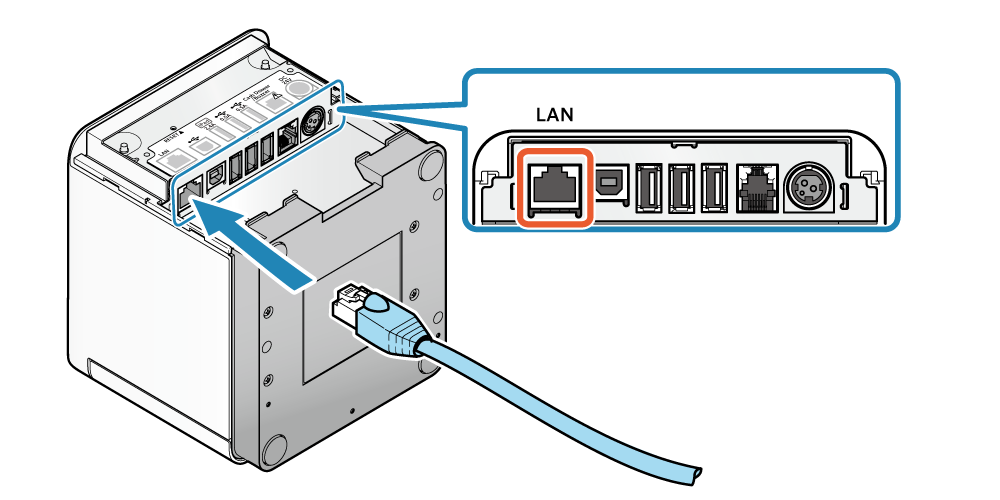
Connect LAN cable to printer
Connect the other side of the LAN cable to the LAN connector of the printer.
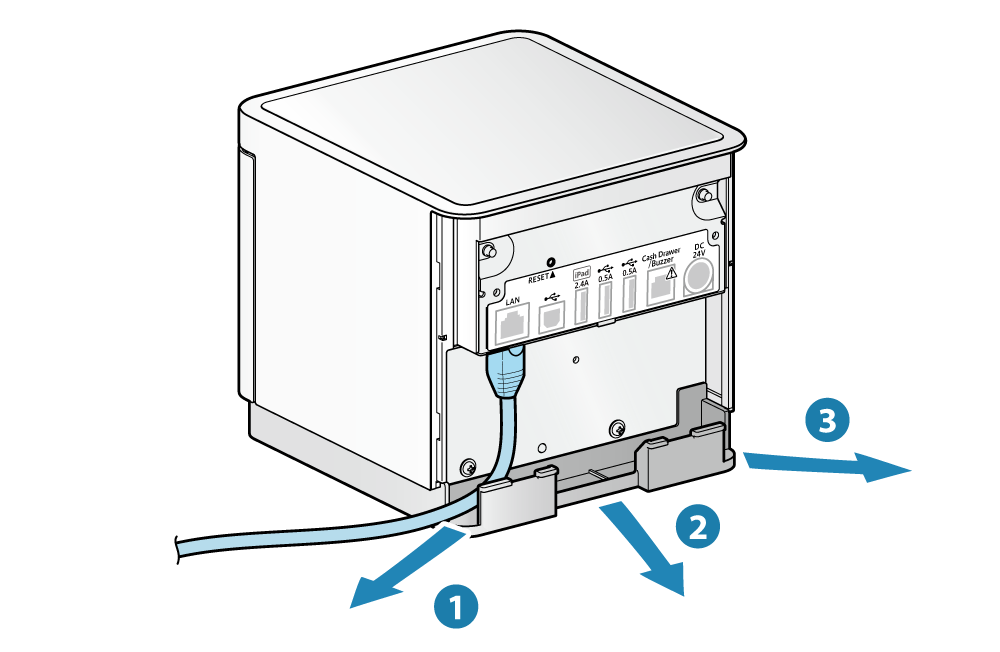
Cable outlets
Cable outlets are provided in 3 locations (right, left, and back), and cables can be connected to suit the location where the device is placed.
Make sure the LAN cable is correctly connected through the cable outlets so that the device does not tilt when it is set up.
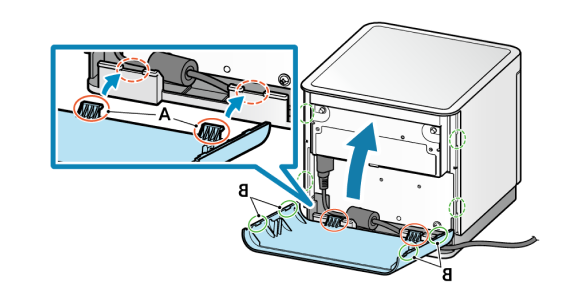
Reattach cover
Reattach the cover to the back of the printer.
Load printer with receipt paper
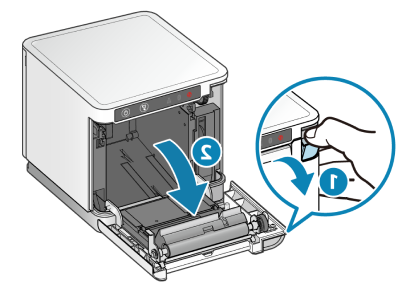
- Pull the lever (1) to open the cover on the front of the printer (2).
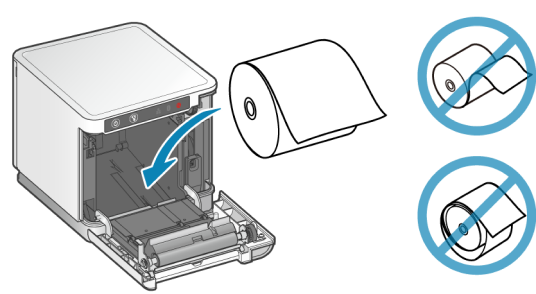
- Insert the receipt roll as shown.
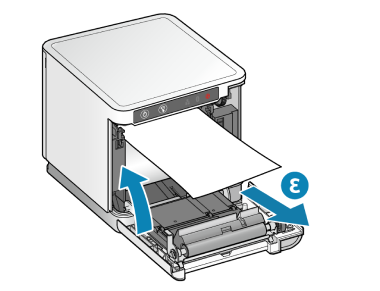
- Adjust the paper by pulling out a piece (3) and close the door.
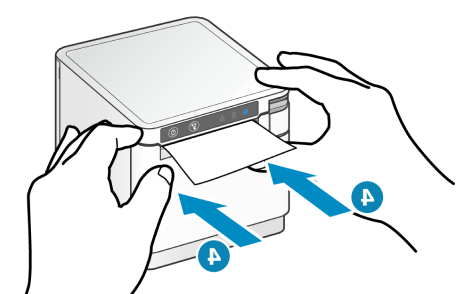
- Close the door by pressing on both sides as shown. The printer confirms successful receipt paper installation by automatically feeding out and cutting off the excess paper.
Activate cloud printer in BackOffice

Use your phone to scan the QR code attached on the inside lid of printer.
If you cannot find a QR code, please contact support for further assistance.
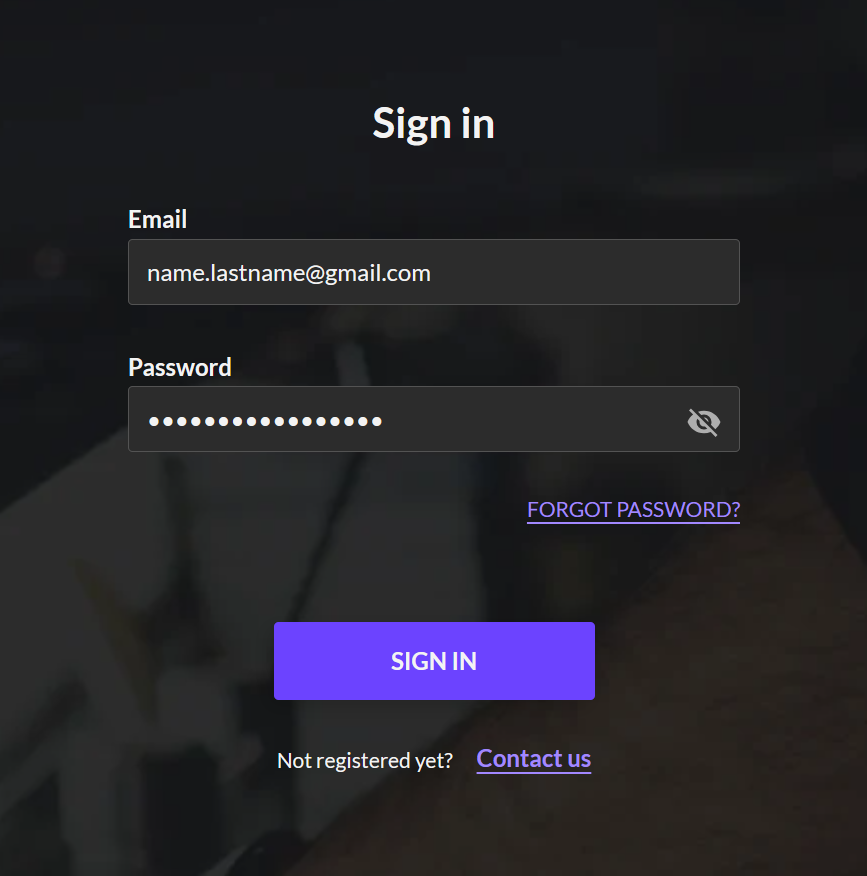
- Sign in to BackOffice.
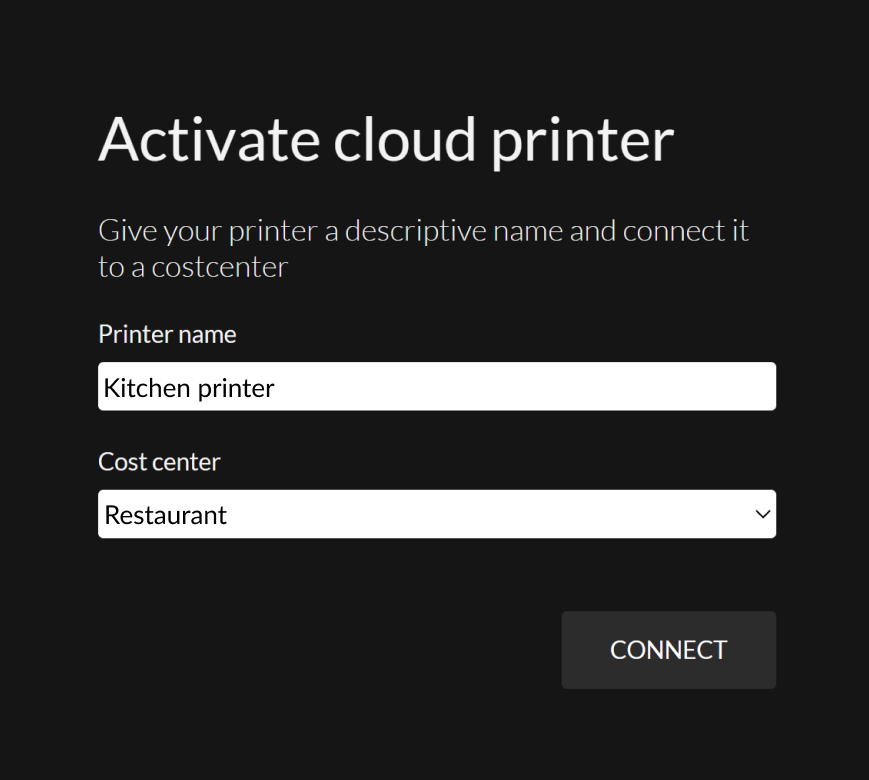
Activate cloud printer
Enter a NAME for the printer and select which COST CENTERS it should belong to. You will later be able to select more or change cost center in BackOffice.
Press CONNECT to complete the activation.
Set up your printer in BackOffice
We will now help you set up your cloud-connected printer to work as a kitchen printer. For example, if the printer is located in the cold kitchen, you may want it to only print tickets for dishes prepared in the cold kitchen. If you use one printer for all dishes, this is also possible.
- In BackOffice, select COMPANY in the menu and go to the DEVICES page.
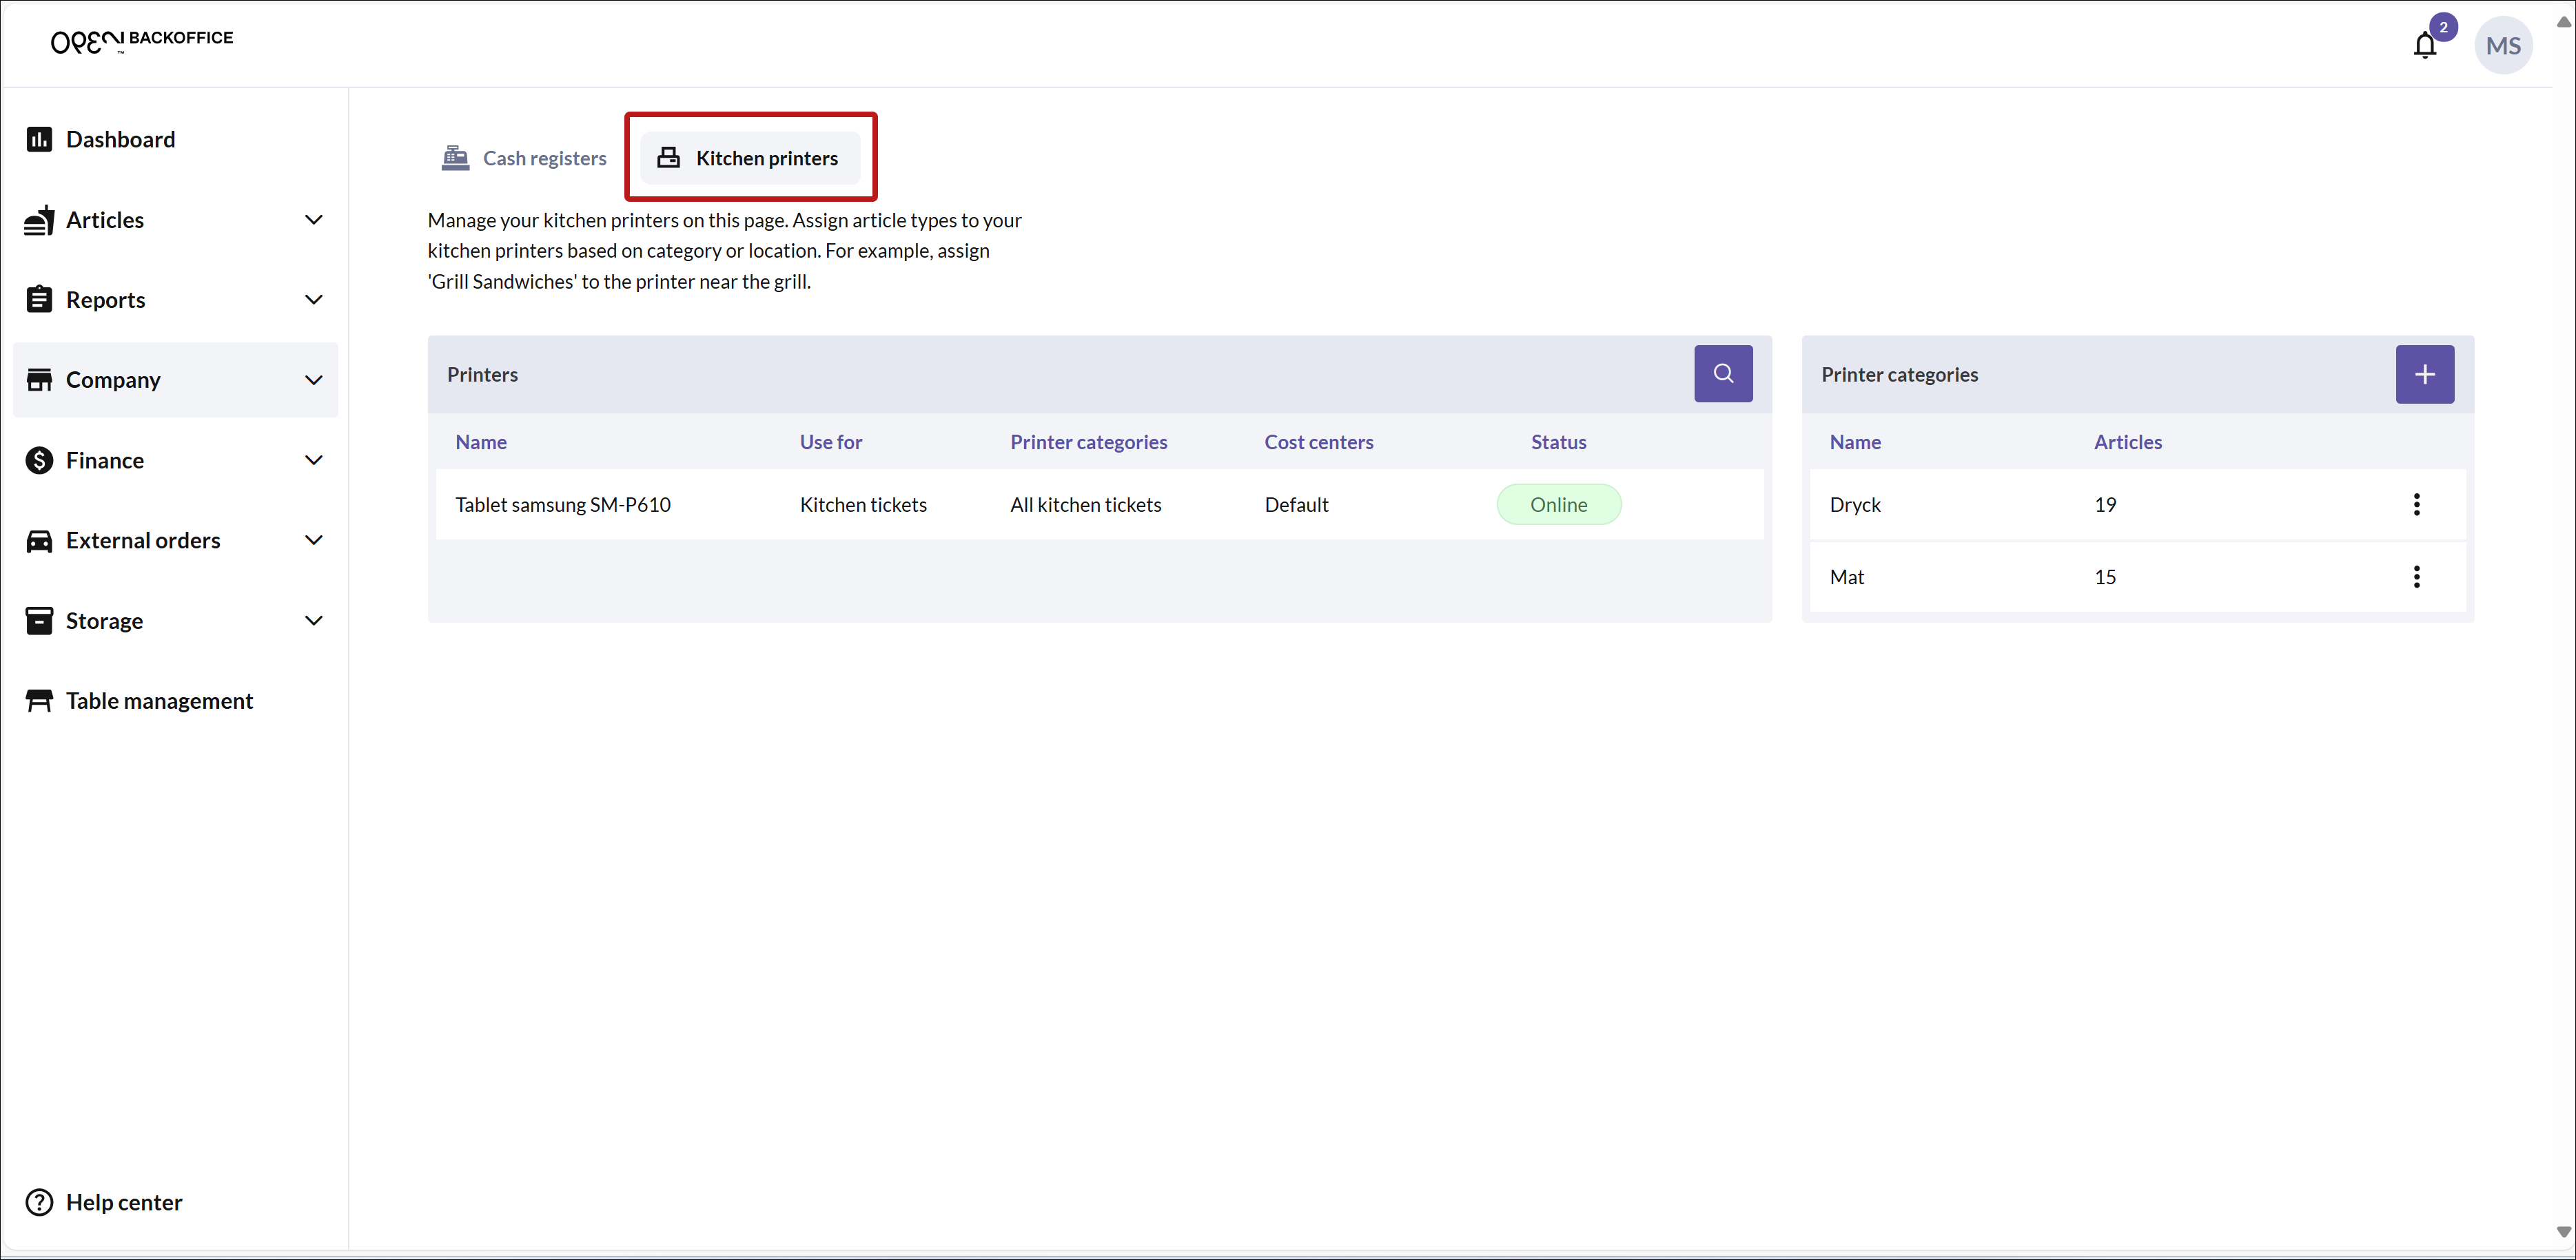
- Select the tab for KITCHEN PRINTERS.
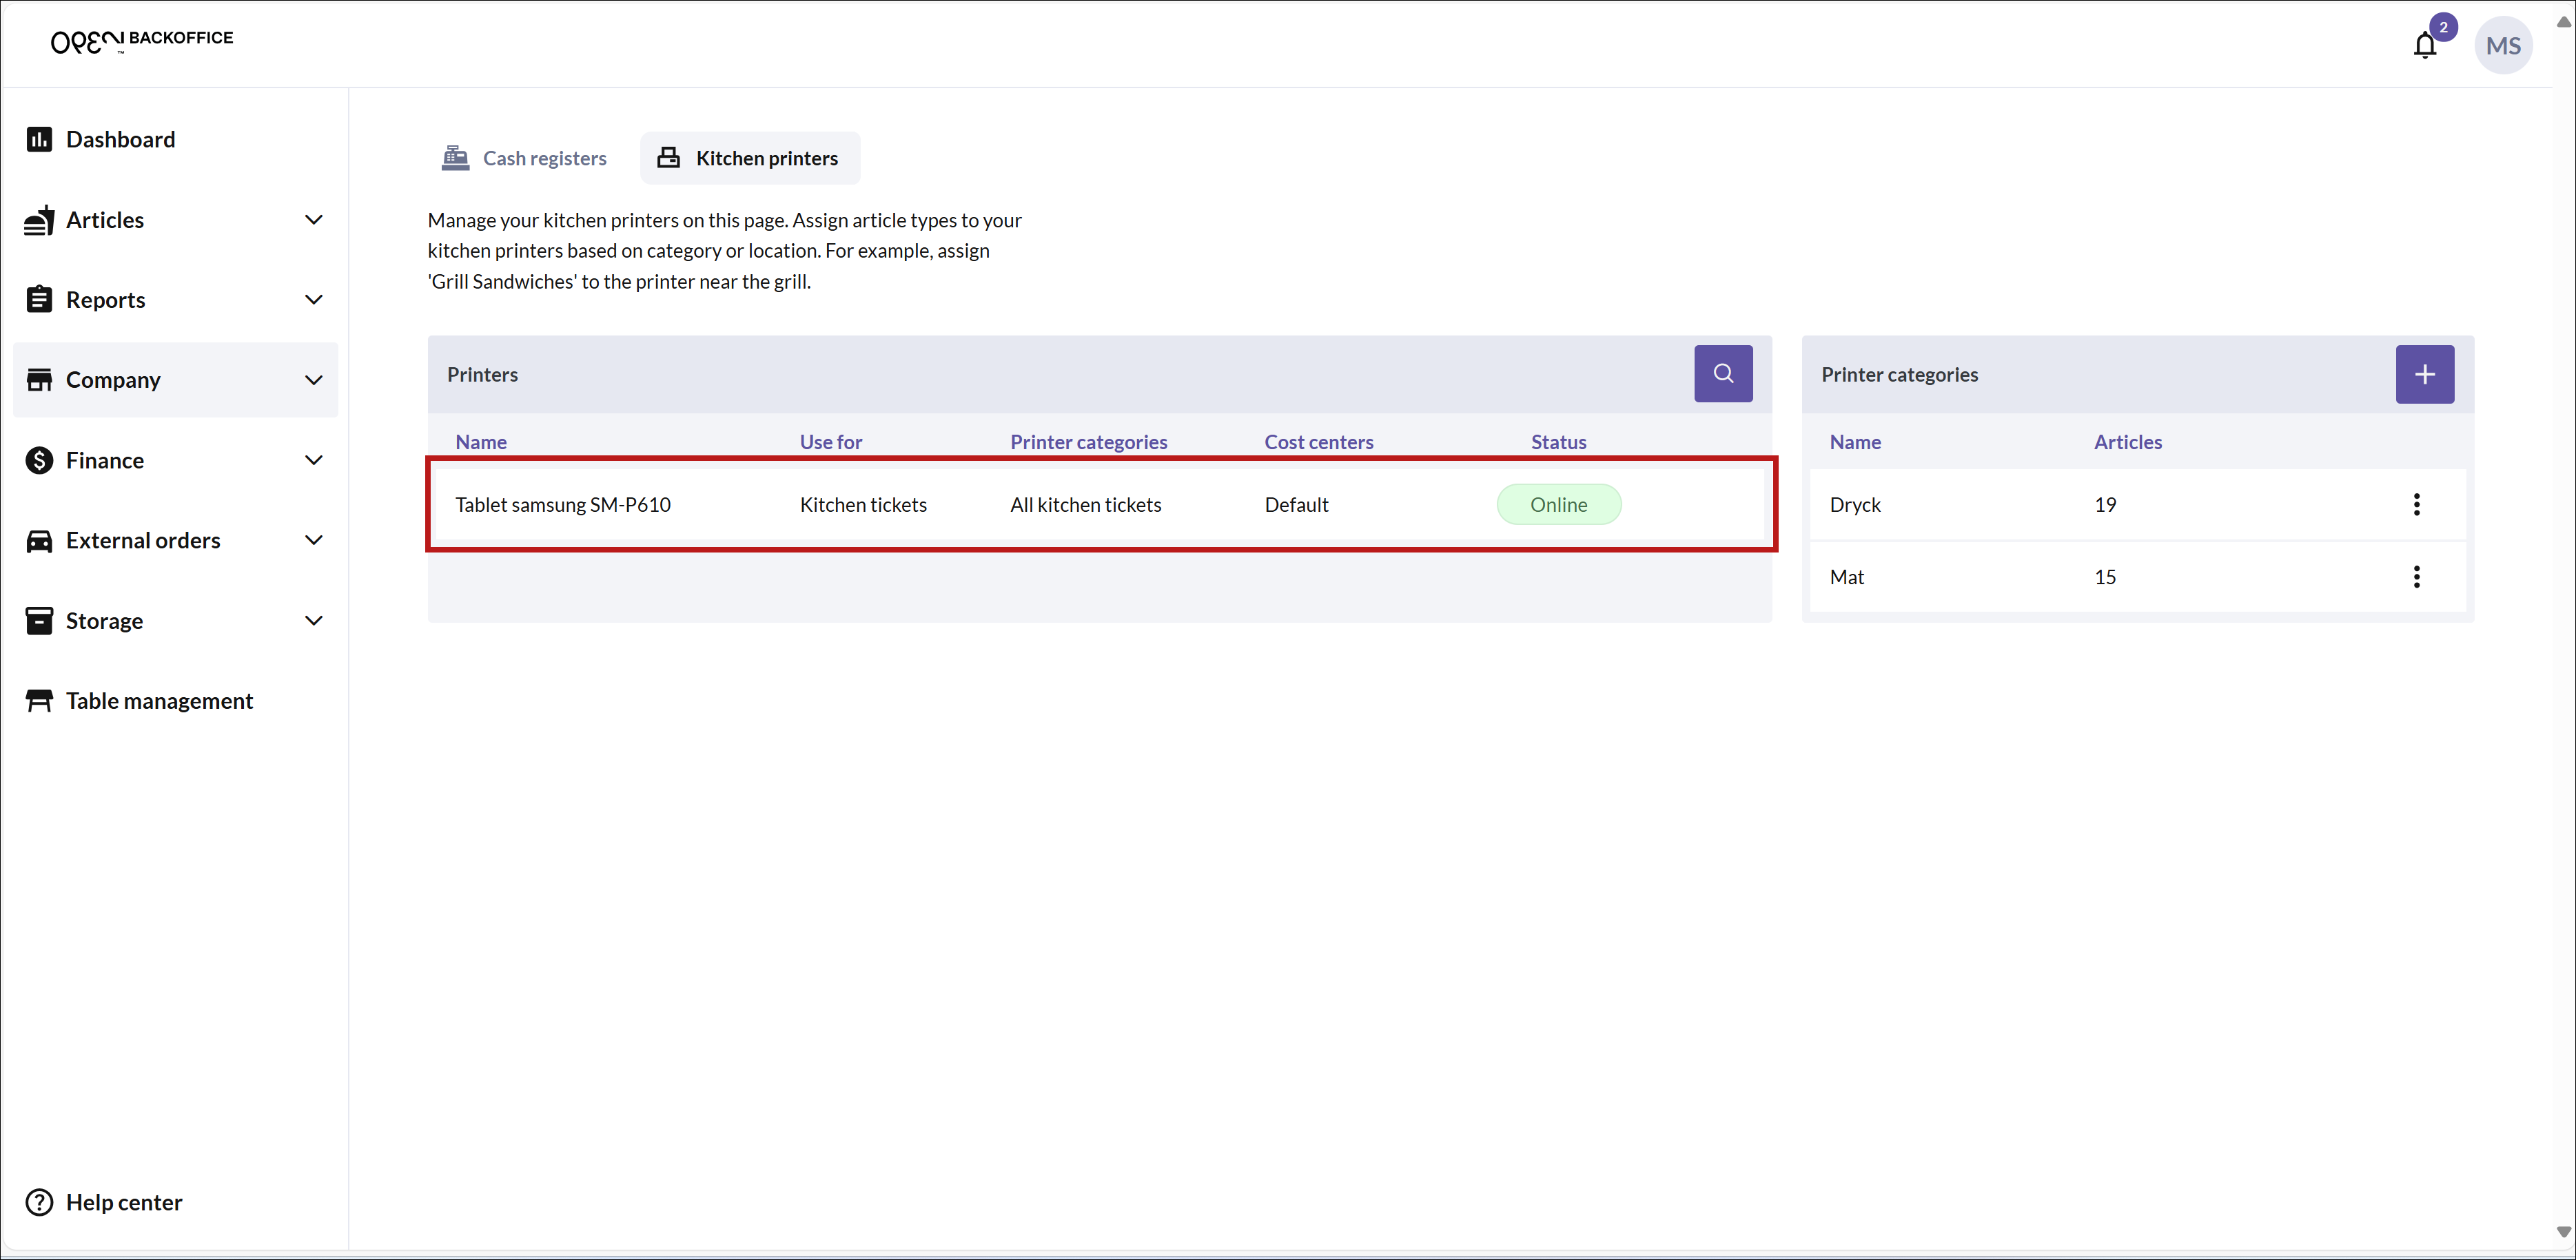
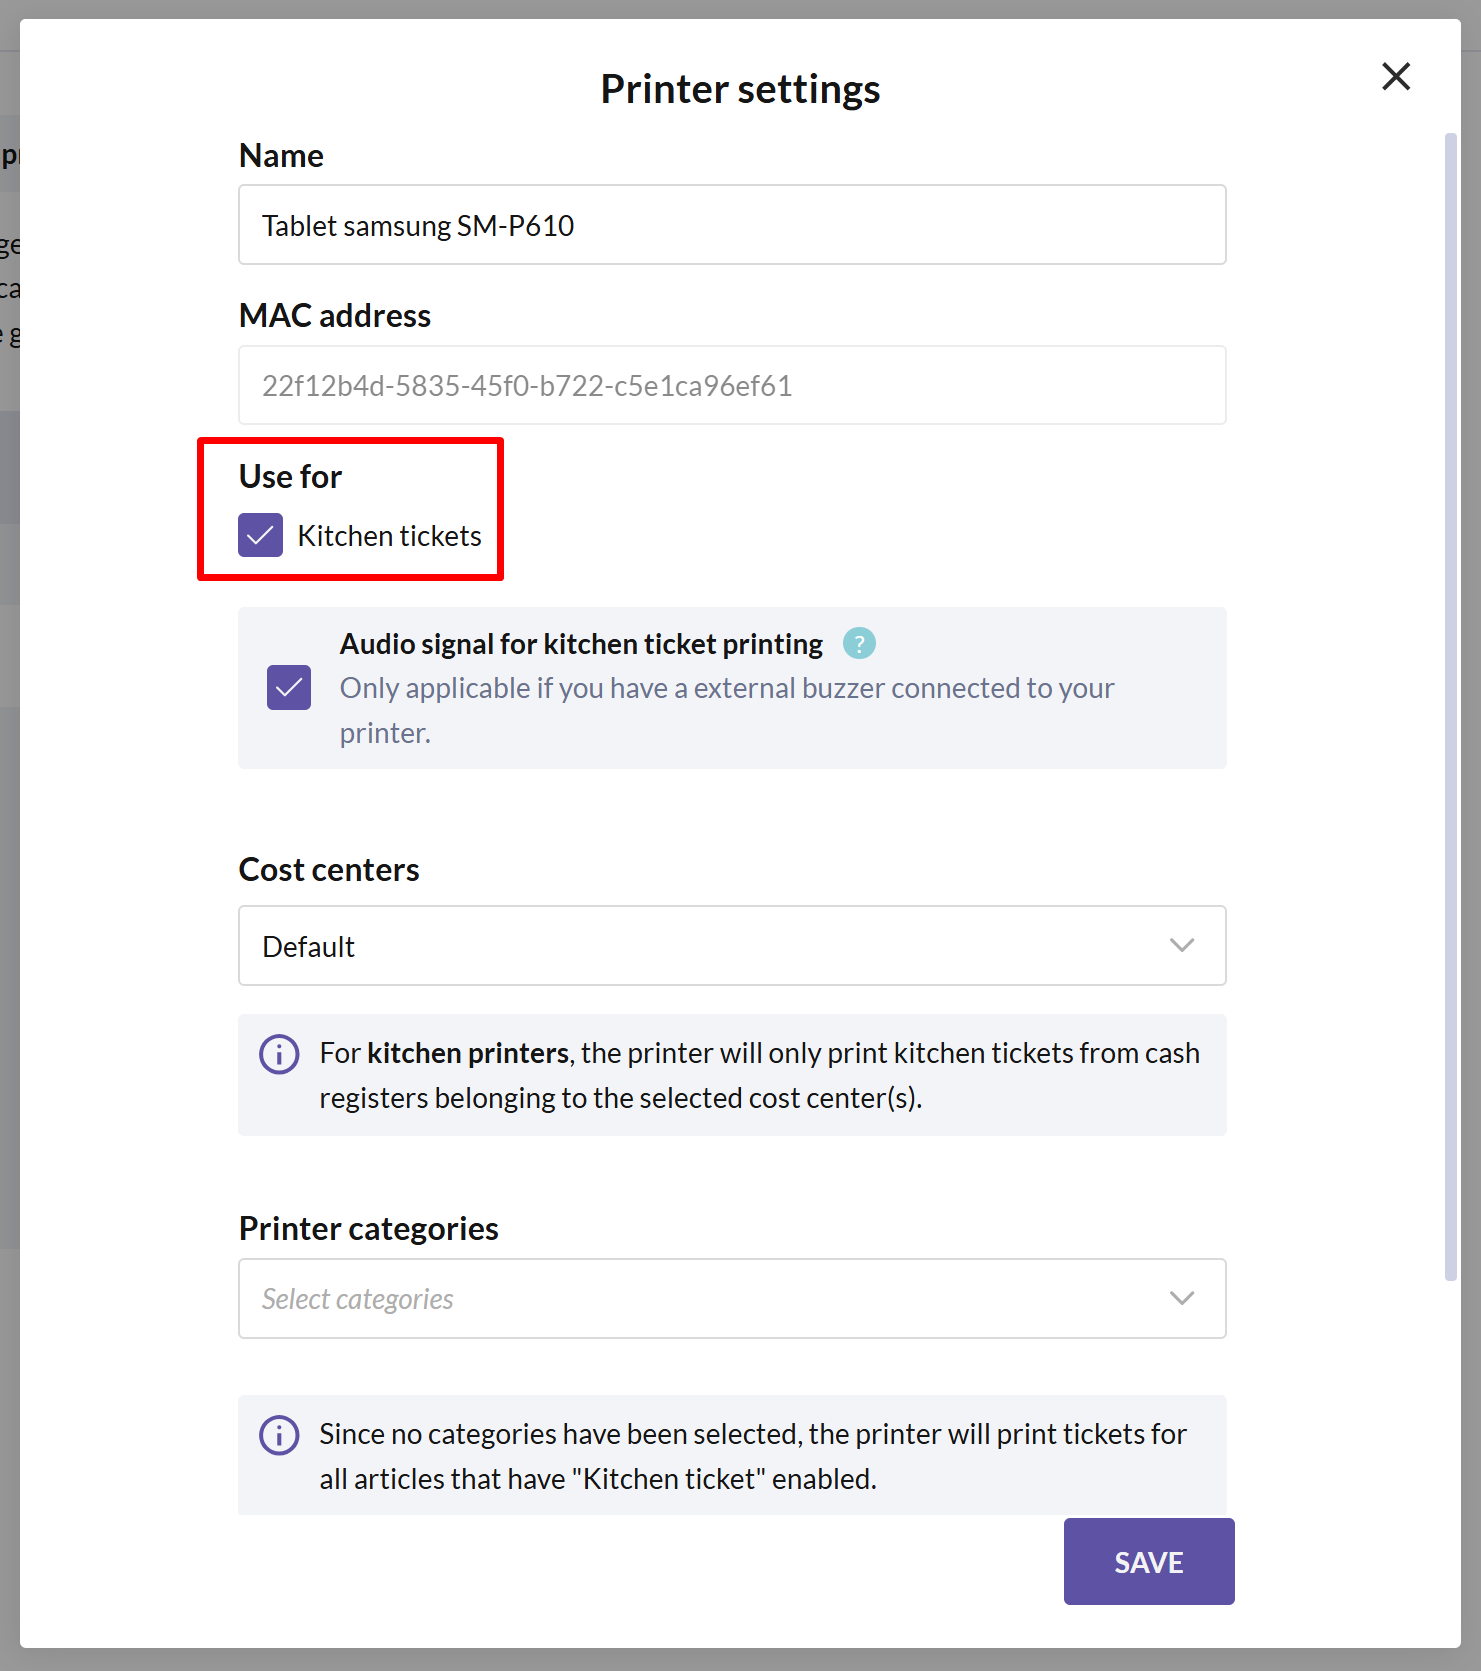
- You should now be able to see your cloud-connected printer in the list. Click on the printer to open the PRINTER SETTINGS dialog.
Usage
In the dialog box that opens, make sure that the checkbox Use for Kitchen tickets is enabled.
Audio signal for kitchen ticket printing
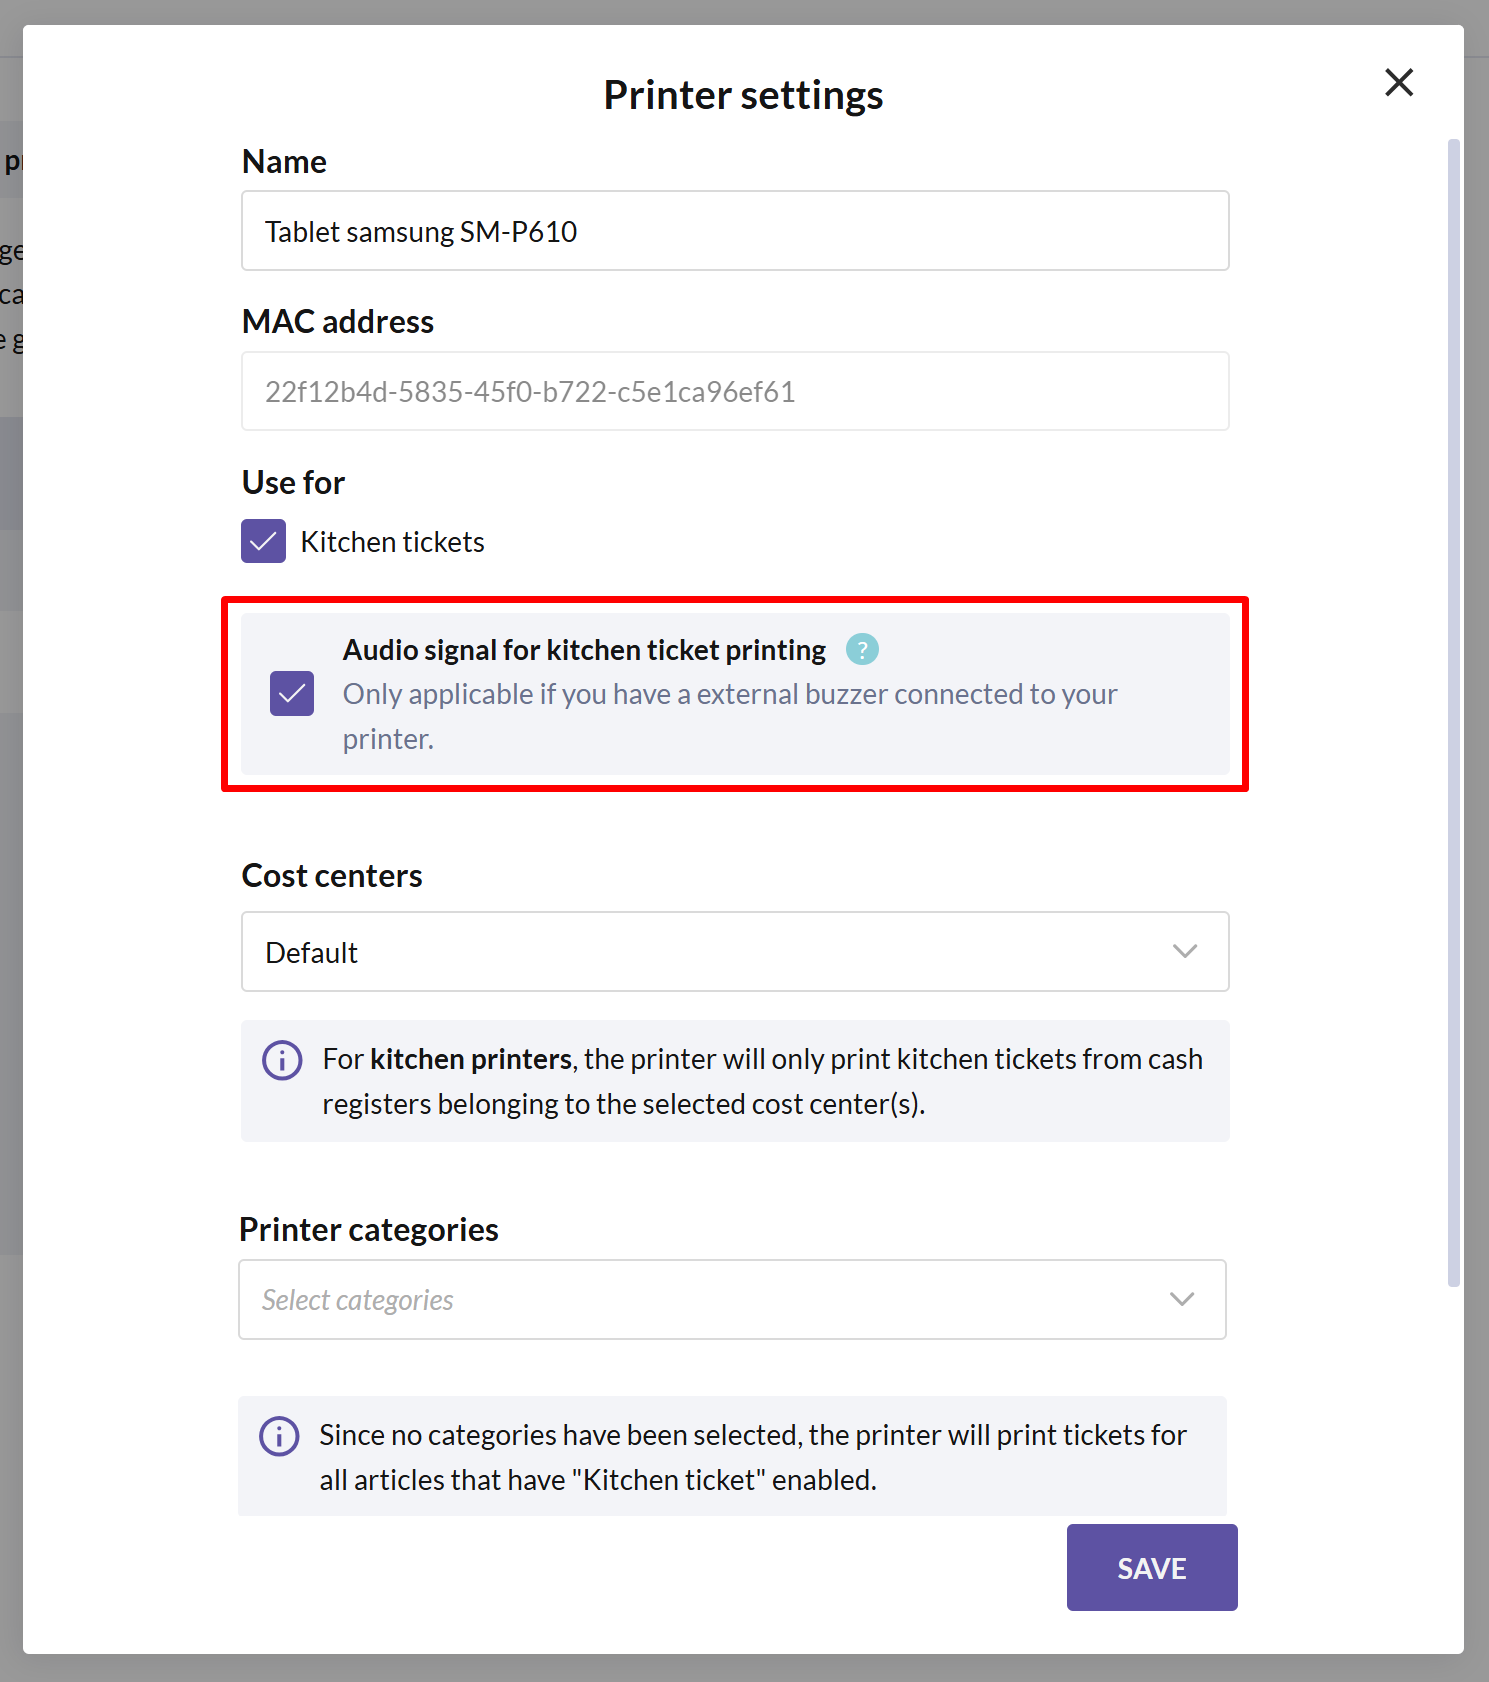
If you have a buzzer connected to the printer, make sure to enable the setting Audio signal for kitchen ticket printing. This way your buzzer will signal each time a kitchen ticket is printed.
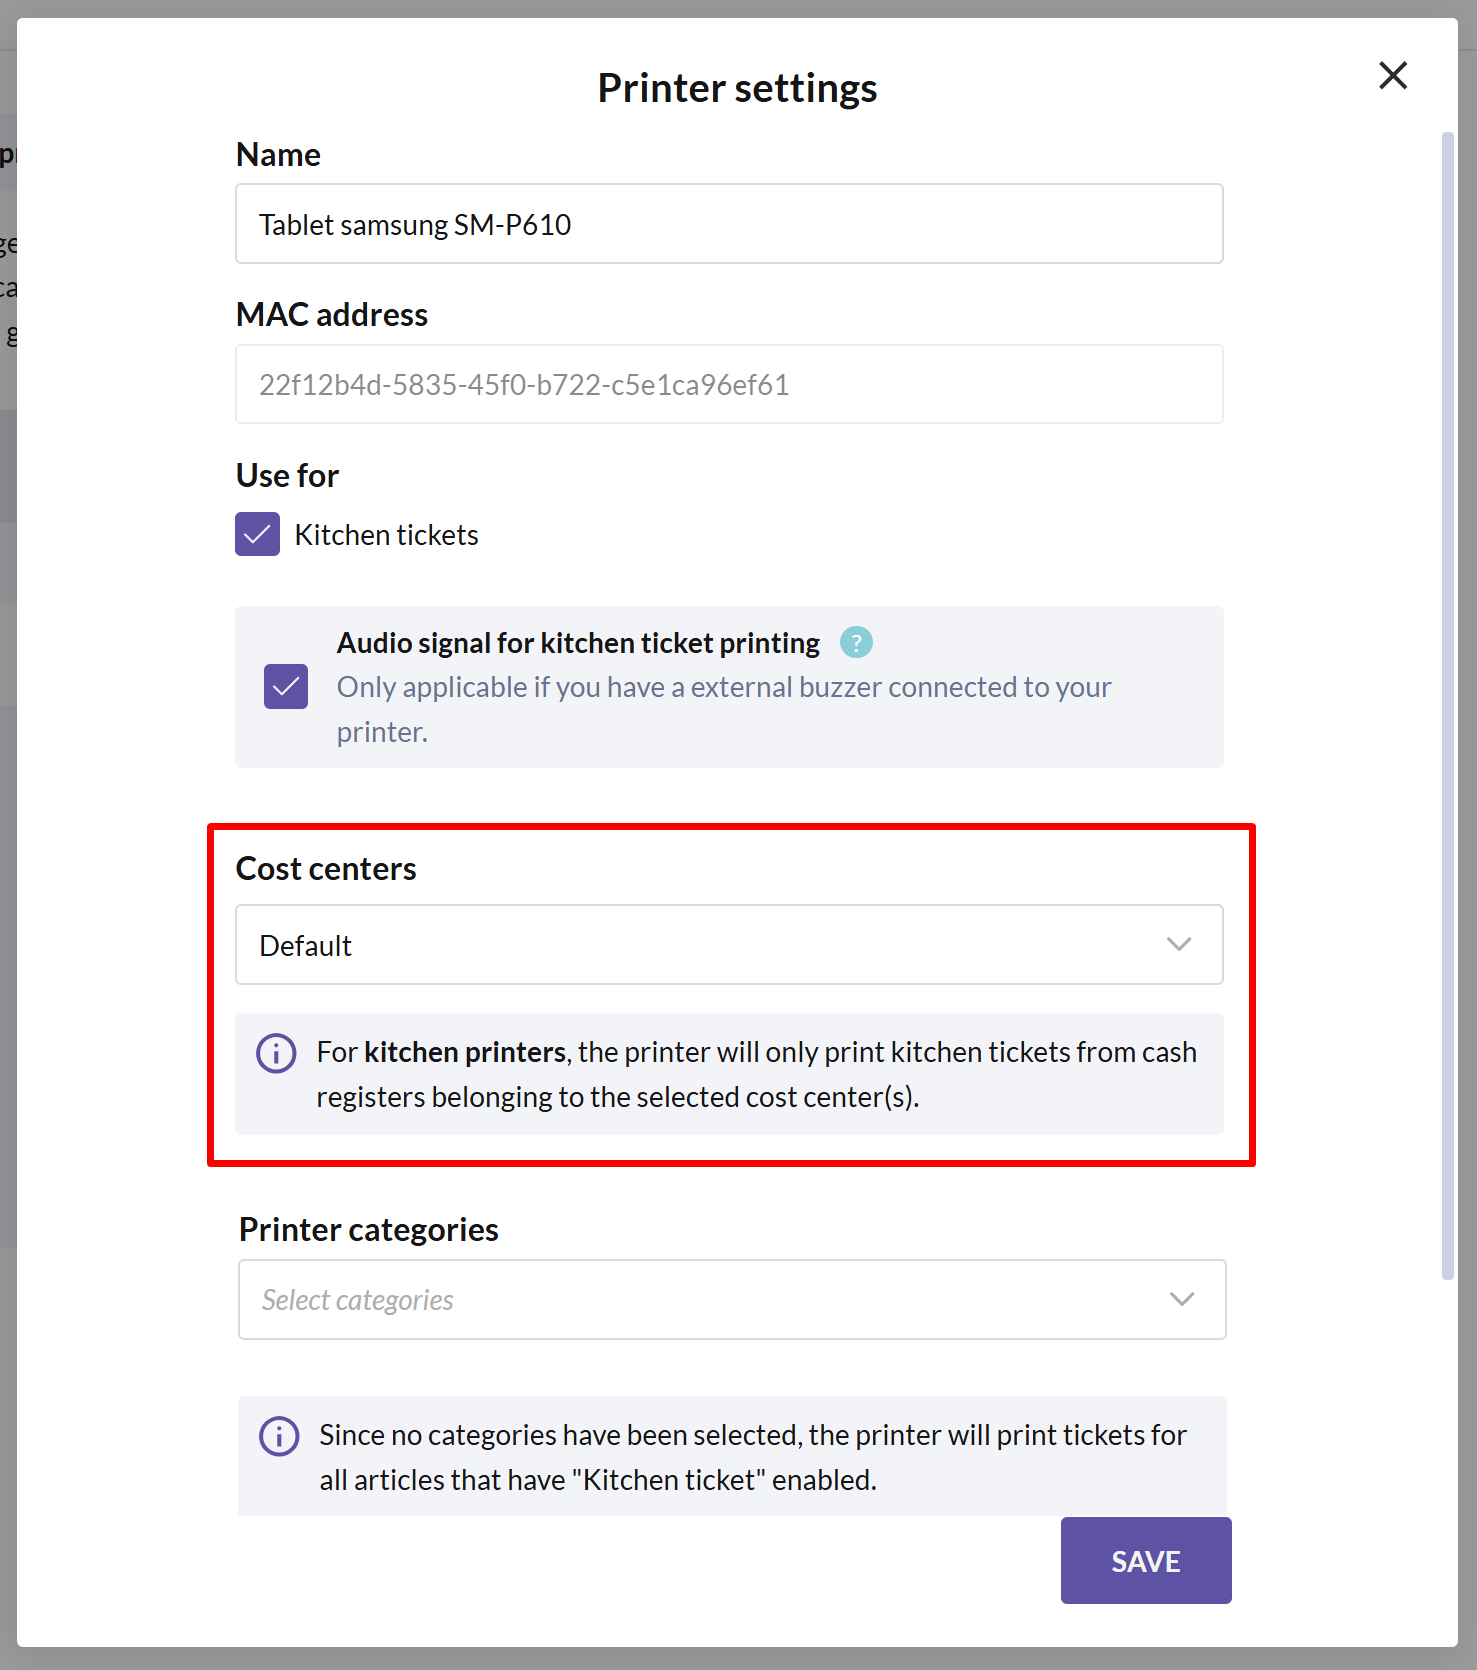
Cost center(s)
If needed, add or change which cost centers the printer should recognize. The printer will only be able to print kitchen tickets from cash registers within the selected cost center(s).
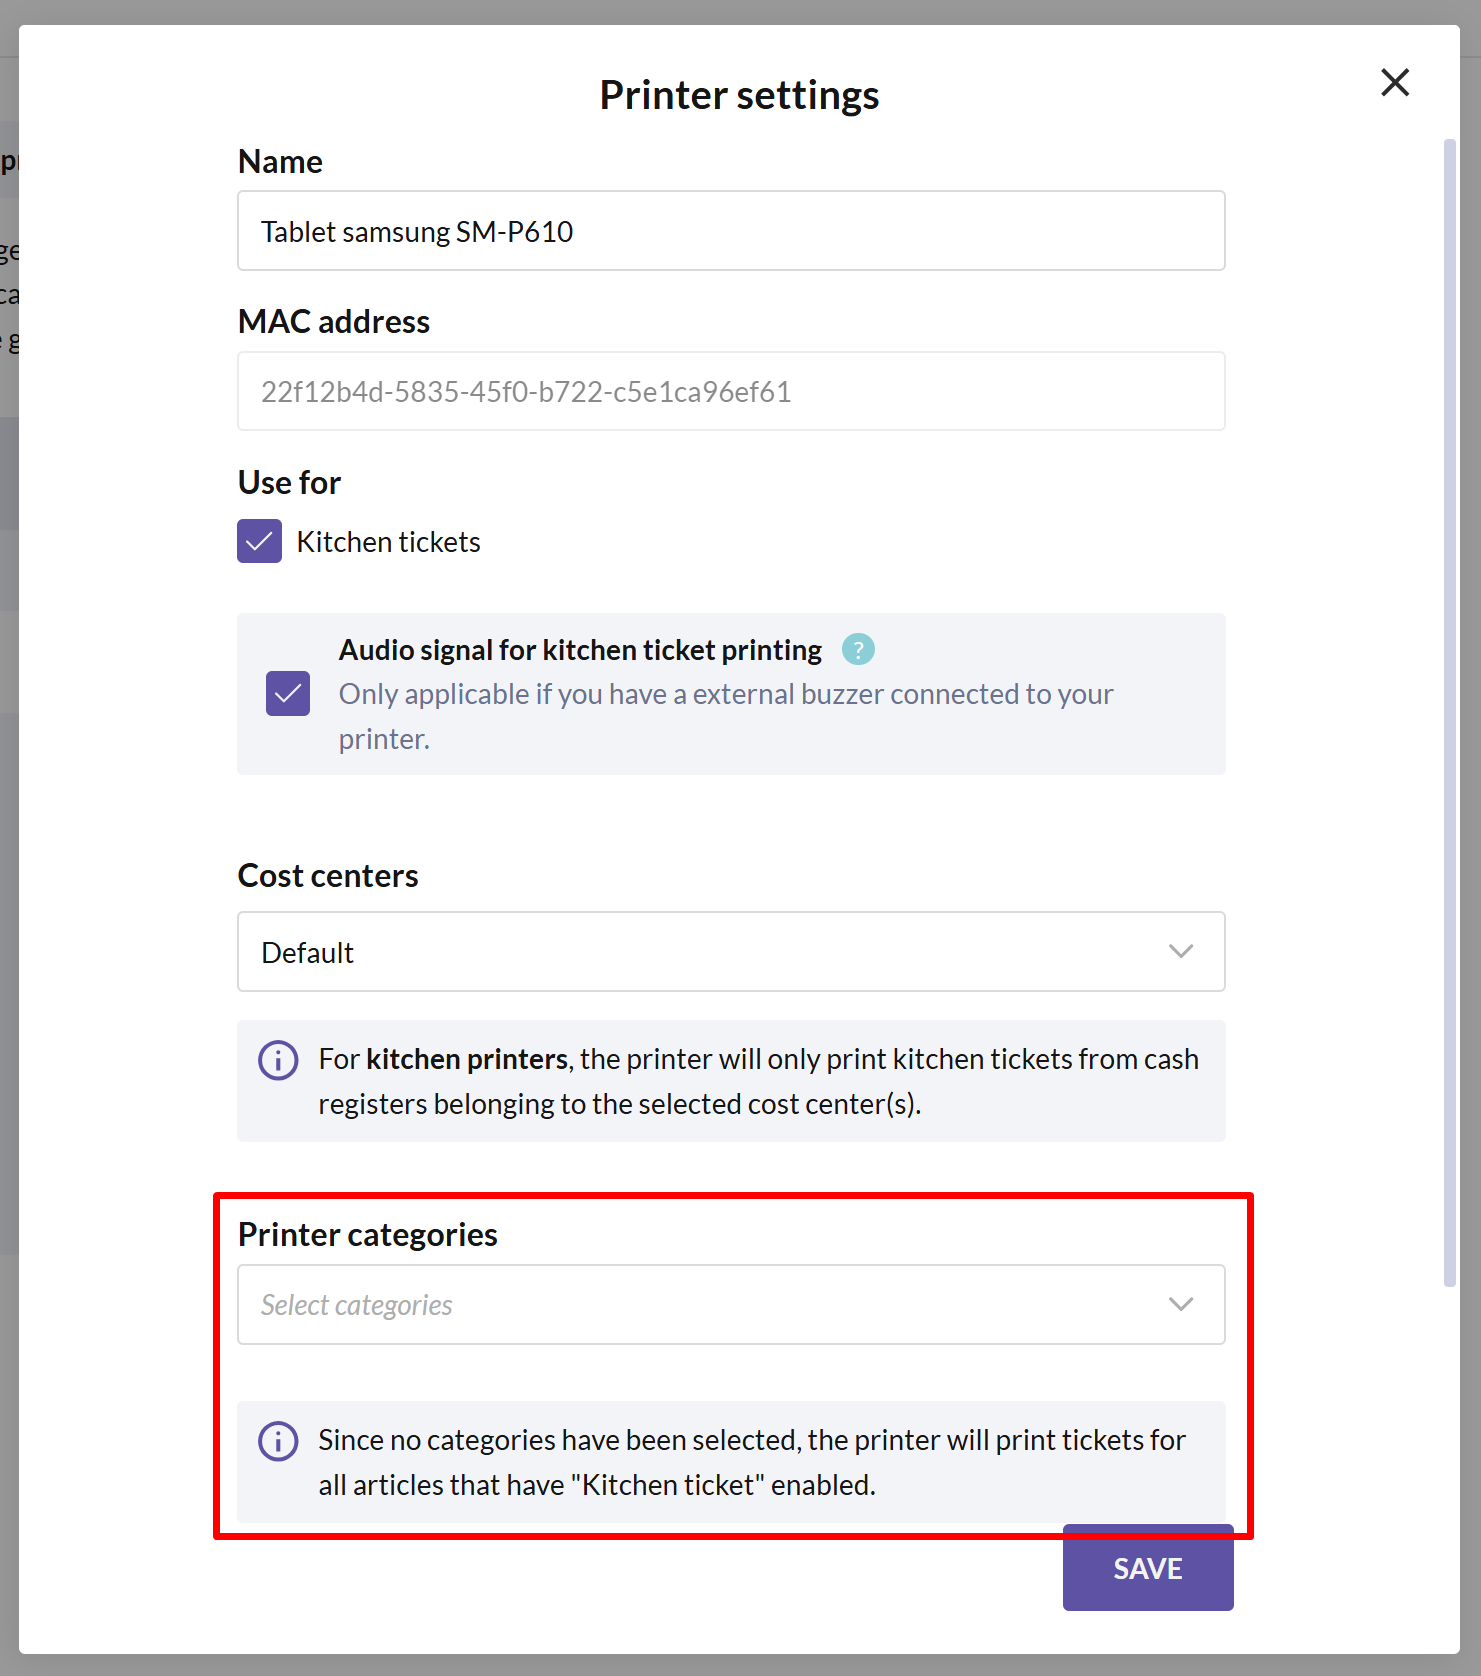
Printer categories
Select the categories of articles to be printed from the printer. If you only have one kitchen printer, you don't need to select any specific categories. The printer will then print tickets for all articles that have the "Kitchen ticket" option enabled.
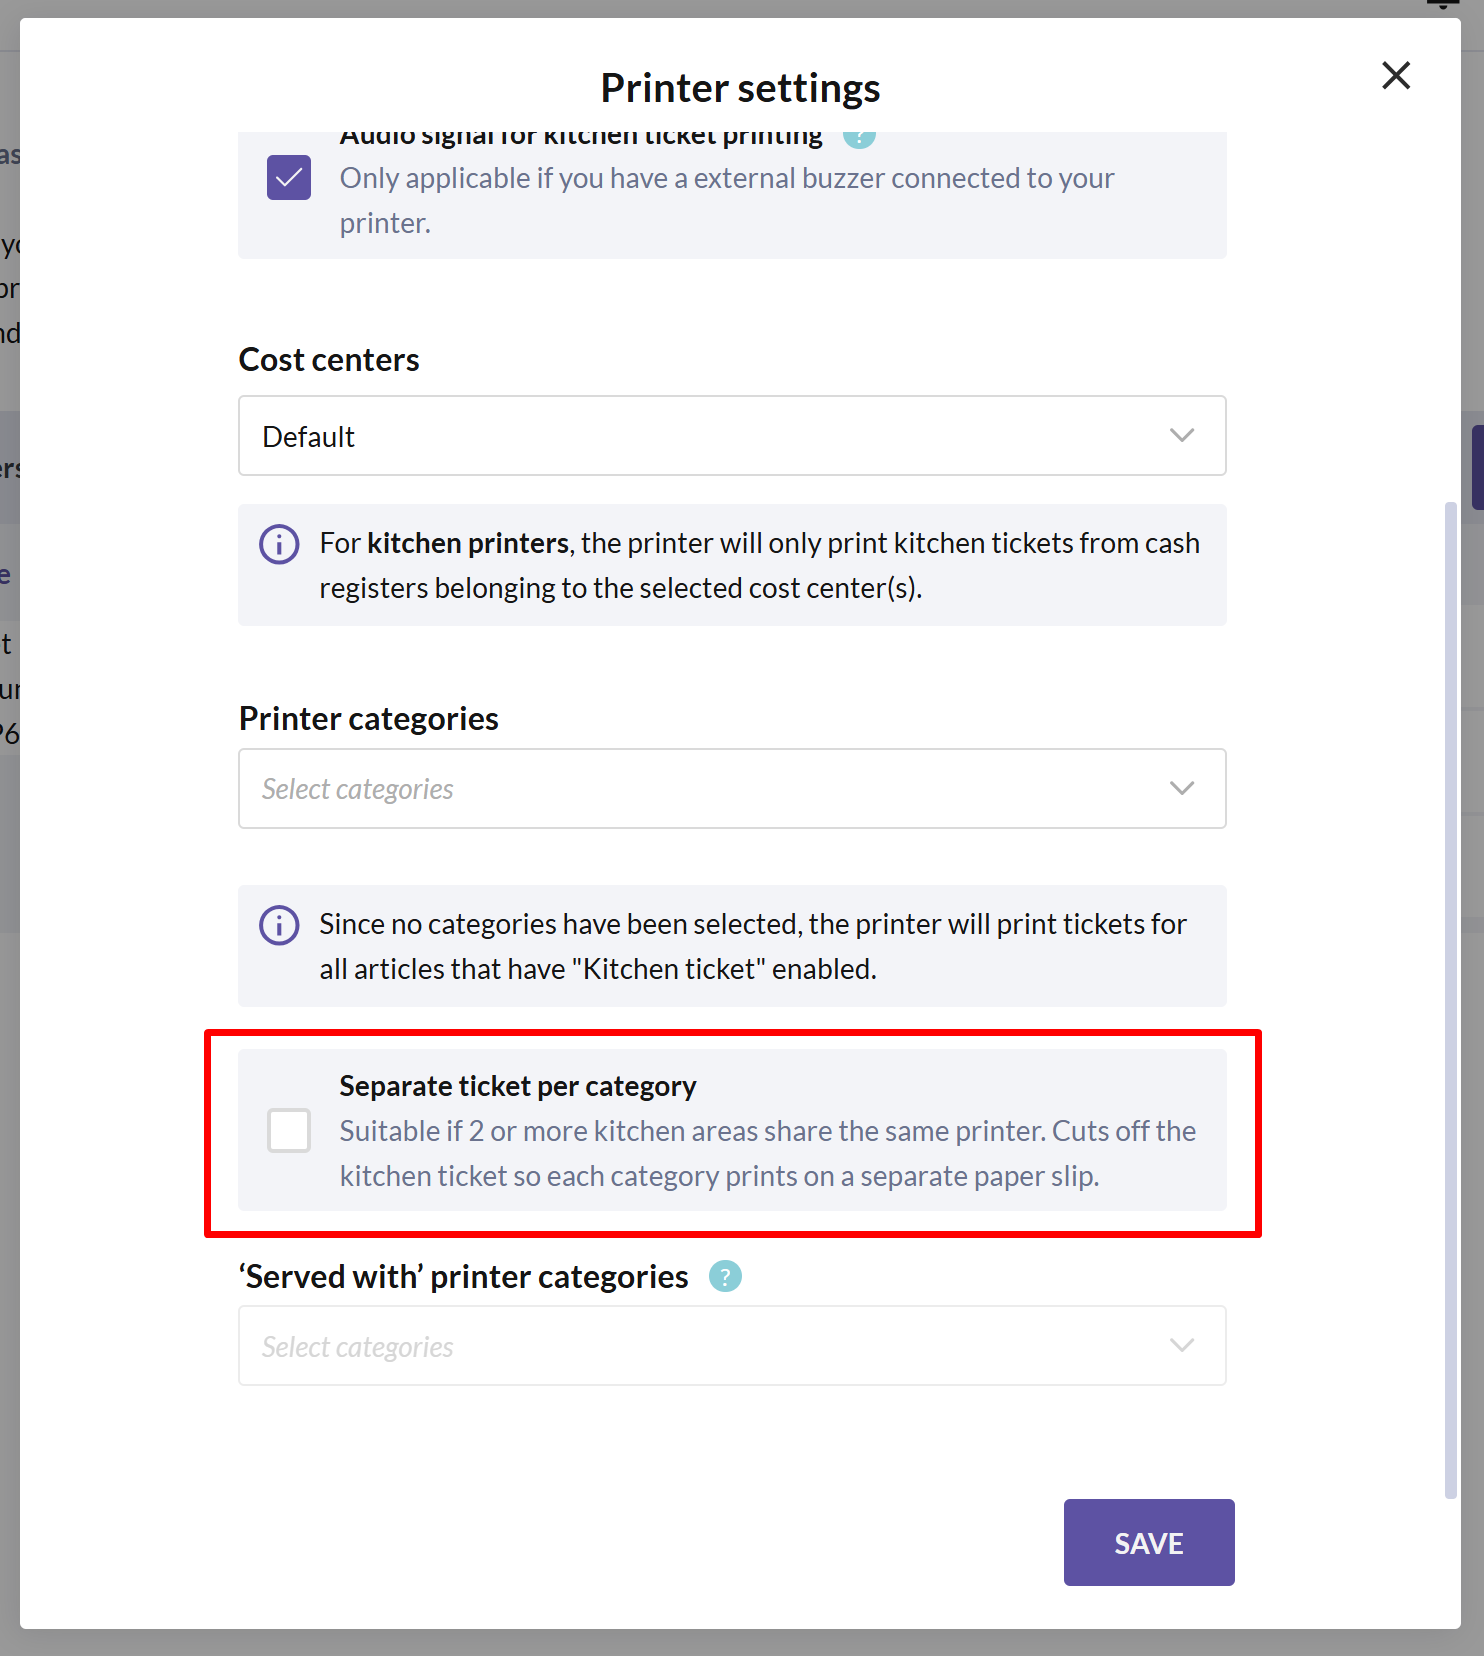
Separate ticket per category
If you have two or more kitchen areas sharing the same printer, you might want separate kichen tickets for your different printer categories, e.g. enabling the hot food and cold food to be printed separately.
By enabling this setting, all categories will be printed on their own kitchen tickets regardless of which serving they belong to.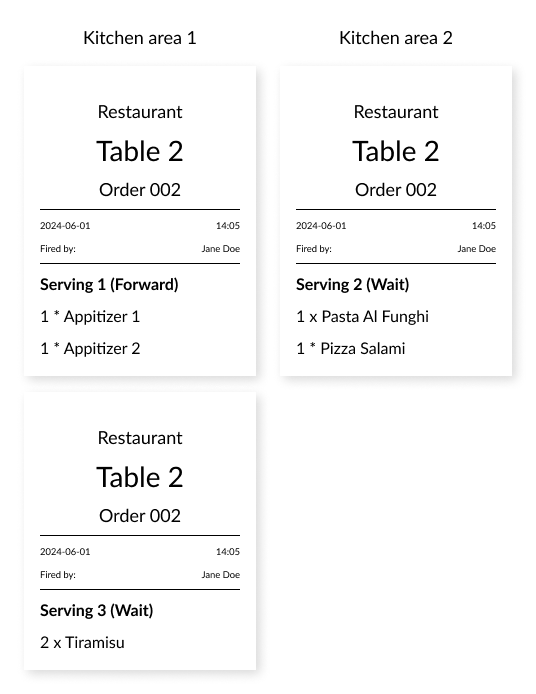
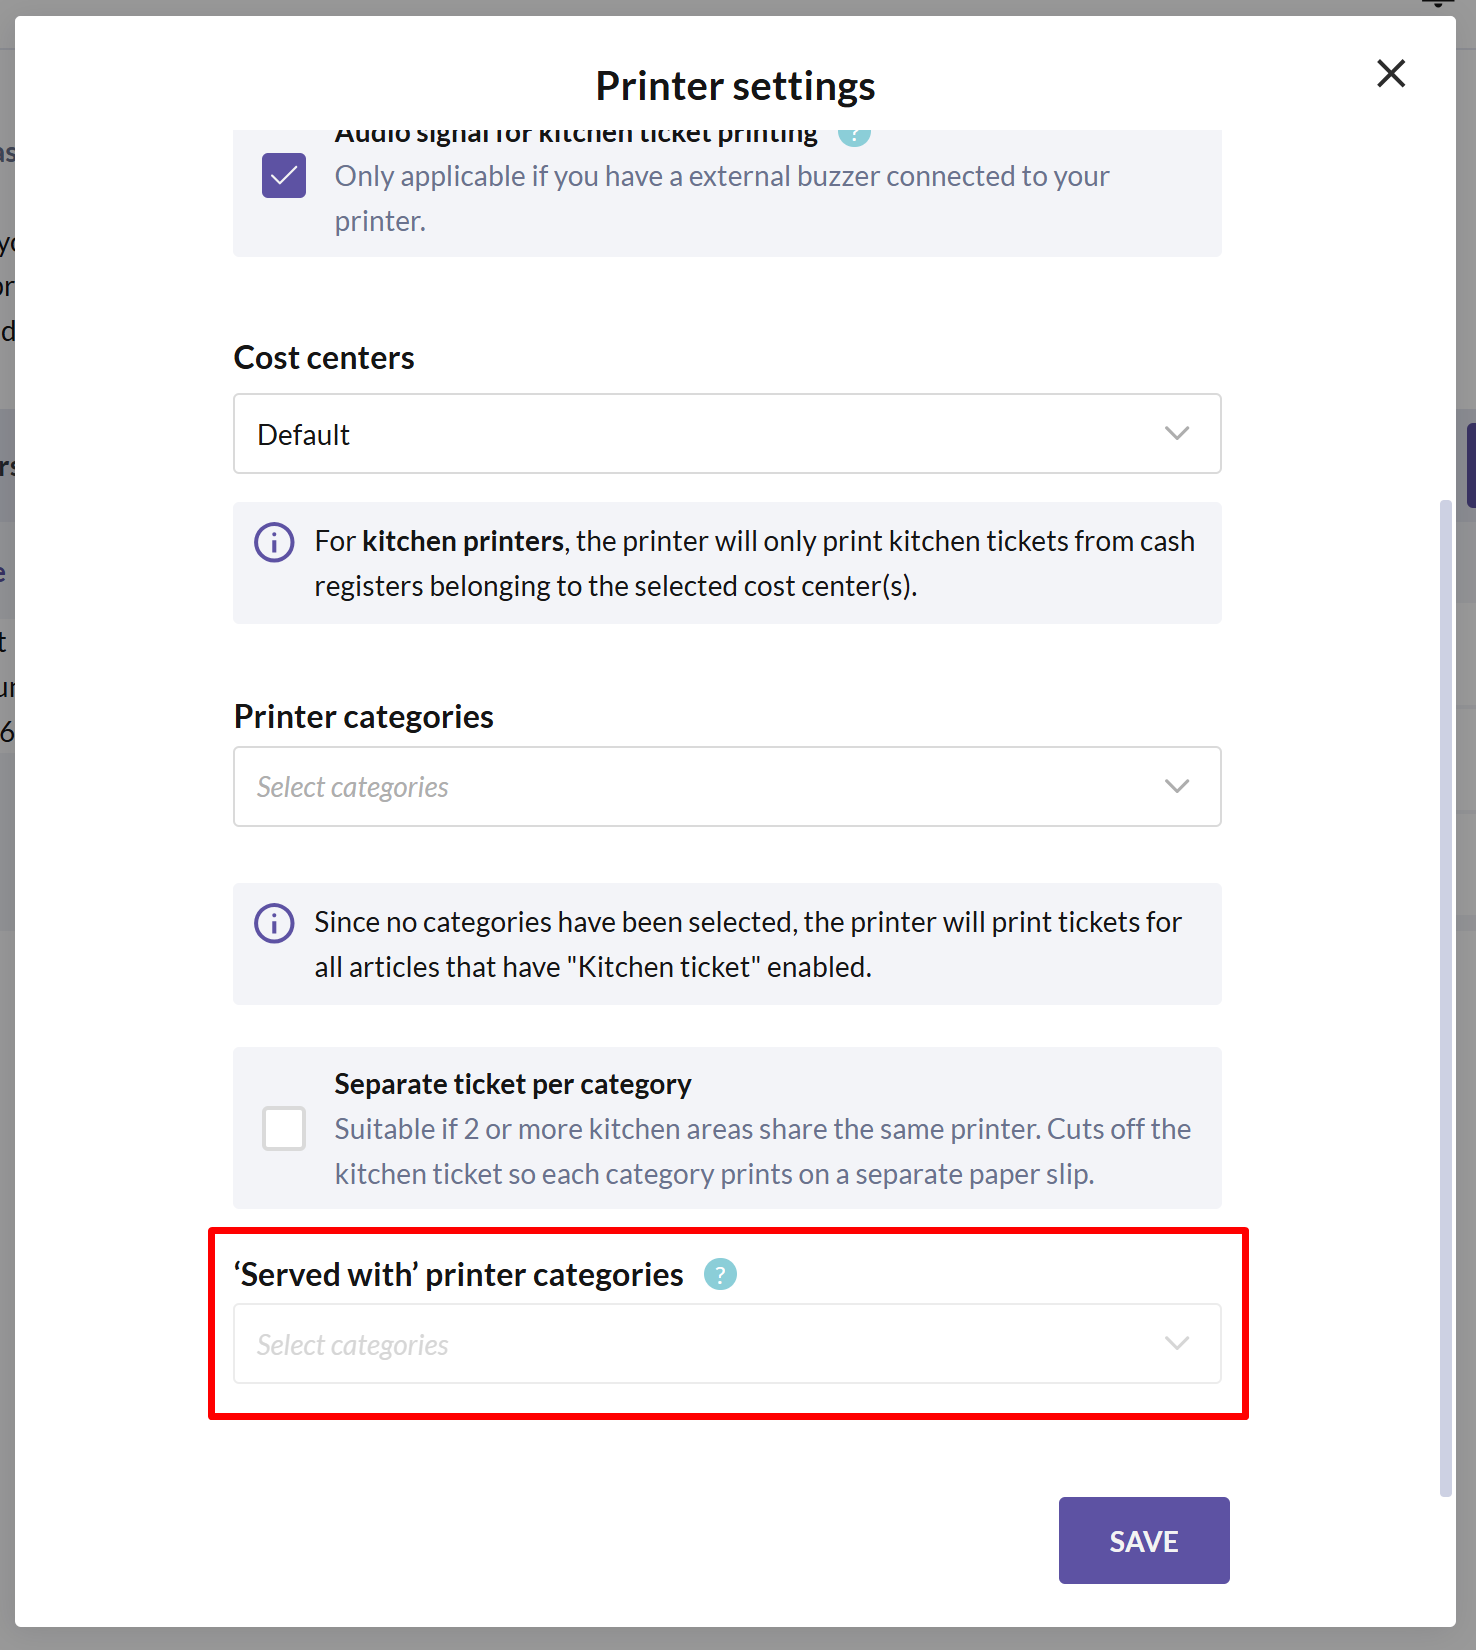
'Served with' printer categories
If you have multiple kitchen areas with their own kitchen printers that need to cooperate, you can use the 'Served with' printer categories setting. Simply select which other 'served with' categories should be highlighted on the tickets from this kitchen printer.
For example, if the pizza chef needs to be aware that the pizza is to be served with a pasta dish, you could select "Pasta" as a 'Served with' printer category.
Note that this setting is only supported if you have at least 2 kitchen printers.
- Once you've completed your settings, simply press SAVE.
The installation is now finalized! The kitchen printer will automatically print kitchen tickets from the cash register(s) belonging to the same cost center, so you won't need to configure anything from the cash register itself.
Ensuring articles print on kitchen tickets
There are two ways to make sure that your articles will be included on the kitchen tickets, from the Articles page and from the Devices page. Below, we'll guide you through both methods to ensure your articles are printed on the kitchen tickets.
Method 1: assign articles to printer categories from the Devices page
If you use printer categories due to multiple kitchen printers or shared printers in different kitchen areas, the easiest way to manage your printer categories and assign articles to them is from the Devices page. This method ensures all relevant articles are included in the kitchen tickets.
In BackOffice, select COMPANY in the menu and go to the DEVICES page.
Select the KITCHEN PRINTERS tab.

- To add a new printer category, simply press the + button in the top right corner.
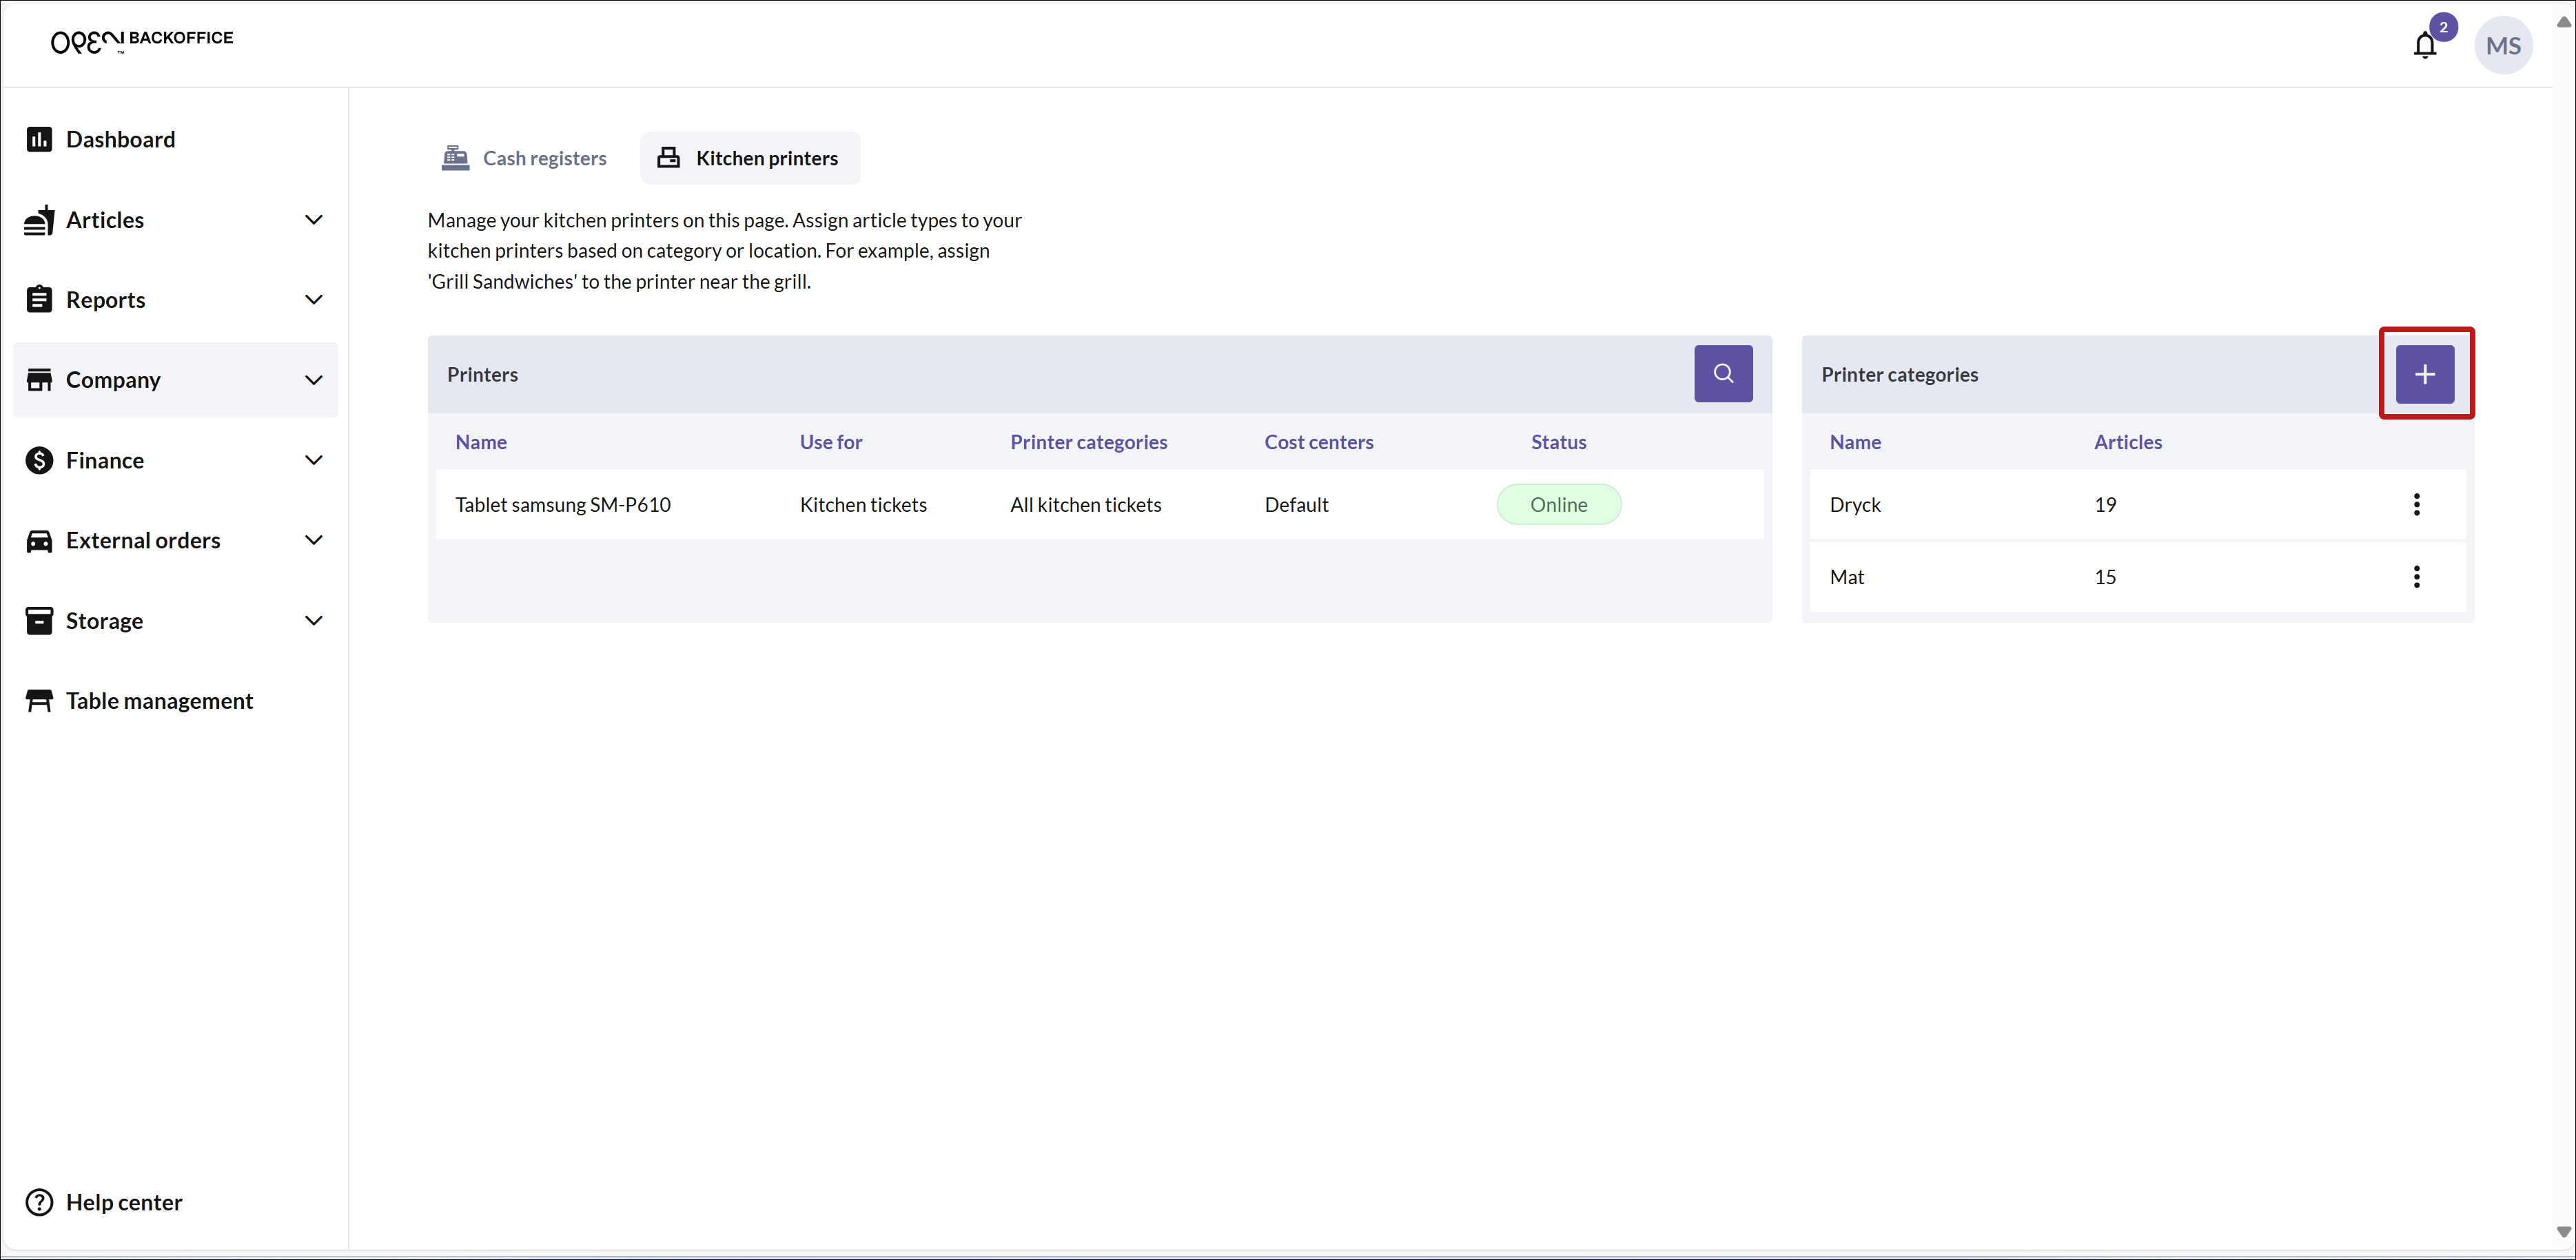
In the new page that opens, name the category and select which articles should be included.
To select or deselect articles, simply press an article from the list.
When you add an article to the category, the "Print kitchen ticket" setting will be automatically enabled.
Once you're done, press SAVE.
You can now see your created category in the list to the right.
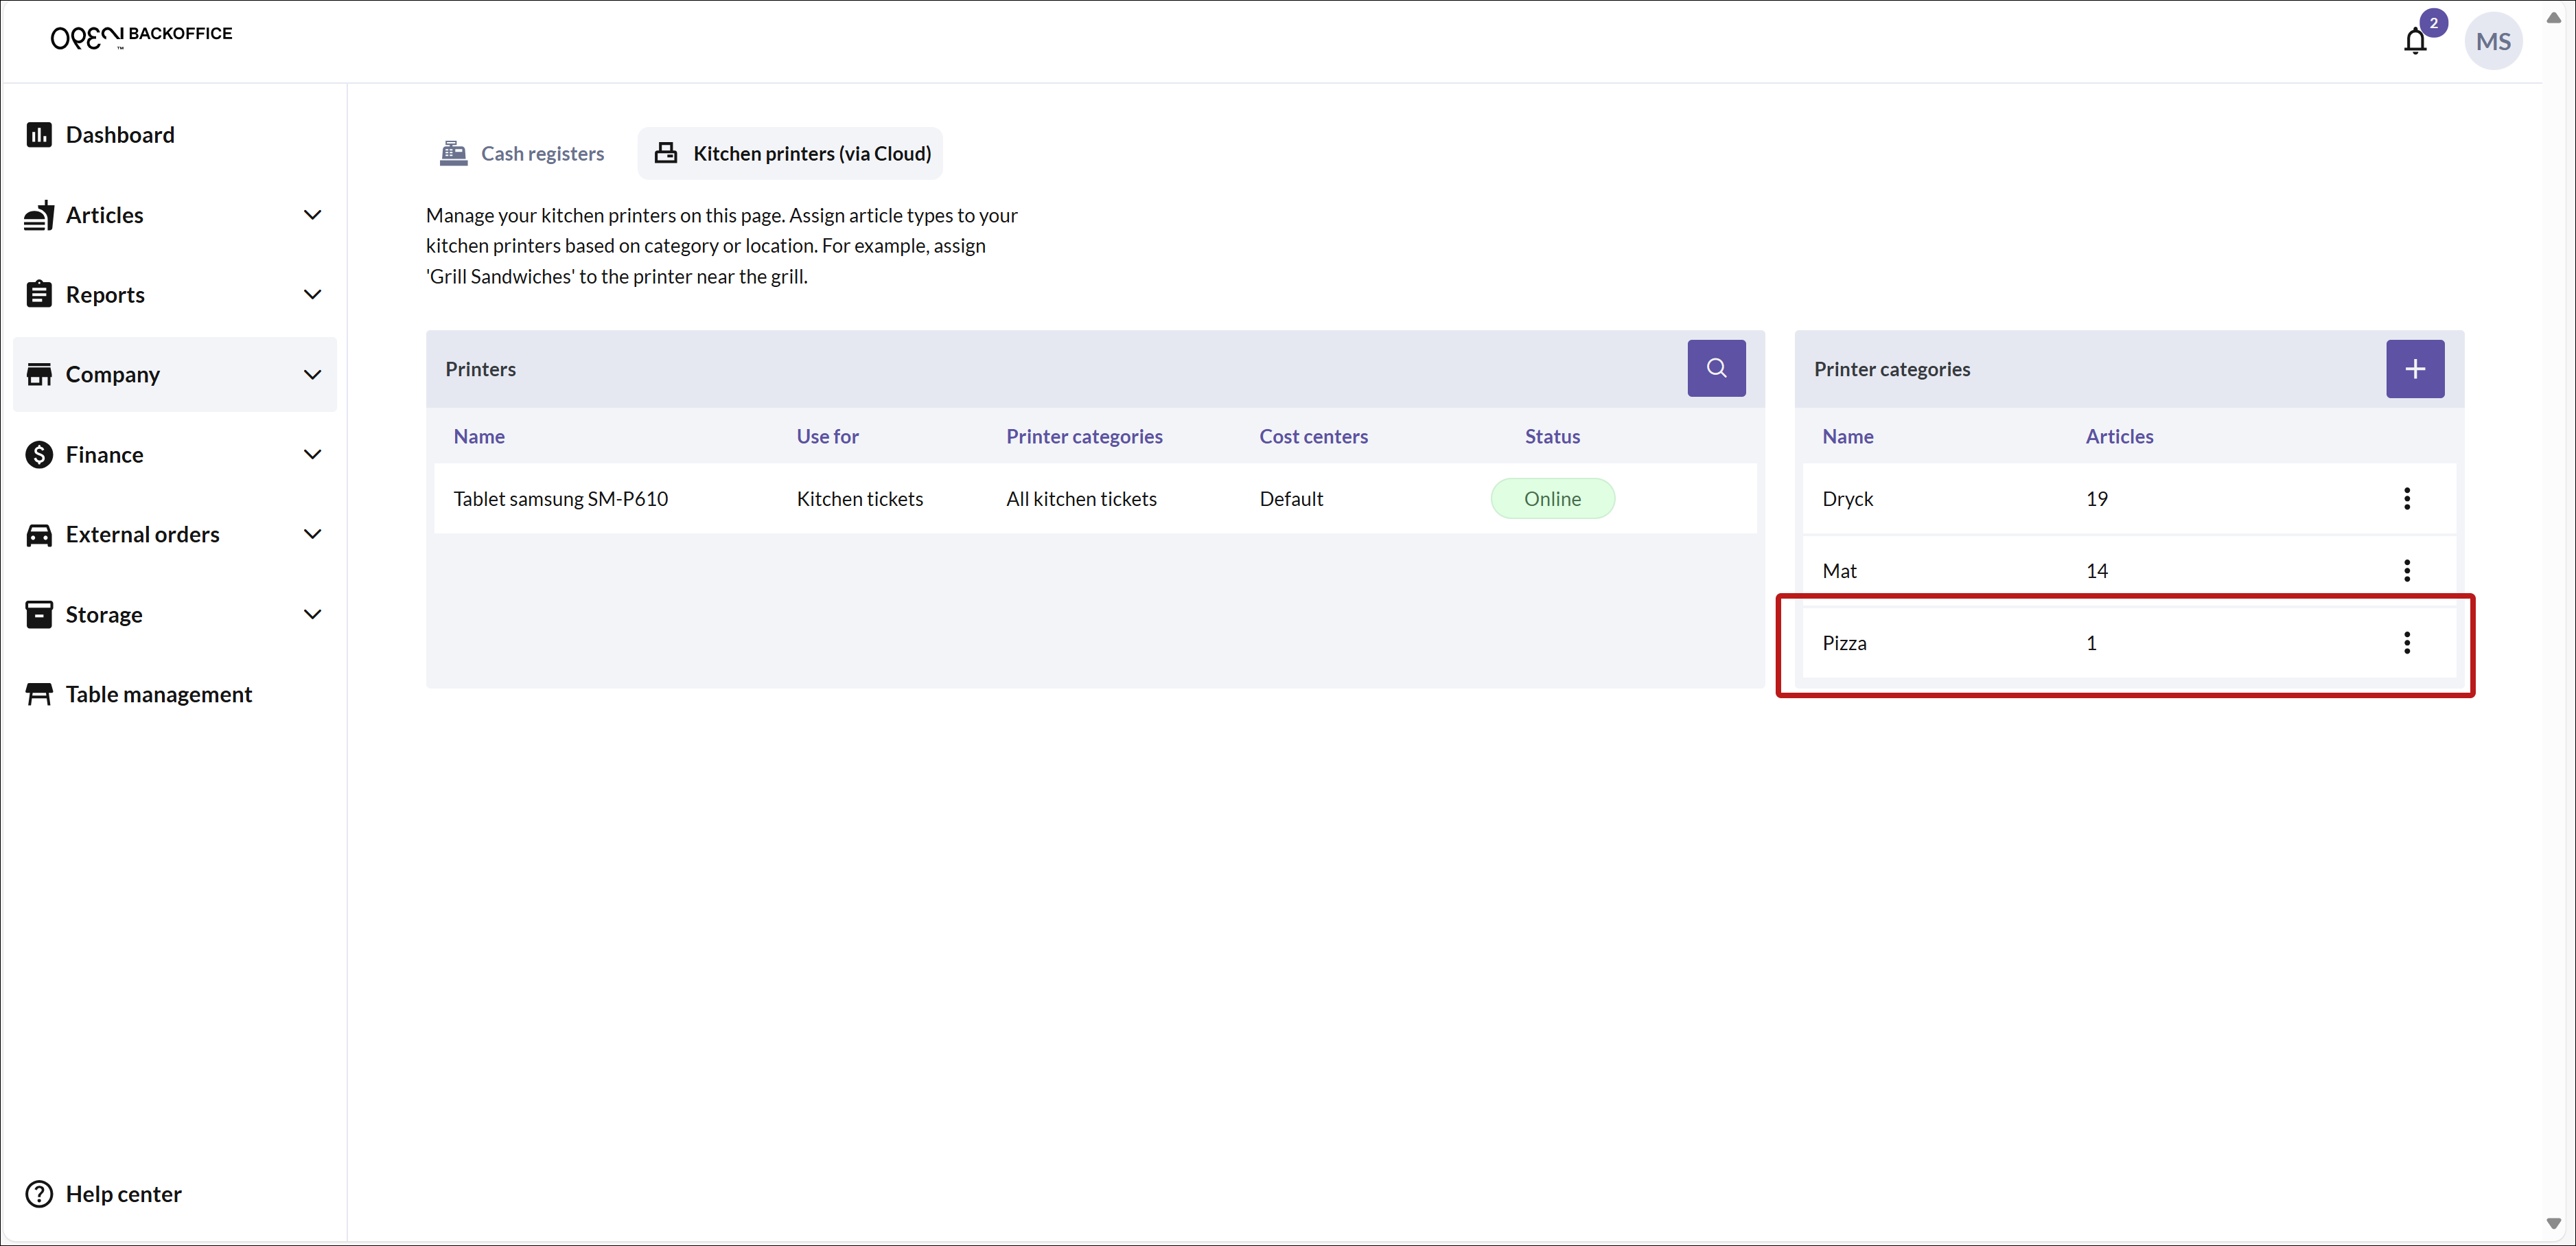
Make sure to assign the printer category to the appropriate kitchen printer from the printer settings.
Method 2: enable "Print kitchen ticket" from the Articles page
For a simpler setup with a single kitchen printer, ensure the "Print kitchen ticket" option is enabled for your articles on the Articles page.
In BackOffice, select ARTICLES in the menu and go to the ARTICLES page.
Enable the Kitchen ticket option on the desired articles.
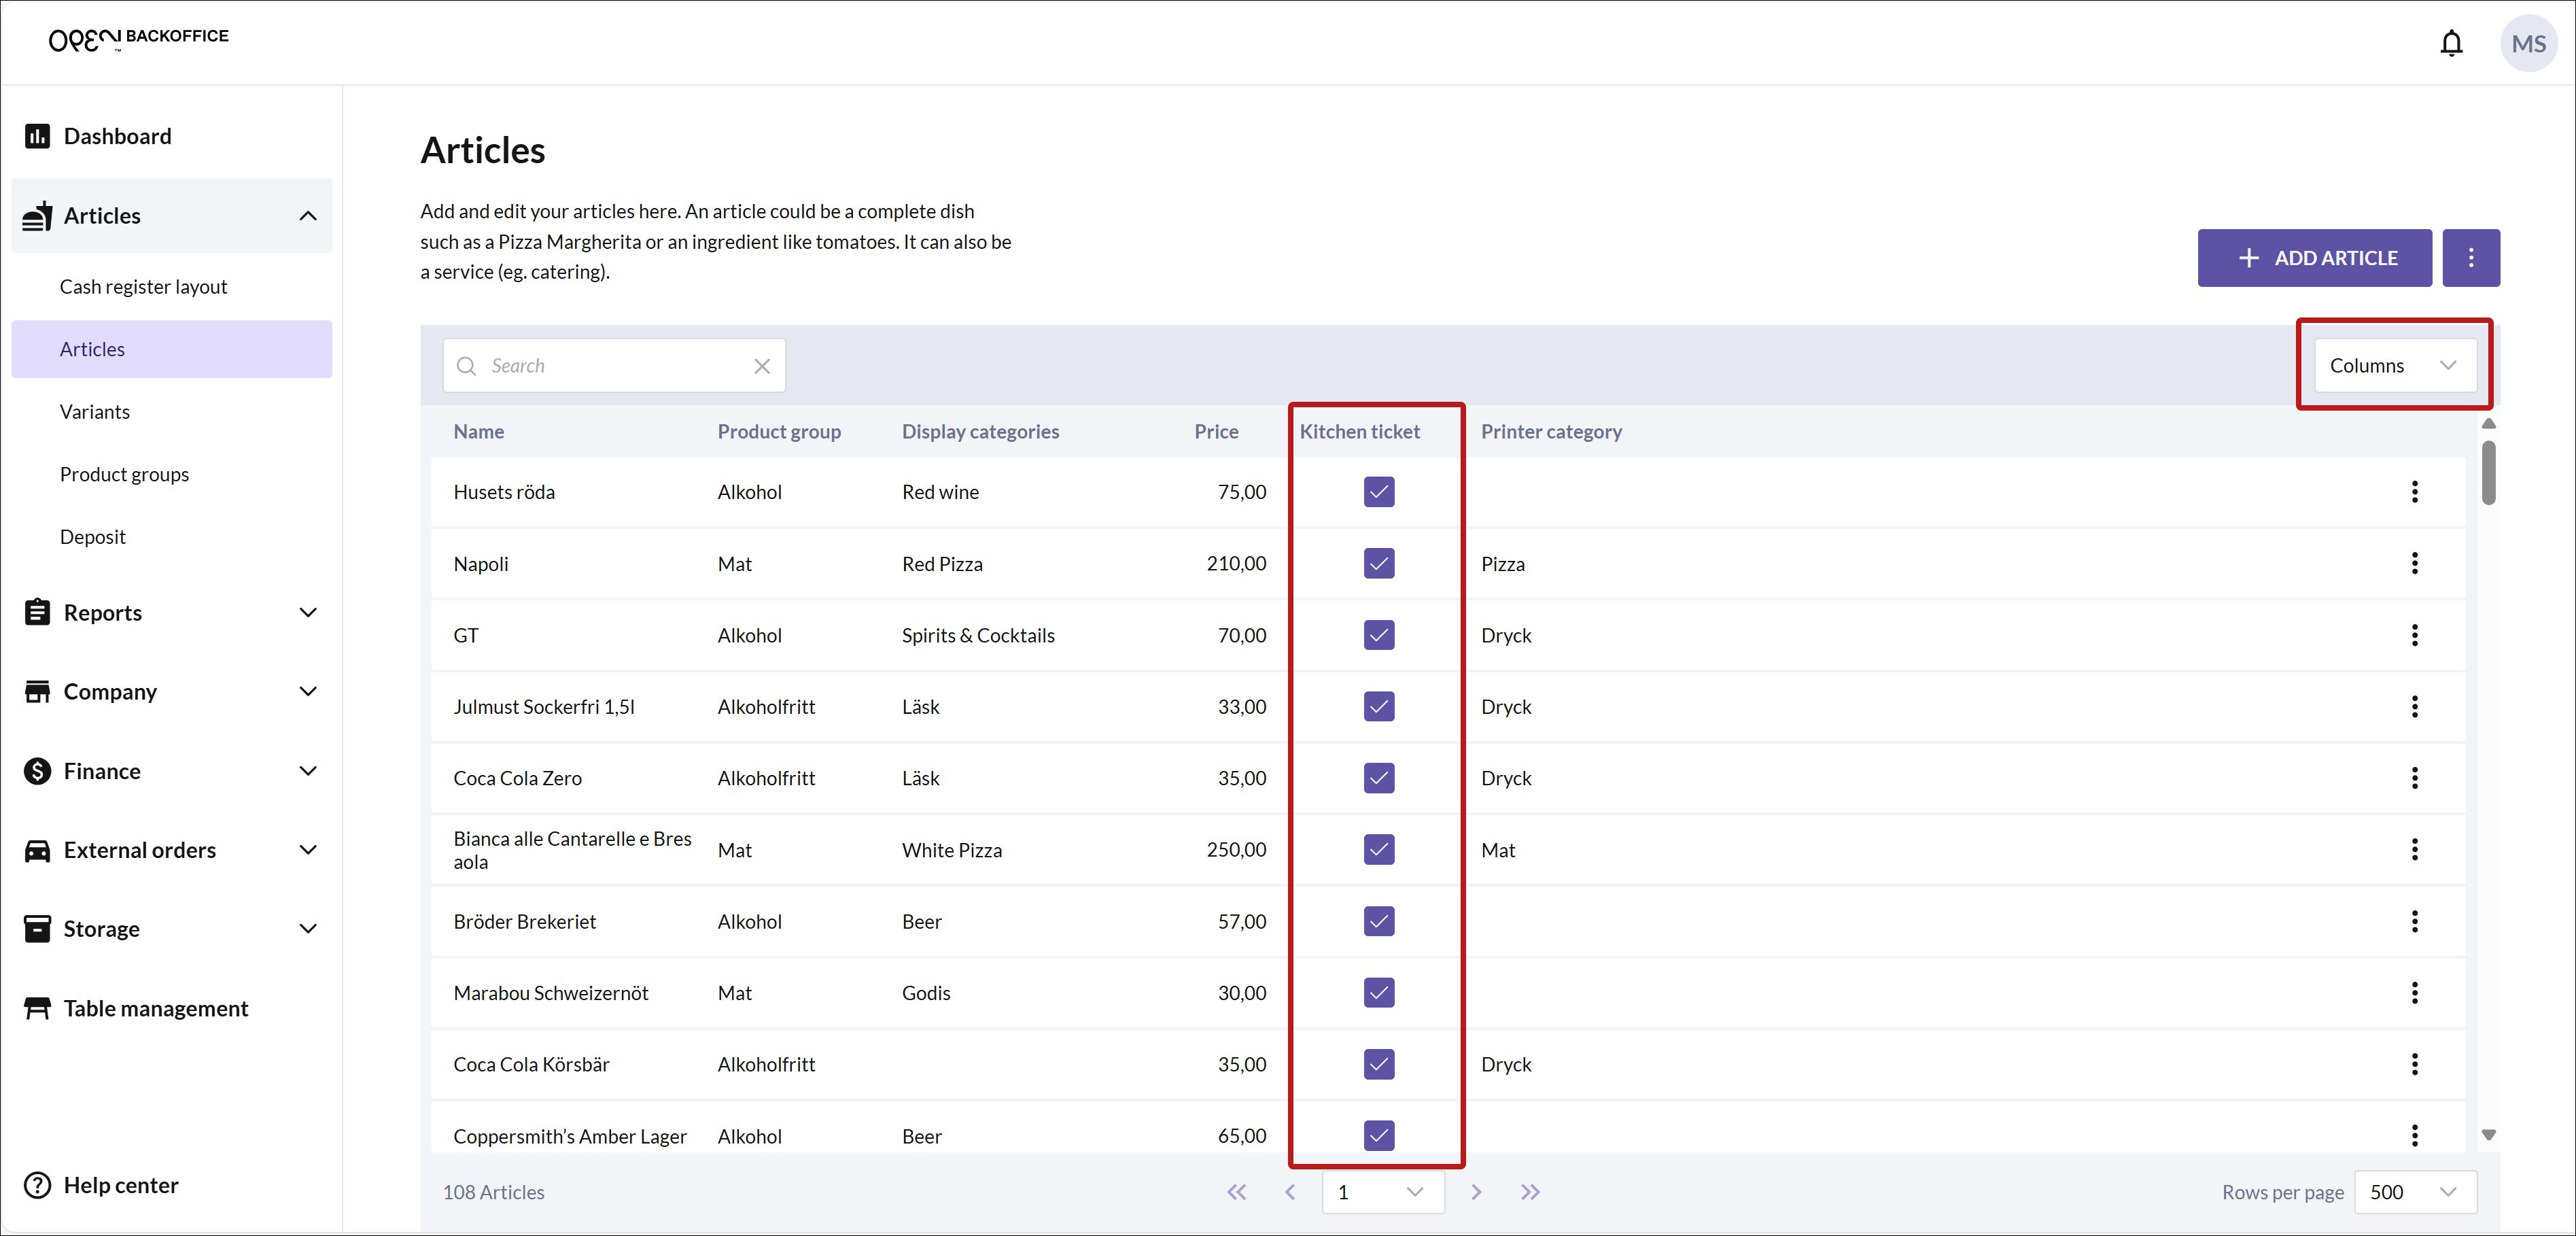
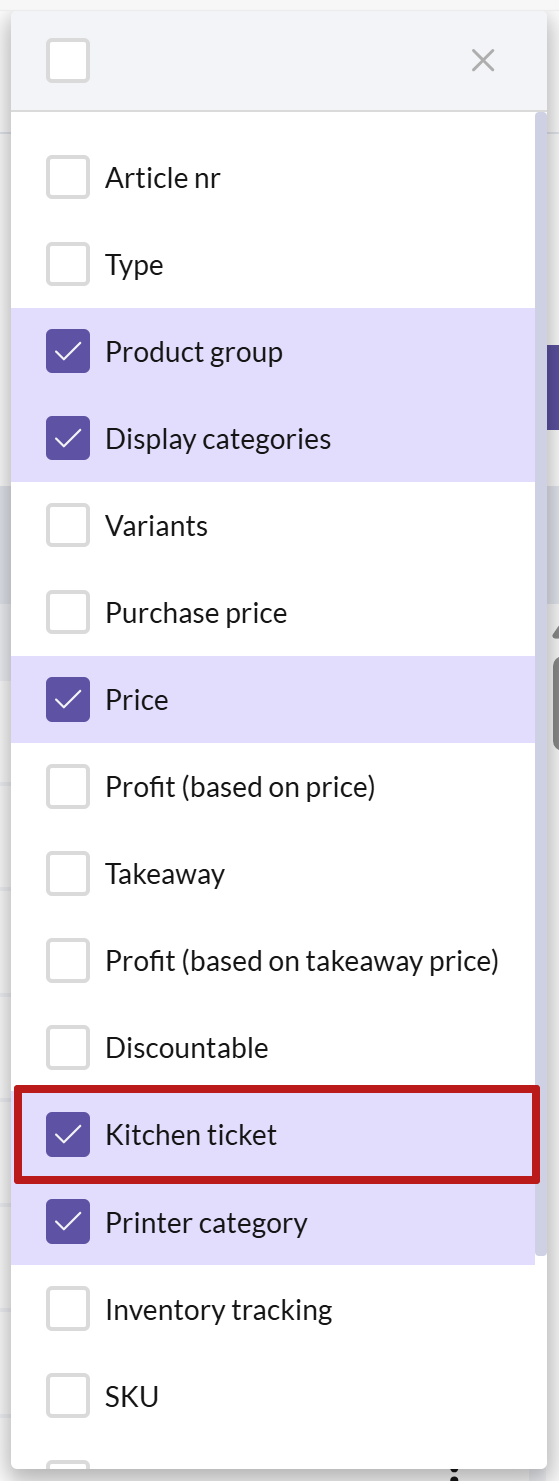
Make sure that the column is visible by selecting it from the Columns menu in the top right corner.
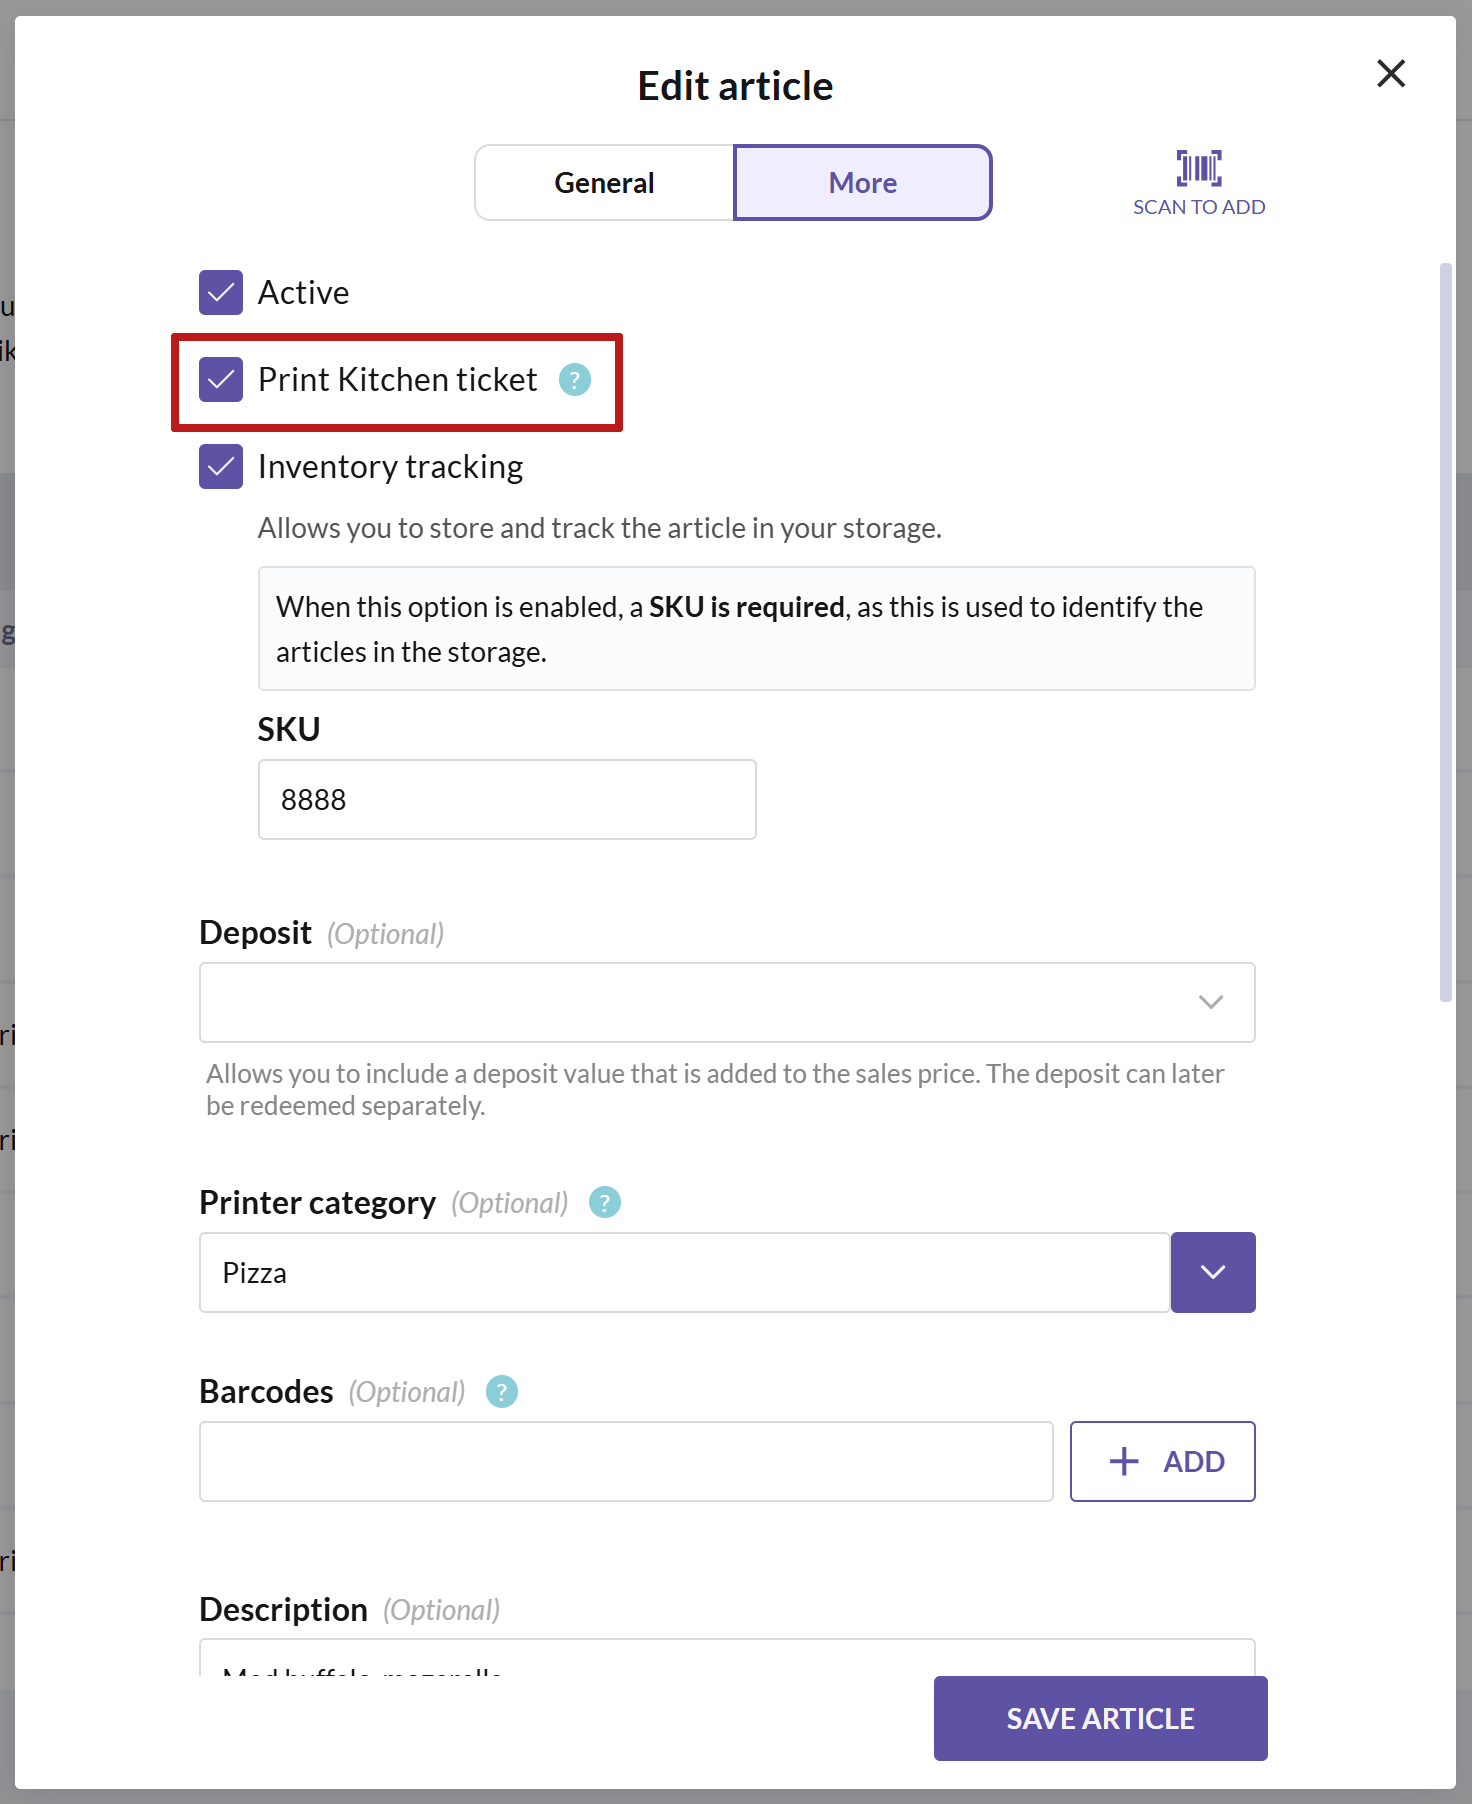
Note that you can also enable this option from the Edit article dialog, in the More tab.
As long as you don't specify certain printer categories for your kitchen printer, it will print all articles with the Kitchen ticket setting enabled.
Printer LED lights
- Blue solid LED (with a Z/flash) = the printer has power
- Green blinking LED = the printer is obtaining the IP address and trying to connect to the internet, please wait
- Green solid LED = printer has internet and the IP address obtained