Stocktaking in OPEN Two
Depending on whether you're working at the cash register or in the BackOffice, there are different ways to handle stocktakes, with the most comprehensive management happening in the BackOffice. A stocktake can have five different statuses: Created, Started, Completed, Recount, and Approved.


As soon as the stocktake is created, it has the status Created, and while someone is conducting the stocktake (filling in what has been counted), it has the status Started.
An stocktake must always be completed in its entirety, meaning all articles must be counted before the stocktake can be submitted. As soon as an stocktake is submitted, it gets the status Completed.
A completed stocktake must be reviewed from the BackOffice before it can be approved (and thus finalized). If the stocktake has too many discrepancies compared to the stocktake balance, you can request a recount. Then, the stocktake gets the status Recount, and all articles that differ from the stocktake balance can be counted again.
As a final step, the stocktake can be approved, which means the stocktake balance is updated according to what has been counted for the articles in the storage. The stocktake then gets the status Approved.
BackOffice: Create, Conduct, Review, and Approve Inventories
You have greater control over stocktakes when working in BackOffice compared to at the cash register. In BackOffice, you can create, fill in, review, and approve stocktakes for all your storages. You can also delete a stocktake regardless of its status, as long as it hasn't been approved (and thus finalized).
Create Stocktake
There are 3 different ways to create stocktakes in BackOffice:
- Standard stocktake: You choose which articles to stocktake for a specific storage and at a specific time.
- Stocktake template: You choose which articles to stocktake for a specific storage, but save this as a template that you can reuse on multiple occasions.
- Scheduled stocktake: You can create a scheduled and recurring stocktake for an entire storage, according to the desired interval. If the storage is linked to a cash register, you'll be notified to conduct a stocktake when you log in to the cash register.
Standard stocktake
Follow the guide below to create a standard stocktake in BackOffice:
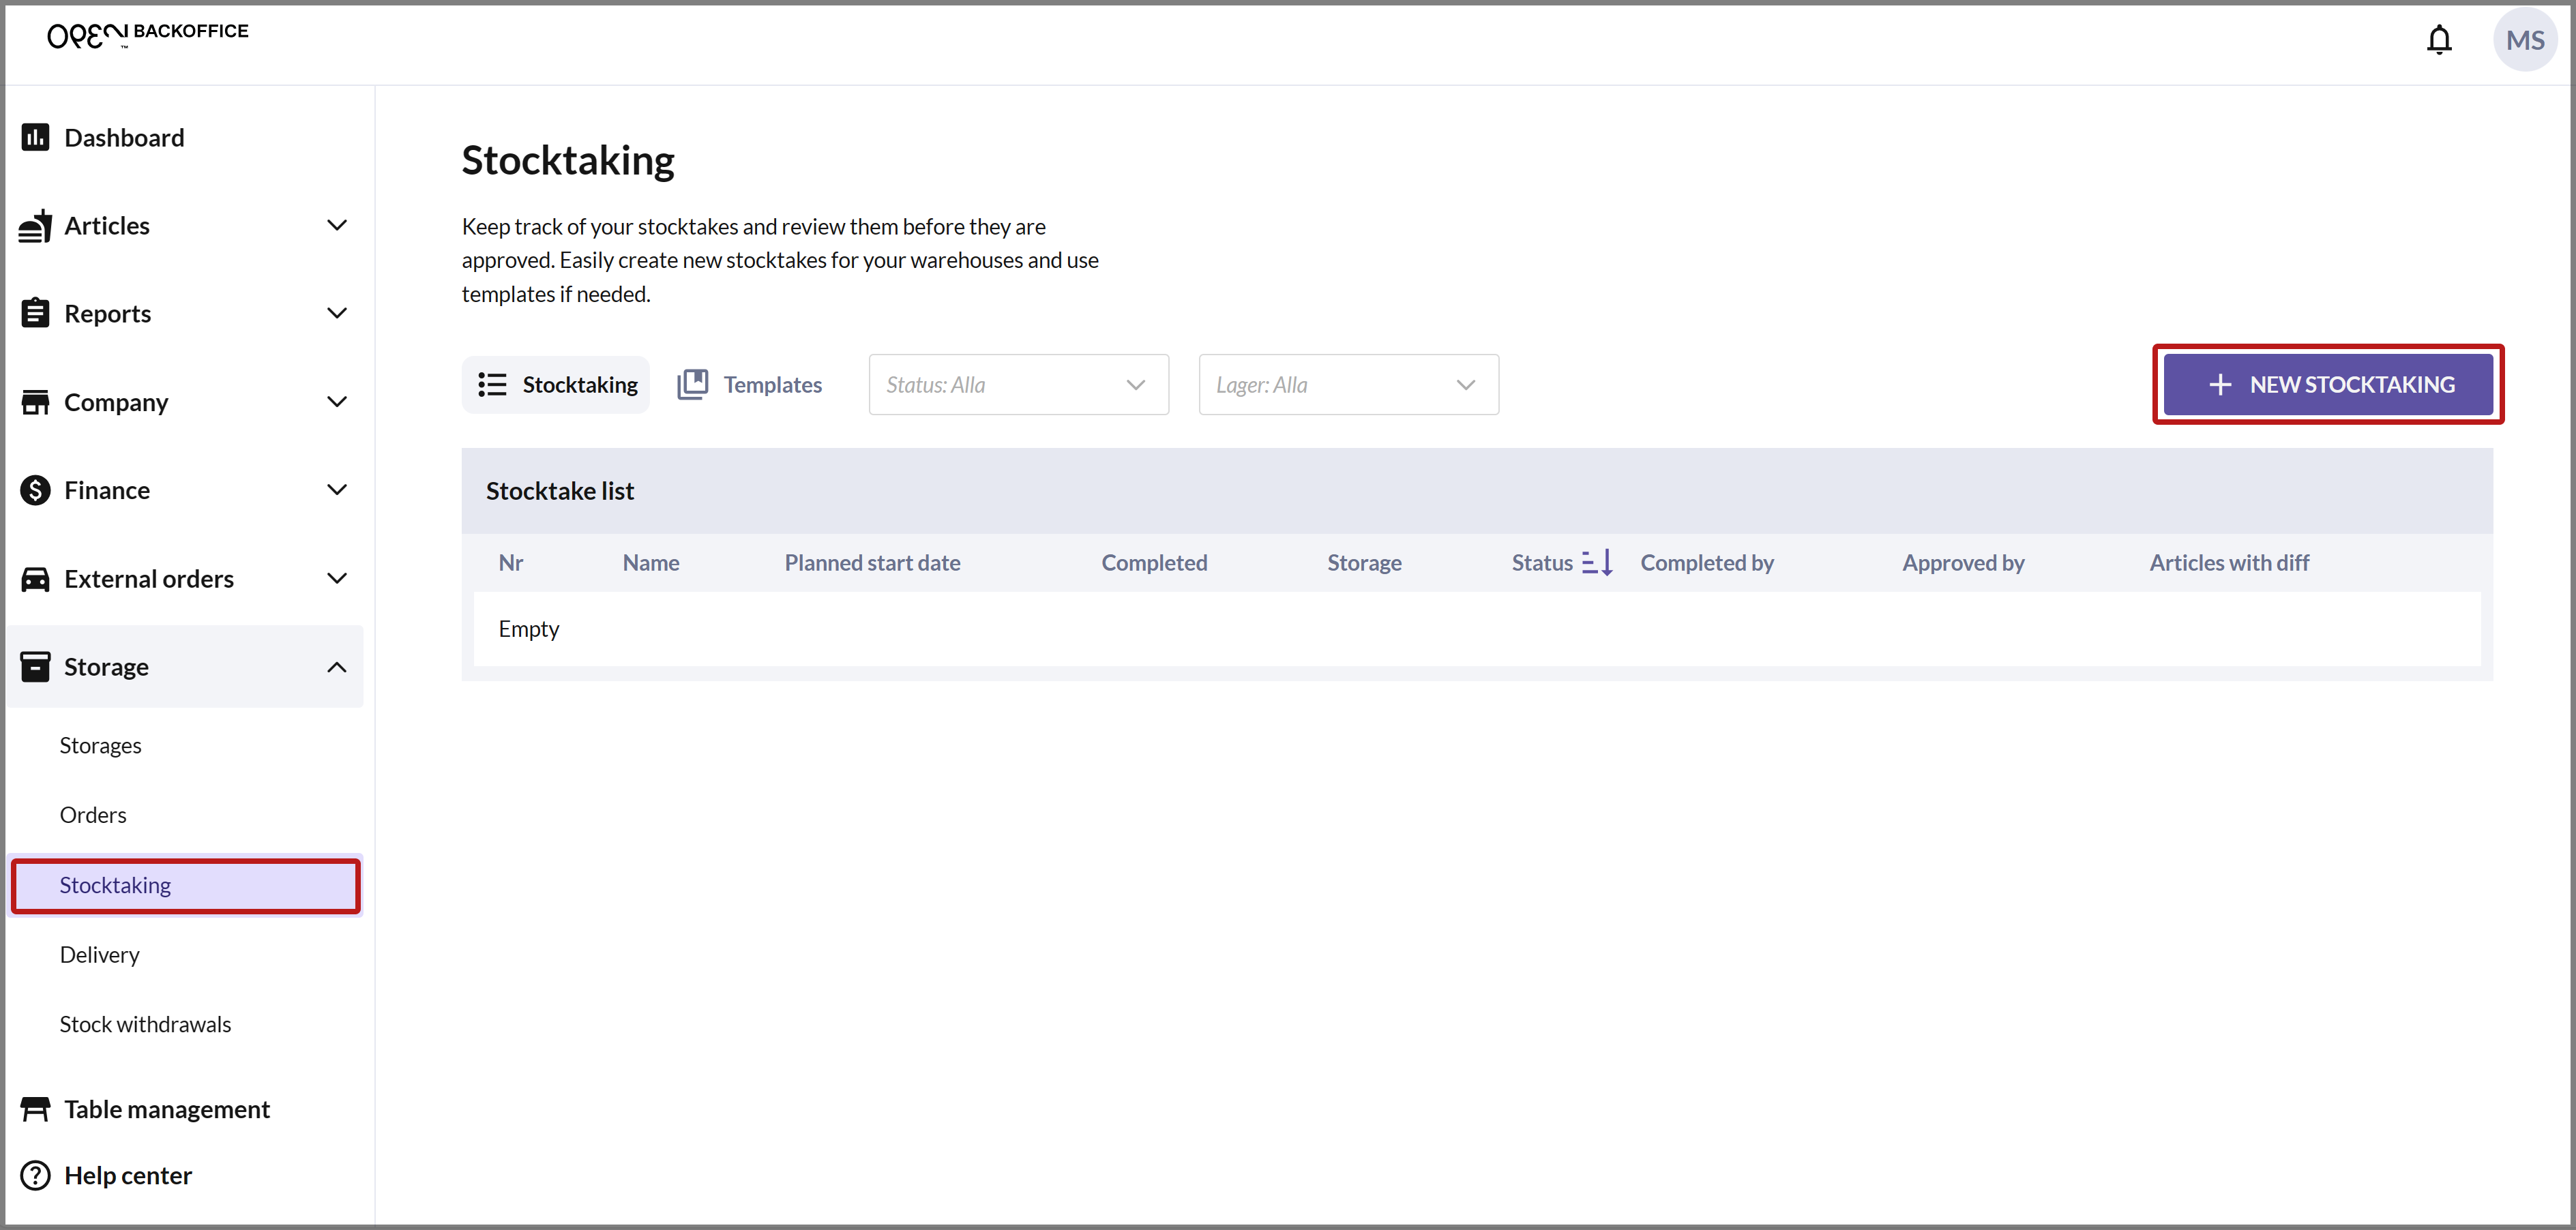
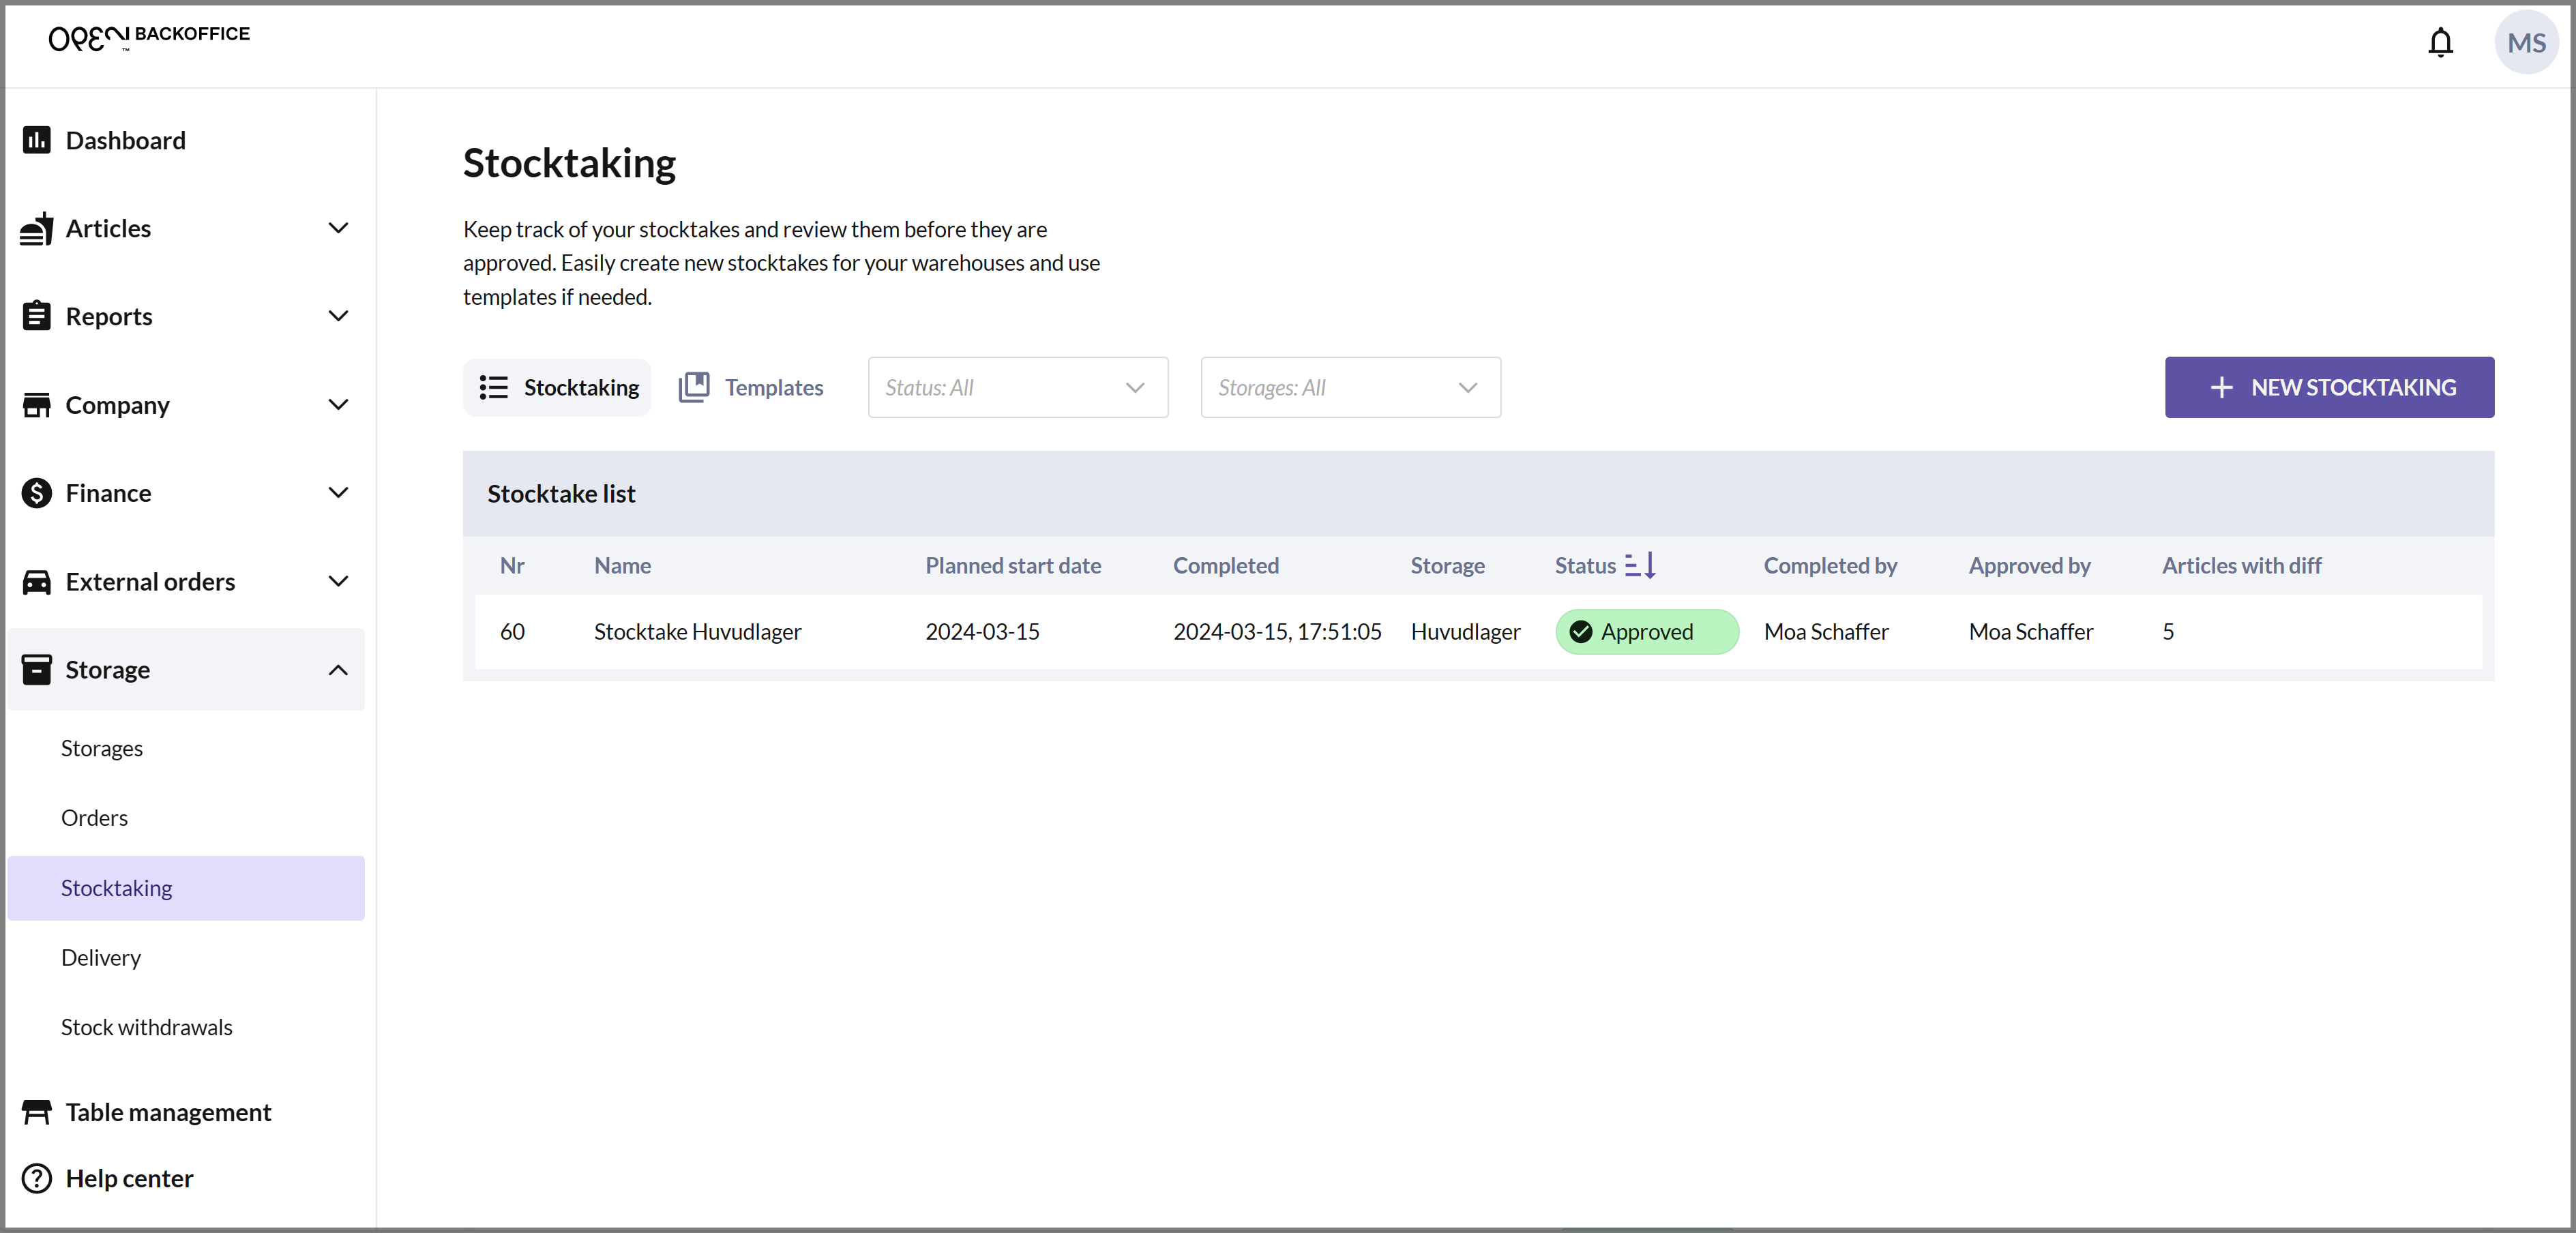
Select STORAGE in the menu and go to STOCKTAKING. Here, you can see your created stocktakes and templates. Click NEW STOCKTAKING to create a new stocktake.
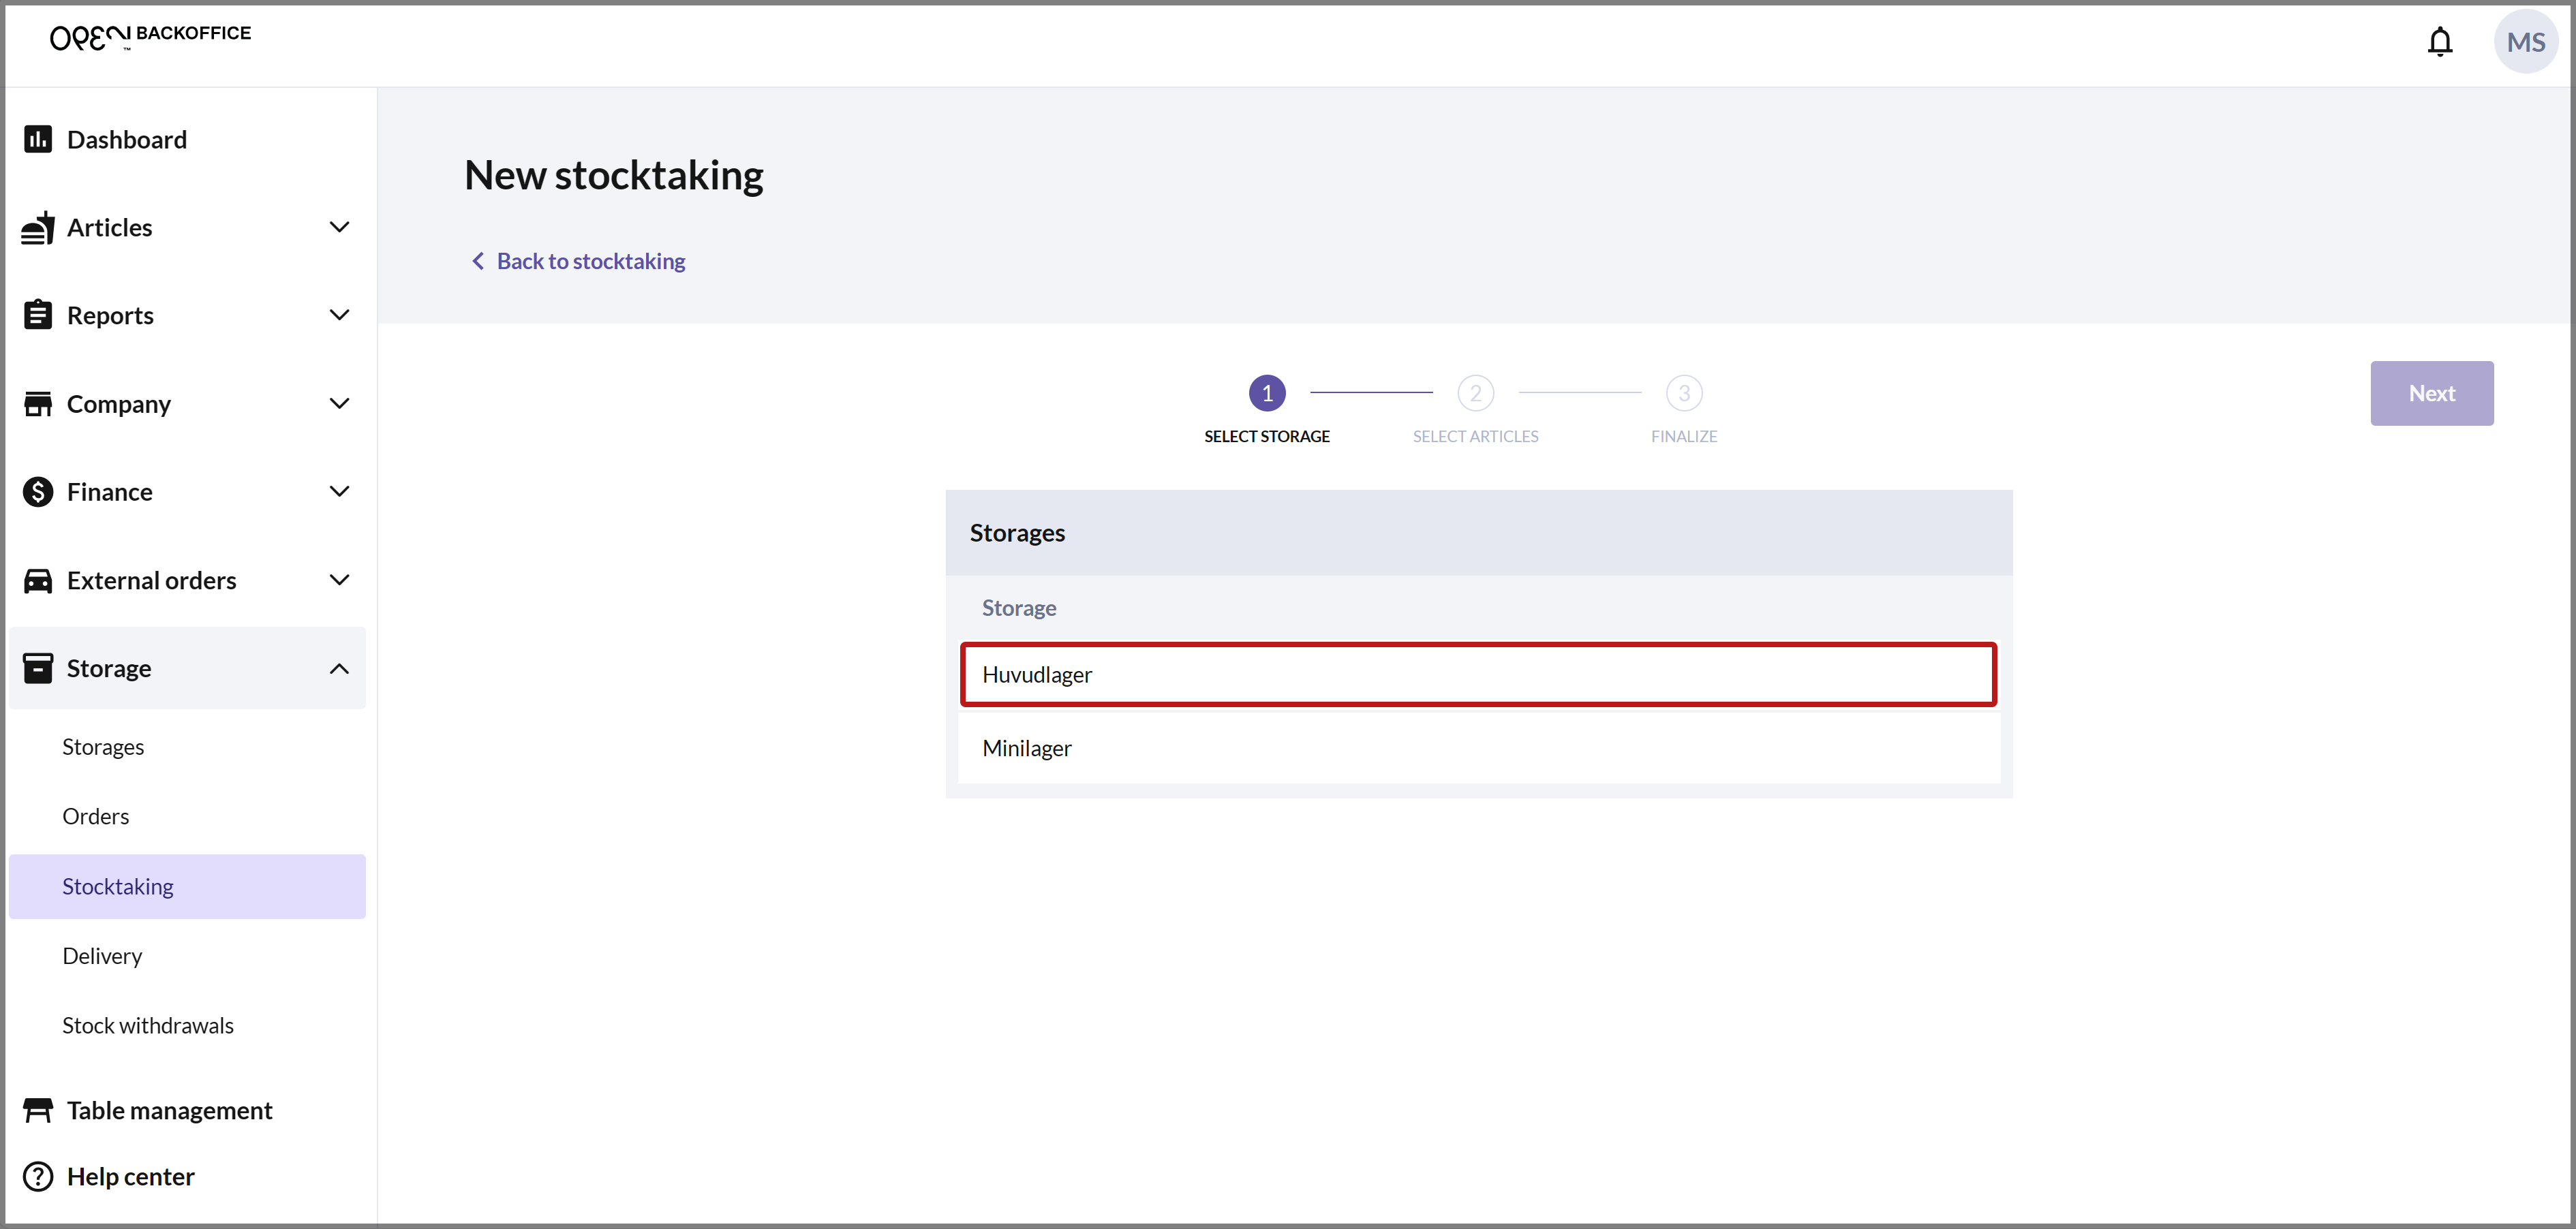
Click on the storage that needs to be recorded, and you will be taken automatically to step 2.
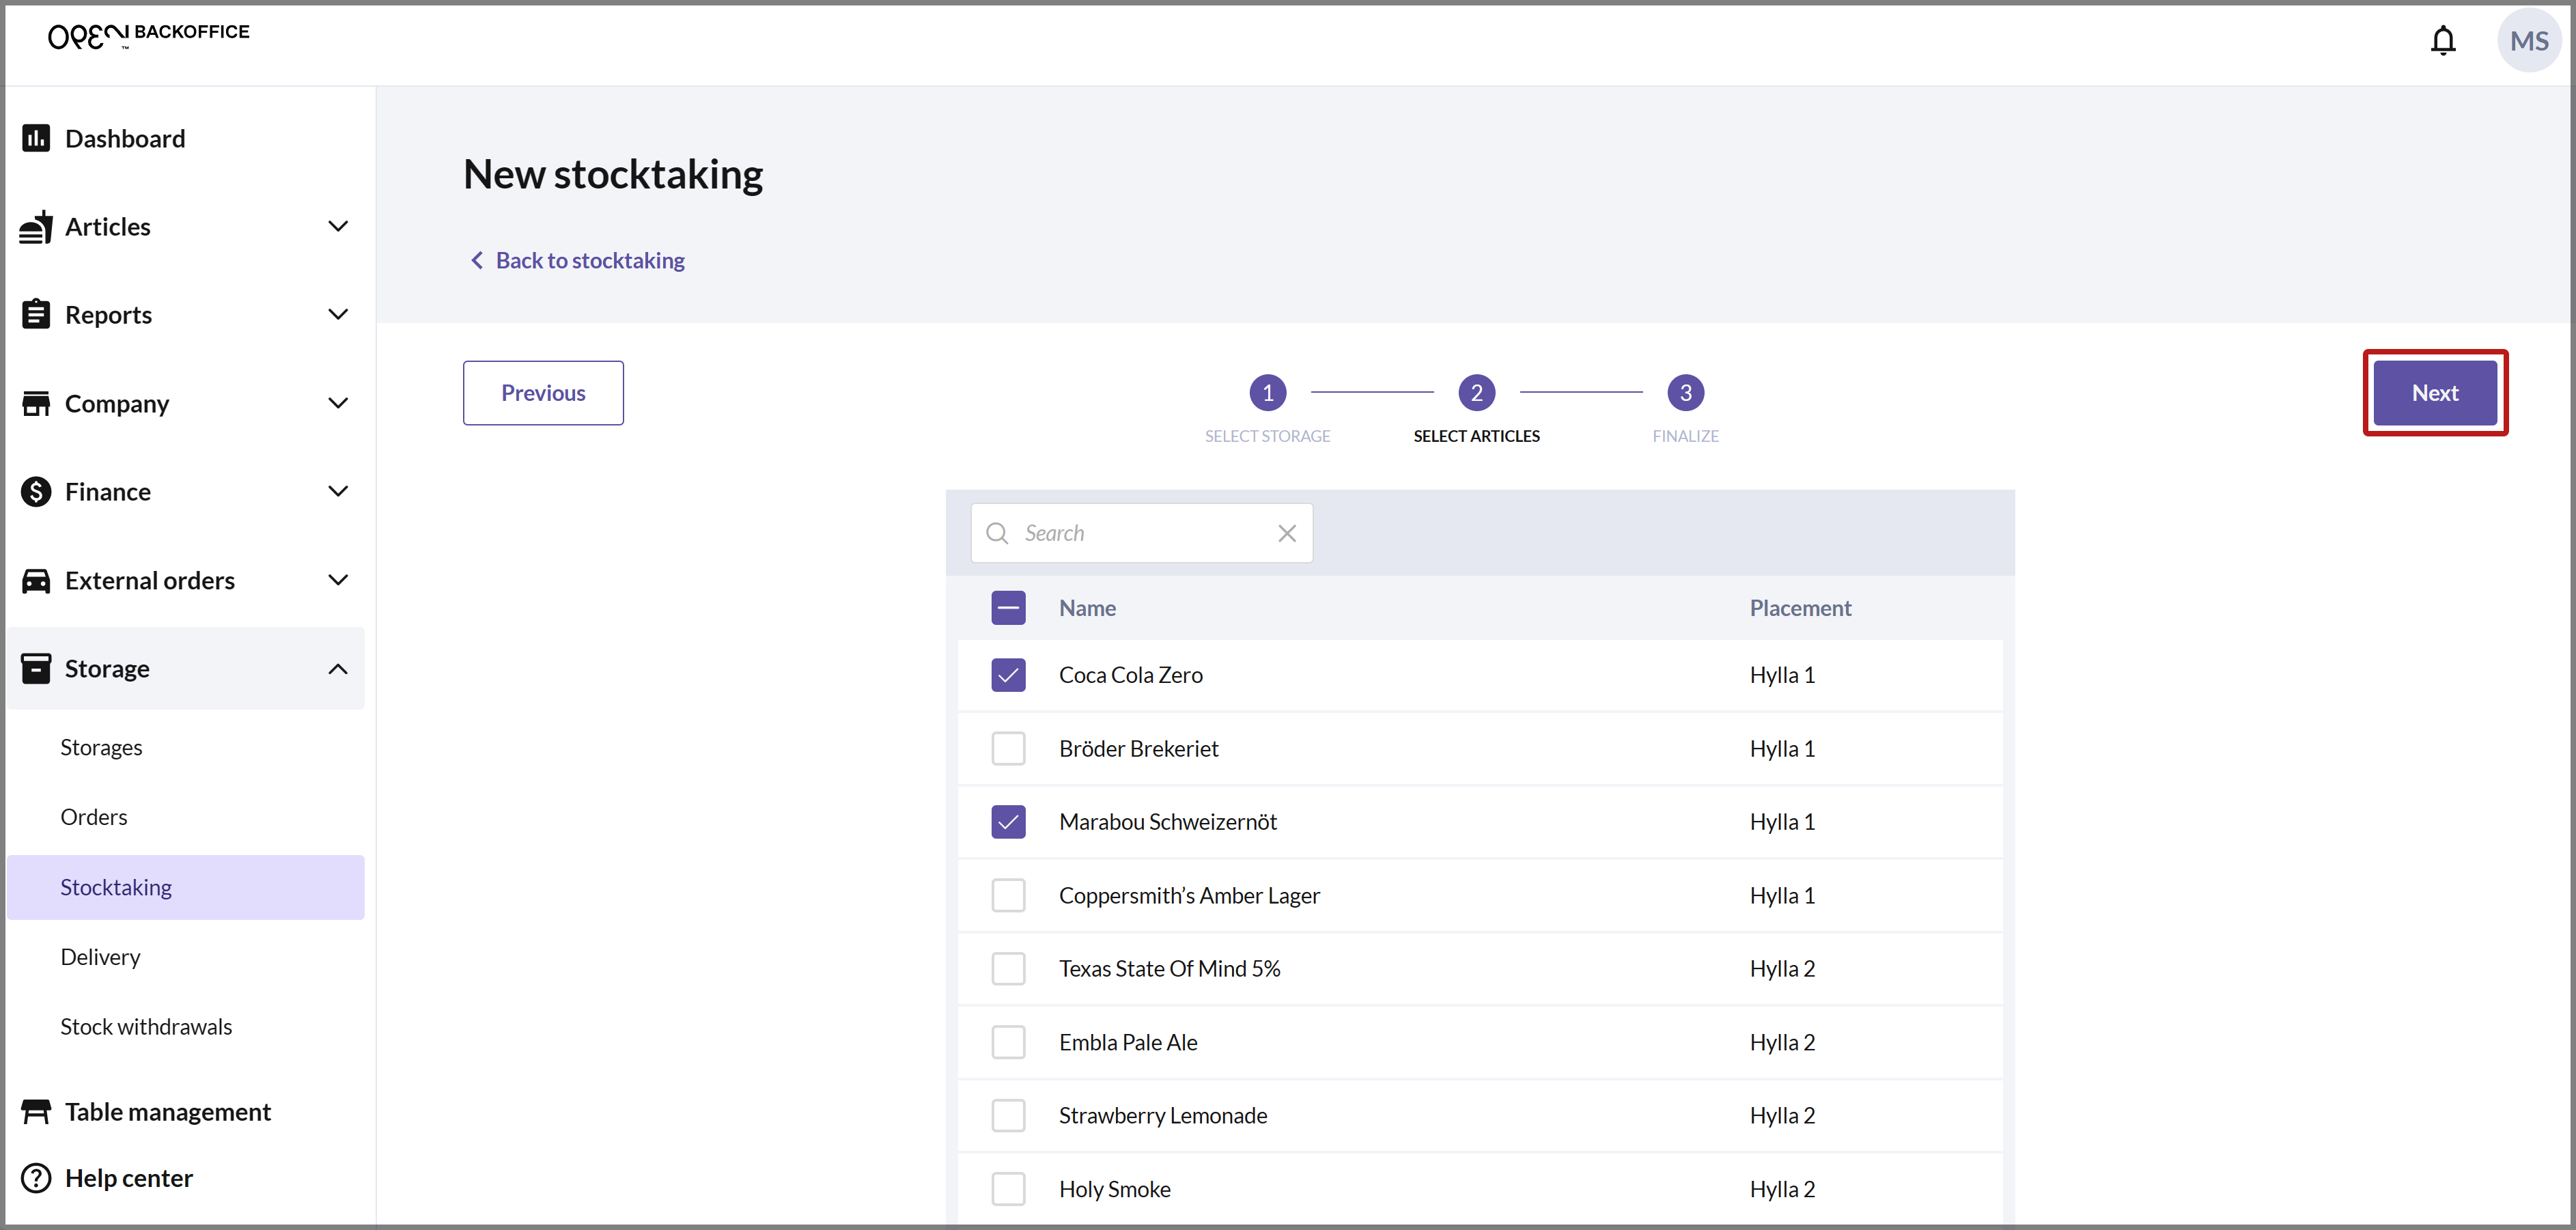
Select the articles to be included in the count. (The right-hand column shows the article's storage location if this has been entered in the storage).

Press NEXT to proceed.
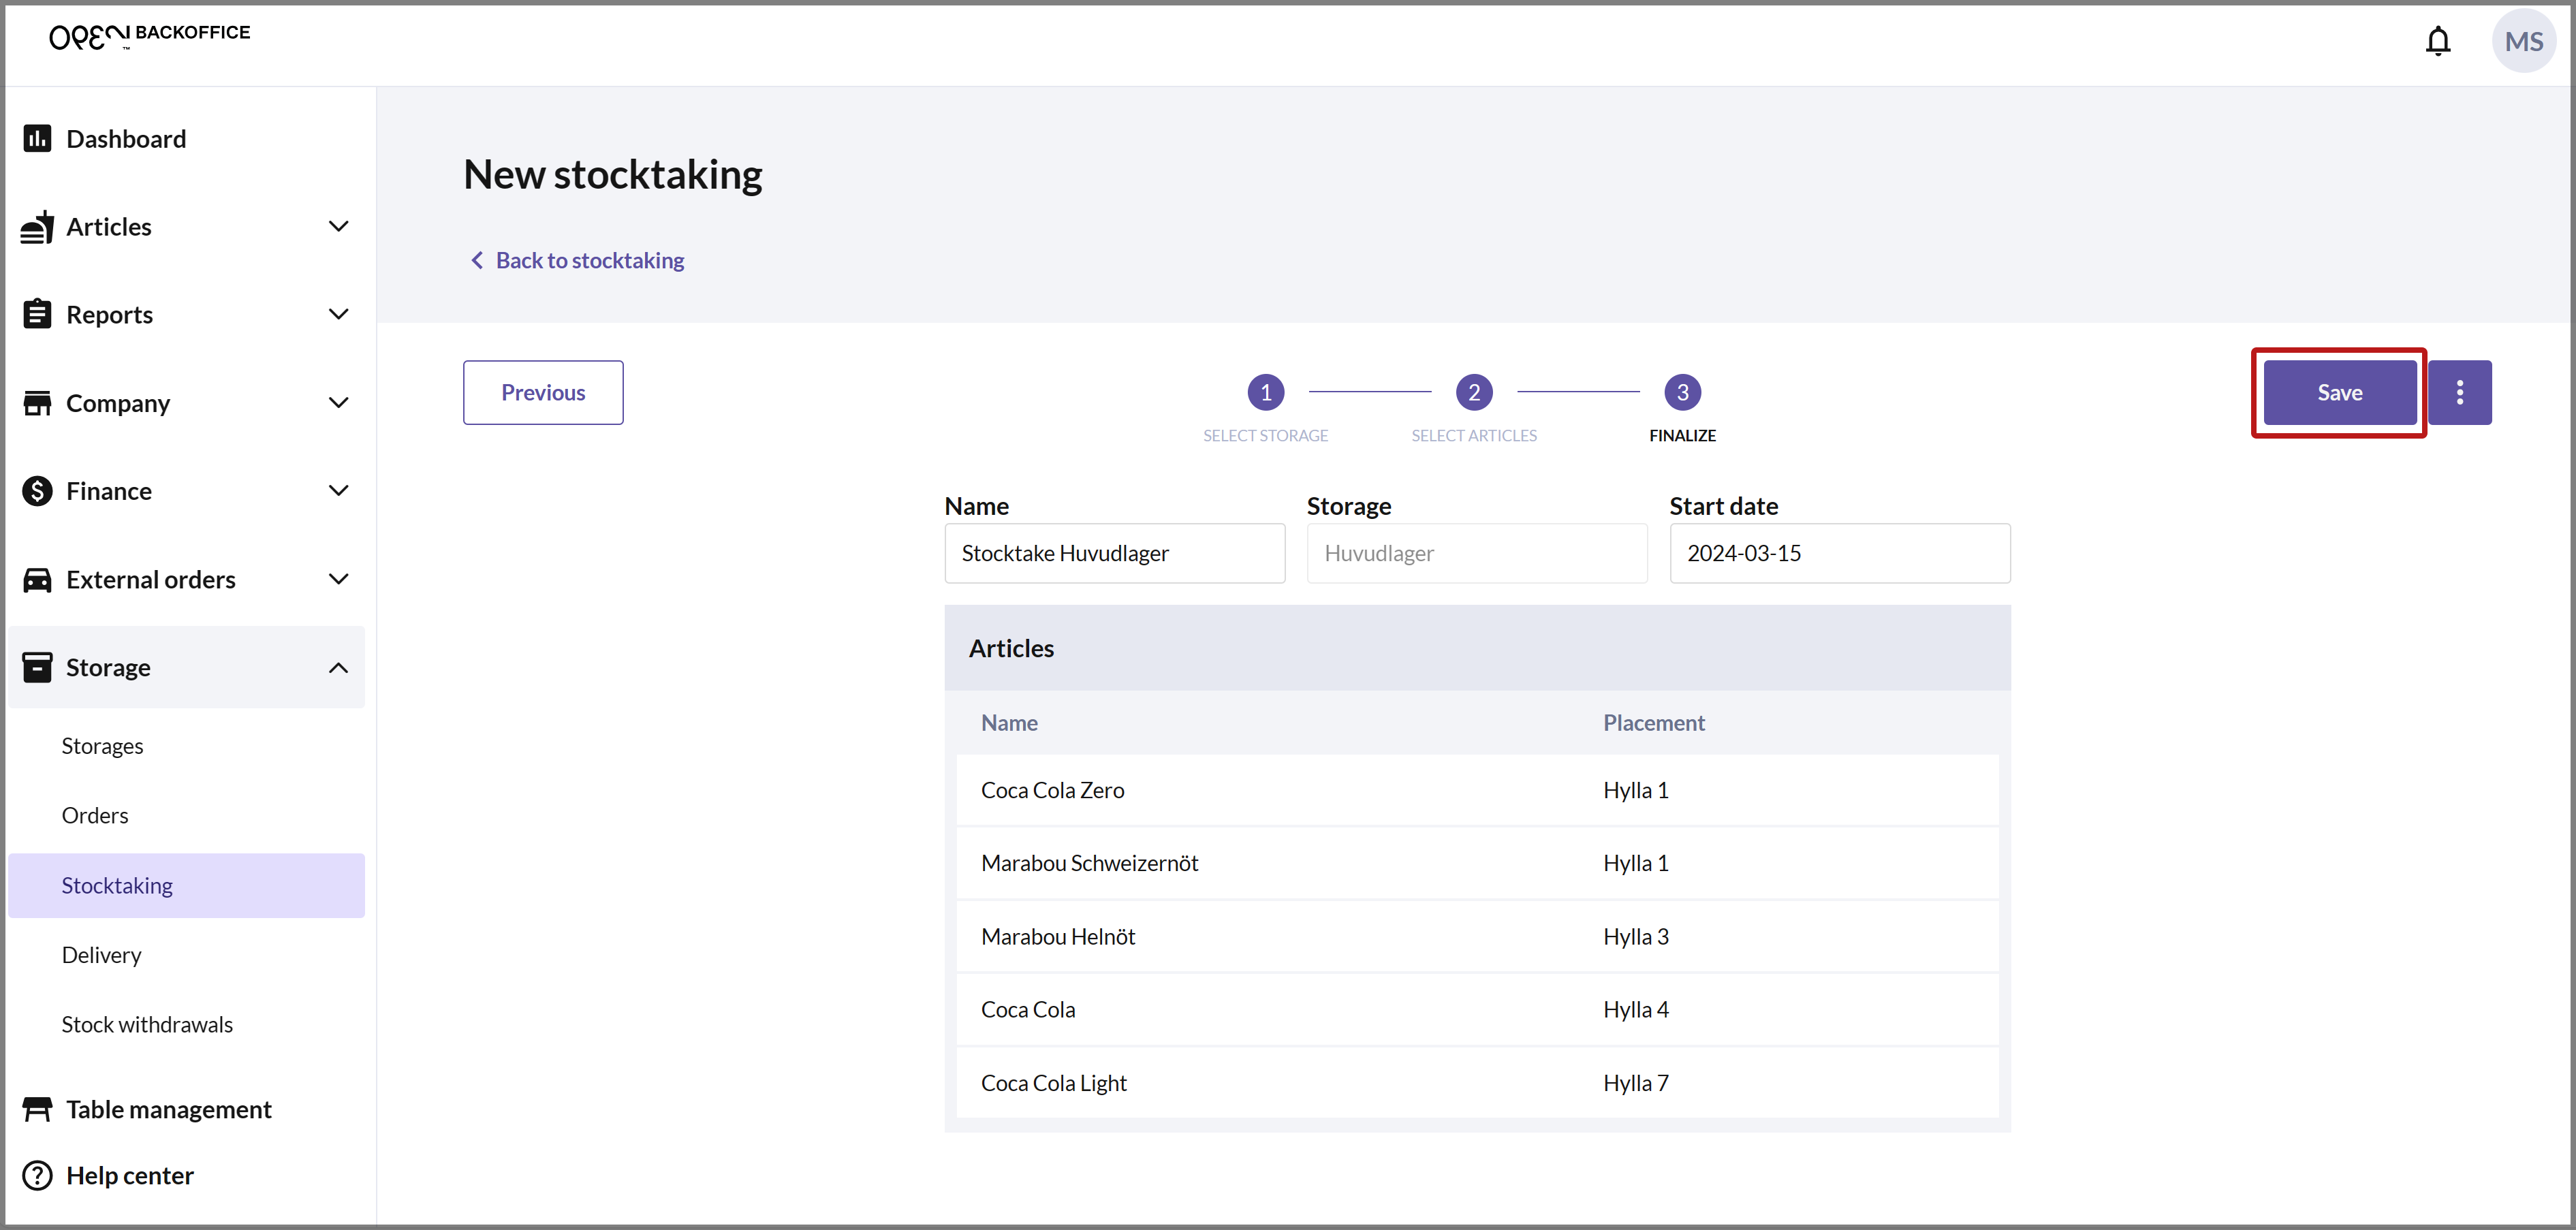
In the final step, you'll see a summary of the stocktake:
The stocktake is automatically assigned a name and a planned start date, but you can choose to change it if you wish.
Note that the start date is only indicative, meaning you can conduct the stocktake as soon as it's saved.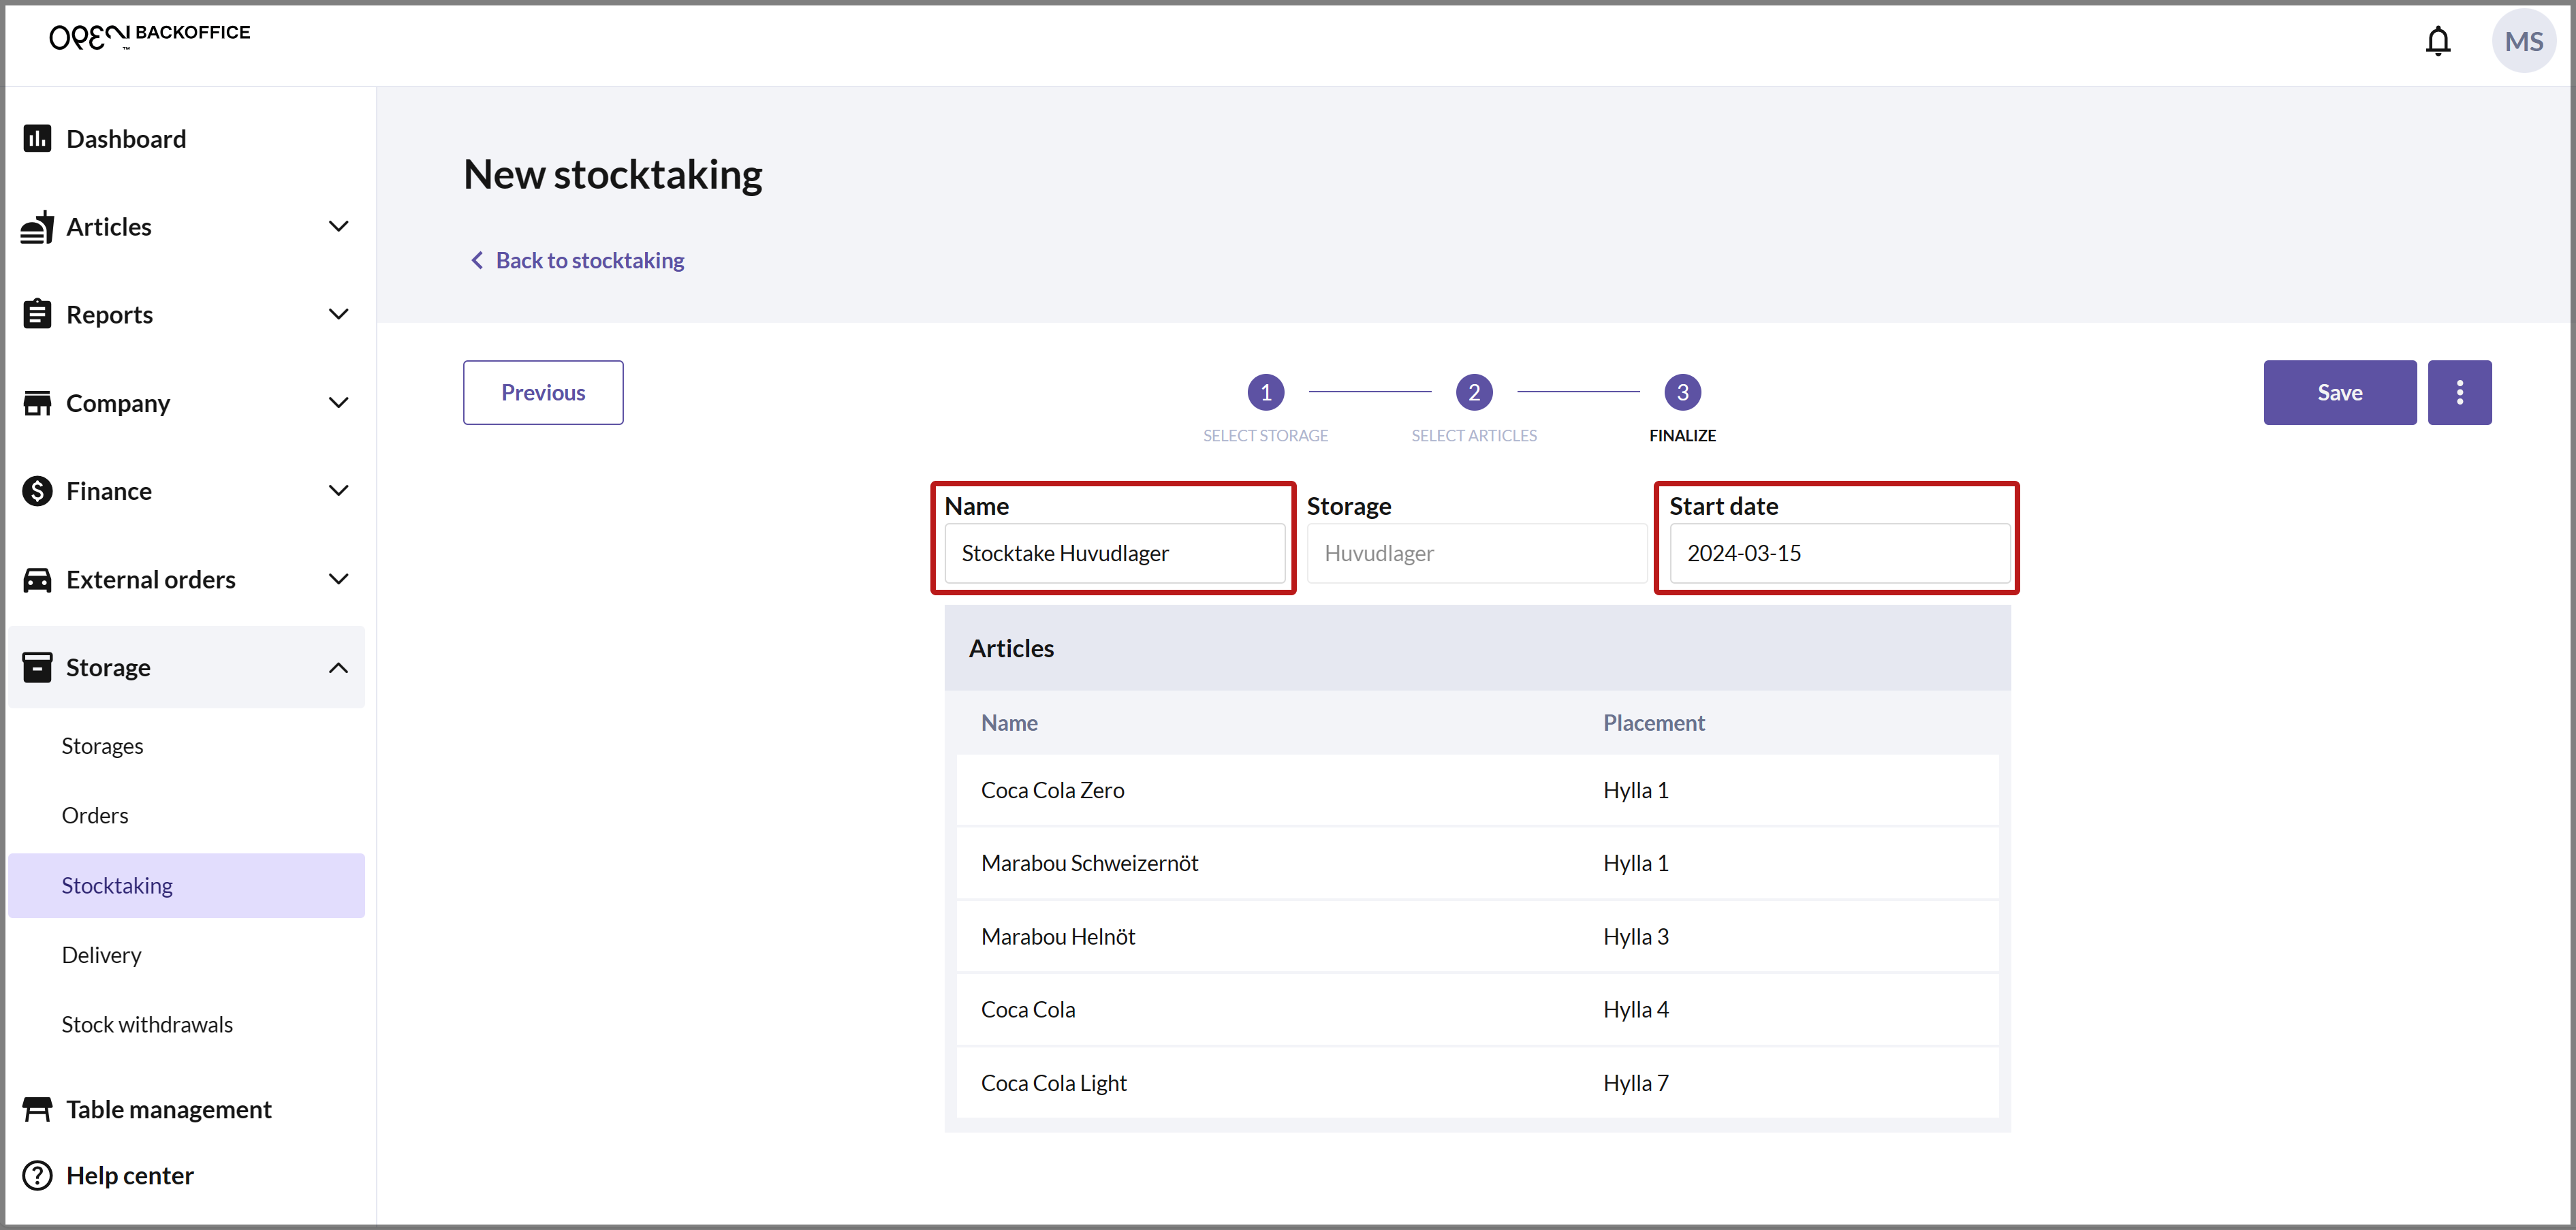
Press SAVE to save the stocktake.
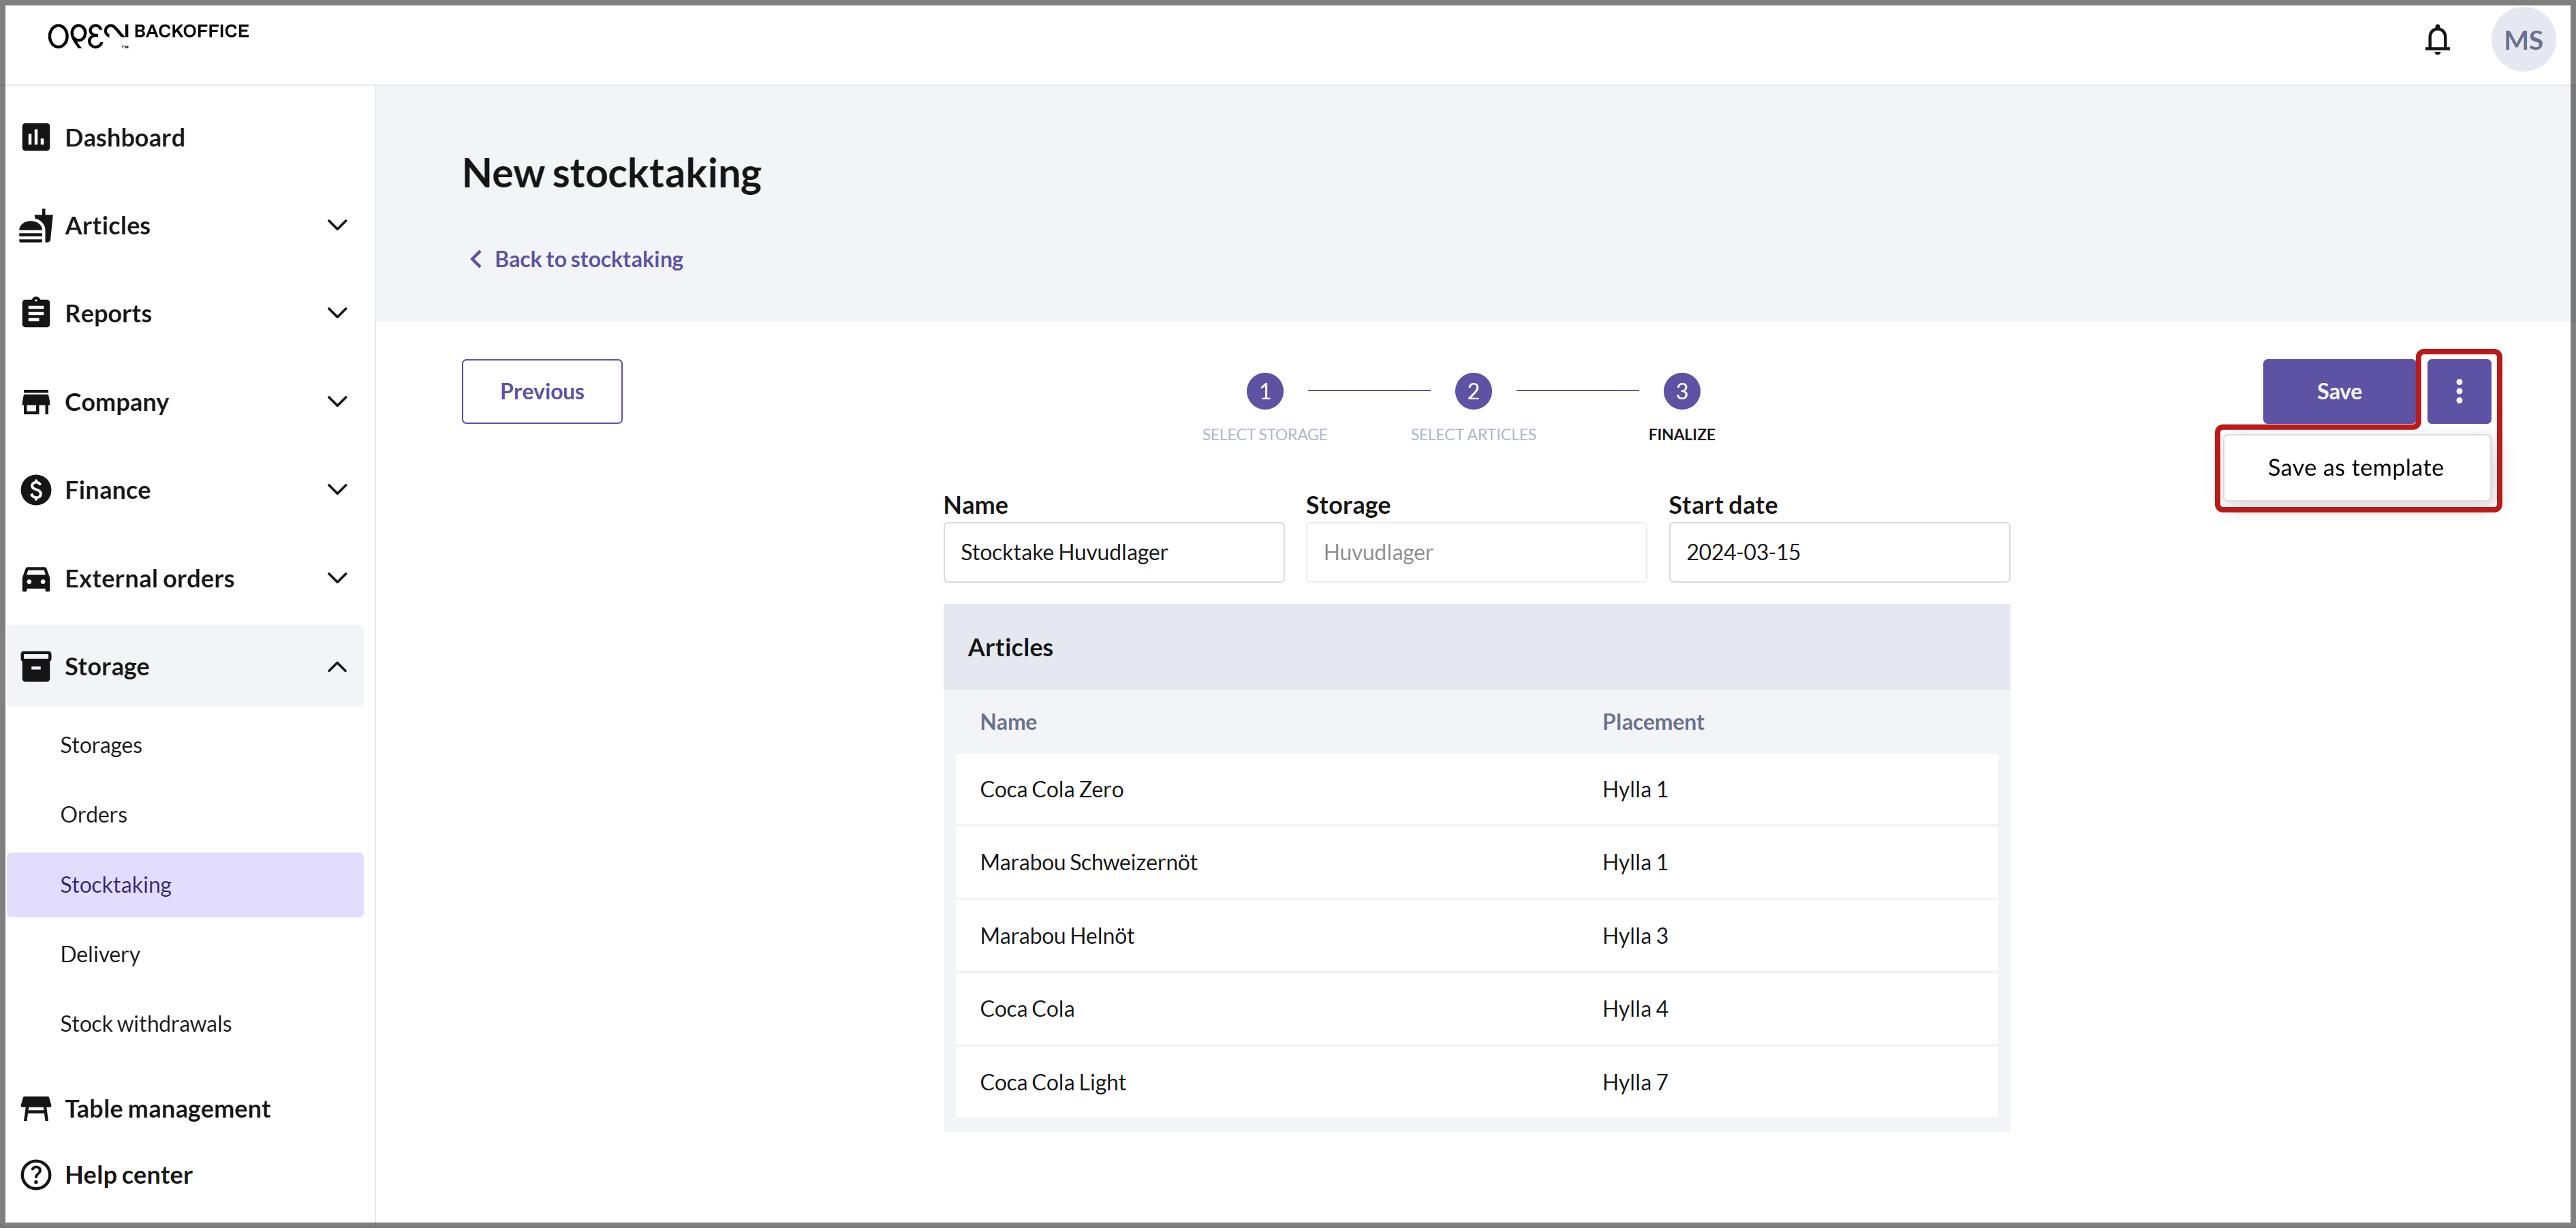
If you prefer to save the stocktake as a template instead, click on the 3-DOT MENU at the bottom right, and press SAVE AS TEMPLATE.
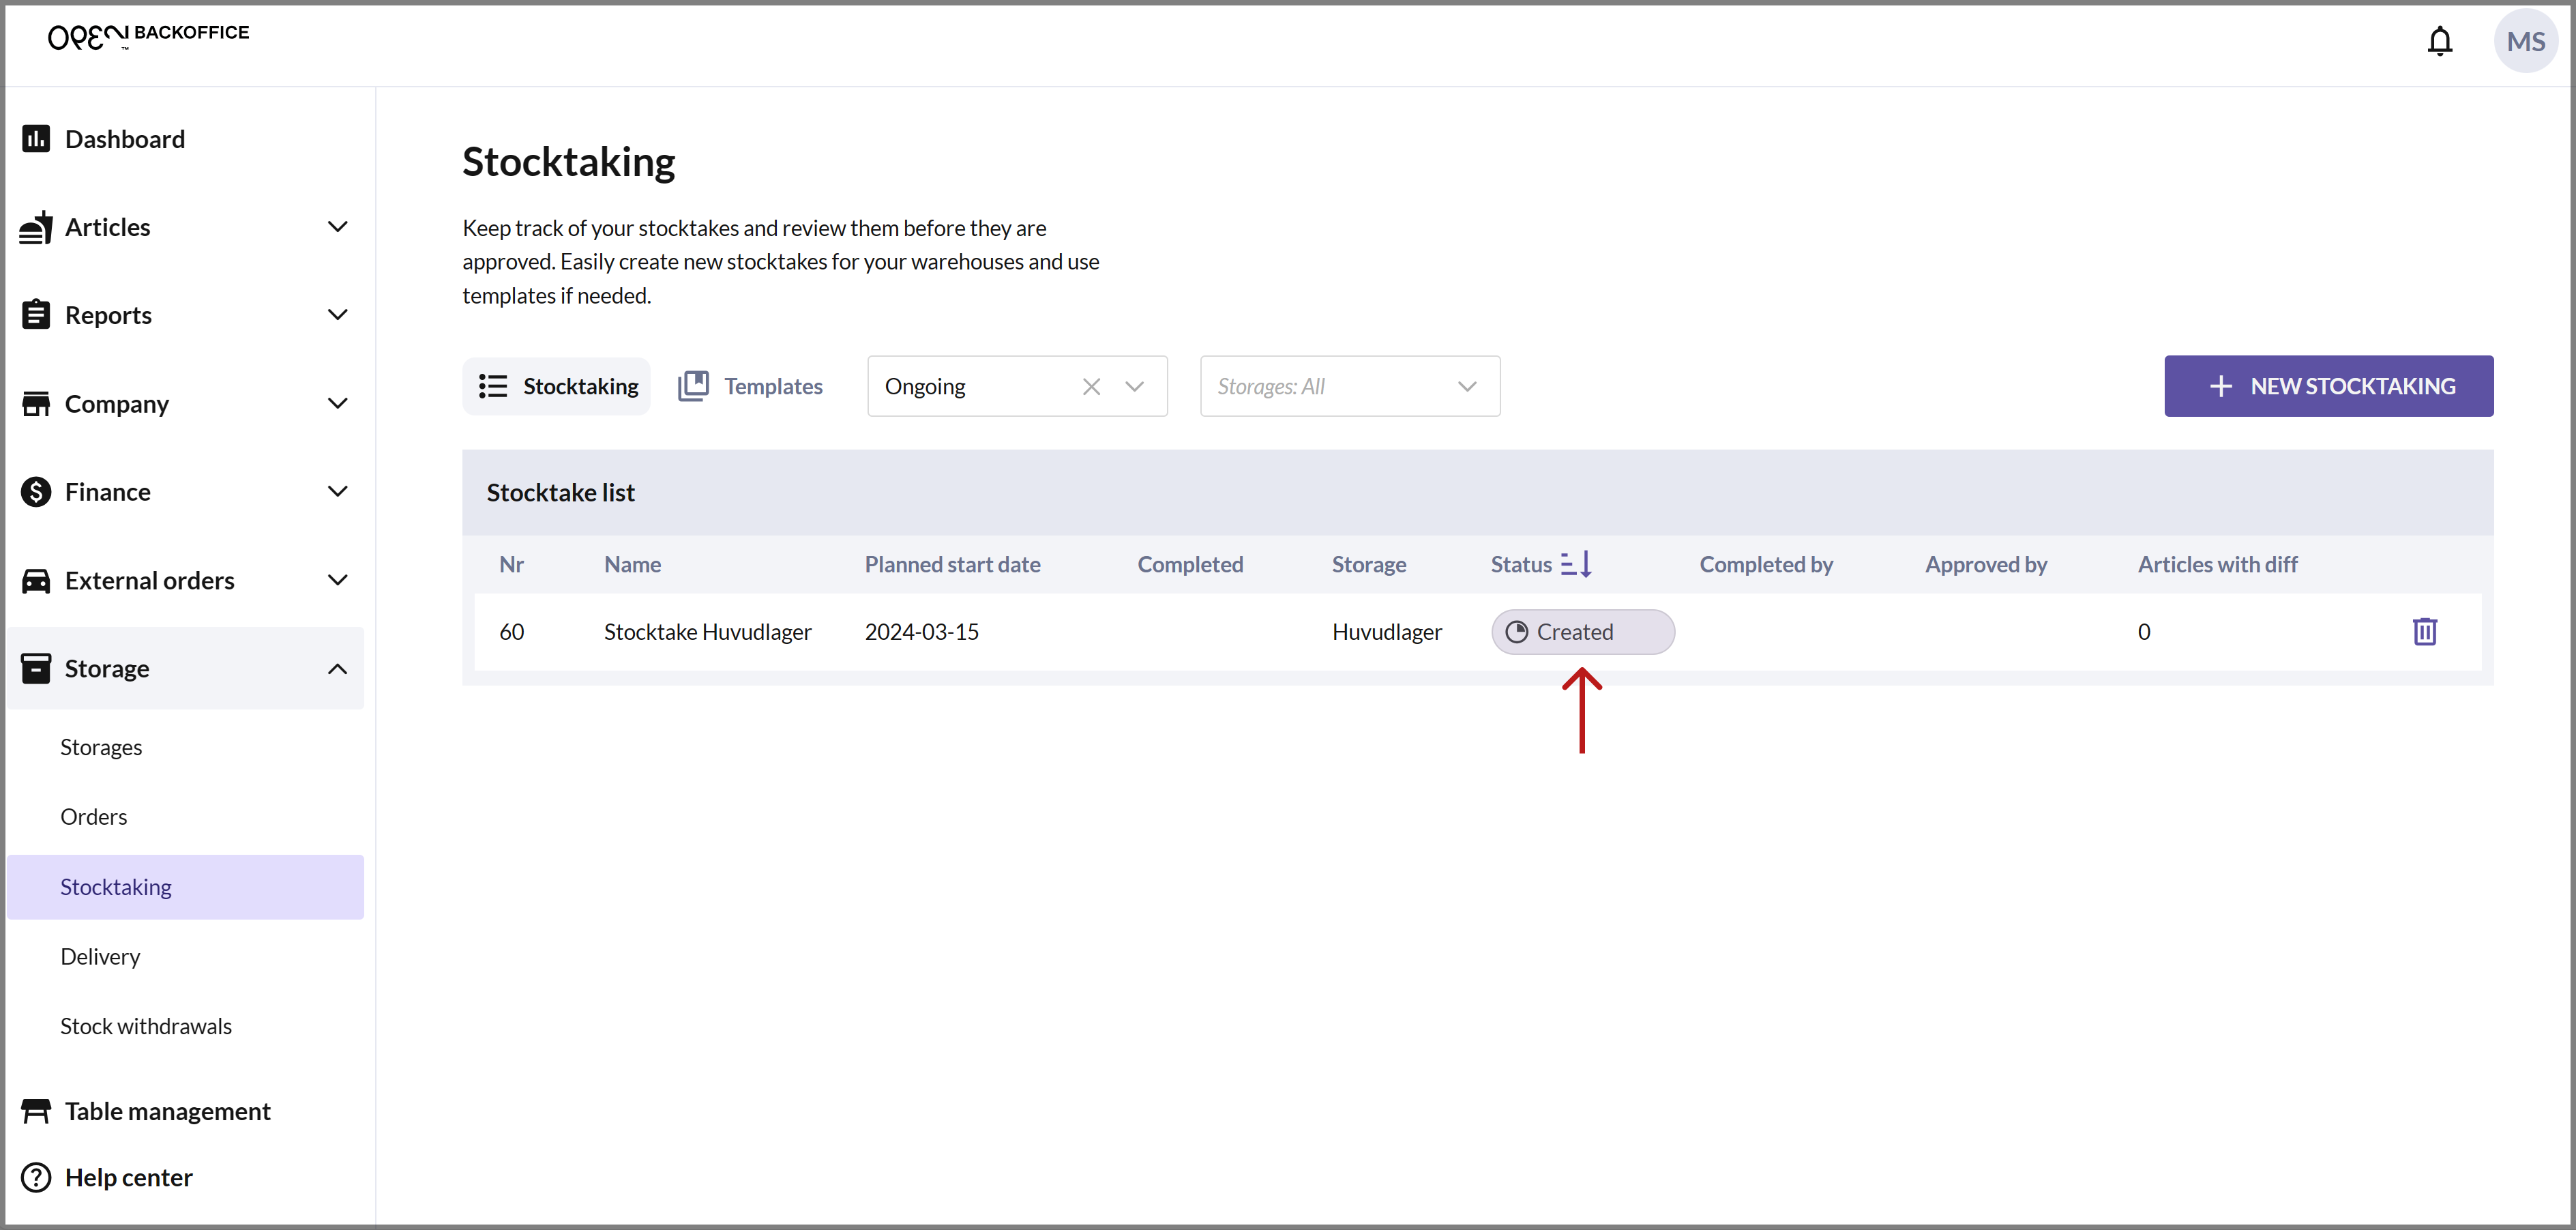
You can now see the stocktake in the list of your stocktakes. If you have a cash register linked to the storage for which the stocktake applies, you can now access and conduct the stocktake from there. You can also conduct the stocktake from BackOffice.
Stocktaking templates
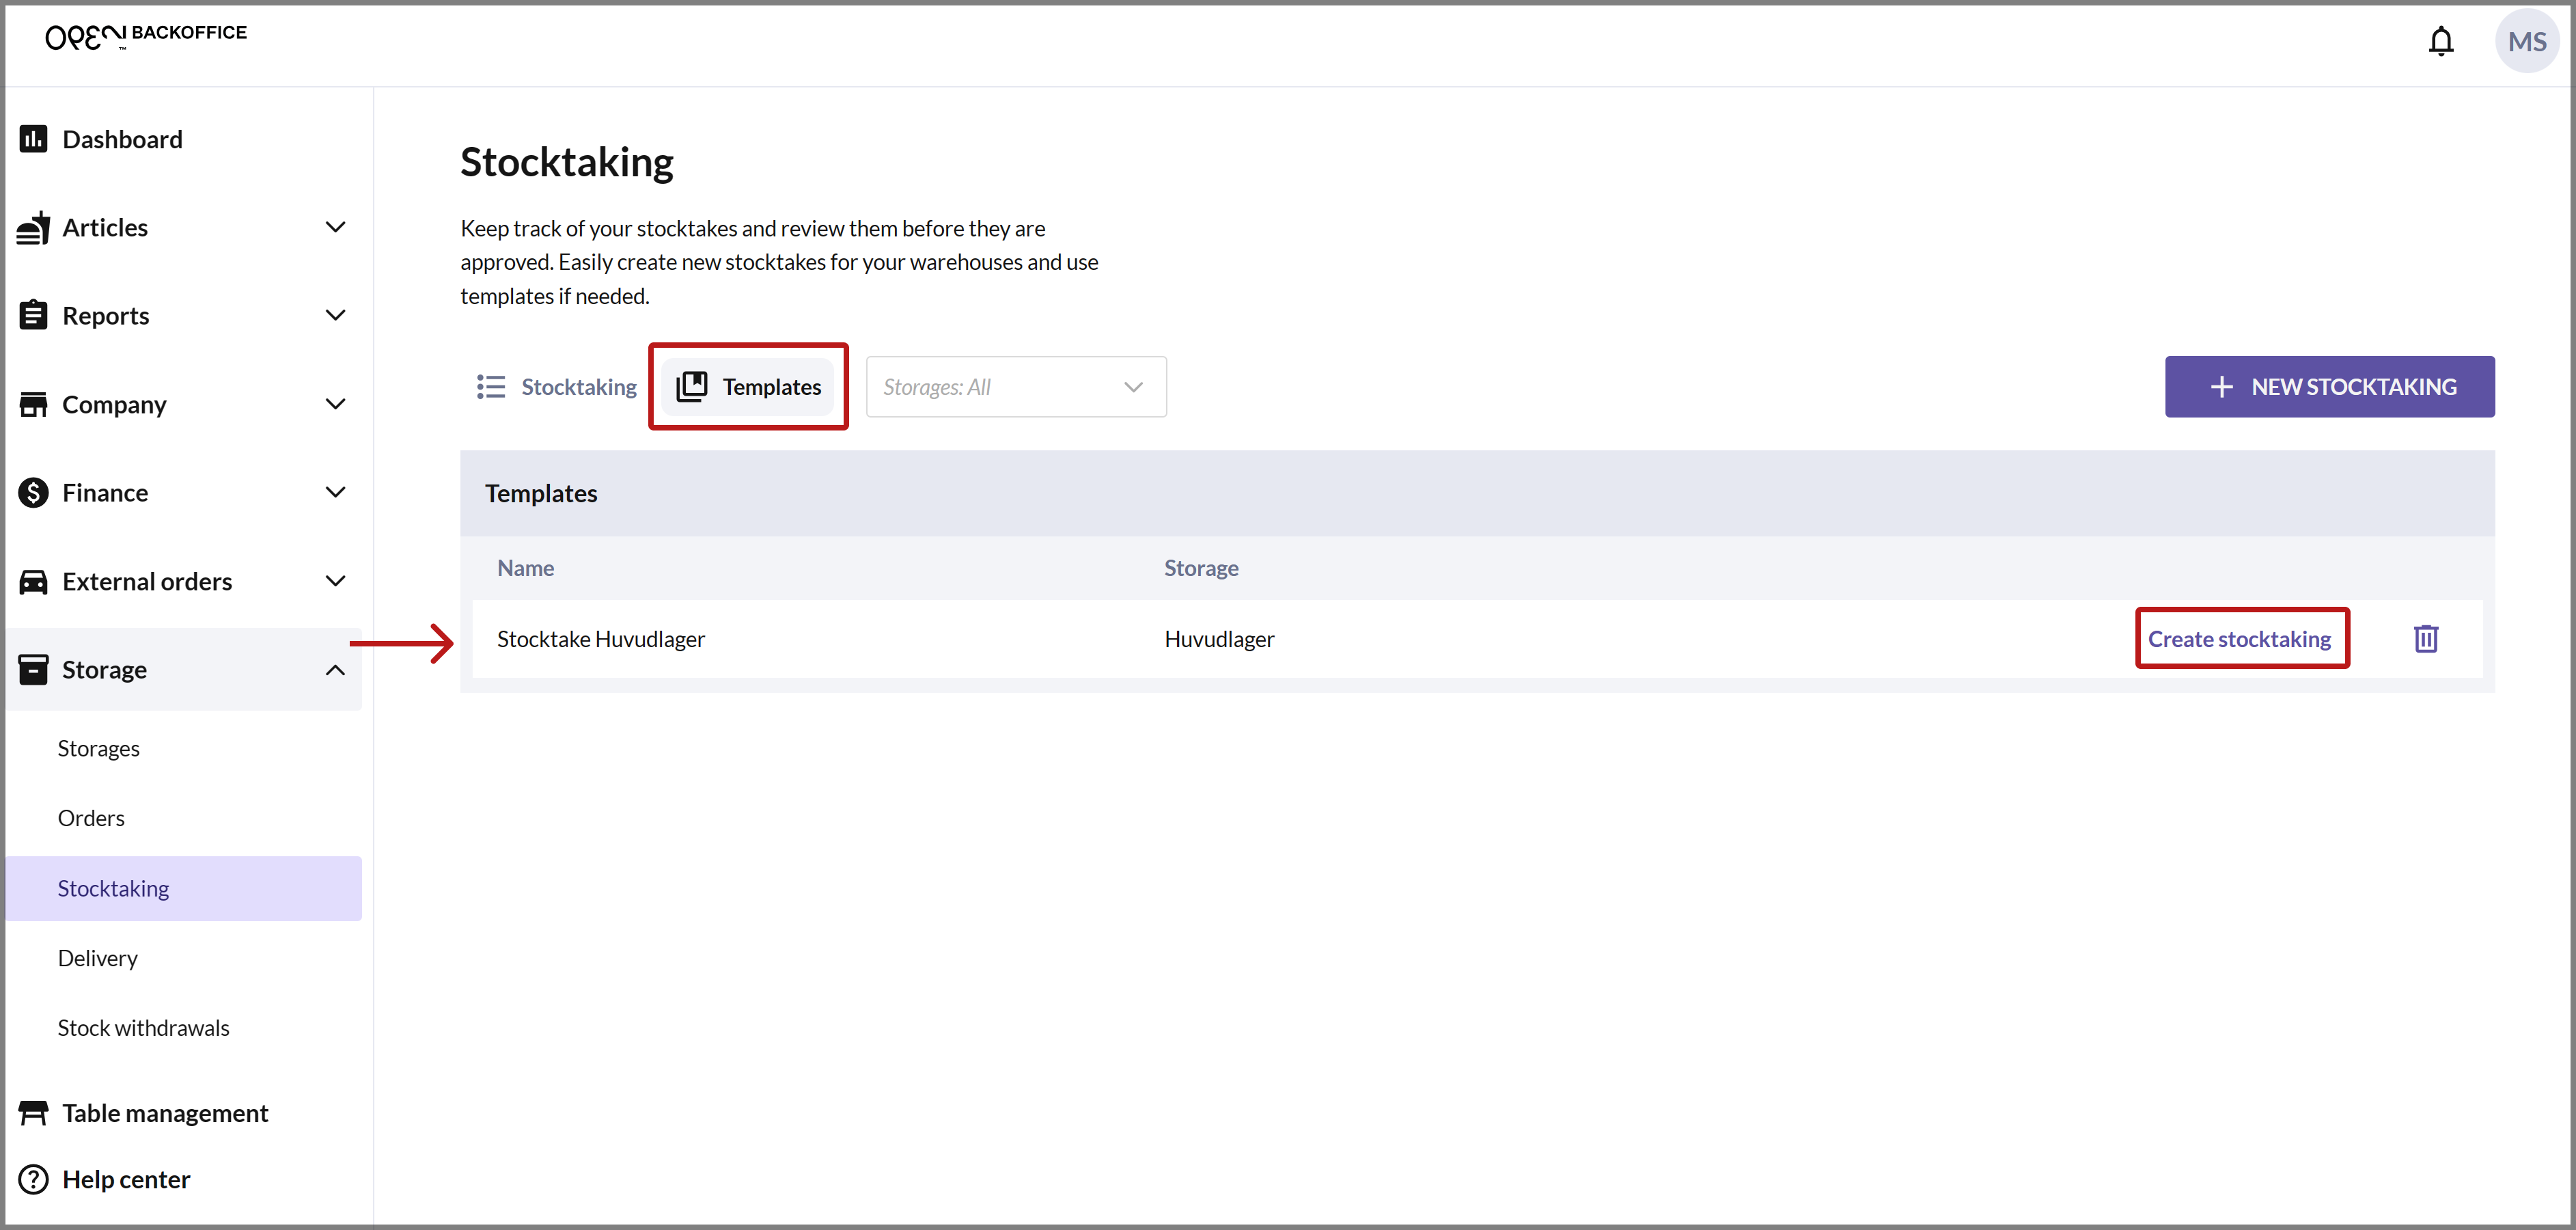
Repeat steps 1-5 above but choose to save the stocktake as a template. Navigate to the TEMPLATES tab to see an overview of your saved templates. If you want to create a stocktake from a template, follow the steps below.
If you want to use the template, press Create stocktaking.
You are now in the final step of the process for creating stocktakes. If you wish, you can go back one step to add or remove articles. Otherwise, press SAVE to save a stocktake that you can then conduct.
You can now see the created stocktake under the STOCKTAKING tab.

- Now a new dialog opens. Choose the interval for the scheduled stocktake, and specify a time for when the stocktake should appear. Press SAVE when you're done.
Press SAVE to close the storage settings dialog.
Press SAVE & EXIT to return to the overview of your storages.
On the specified day, a stocktake will be created, which you can conduct from BackOffice.
Conduct stocktake
If you have the correct permissions, you can conduct stocktakes for all of your storages in BackOffice, whether they are created in BackOffice or from a cash register connected to a storage.
Select STORAGE in the menu and go to STOCKTAKING. Under the "Stocktaking" tab, you can see a list of your created stocktakes. Each stocktake has a status, and a new stocktake has the status CREATED.
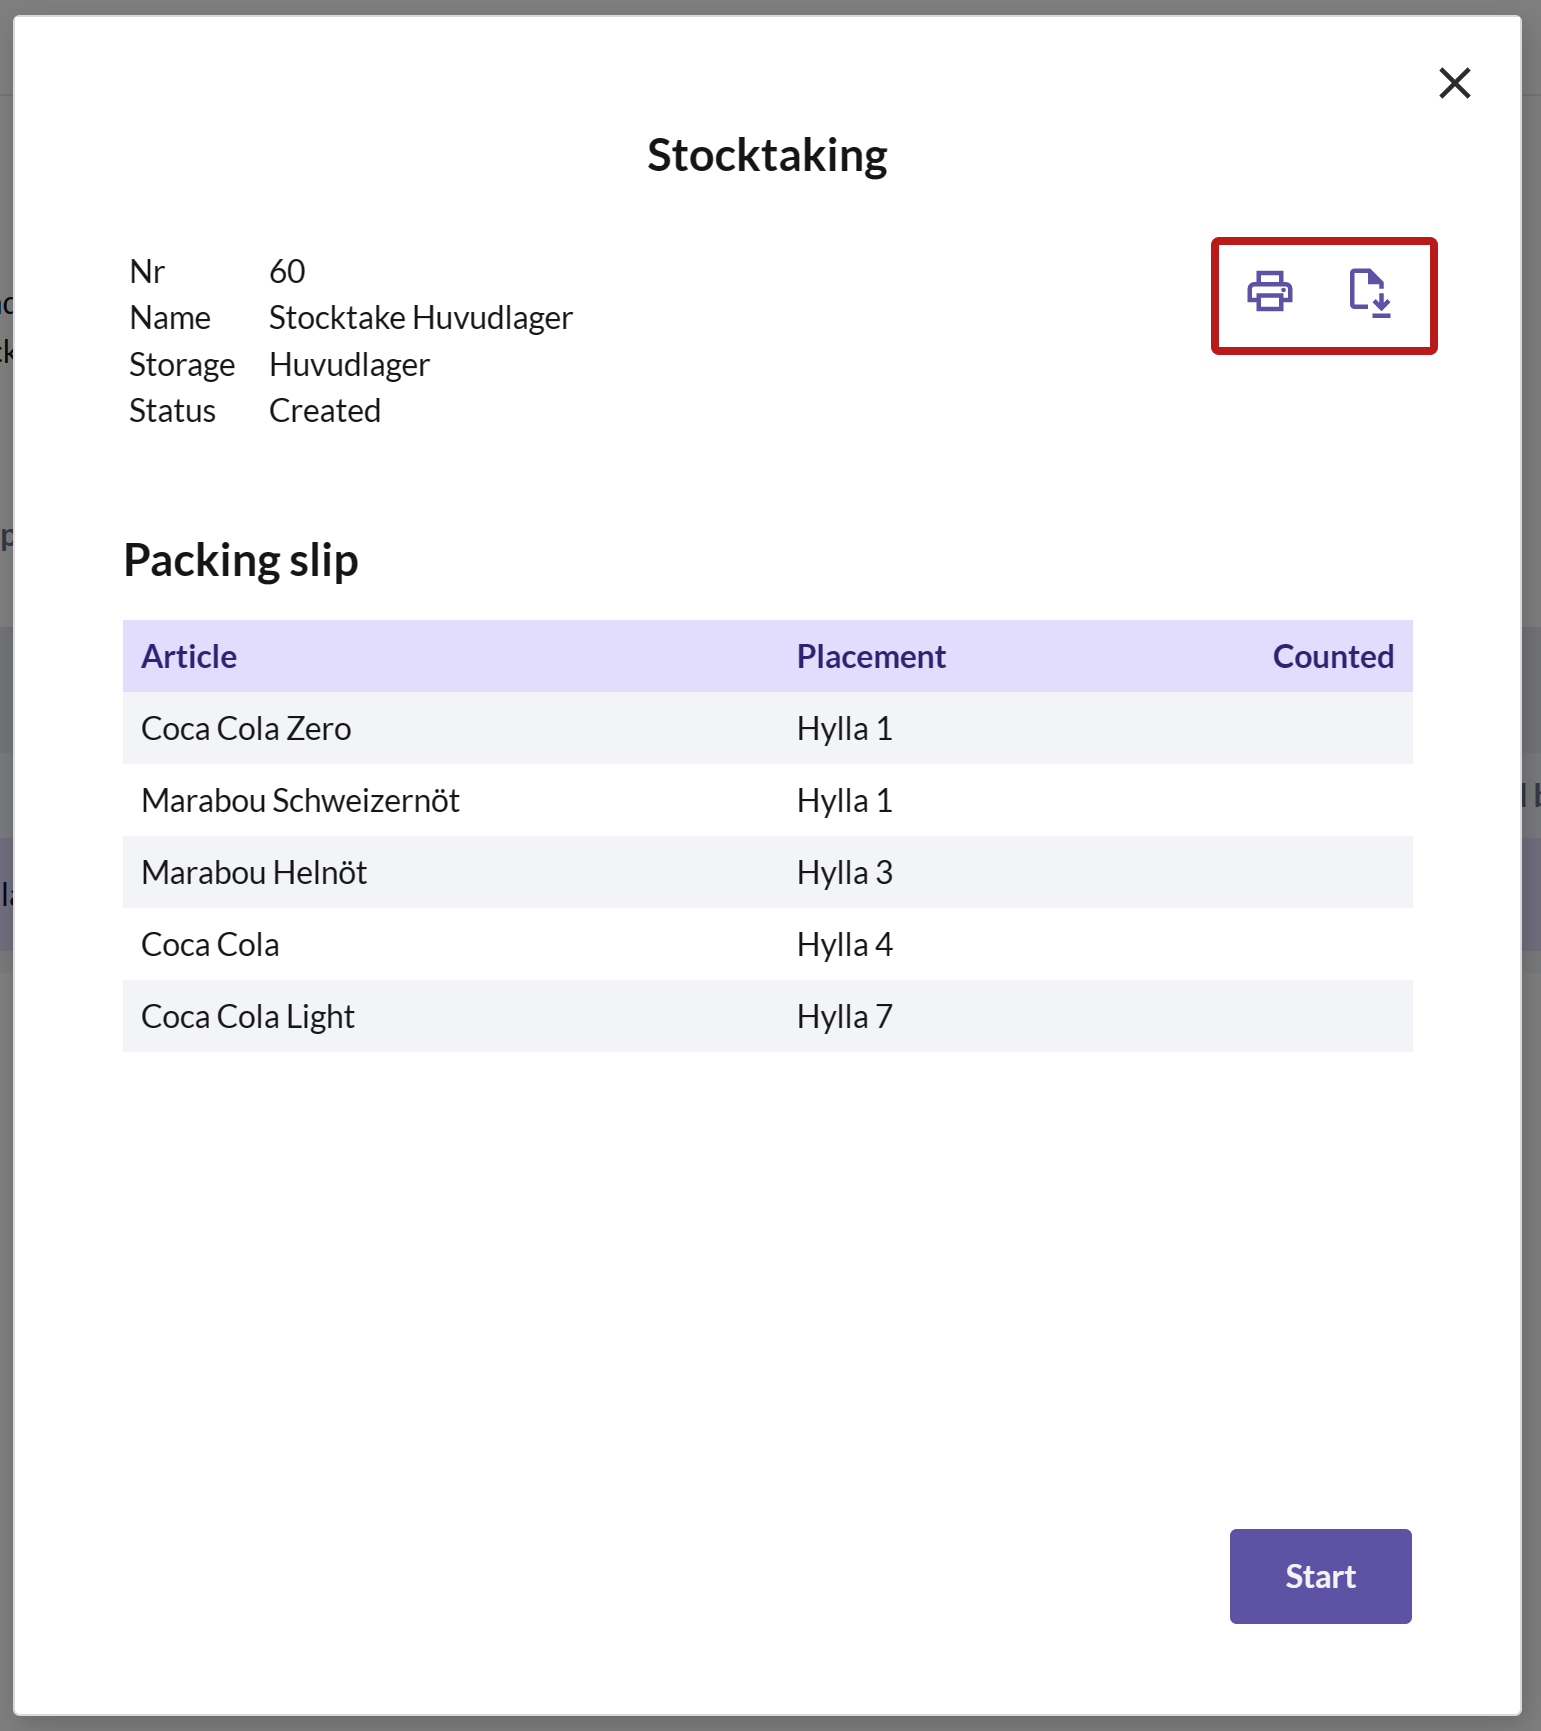
- Click on the stocktake that needs to be counted, and a dialog will open showing the items included in the stocktake. You can choose to either print or download the PDF of the stocktake list.
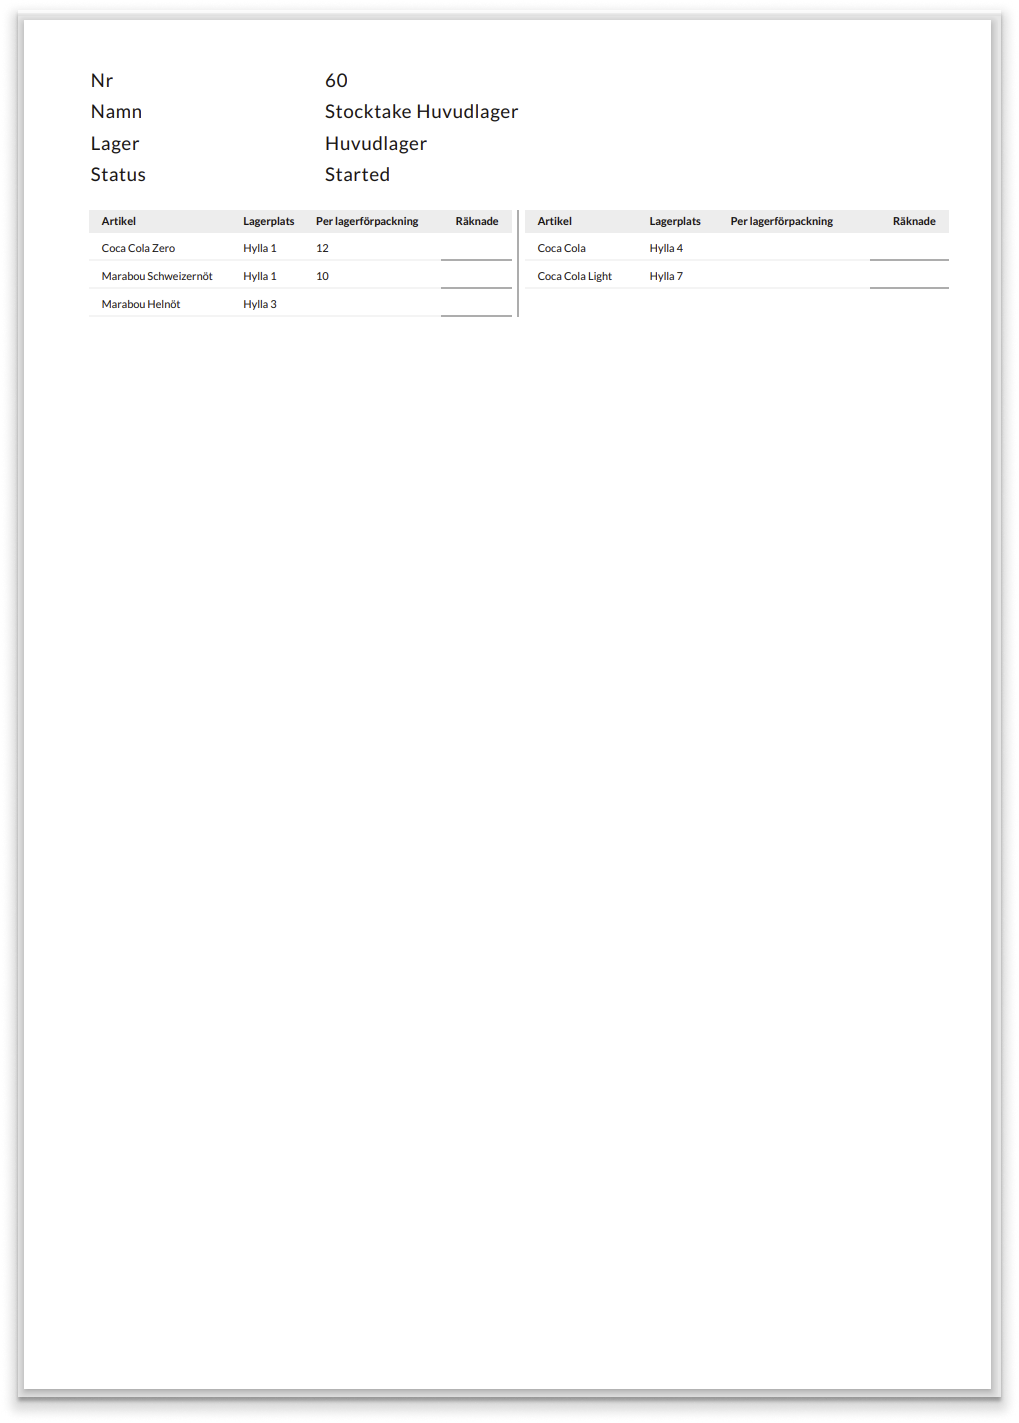
- On the right, you can see how the stocktake list looks in PDF format.
Count the articles in your storage and then return to BackOffice to complete the stocktake. Again, click on the stocktake in the list to open the dialog.
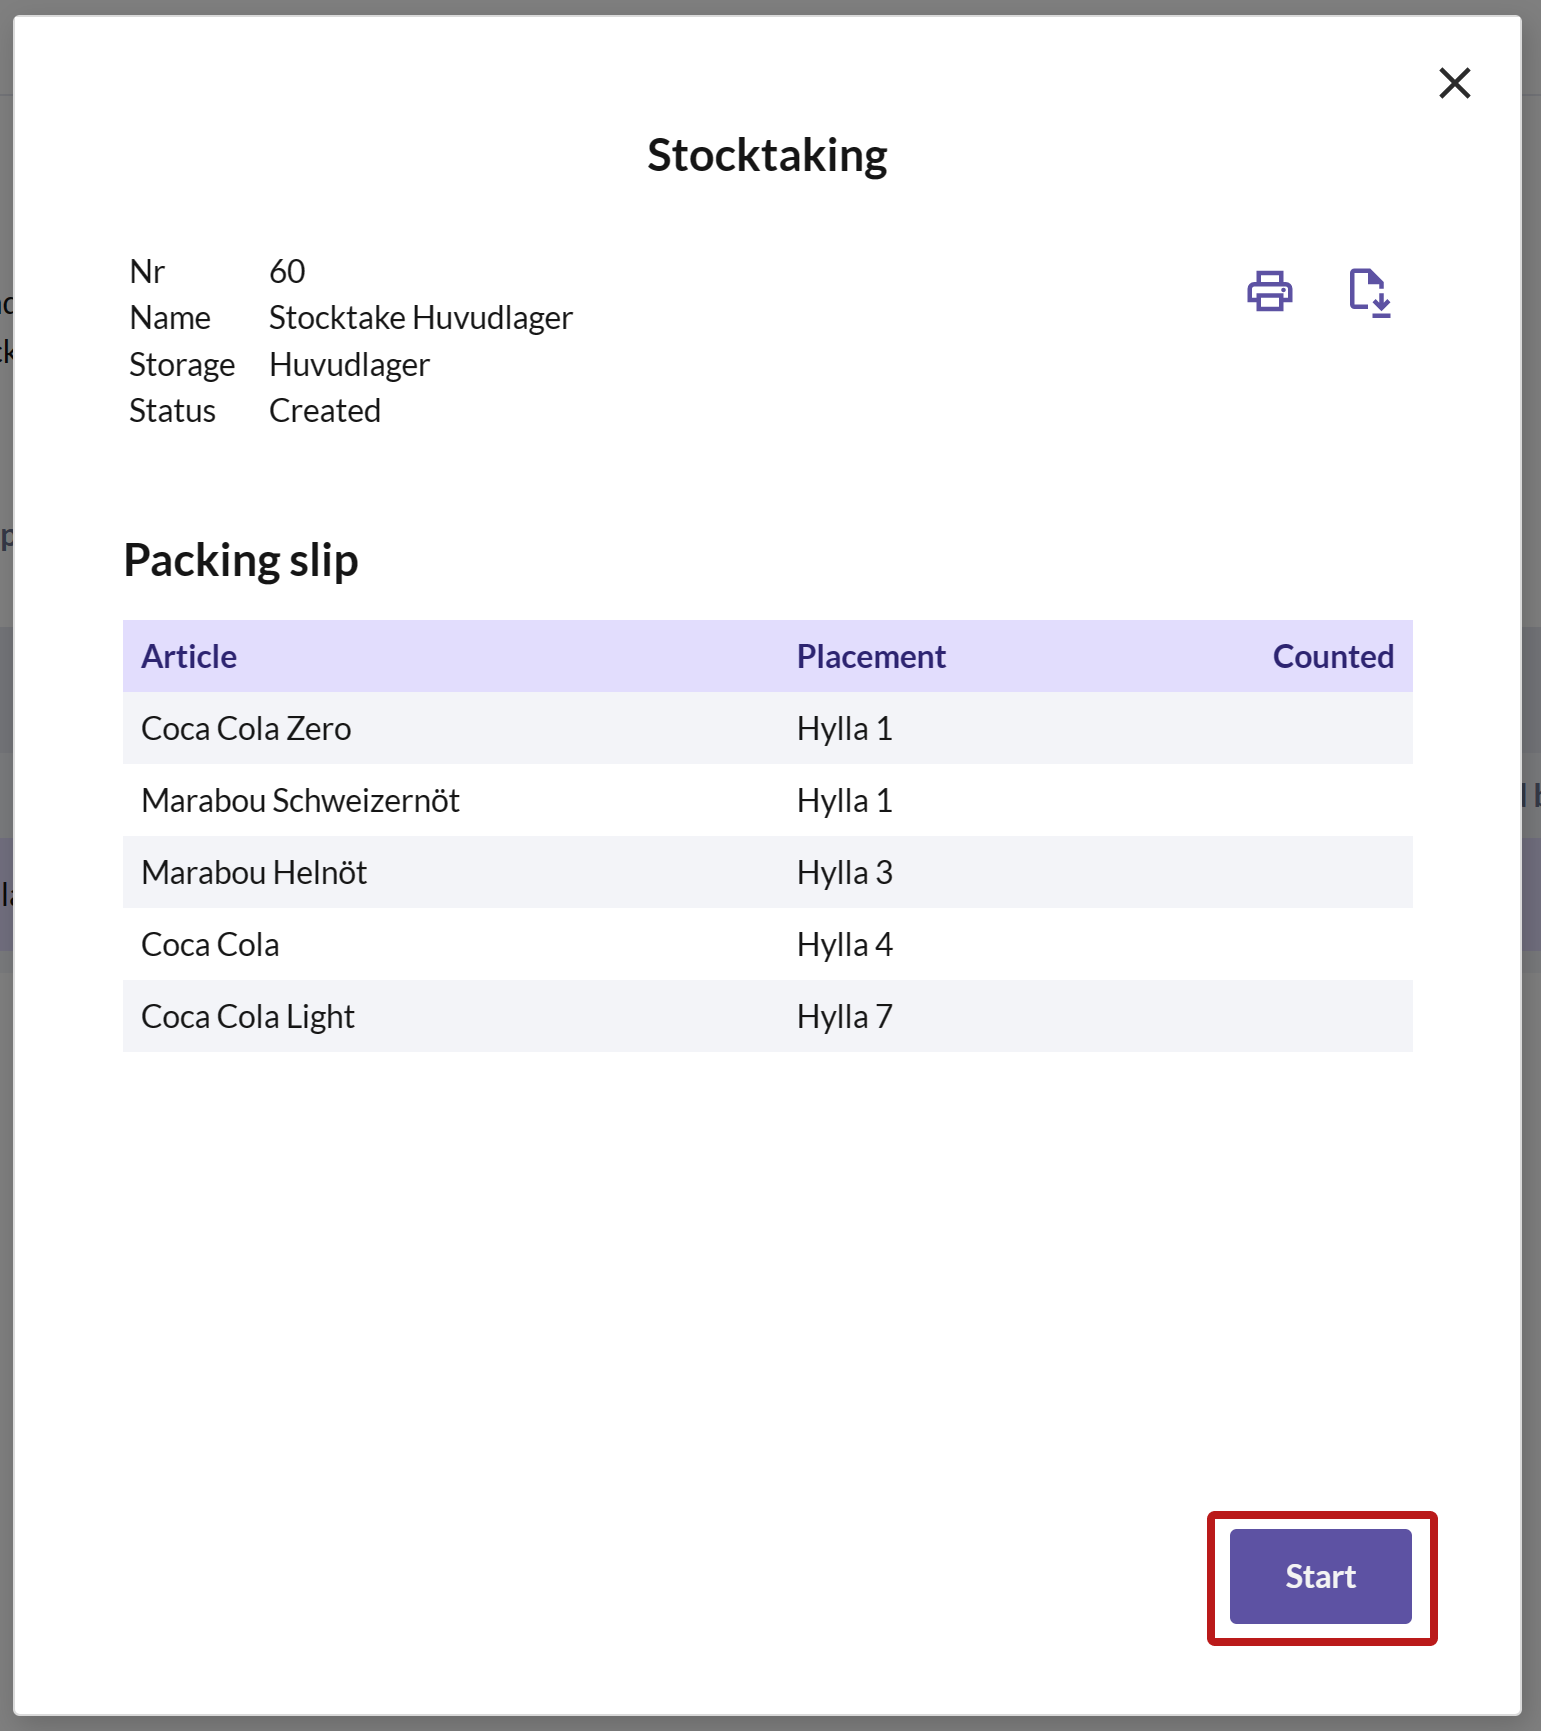
- Then press START.
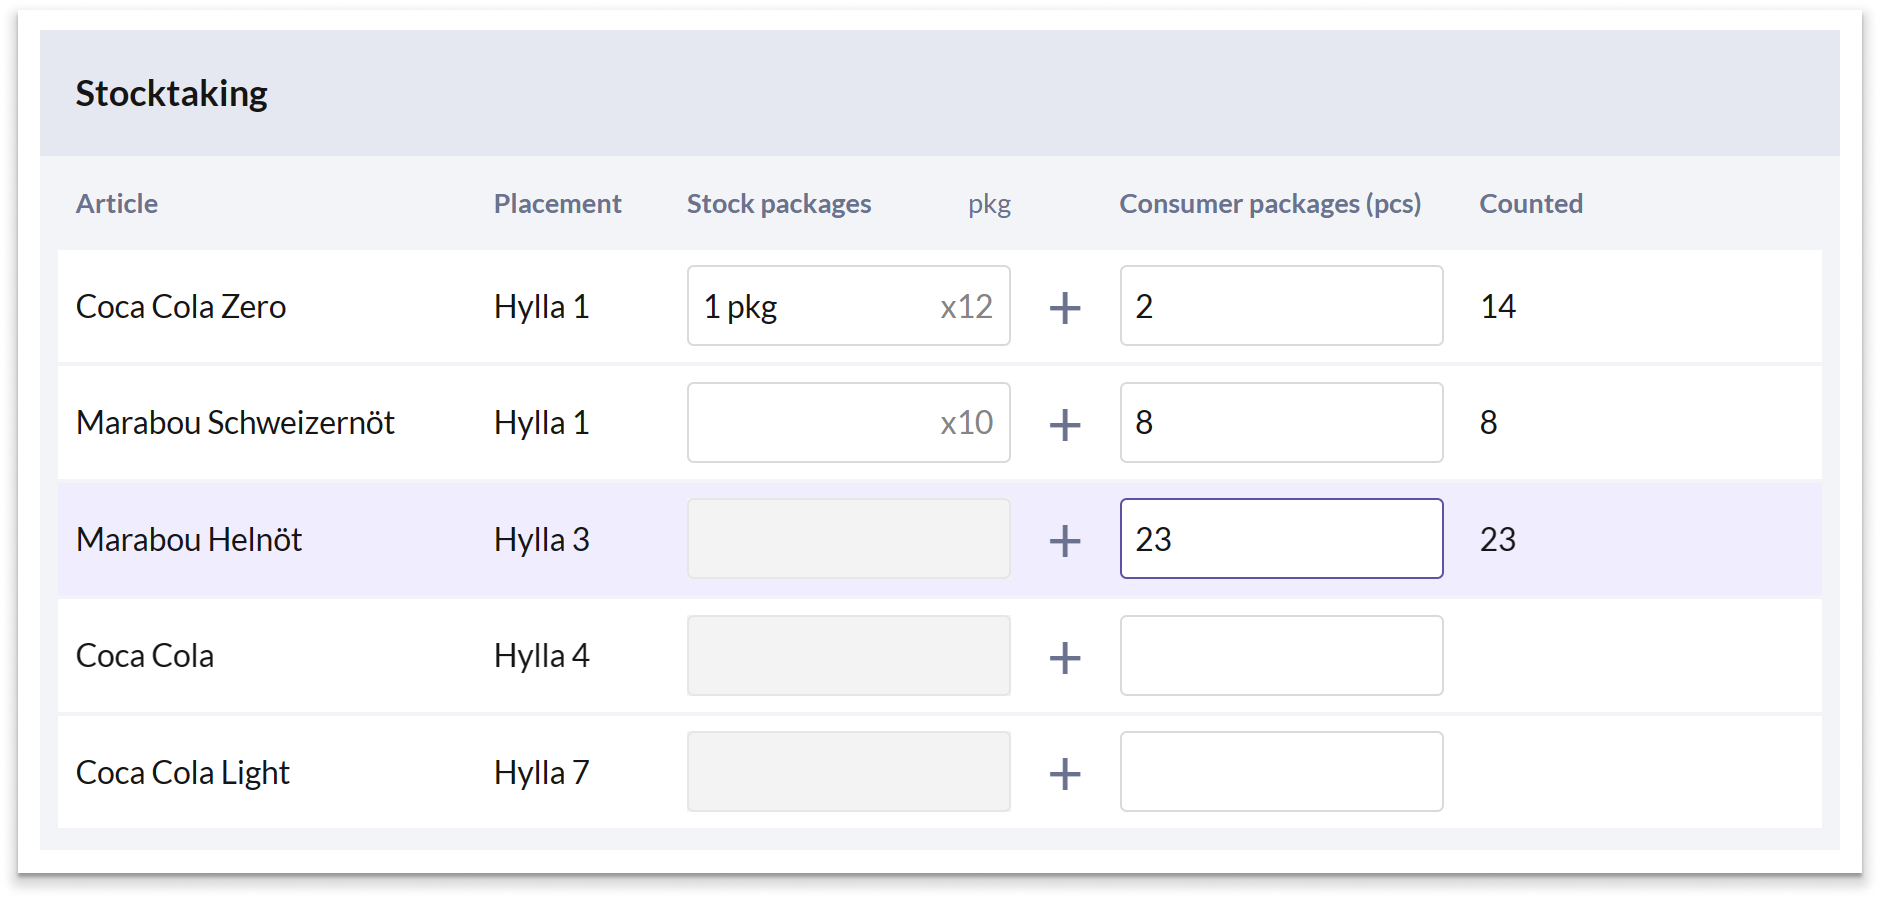
Fill in what you have counted for all articles. You can easily tab down to the next article by pressing ENTER.
 Please note that you have the option to enter the number you have counted in two separate columns: "Stock packages" and "Consumer packages", where consumer packages refer to the packaging unit sold to the customer. What you enter in the two columns is added together and the total number counted is displayed in the third column "Counted".
For example, if you have counted 1 stock package and 2 consumer packages of a certain product, first enter "1" in the first column, and then "2" in the second column. Then the total count is shown under "Counted".

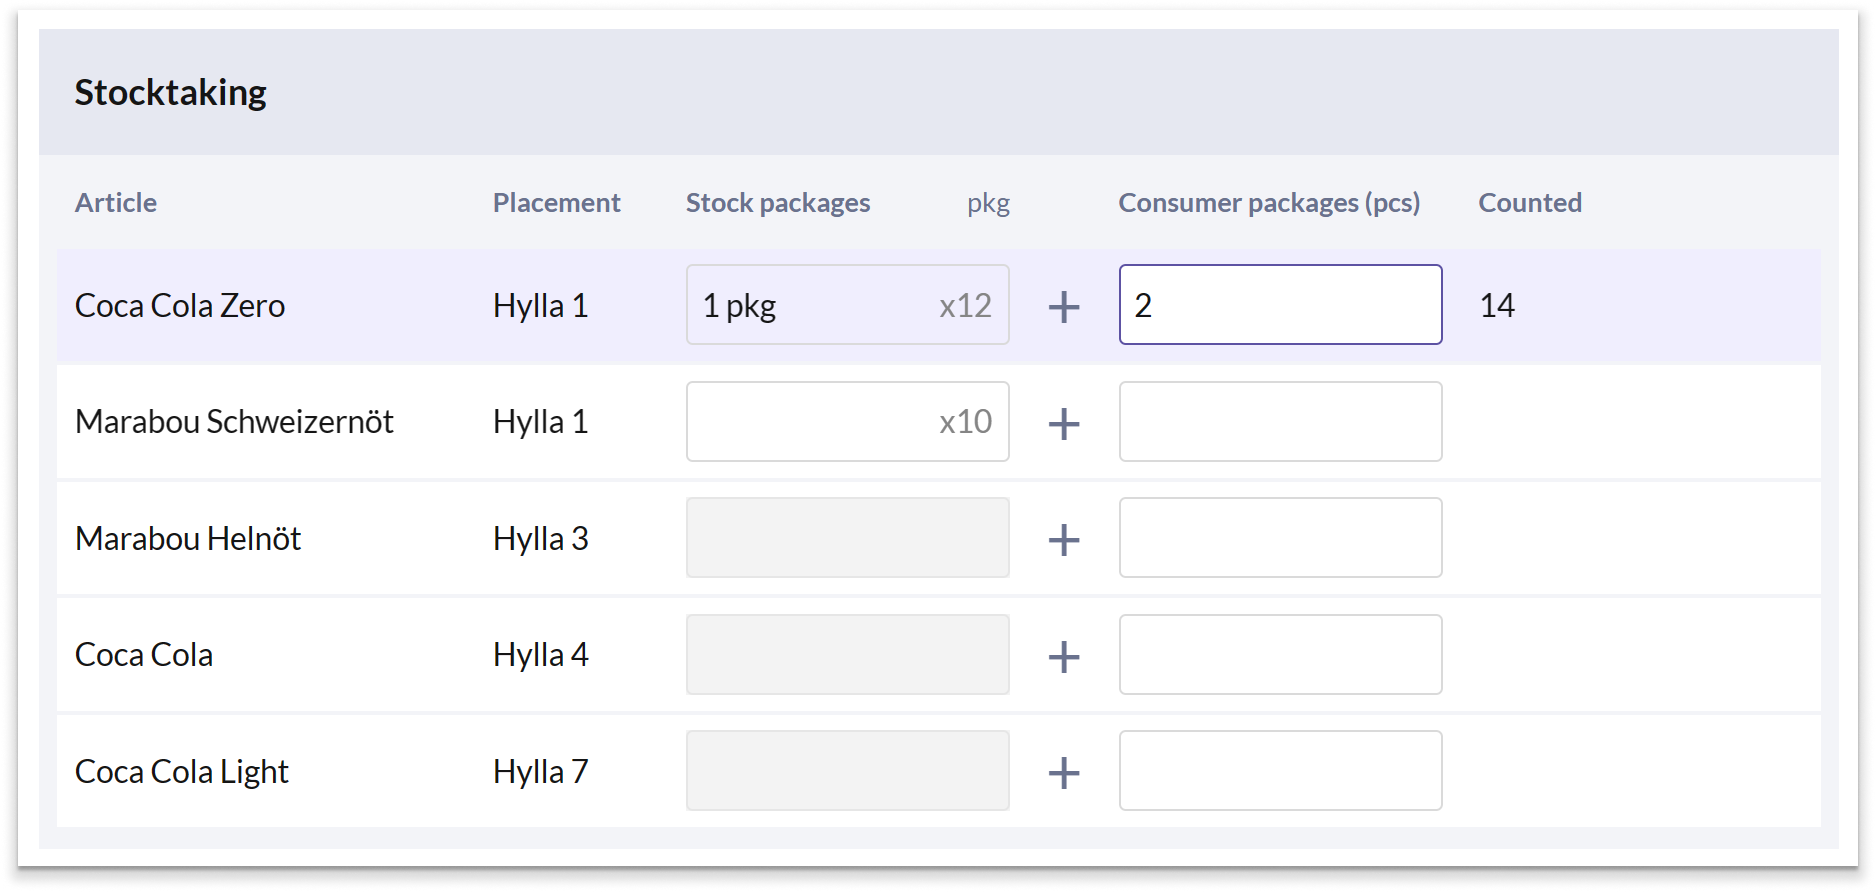
If the Stock packages column is grayed out, it means that the stock package quantity has not been specified for the item. In this case, use the Consumer packages column instead to indicate what you have counted.
- Once you have filled in what you have counted for all articles, press SAVE.
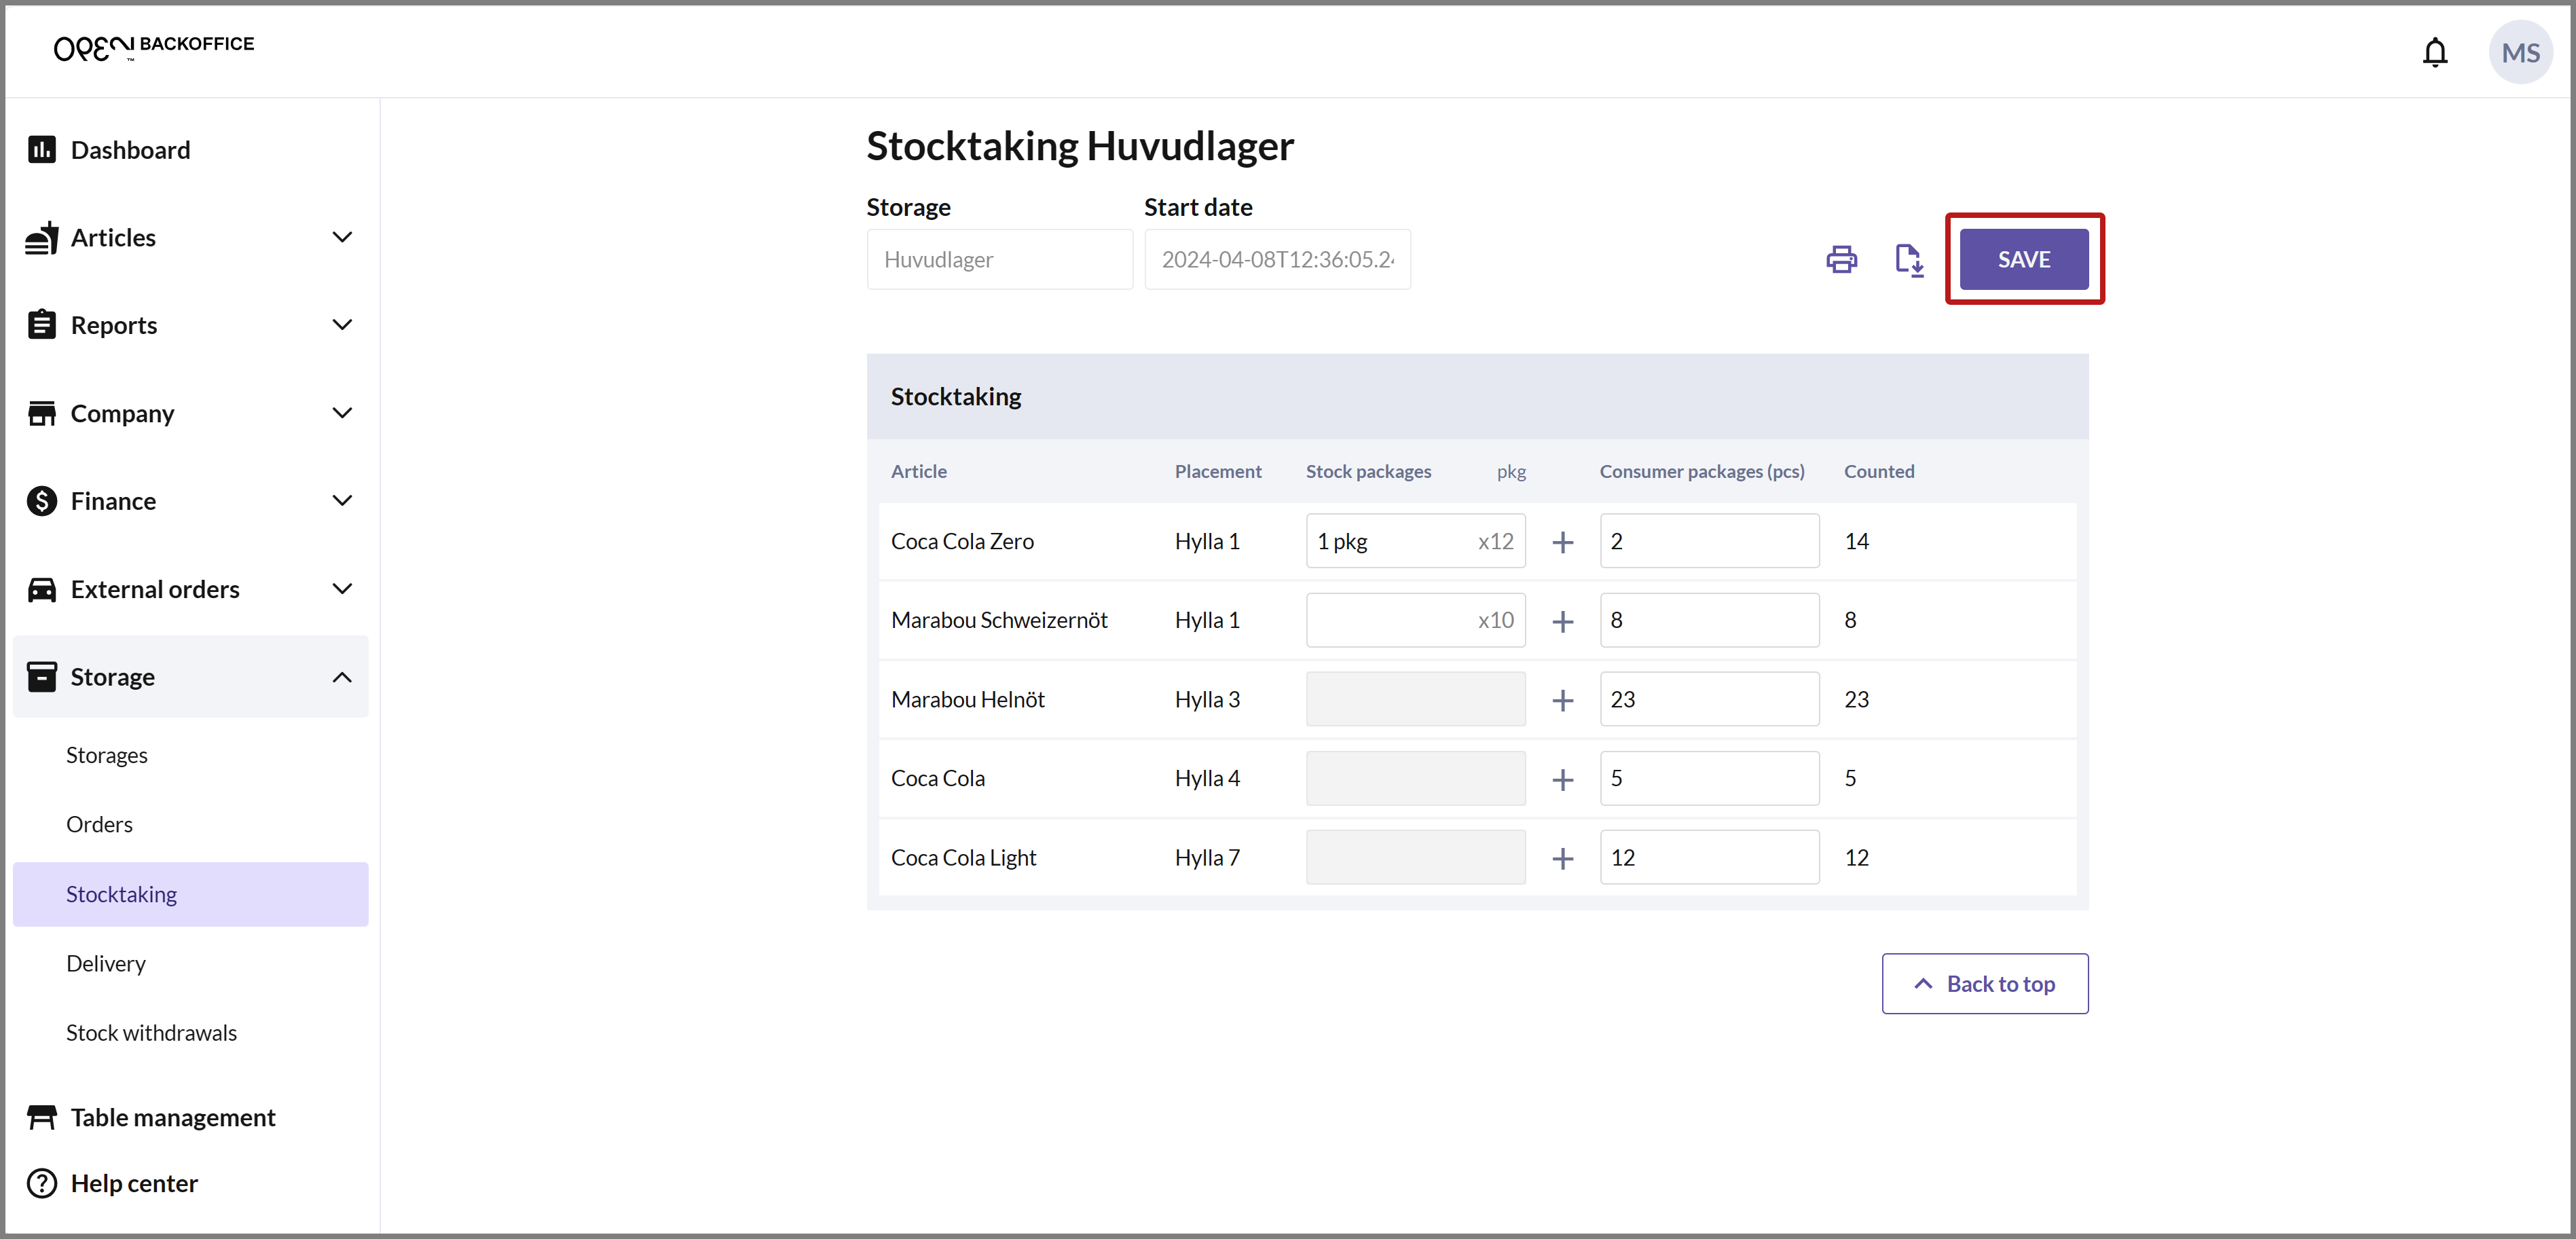
- You can now see that the stocktake has the status COMPLETED.

Review and approve the stocktake
All stocktakes must be reviewed and approved by a user with BackOffice authorization. Only after approval, the stock balance is updated. It is also possible to request a recount if there is a significant difference between the stock balance and what has been counted.
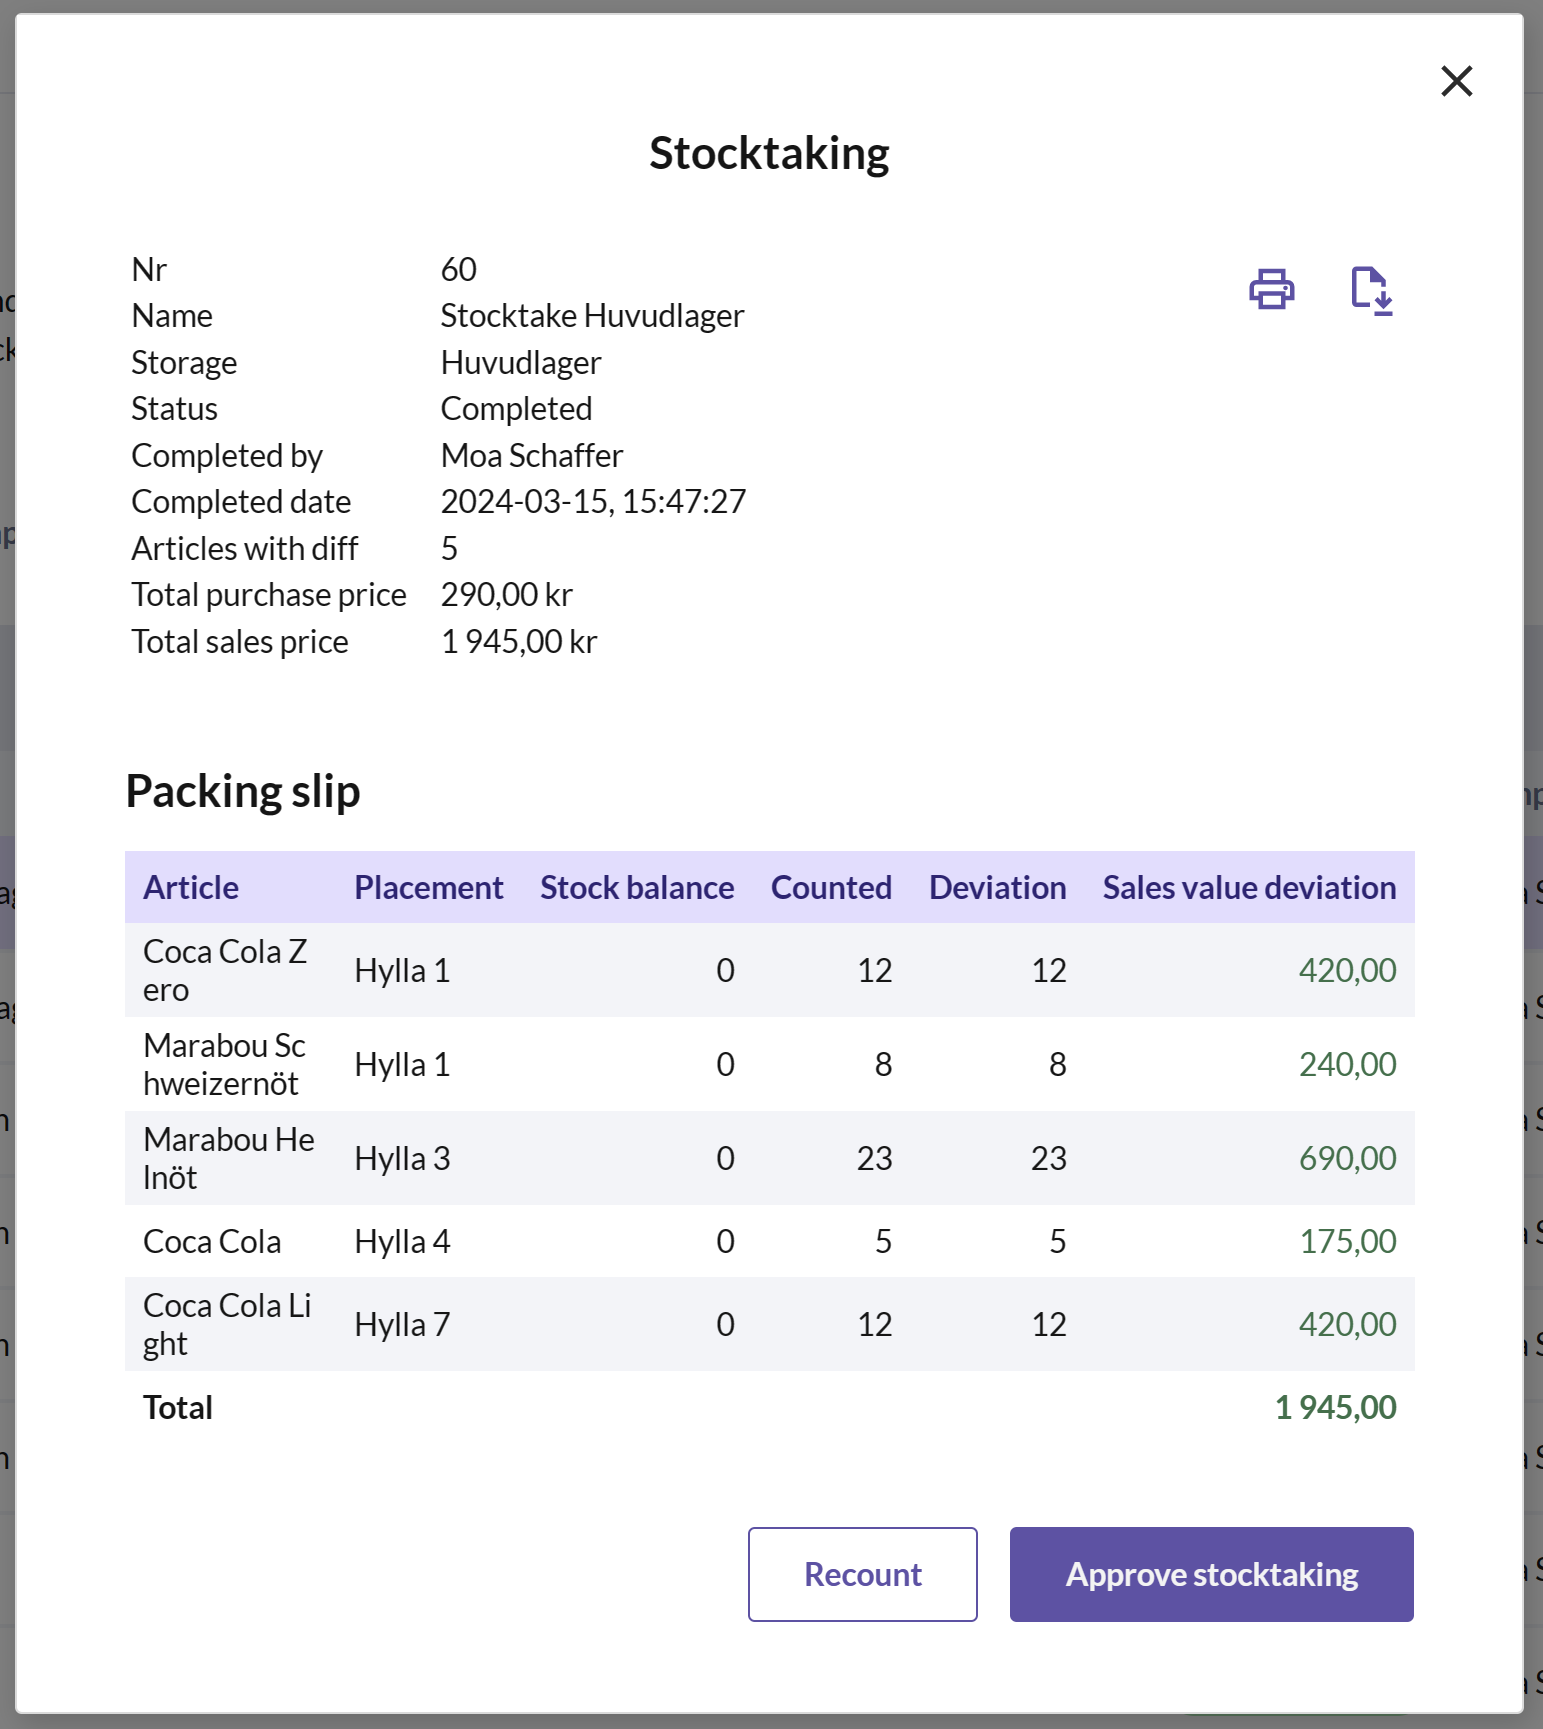
- In the list of your stocktakes, you can now see that the stocktake has the status COMPLETED. If you click on a stocktake, a dialog will open where you can see if what has been counted matches the inventory balance.
You can choose whether the stocktake should be approved immediately or if it needs to be recounted, for example, if there is a significant difference in the articles.
Approve stocktake
If you choose to approve the stocktake, it will be marked as Approved. The inventory balance is updated according to the stocktake.
Recount stocktake
If the stocktake needs to be recounted, it will also be marked as Recount. The stocktake needs to be filled in again, but only for the articles that have differed from the inventory balance. You can redo the stocktake either in the cash register or directly in BackOffice.

Cash register: creating and conducting stocktakes
In the cash register, you can create and conduct stocktakes for the storage linked to the cash register. The stocktake then needs to be reviewed and approved in BackOffice for the inventory balance to be updated.
The stocktake view in the cash register consists of two tabs, Ongoing and History:
- Ongoing: Here, stocktakes that need to be counted are listed, including any stocktakes that need to be recounted.

- History: Here, stocktakes you have counted and submitted are listed, including both completed stocktakes that need to be reviewed from BackOffice and approved stocktakes.
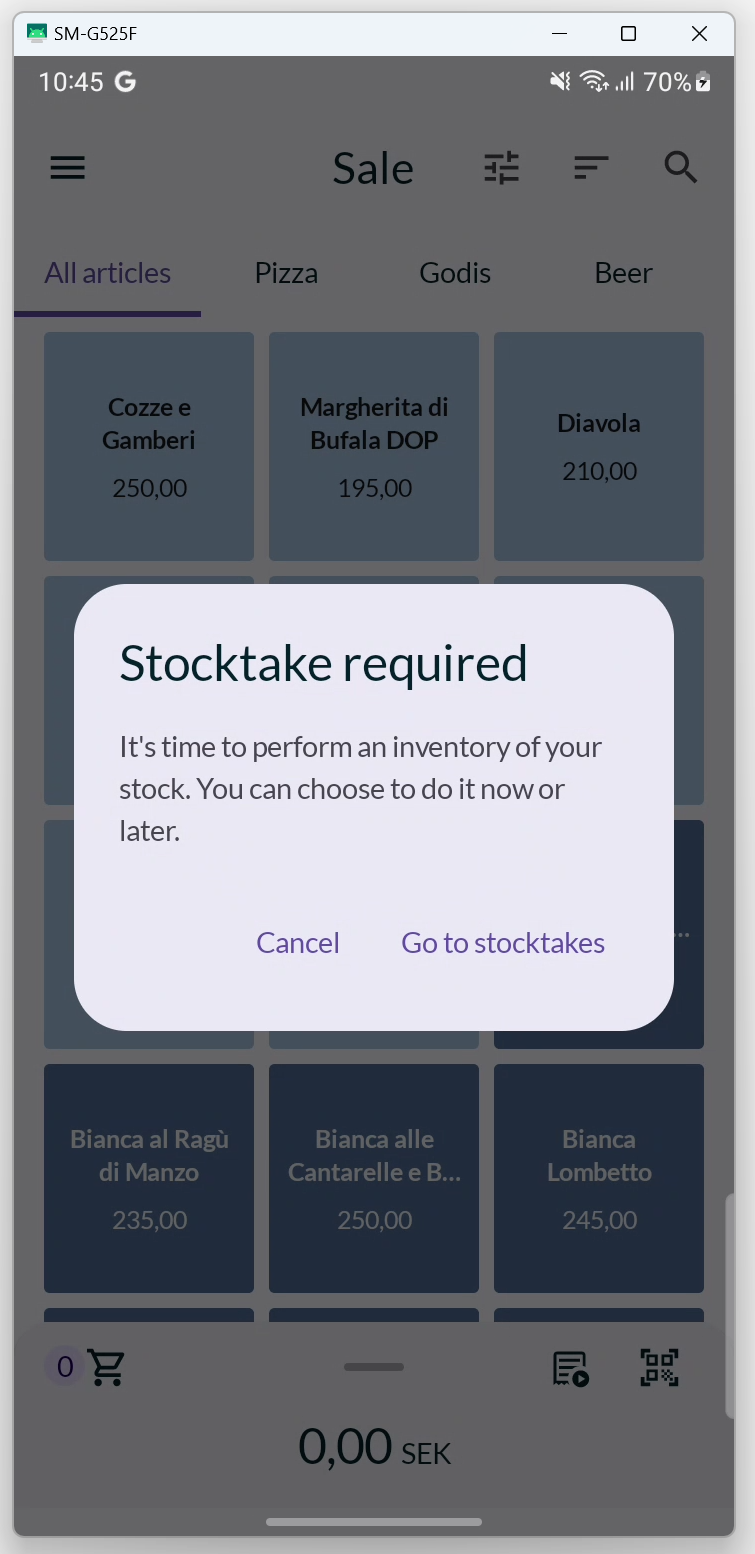 If there is a scheduled stocktake for the storage linked to the cash register, you will receive a notification on the specified day when you log in to the cash register.
 Create stocktake
If you create a stocktake from the cash register, it automatically applies to all articles in the storage. For a stocktake involving only a specific number of articles, you need to create the stocktake in BackOffice.
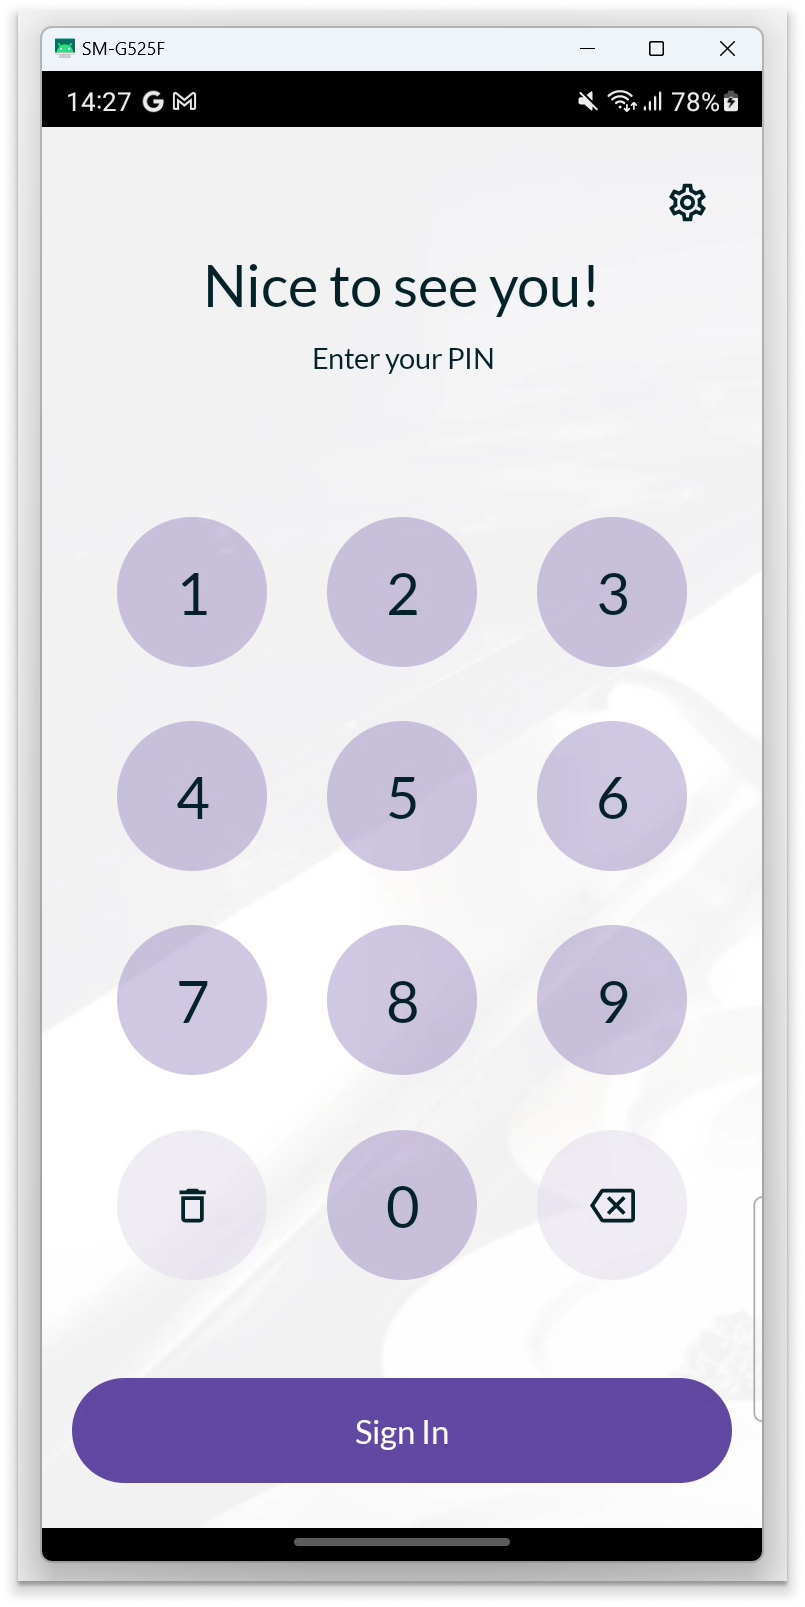
- Enter your PIN to log in to OPEN Two.
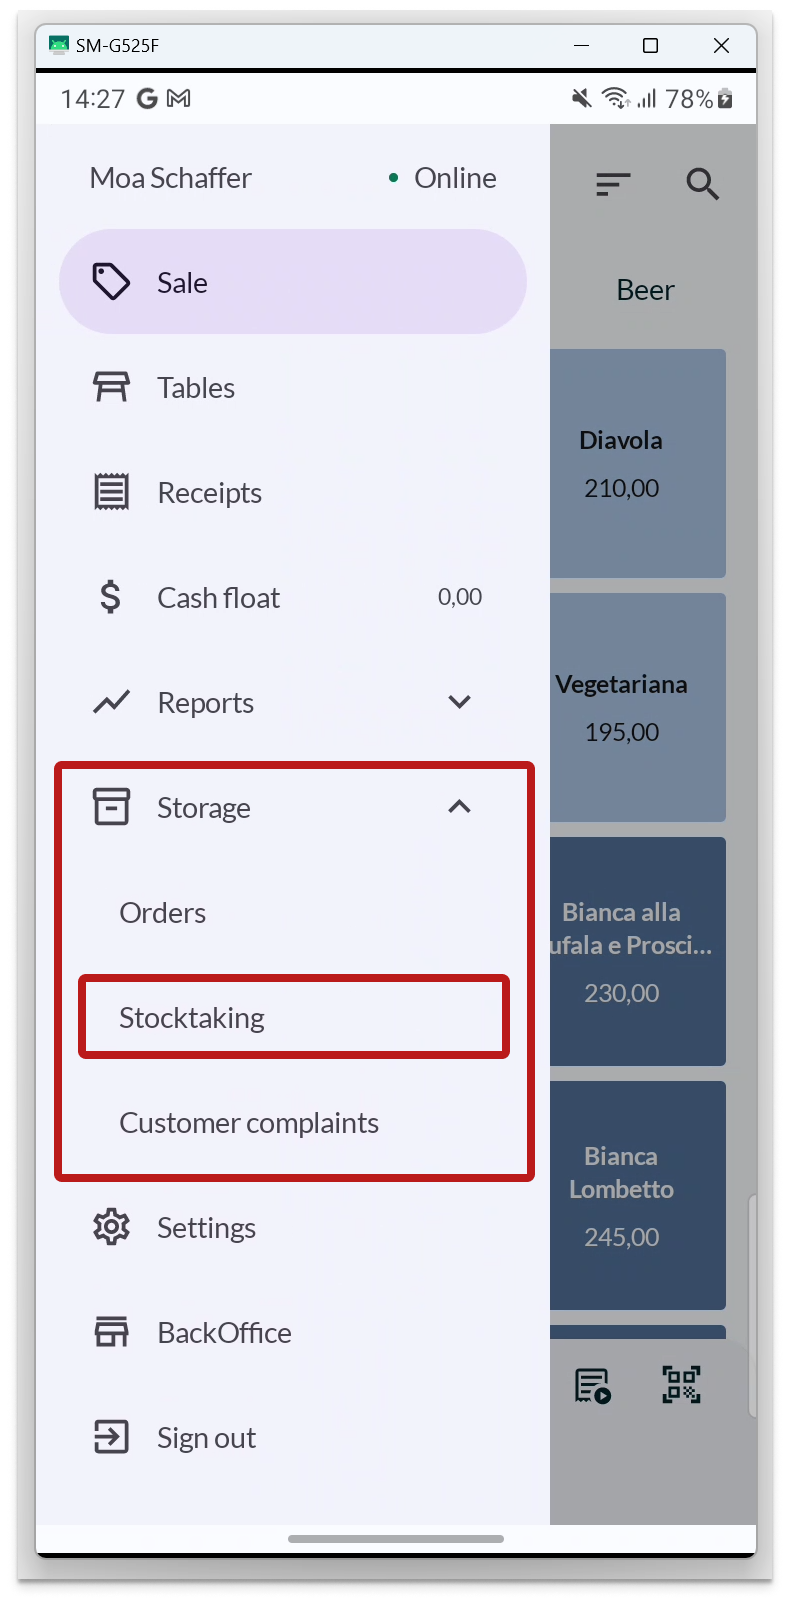
- Press the Menu button and navigate to STORAGE. Then, open STOCKTAKING.
- Press NEW STOCKTAKE to create a stocktake. Note that the stocktake will include all articles in your storage.

If you wish, you can give your stocktake an optional name. You can also change the planned start date, which is otherwise set to today.
Note that the start date is merely indicative and does not affect when you can actually conduct the stocktake.
Press CREATE to create the stocktake.
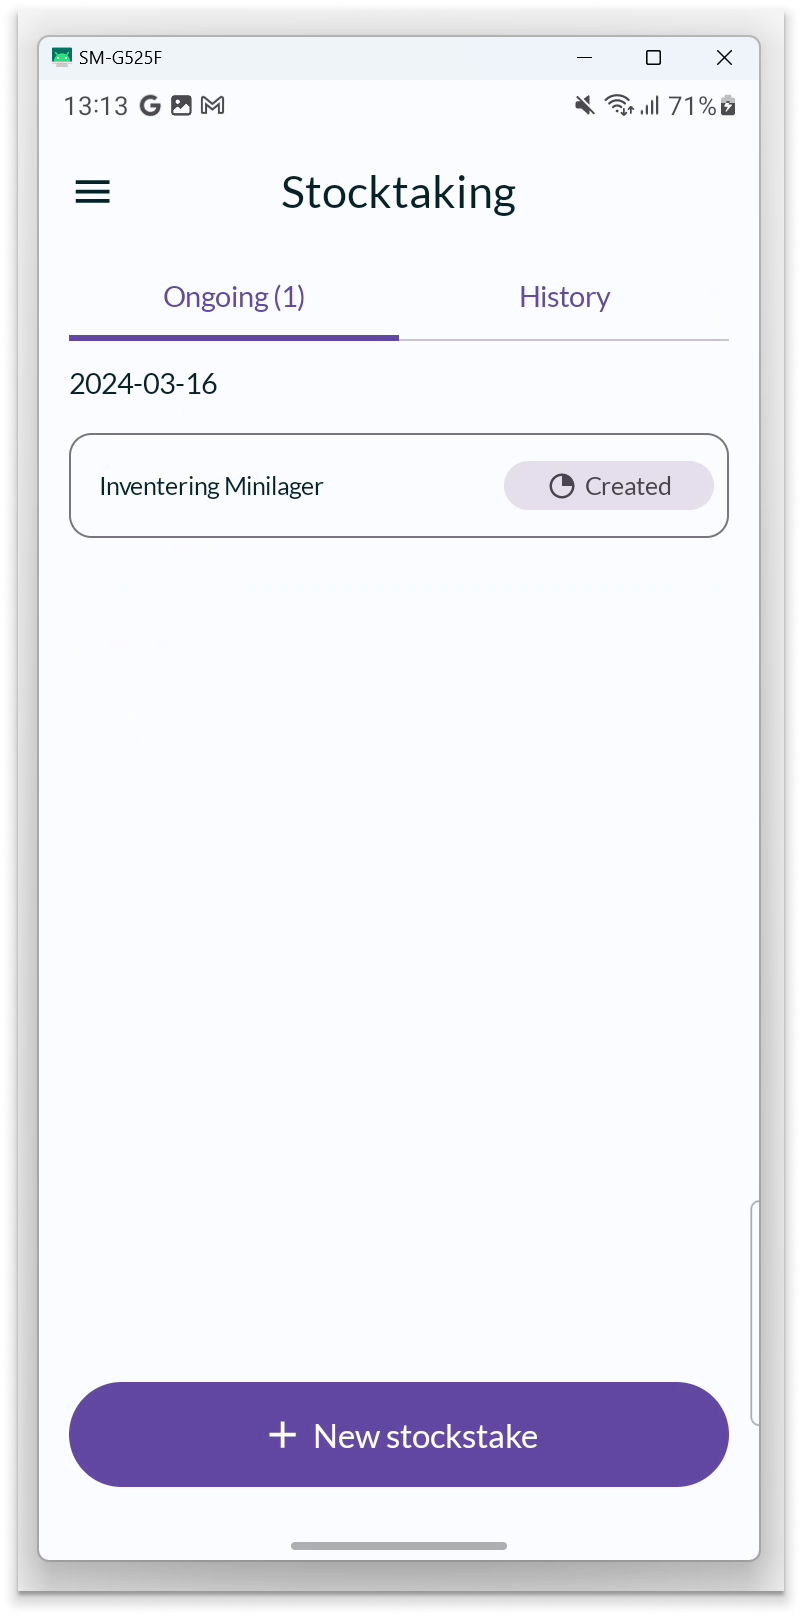
- You can now see the stocktake under ONGOING. If you want to conduct the stocktake immediately, simply press on the card.
Conducting stocktakes
When you conduct a stocktake in the cash register, all articles must be counted before you can submit the stocktake. This is to reduce the risk of inventory balance discrepancies.
- Enter your PIN to log in to OPEN Two.
- Press the Menu button and go to STORAGE. Then, open STOCKTAKING.
- If there is a stocktake to be conducted, it will be displayed under the "Ongoing" tab. Press on the card to start the stocktake.

- A dialog box now appears, informing you that you are about to start the stocktake. Confirm by pressing START COUNT.
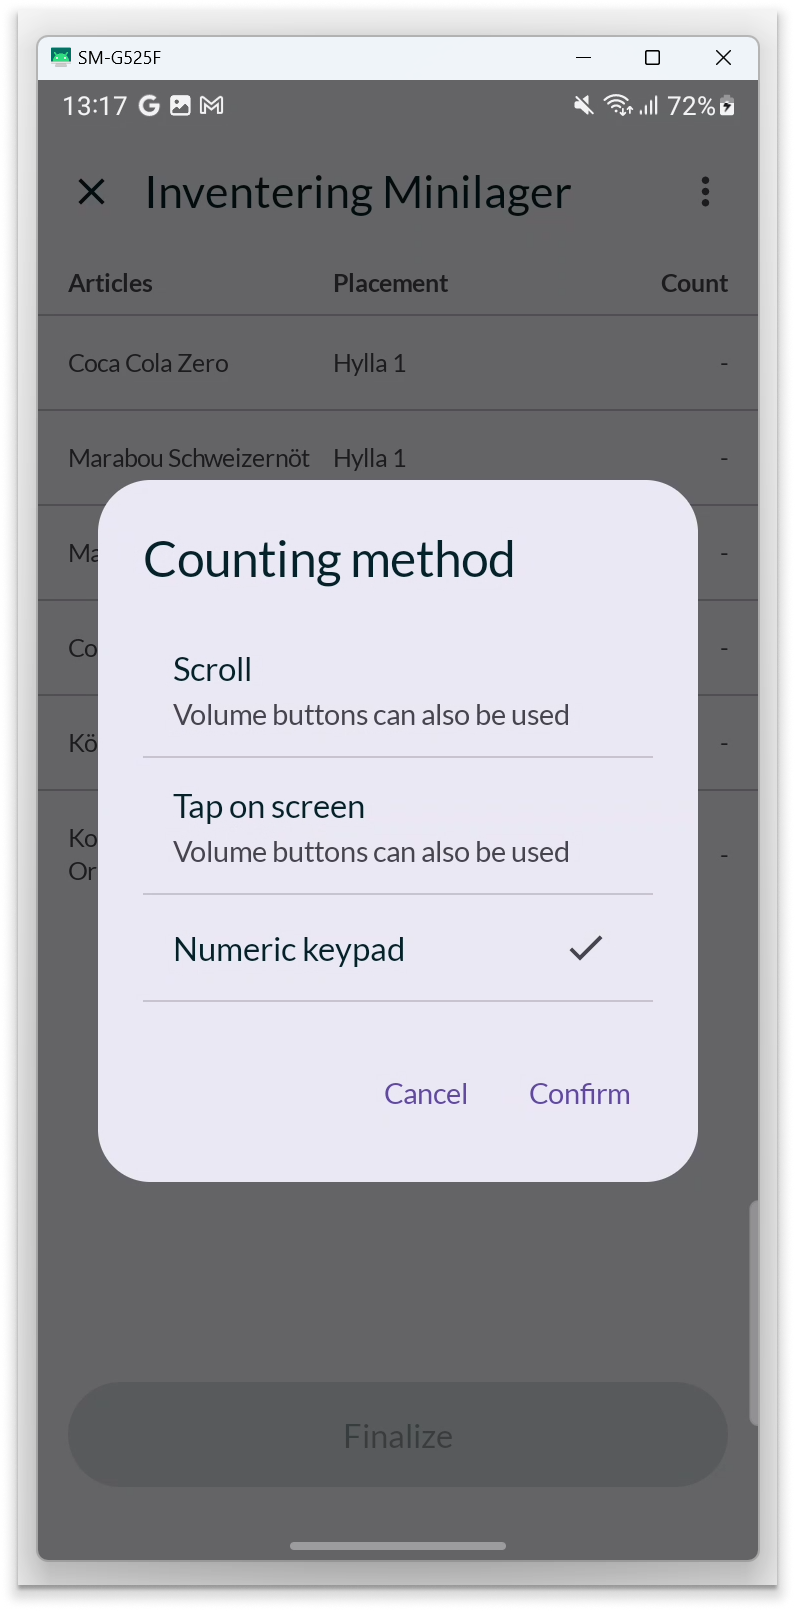
- Now, a list of all articles included in the stocktake is displayed. There are 3 different ways to count the articles, and you can choose the one that suits you best. Press the THREE-DOT MENU in the upper right corner to switch methods.

- Scroll - With this method, you scroll to the correct number. On most devices, you can also use the volume buttons to step up or down.
- Tap on screen - With this method, the counted quantity is increased one step at a time by tapping on the screen. On most devices, you can also use the volume buttons to step up or down.
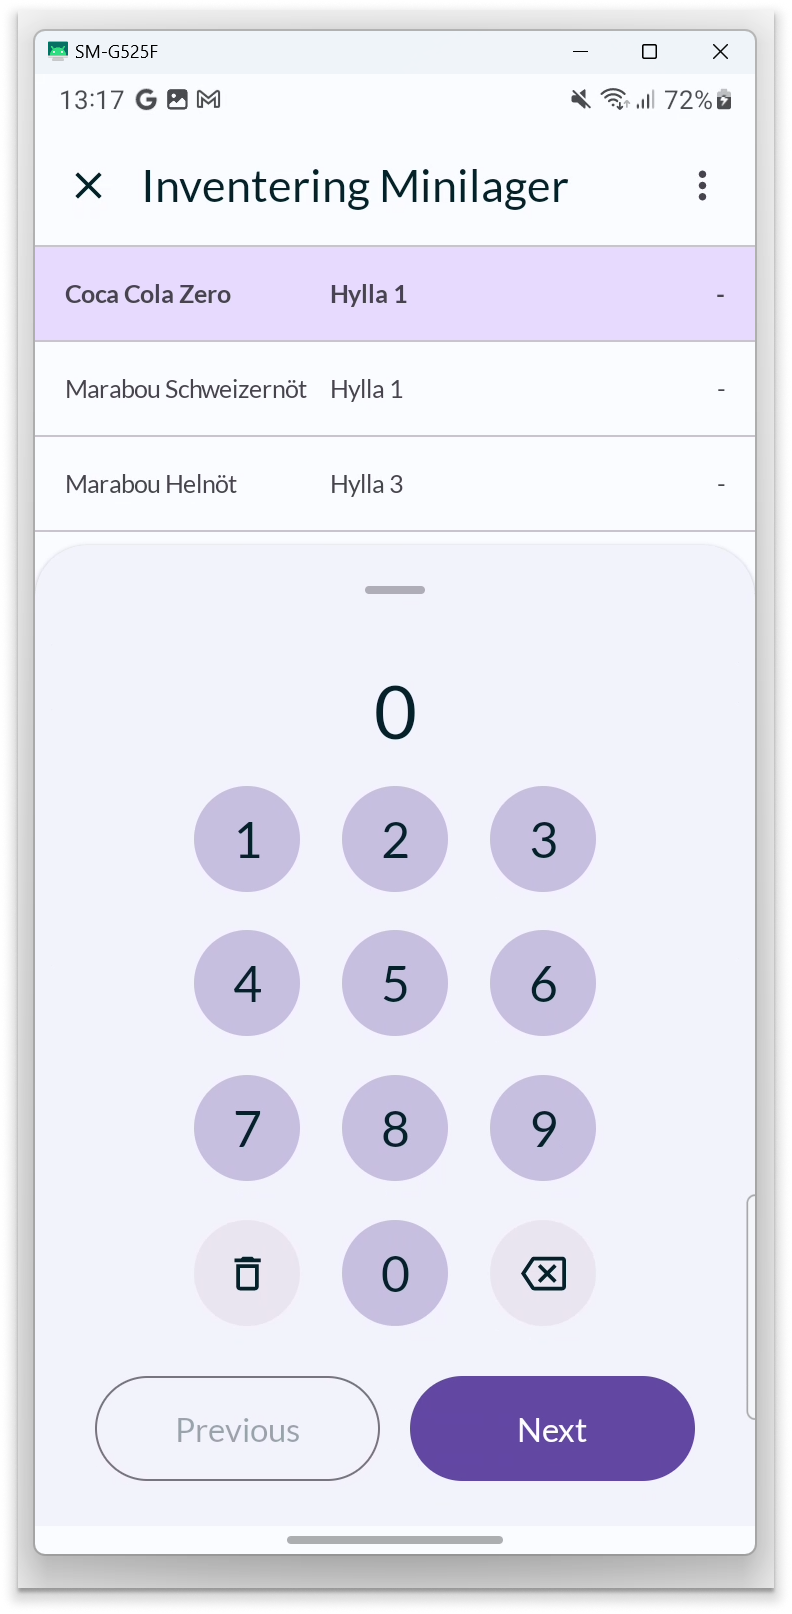
- Numeric keypad - With this method, you simply enter the counted quantity on the numeric keypad. This is the default counting method.
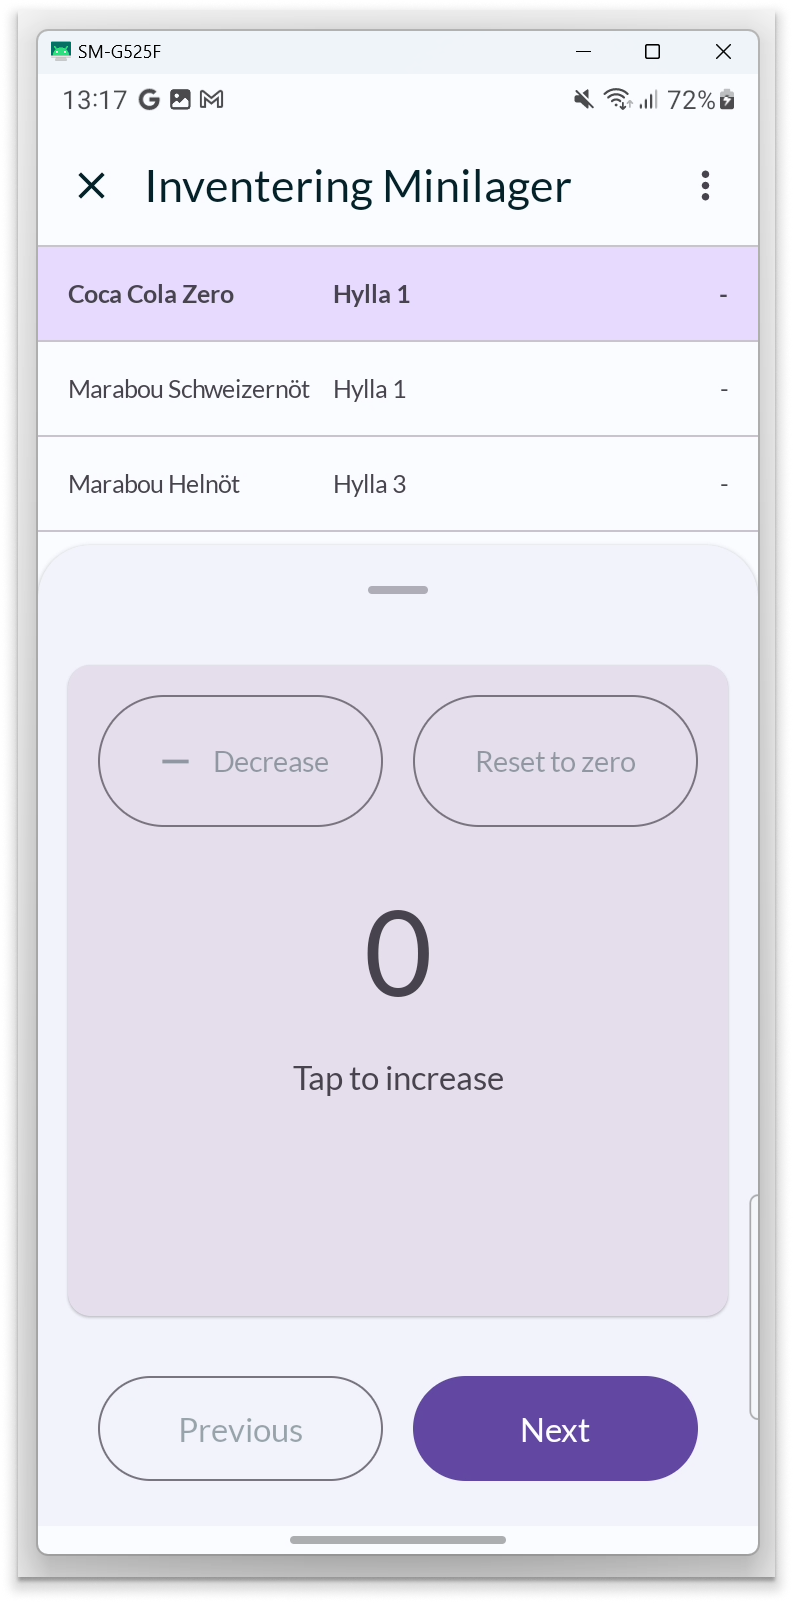
Press on an article row to input what you have counted. You can then easily proceed to the next article by pressing NEXT.
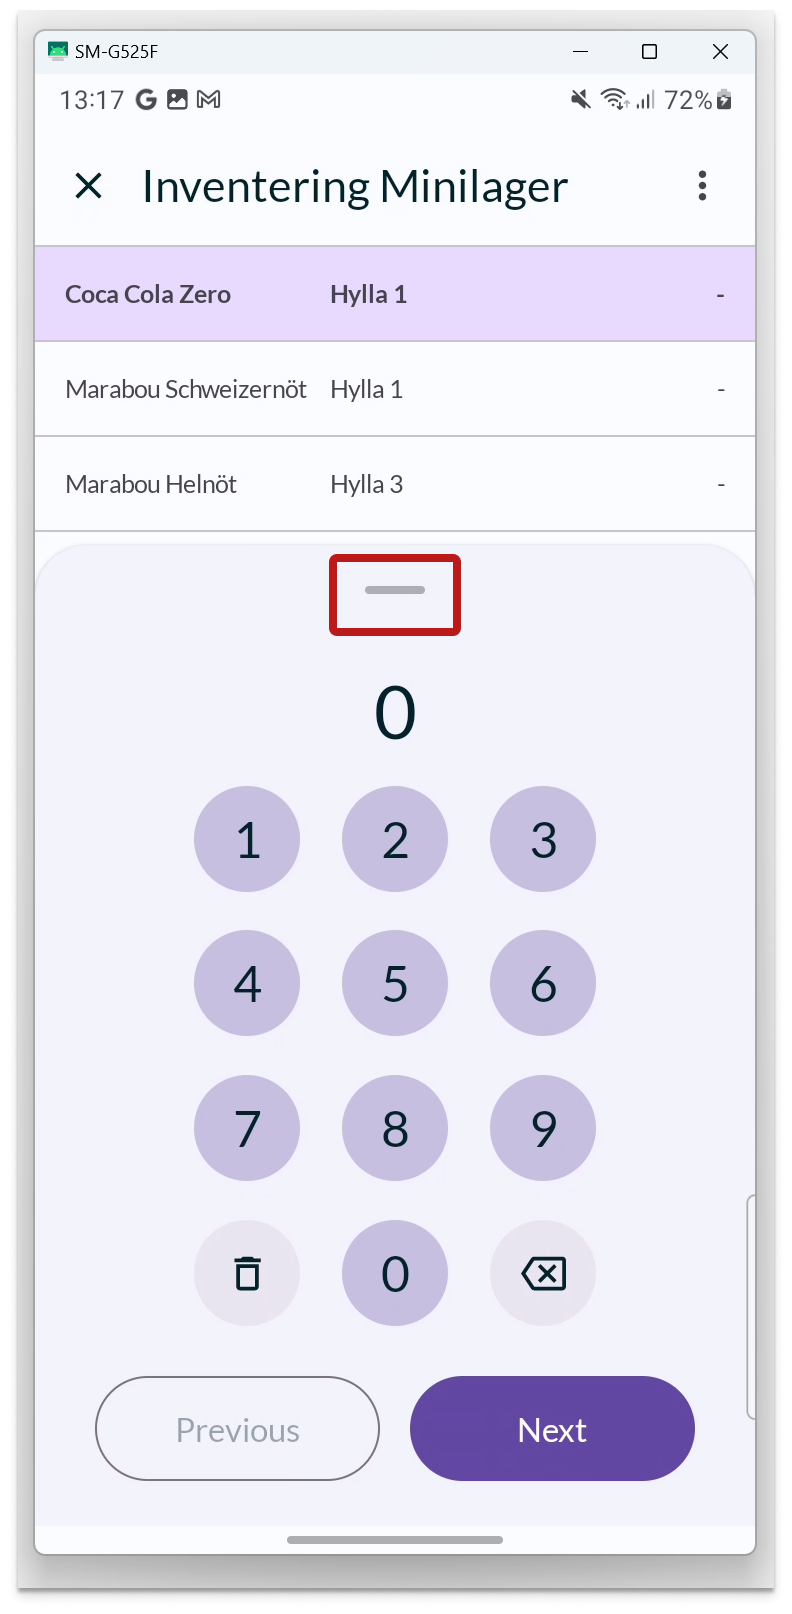
To collapse the window, swipe down on the indicator at the top.
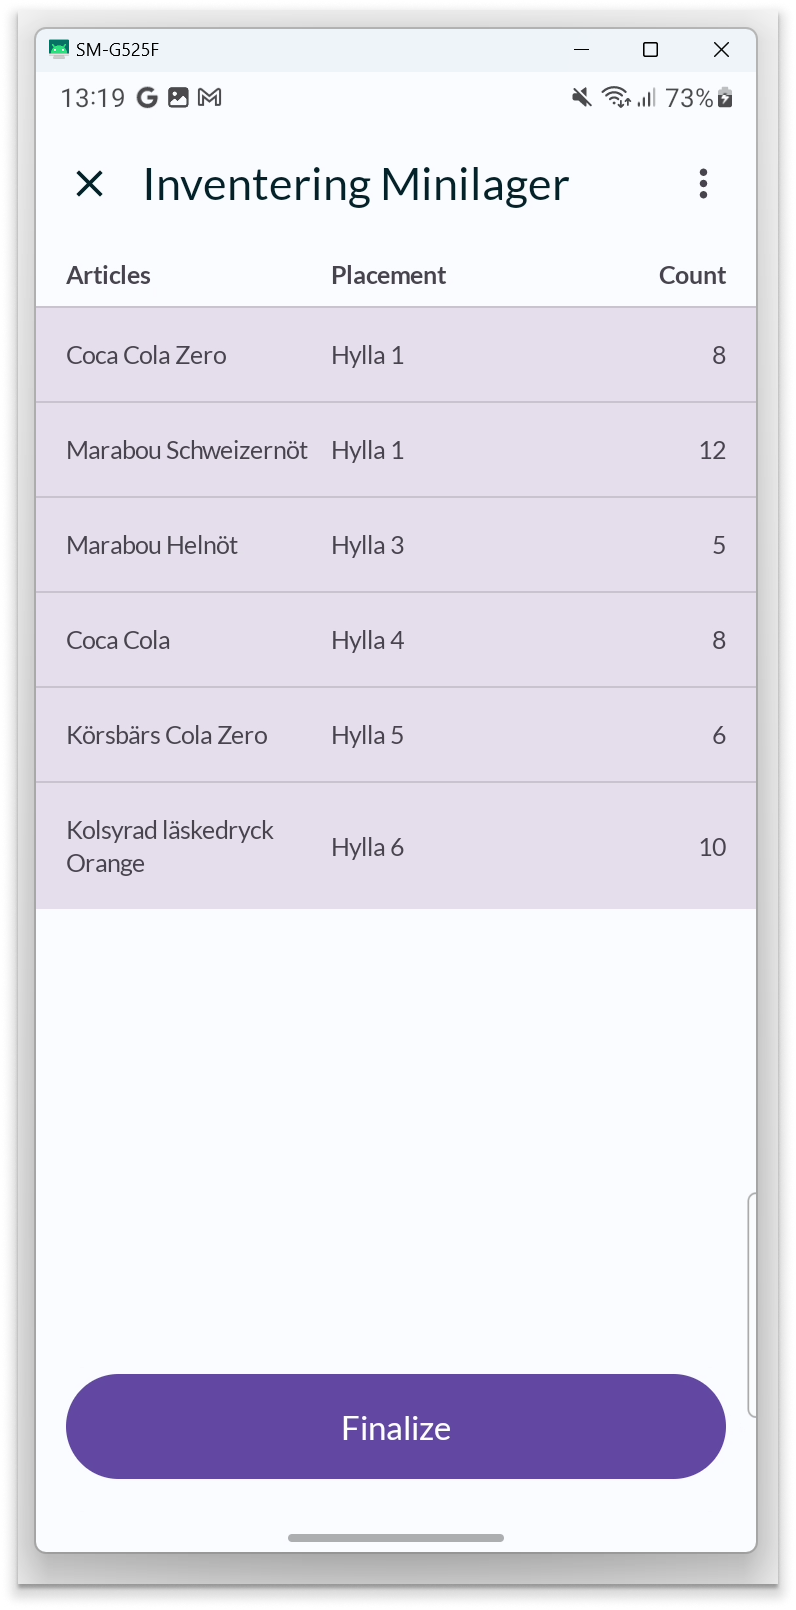
- When you have counted all your articles, press FINALIZE.
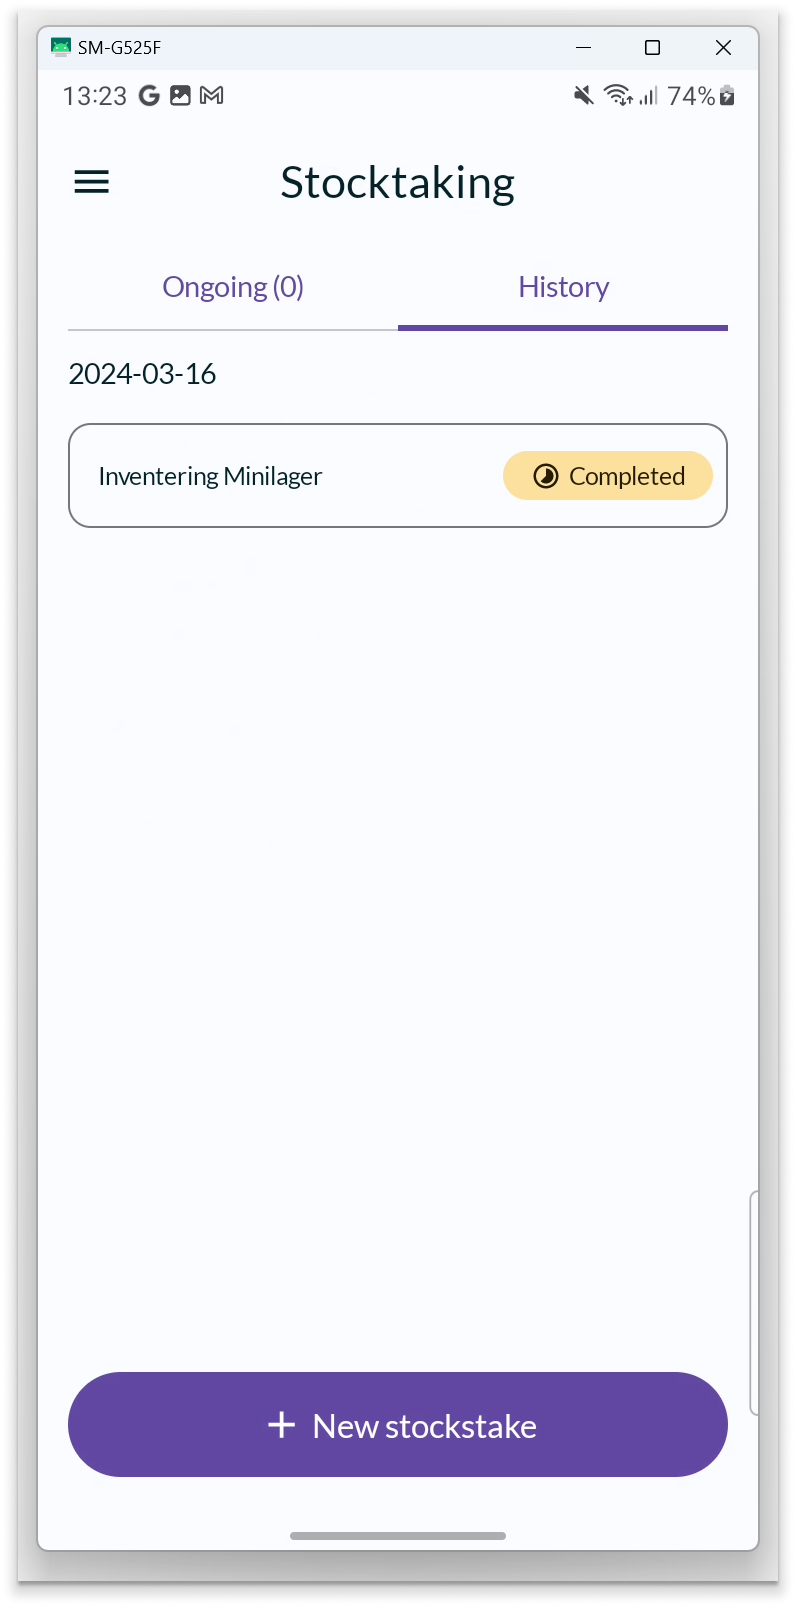
- The stocktake now appears under the "History" tab, where it has the status "Completed", until someone reviews and approves it from BackOffice. The reviewer will see the result of what you have counted and compare it with the inventory balance.
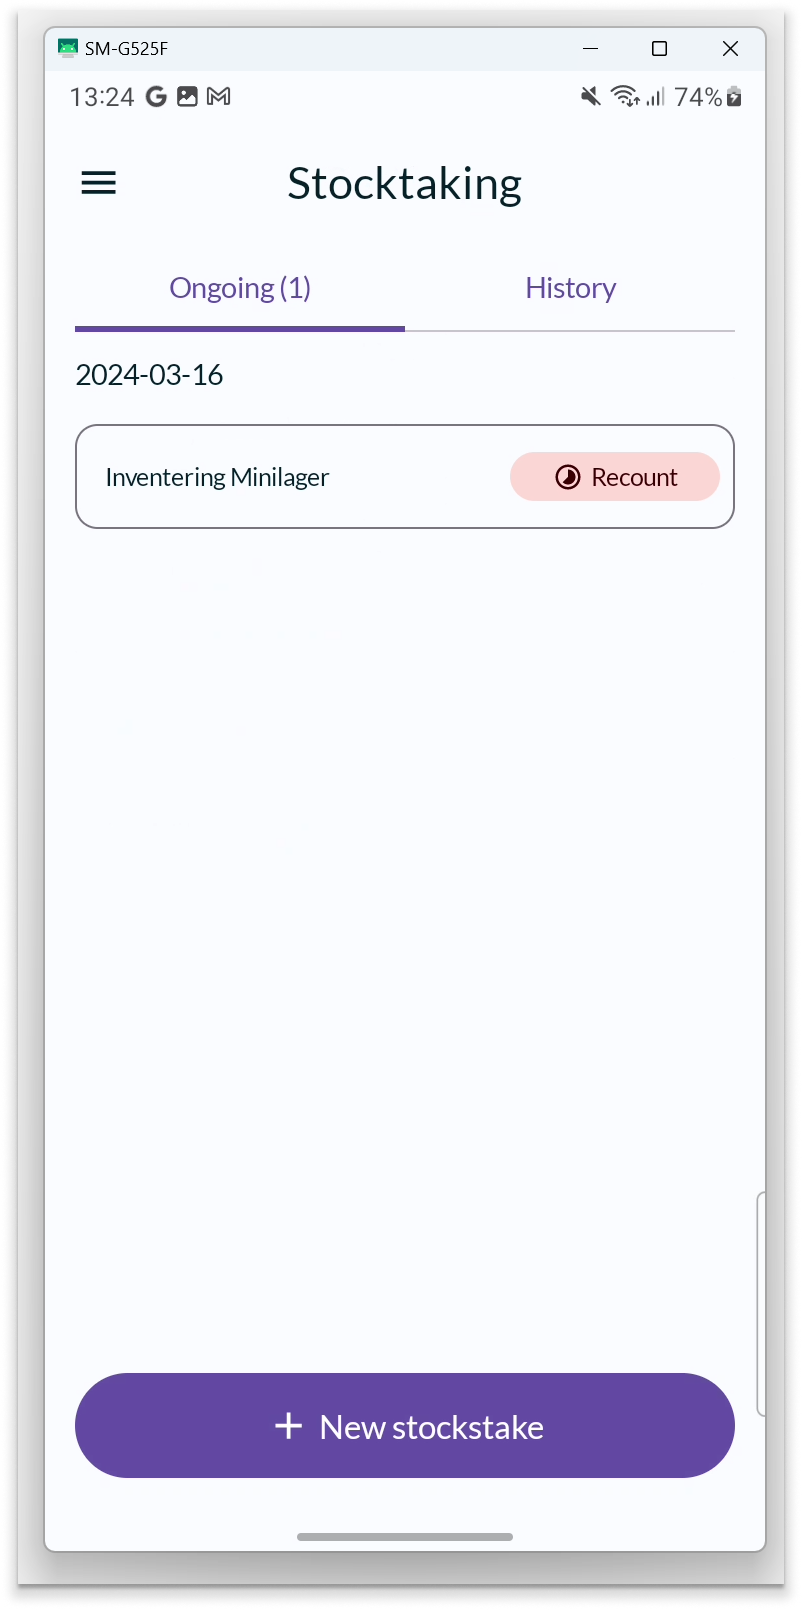
If there are discrepancies among the articles, the stocktake may need to be recounted. It will then reappear under the "Ongoing" tab with the status "Recount". You will only need to recount the articles where what you have counted differs from the inventory balance.
Once the stocktake has been approved, it will instead appear under the "History" tab with the status "Approved".
Error messages
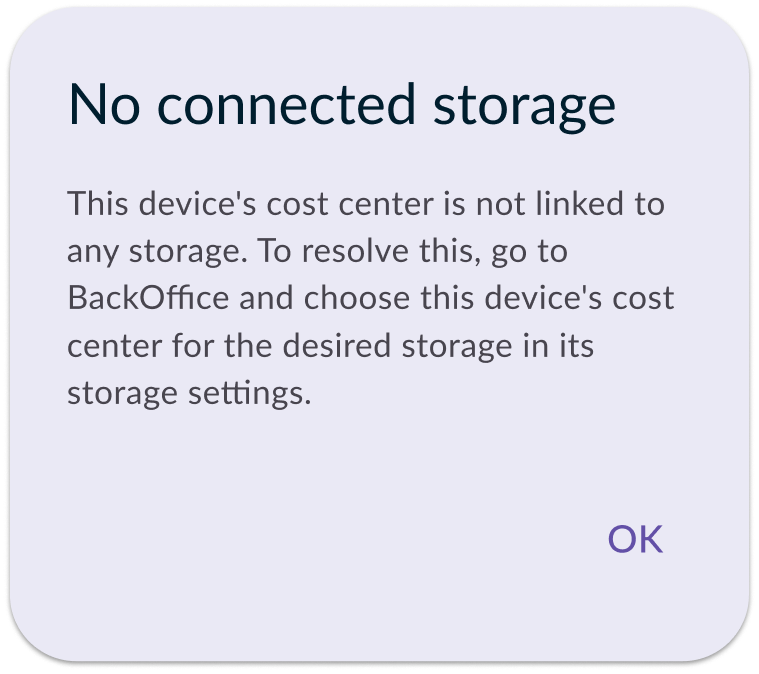
No connected storage
The error message appears if there is no storage with the same cost center as the cash register's cost center. To resolve this, go to BackOffice and select the cash register's cost center for the desired storage in the storage settings.
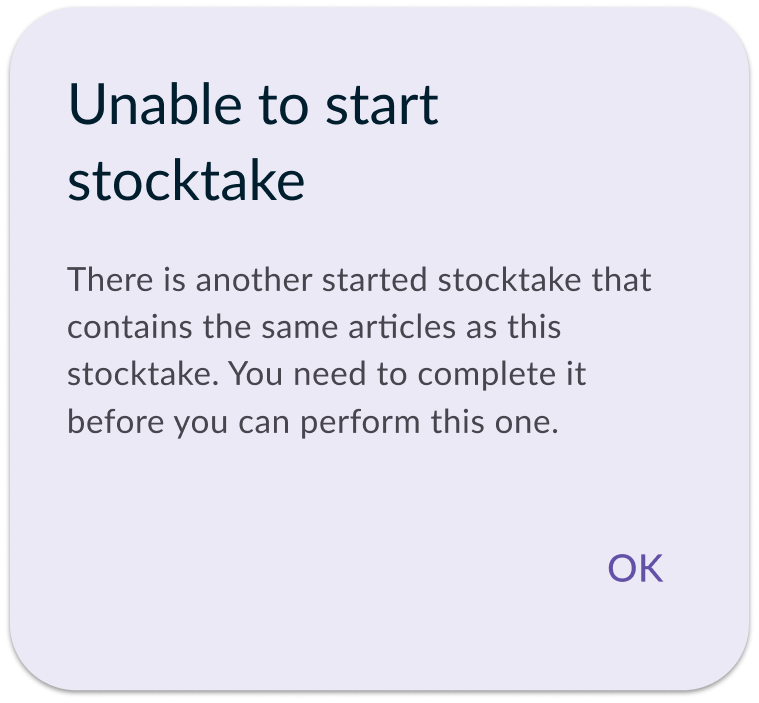
Unable to start stocktake
The error message appears if you try to conduct a stocktake where some articles also exist in another stocktake for the same storage that has not yet been approved (and therefore completed). Make sure that previous stocktakes are approved before starting this one.
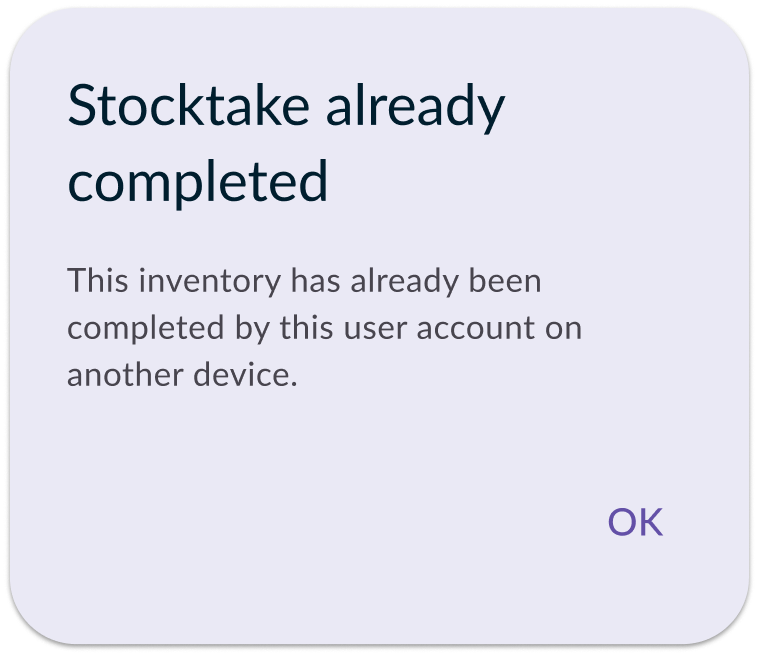
Stocktake already completed
The error message appears if you try to submit a stocktake that has already been completed from another device.

Stocktake has been deleted
The error message appears if you try to submit a stocktake that someone has deleted in BackOffice while you have been accessing it.
Guidelines for stocktaking
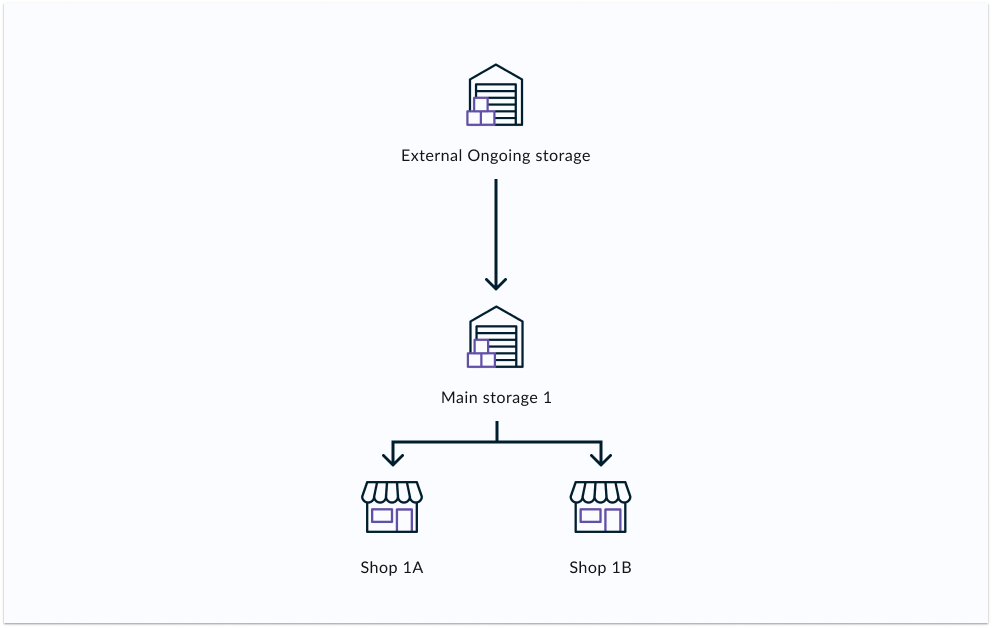
If your company has an Enterprise structure with a larger main storage and several smaller storages (for example, a franchisee), there are certain guidelines to follow to ensure inventory accuracy. In this scenario, the main storage regularly receives goods from an external Ongoing storage and also sends out goods to the smaller storages on a daily basis.
Guidelines for stocktaking of the main storage:
Isolated stocktaking process
Stocktaking of the main storage should be conducted as a separate and independent process without being influenced by other activities. This is because the inventory balance of the main storage decreases when an order is marked as 'Completed', and to avoid misunderstandings about what should be counted or not counted in the stocktake.
Finalize stocktake before processing orders
Before any orders are picked or delivered from the main storage, the stocktake should be finalized. This is to avoid inaccuracies in the inventory balance and to ensure that everything is counted correctly.
No withdrawals or deliveries during stocktaking
During ongoing stocktaking of the main storage, neither withdrawals nor deliveries should take place to avoid inaccuracies in the stocktake.
Stocktake does not need immediate approval
The stocktake of the main storage needs approval to be considered finalized, but it does not need to happen immediately after the stocktake has been conducted. As soon as the stocktake is completed, it is possible to start picking orders, etc. However, make sure to approve the main storage's stocktake before starting a new one.
Recount stocktake
If the stocktake of the main storage needs to be recounted, it is important to consider any changes in the inventory balance that may have occurred after the initial stocktake. For example, if goods have arrived from the external Ongoing storage or deliveries have been made to the smaller storages, this may have affected the inventory balance.
Guidelines for stocktaking of the smaller storages (which are also sales points):
Isolated stocktaking process
Stocktaking of the smaller storages should be conducted as a separate and independent process without being influenced by other activities.
Complete stocktake before delivering orders from the Main storage
Ensure that the smaller storages are fully inventoried before any orders from the main storage are delivered to them. This is important because the inventory balance increases upon delivery of orders, which can lead to confusion for the seller regarding the stocktake.
No sales or deliveries during stocktaking
During ongoing stocktaking of the smaller storages, neither sales nor deliveries should take place to avoid inaccuracies in the stocktake.
Stocktake does not need immediate approval
A representative from the main storage needs to approve the stocktakes of the smaller storages for them to be considered finalized, but it does not need to happen immediately after the stocktake has been conducted. As soon as the stocktakes are submitted (and they have the status 'Completed'), the sellers can receive deliveries and conduct sales. However, make sure to approve the stocktakes of the smaller storages before the sellers proceed with the next stocktake of their storage.
Recount stocktake
Regarding requests for recounting of the stocktakes of the smaller storages, it is important to clearly inform the seller about which goods have been added since the initial stocktake. This is especially important if there have been deliveries after the initial stocktake, as these goods need to be included in the updated inventory balance.