BackOffice overview
This guide is designed to provide support staff with a clear understanding of how retail stores use the OPEN One BackOffice. It includes both an introduction to key functions and practical tips for troubleshooting and customer support.
1. Manage articles in BackOffice
Go to the Articles tab - Here you will find an overview of all articles in the system. You can see details and make changes if necessary. Here are some lines that explain what they mean:
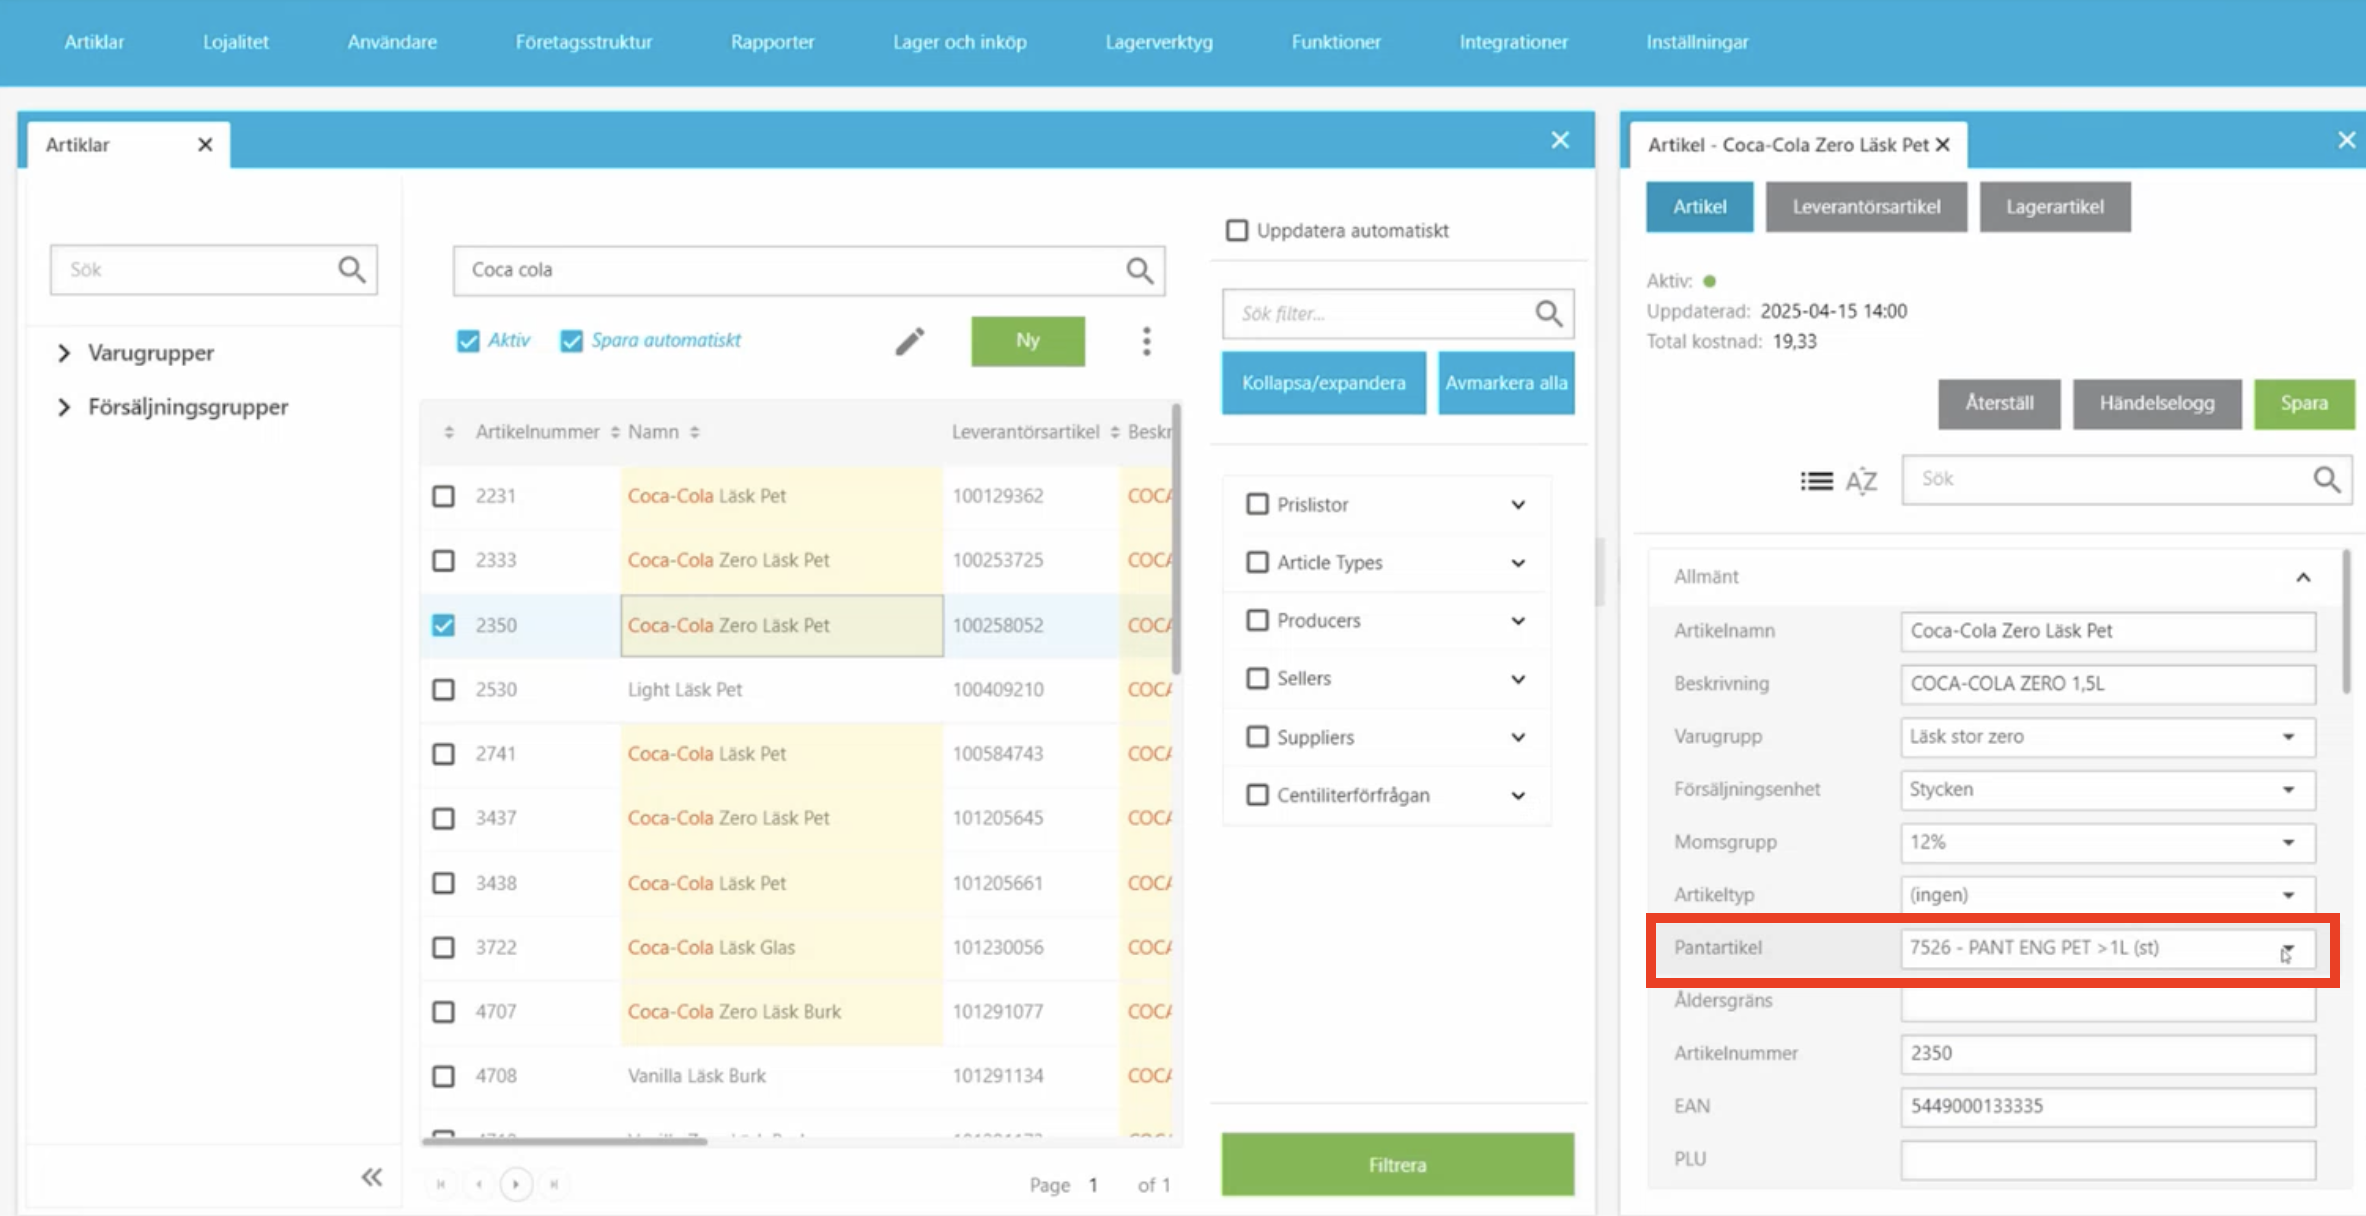
1.1 Deposit
In the article information you can see if an article has a deposit. The deposit is automatically retrieved from the supplier. If you enter the article manually or if something is not correct → check/troubleshoot the deposit here.
1.2 Age limit
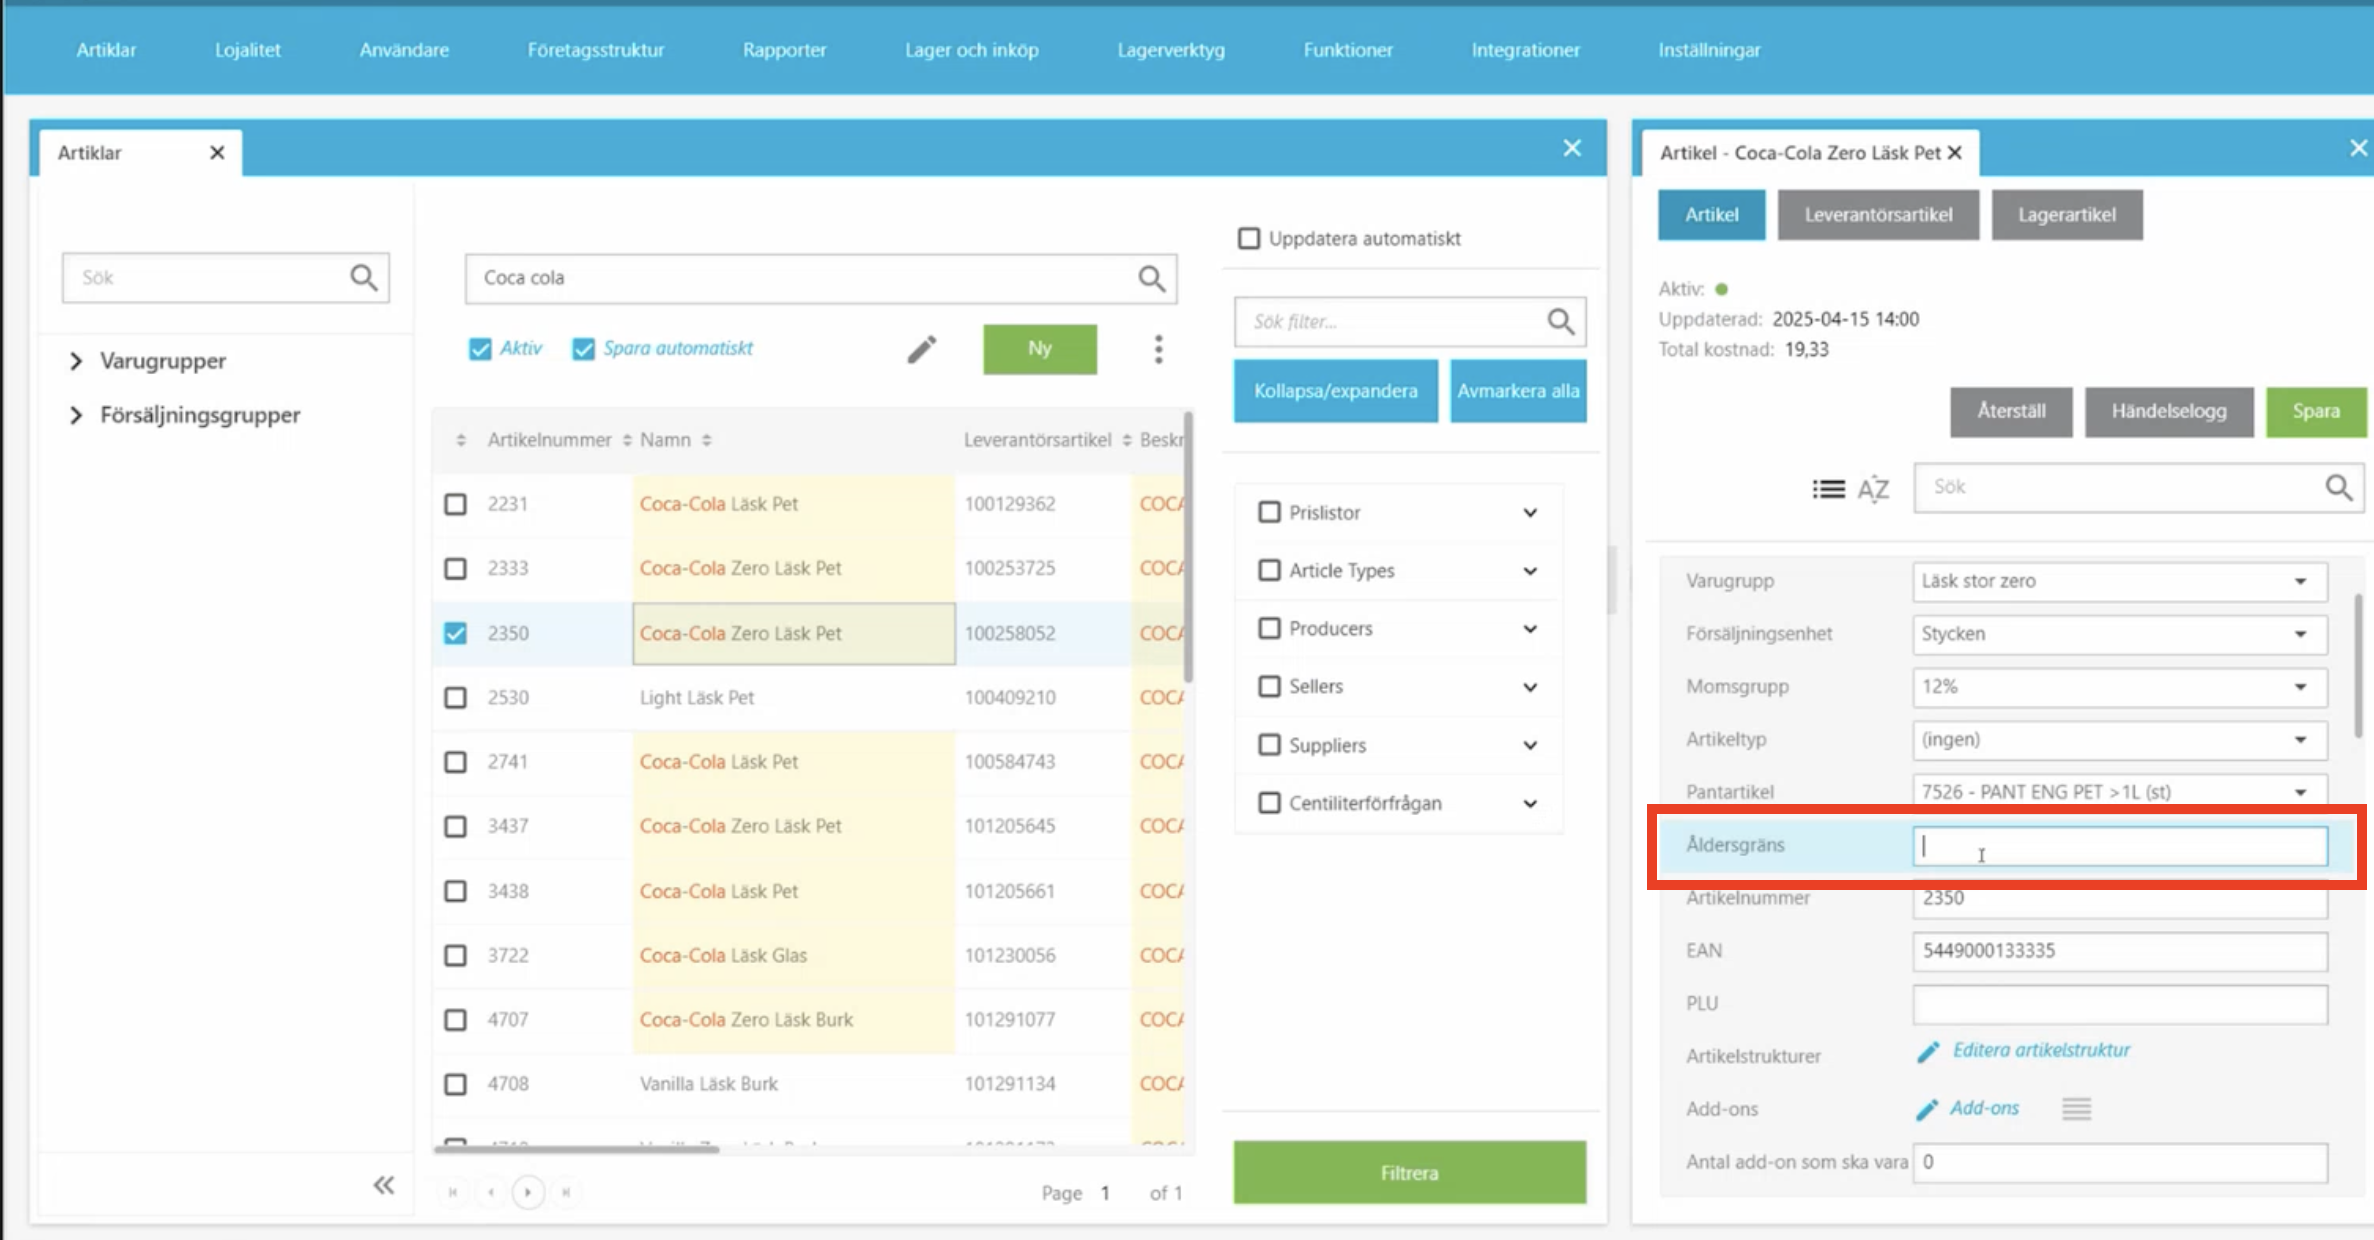
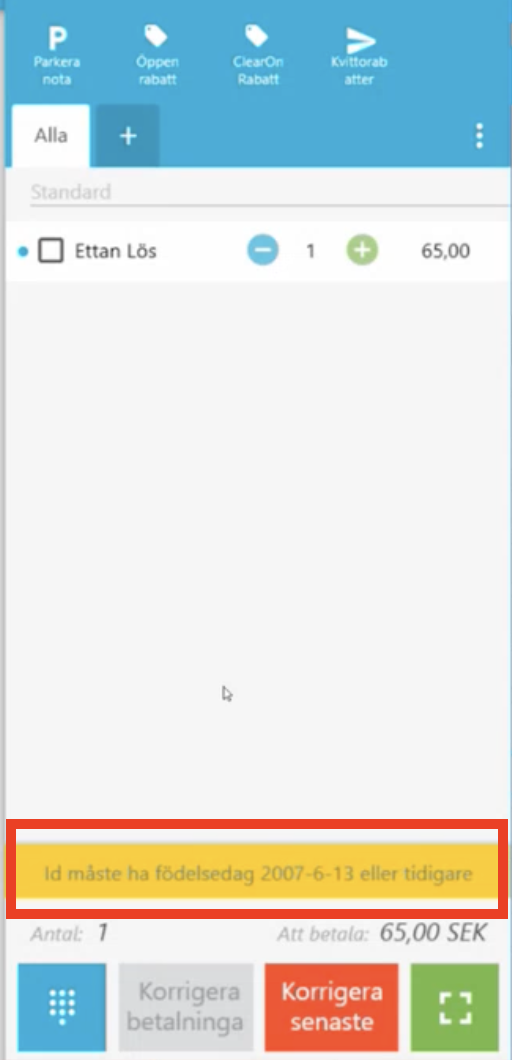
In the Age limit line you can set a specific age limit for the article. Example: 15 years for energy drinks.
Age limit in BackOffice:
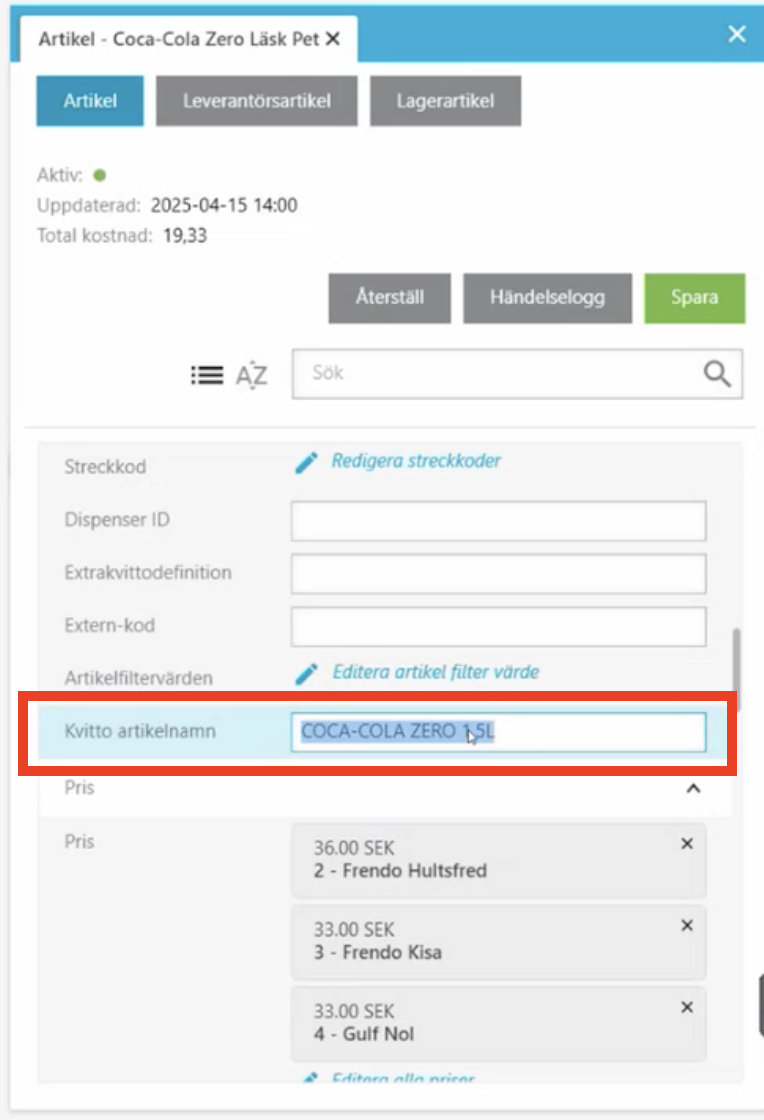
1.3 Receipt article name
1.4 Description
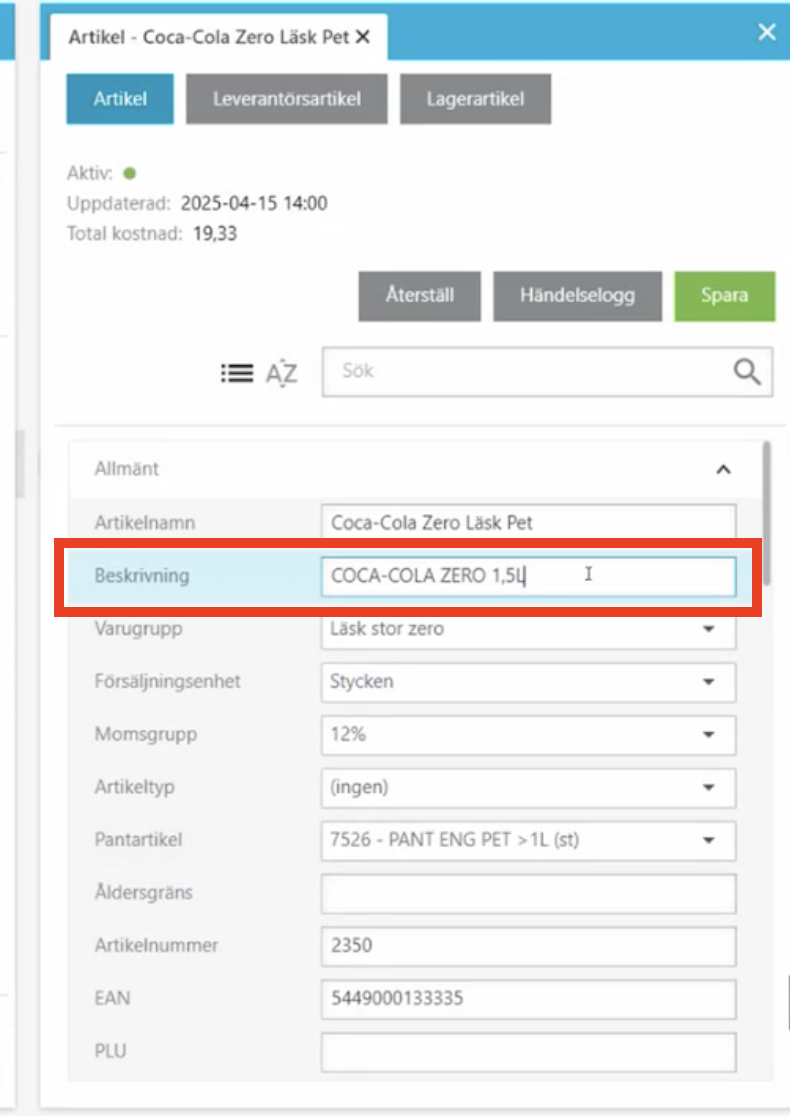
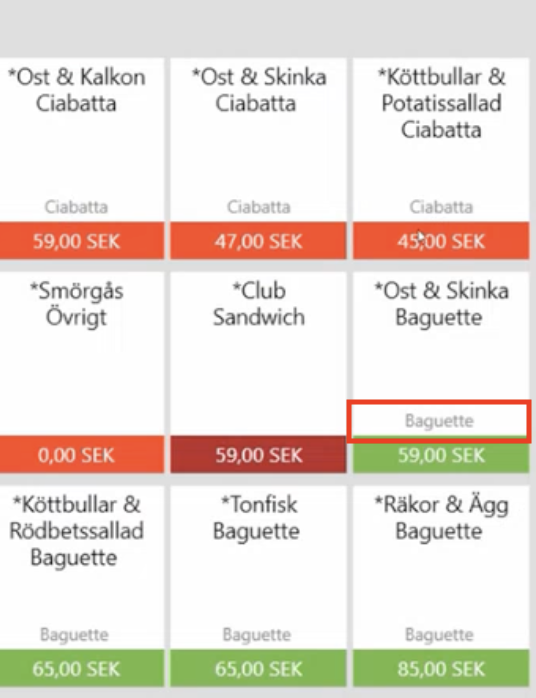
In the Description field you can add an extra explanation of the article. This text is displayed as a light gray “help text” on the article in the checkout view. Good for giving staff more info about the article.
2. Article costs
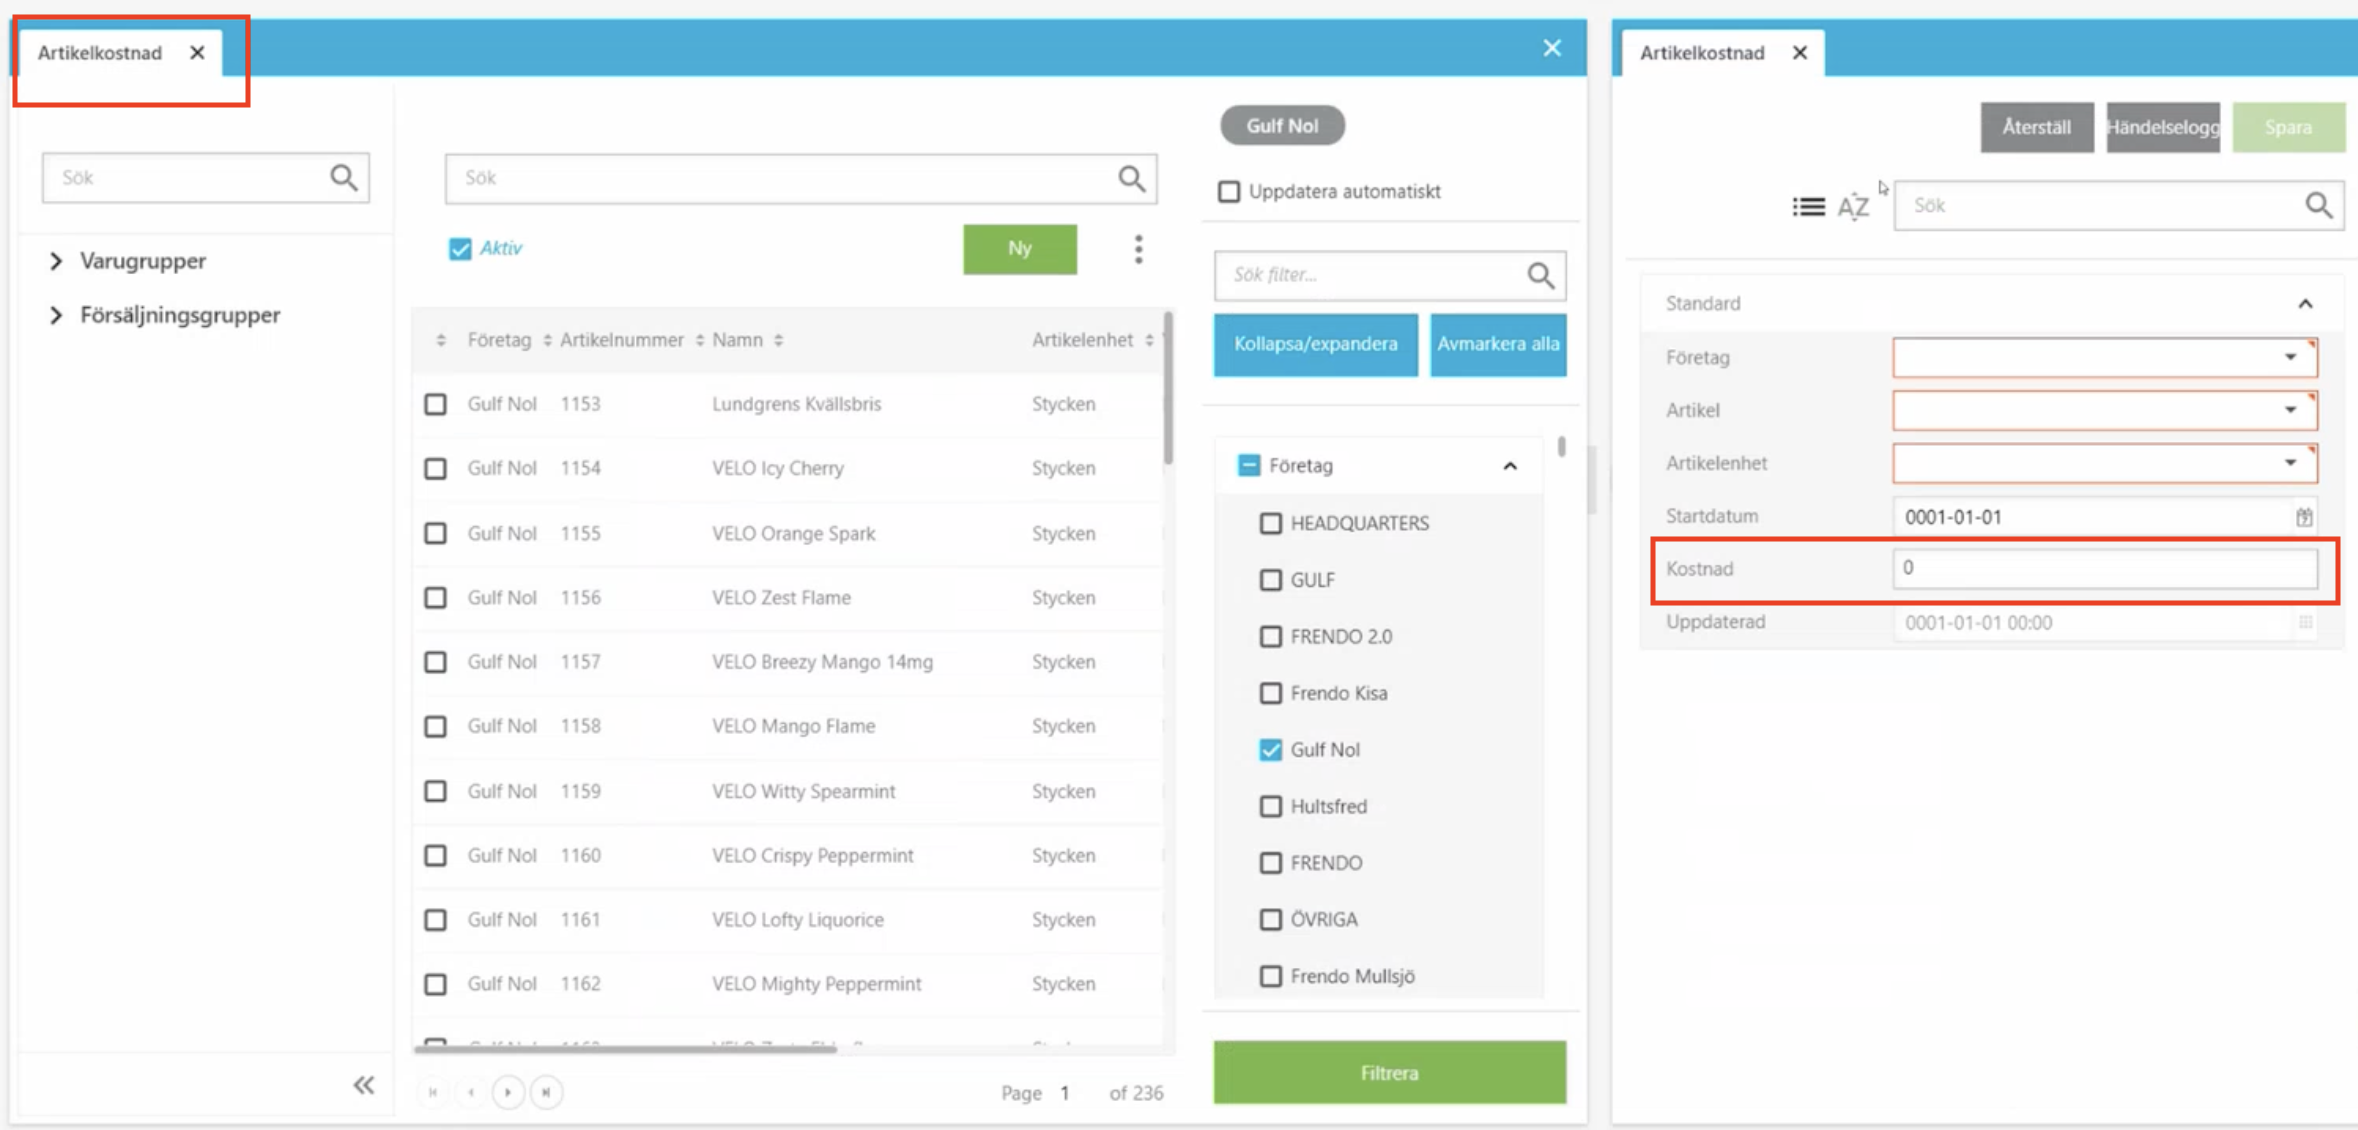
Under article costs you will find all articles that have costs. You can add costs manually, but in all integrations we get costs from the supplier so there is nothing that needs to be done.
3. Mass editing price list entries
Mass editing price list entries is used to change prices for multiple articles at the same time. Instead of changing the price article by article.
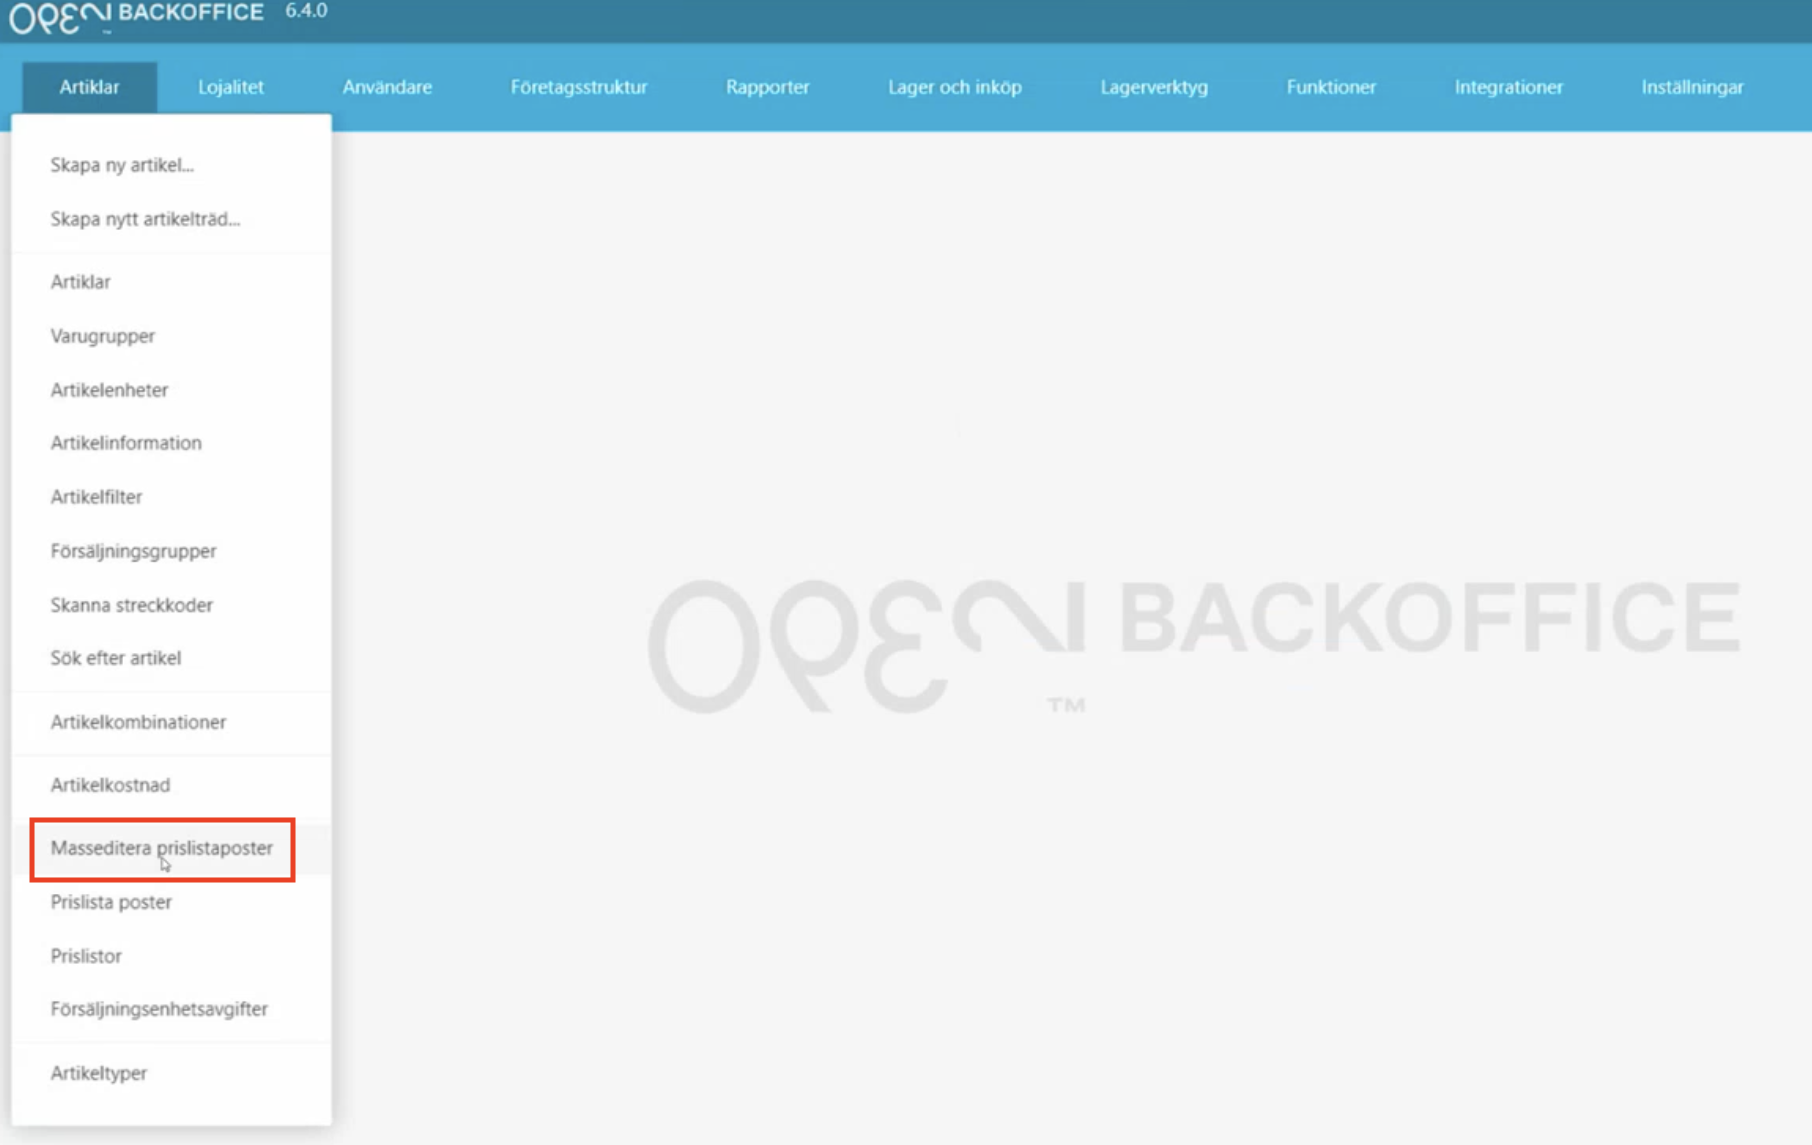
- To mass edit a price for articles, go to articles and select Mass editing price list entries.
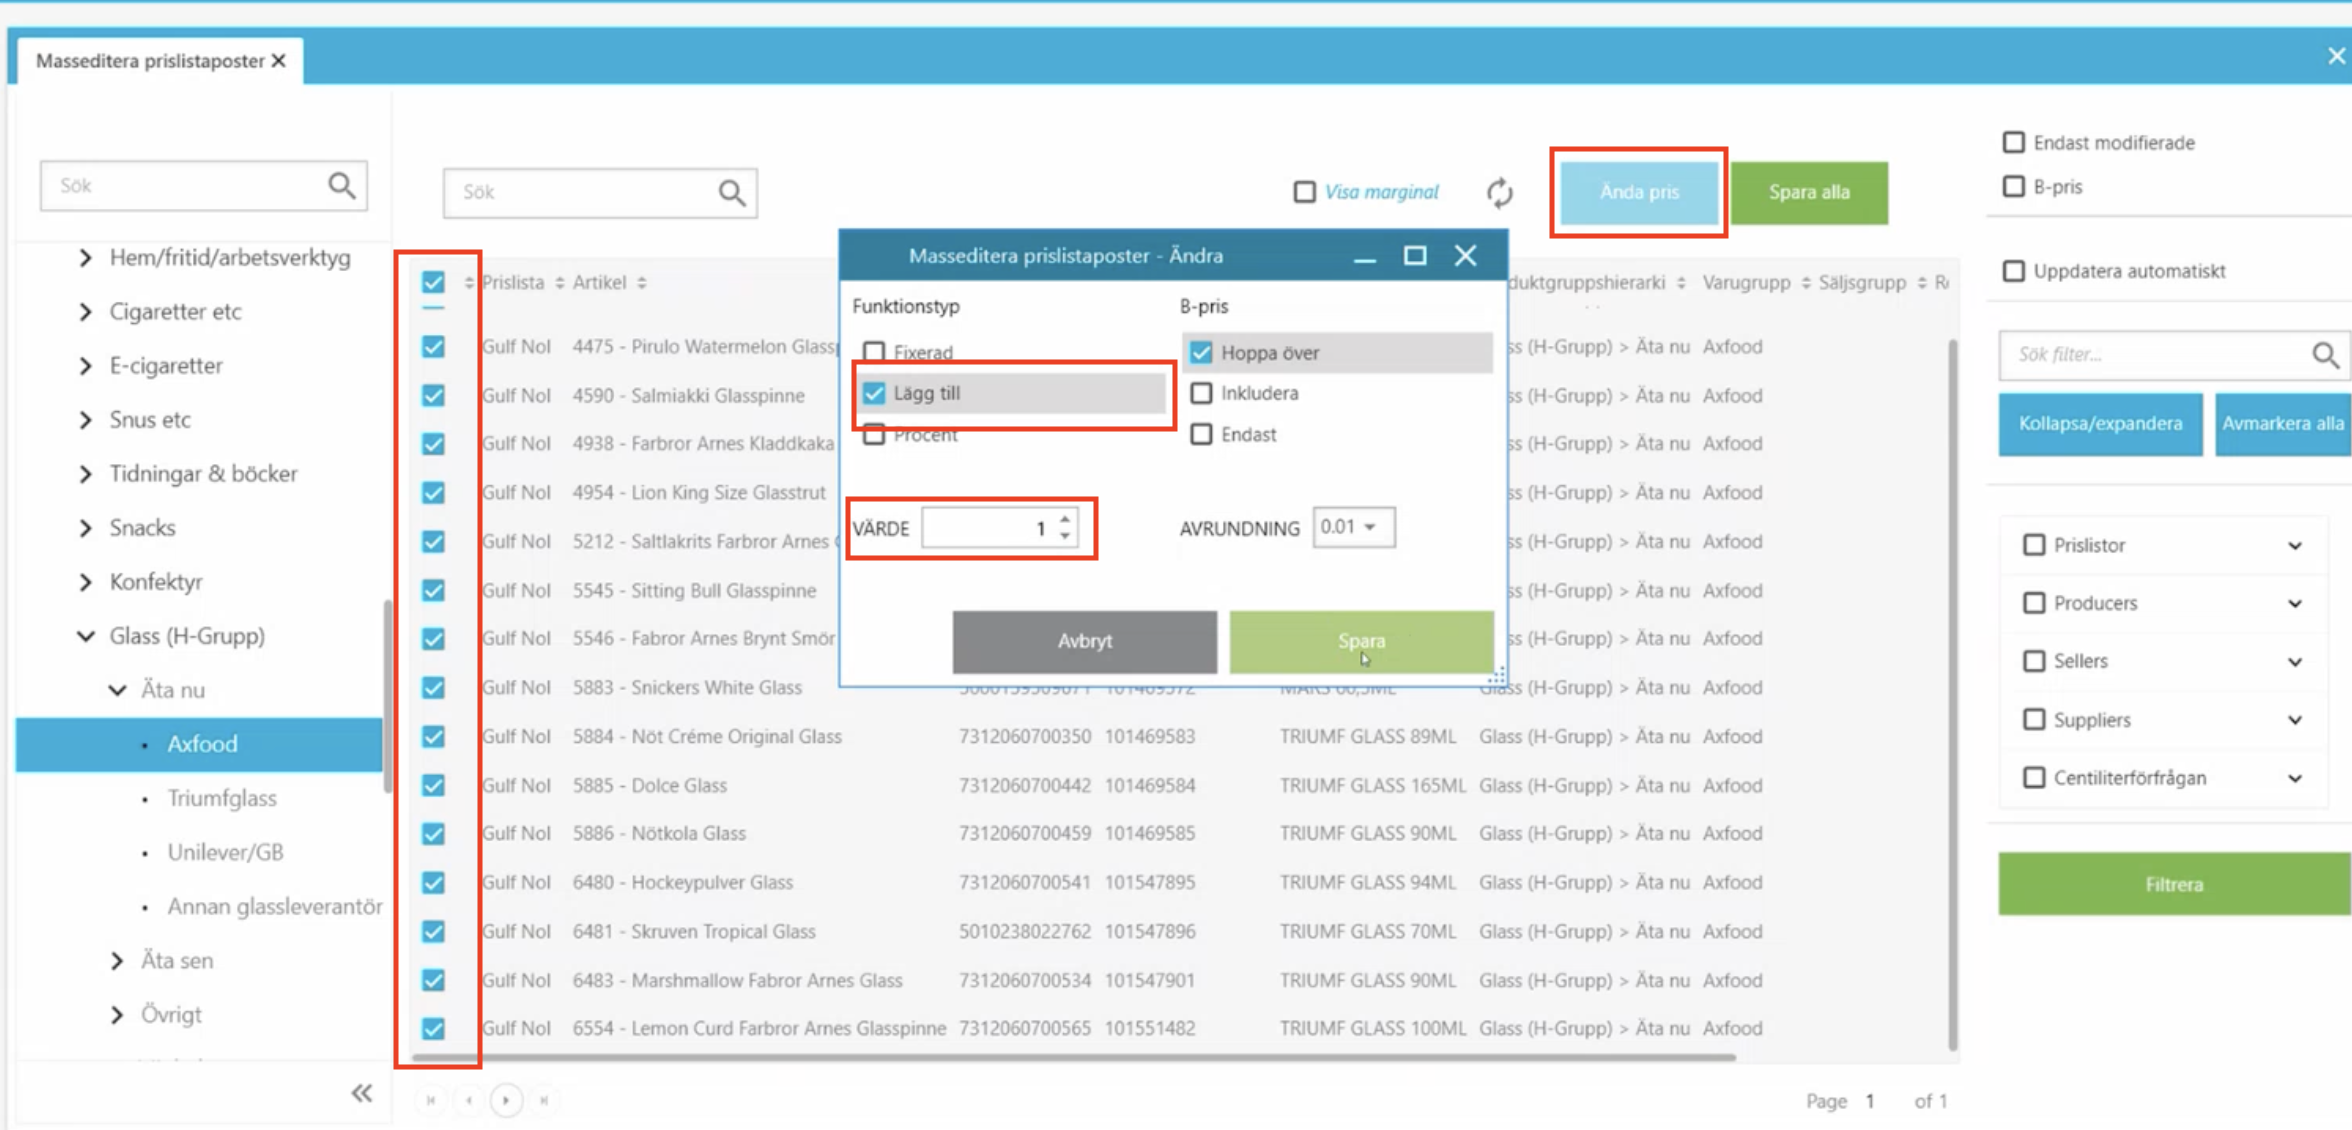
- To the left of the table that appears, you can filter by product groups or sales groups, and then choose to filter further by supplier, for example.
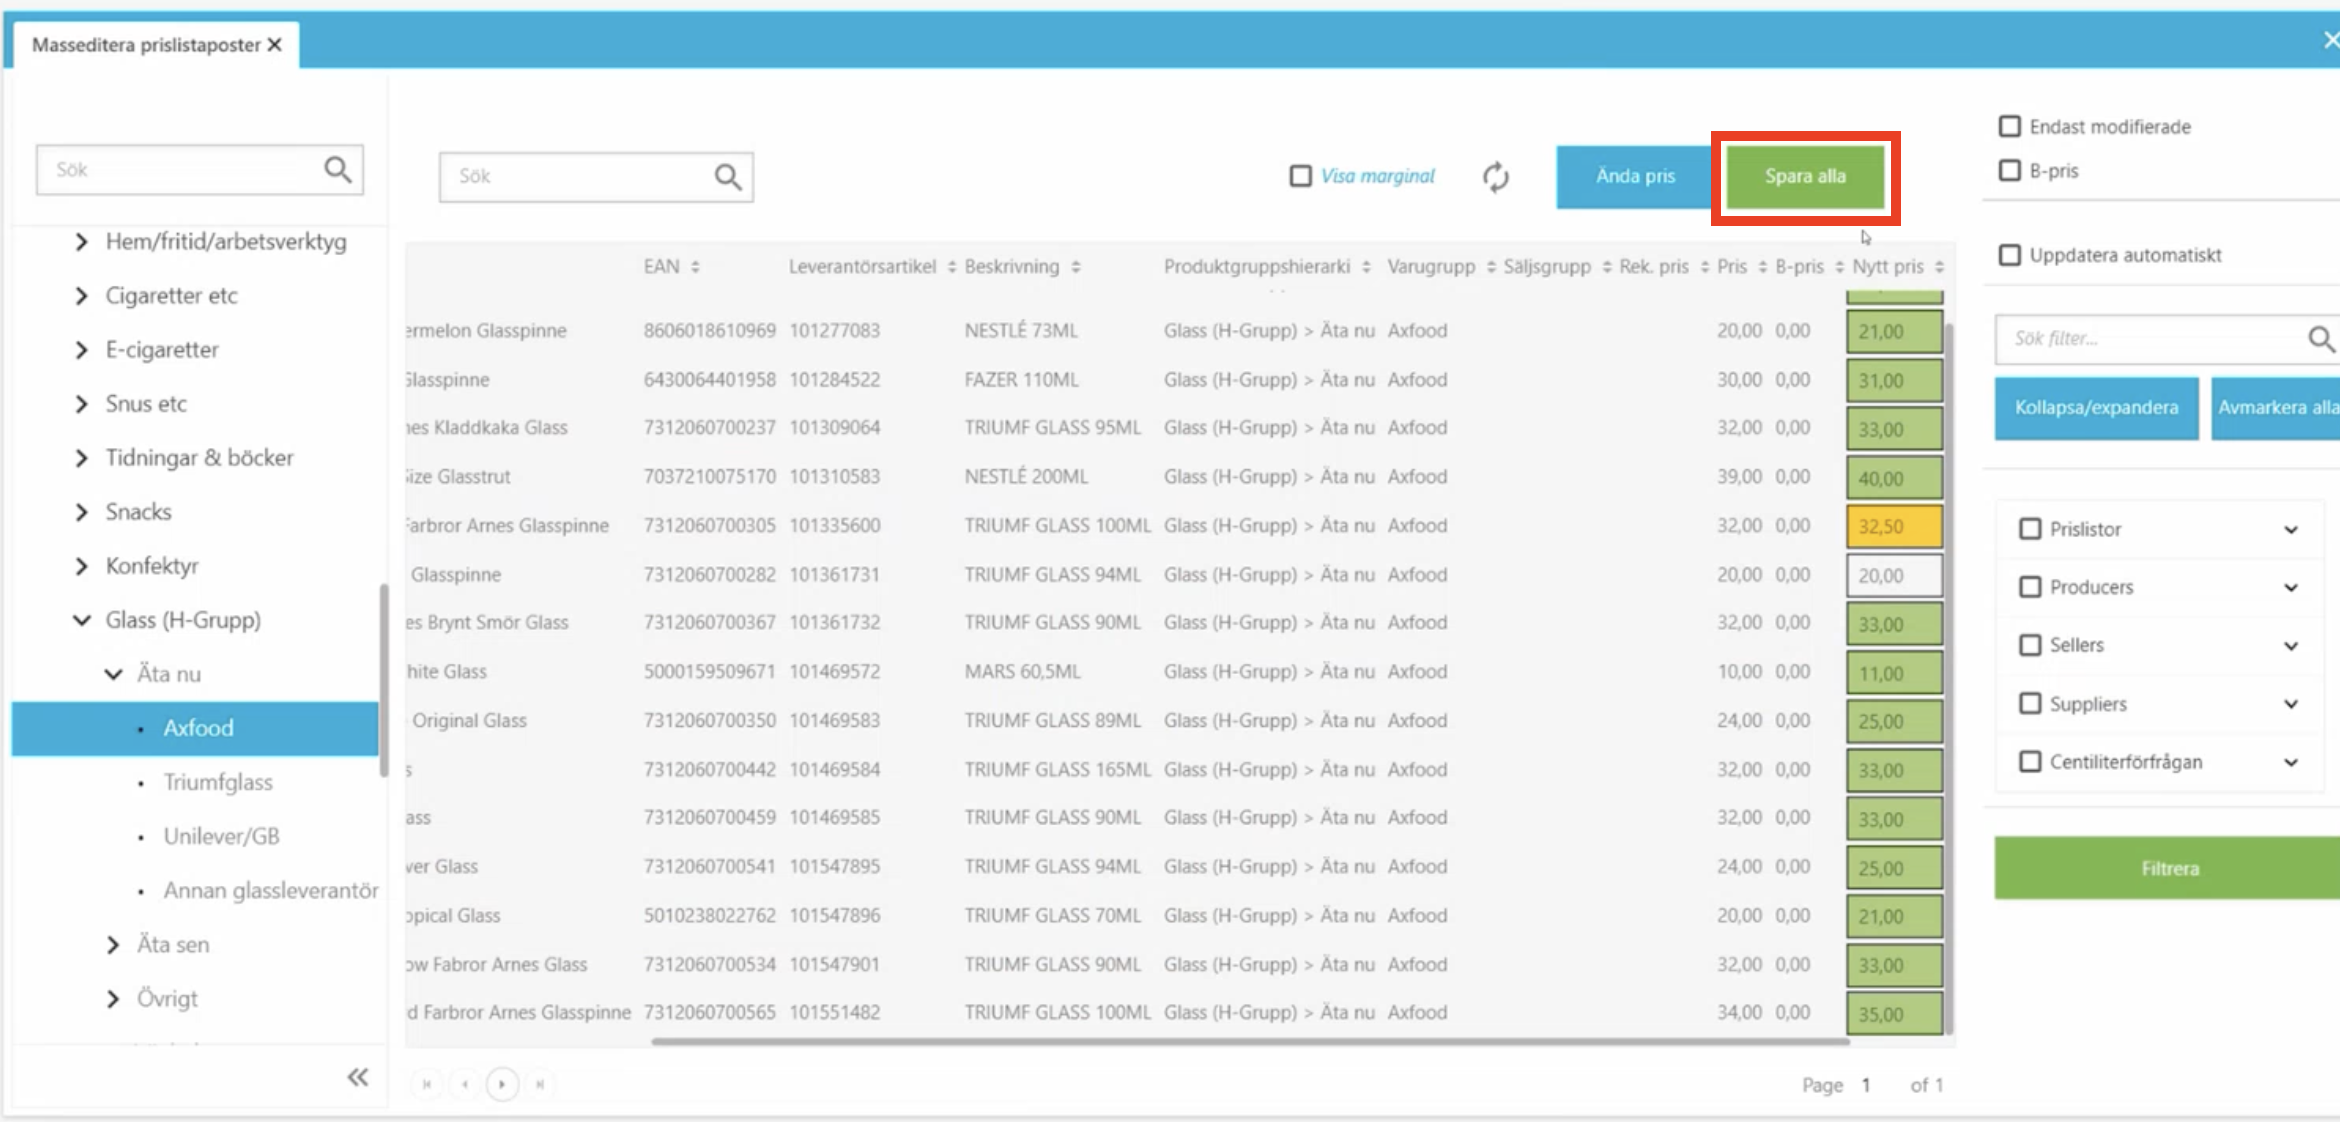
- When you have filtered out the desired articles, check all the articles. Click the change price button above the table on the right. You can then add, for example, 1 krona to all of them. The new price is displayed in a green column. You can also go in and change the price per row (manually).
- Then when you have made all the changes, click save all, which is above the table on the right.
4. Article import
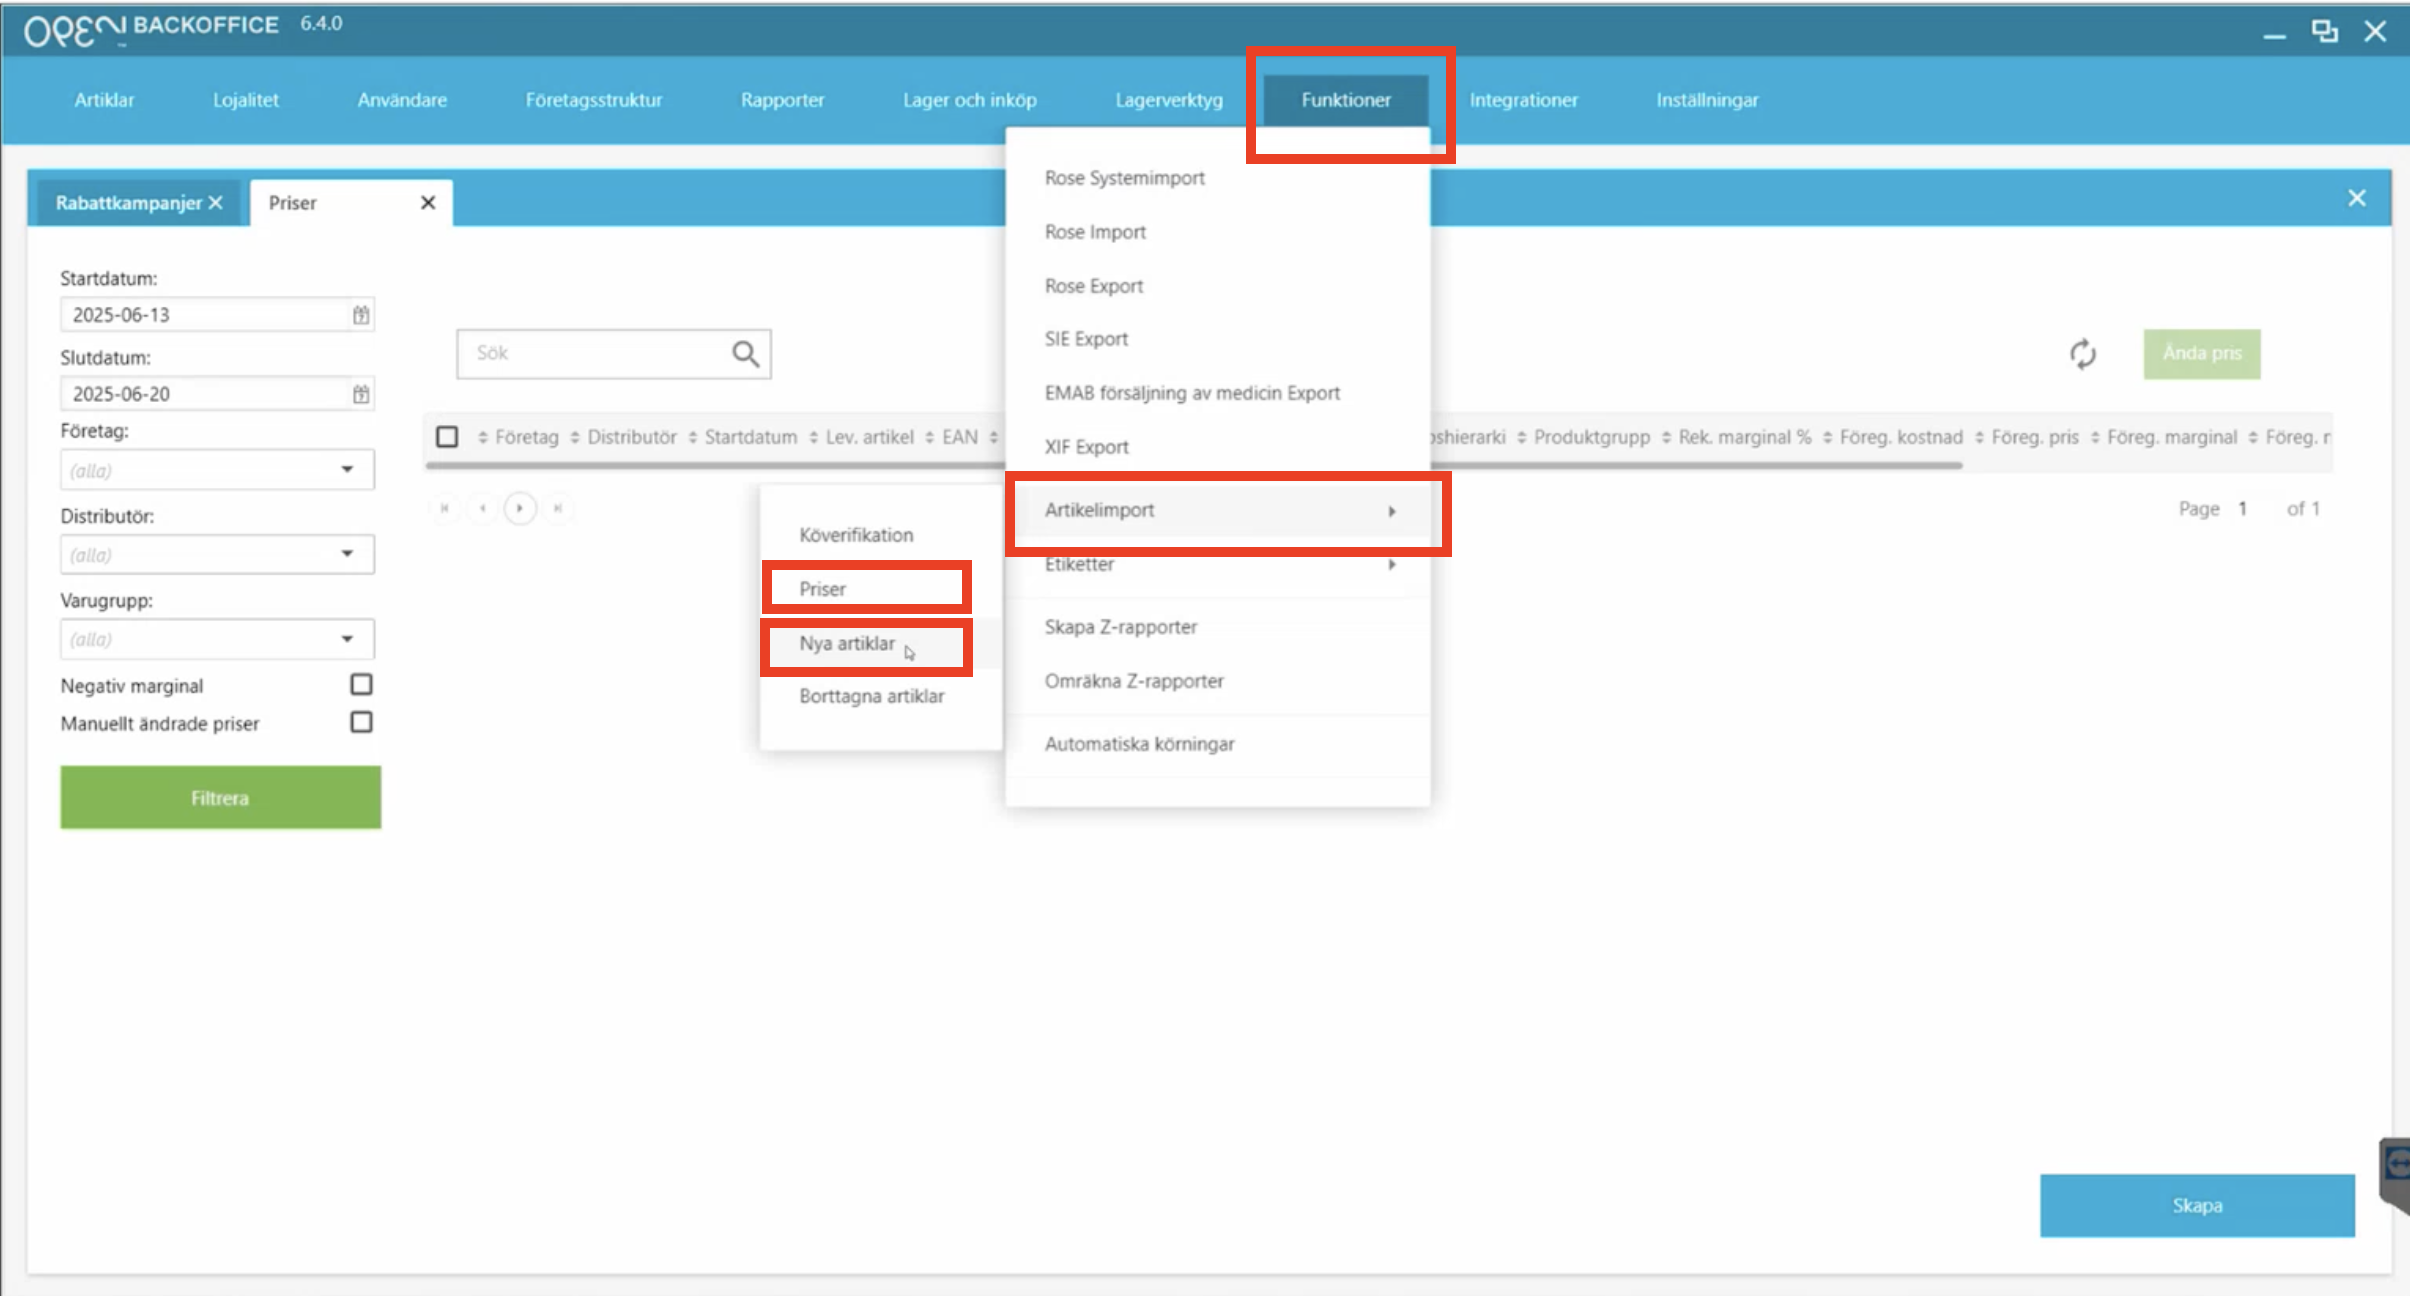
At Article import, there are two views in BackOffice that will be used. Under functions, you will find Article import, then go to Prices (tab) and New articles (tab).
4.1 Prices
Under prices, you will find the articles that are already in the system and those that are already in their price list, but they have received updates. If there is a field that is marked yellow, it shows that something has changed.
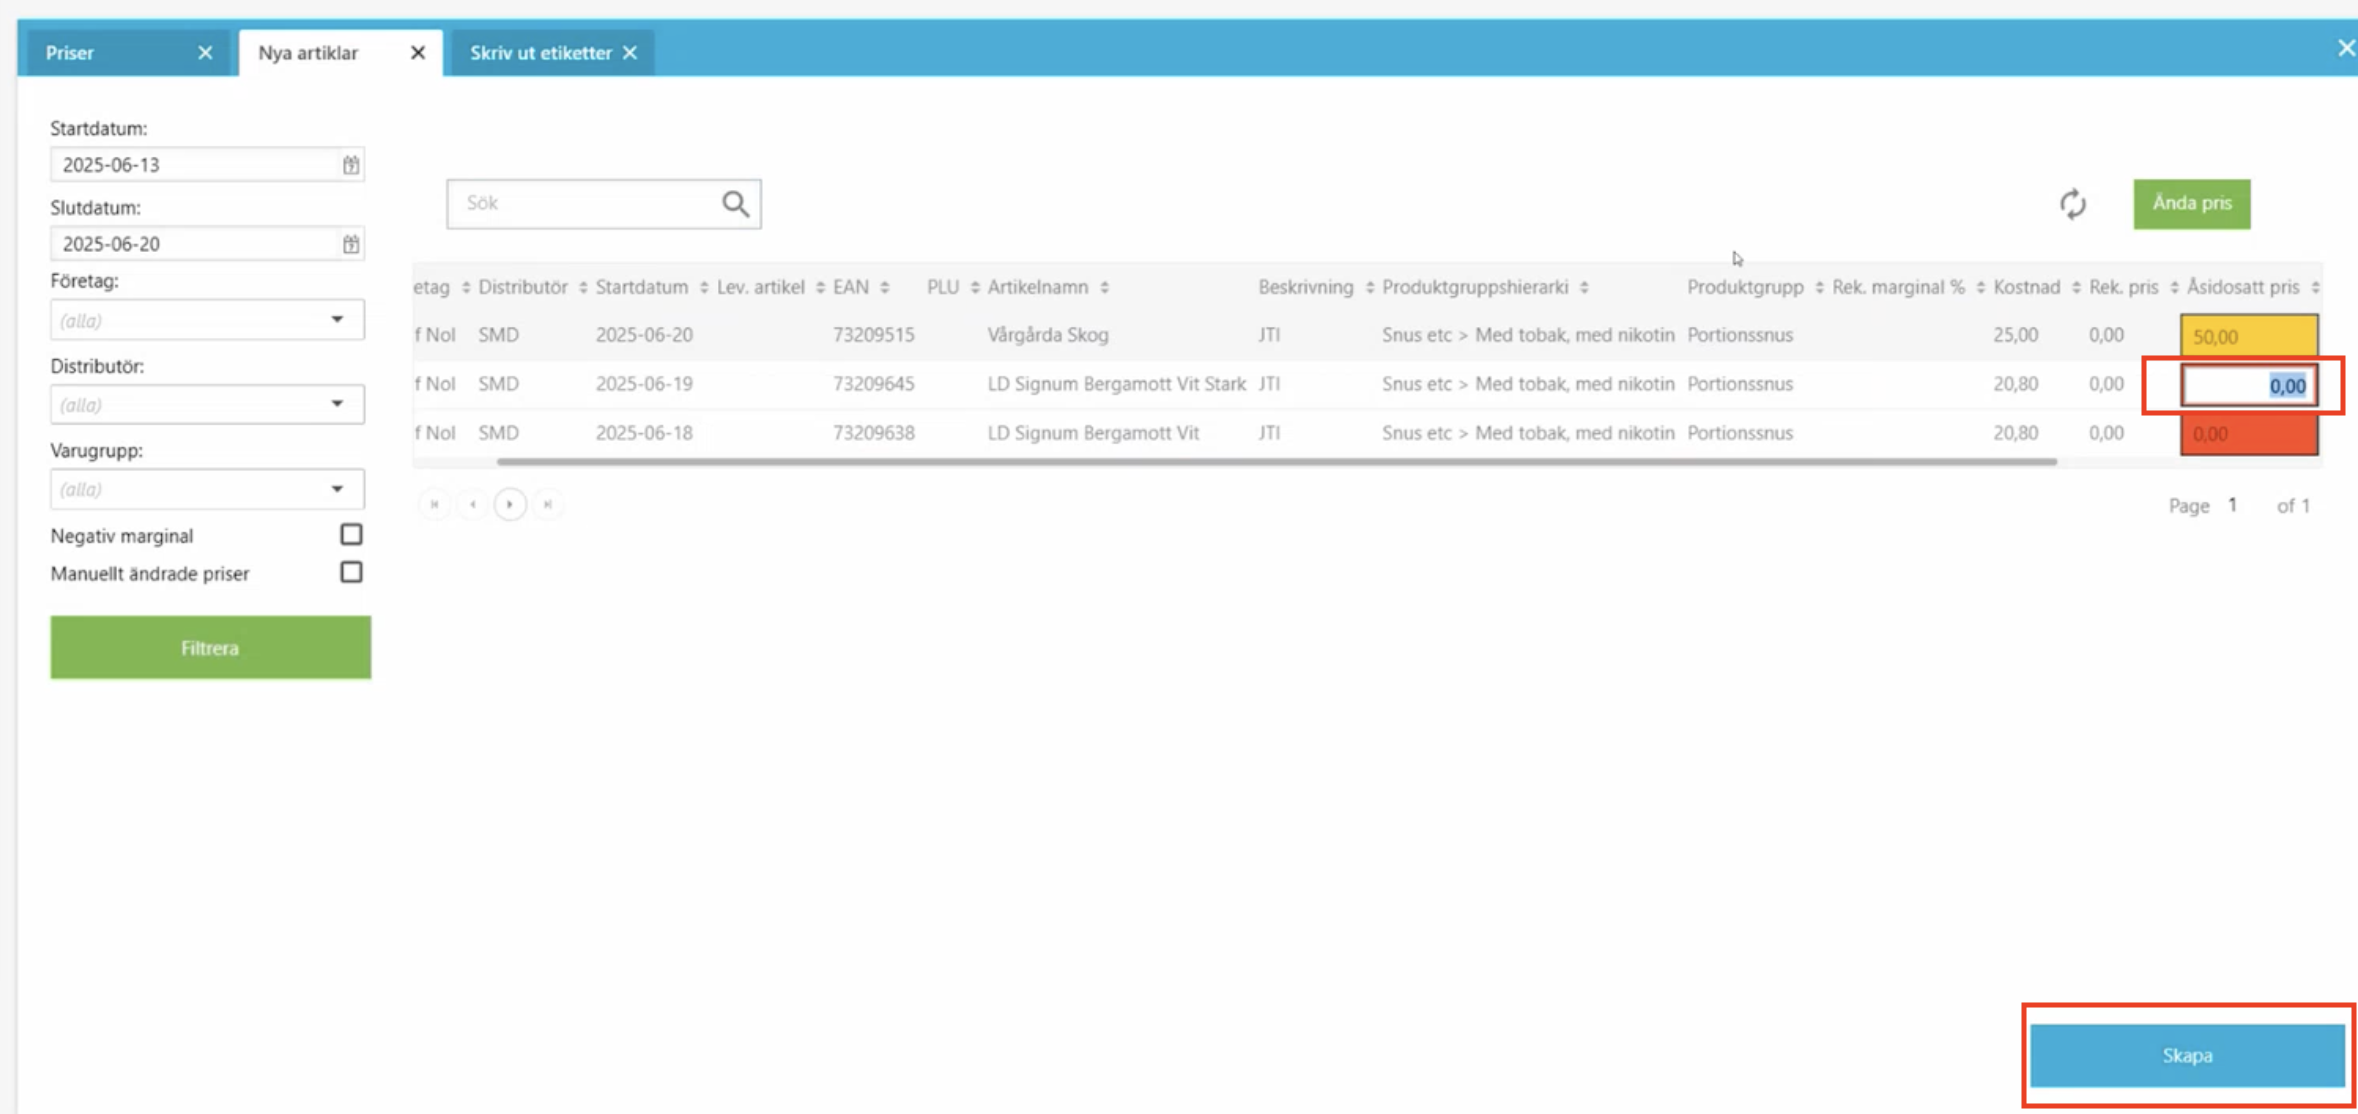
Override price is the price that the customer will sell and Recommended price is the price that the supplier recommends that you take.
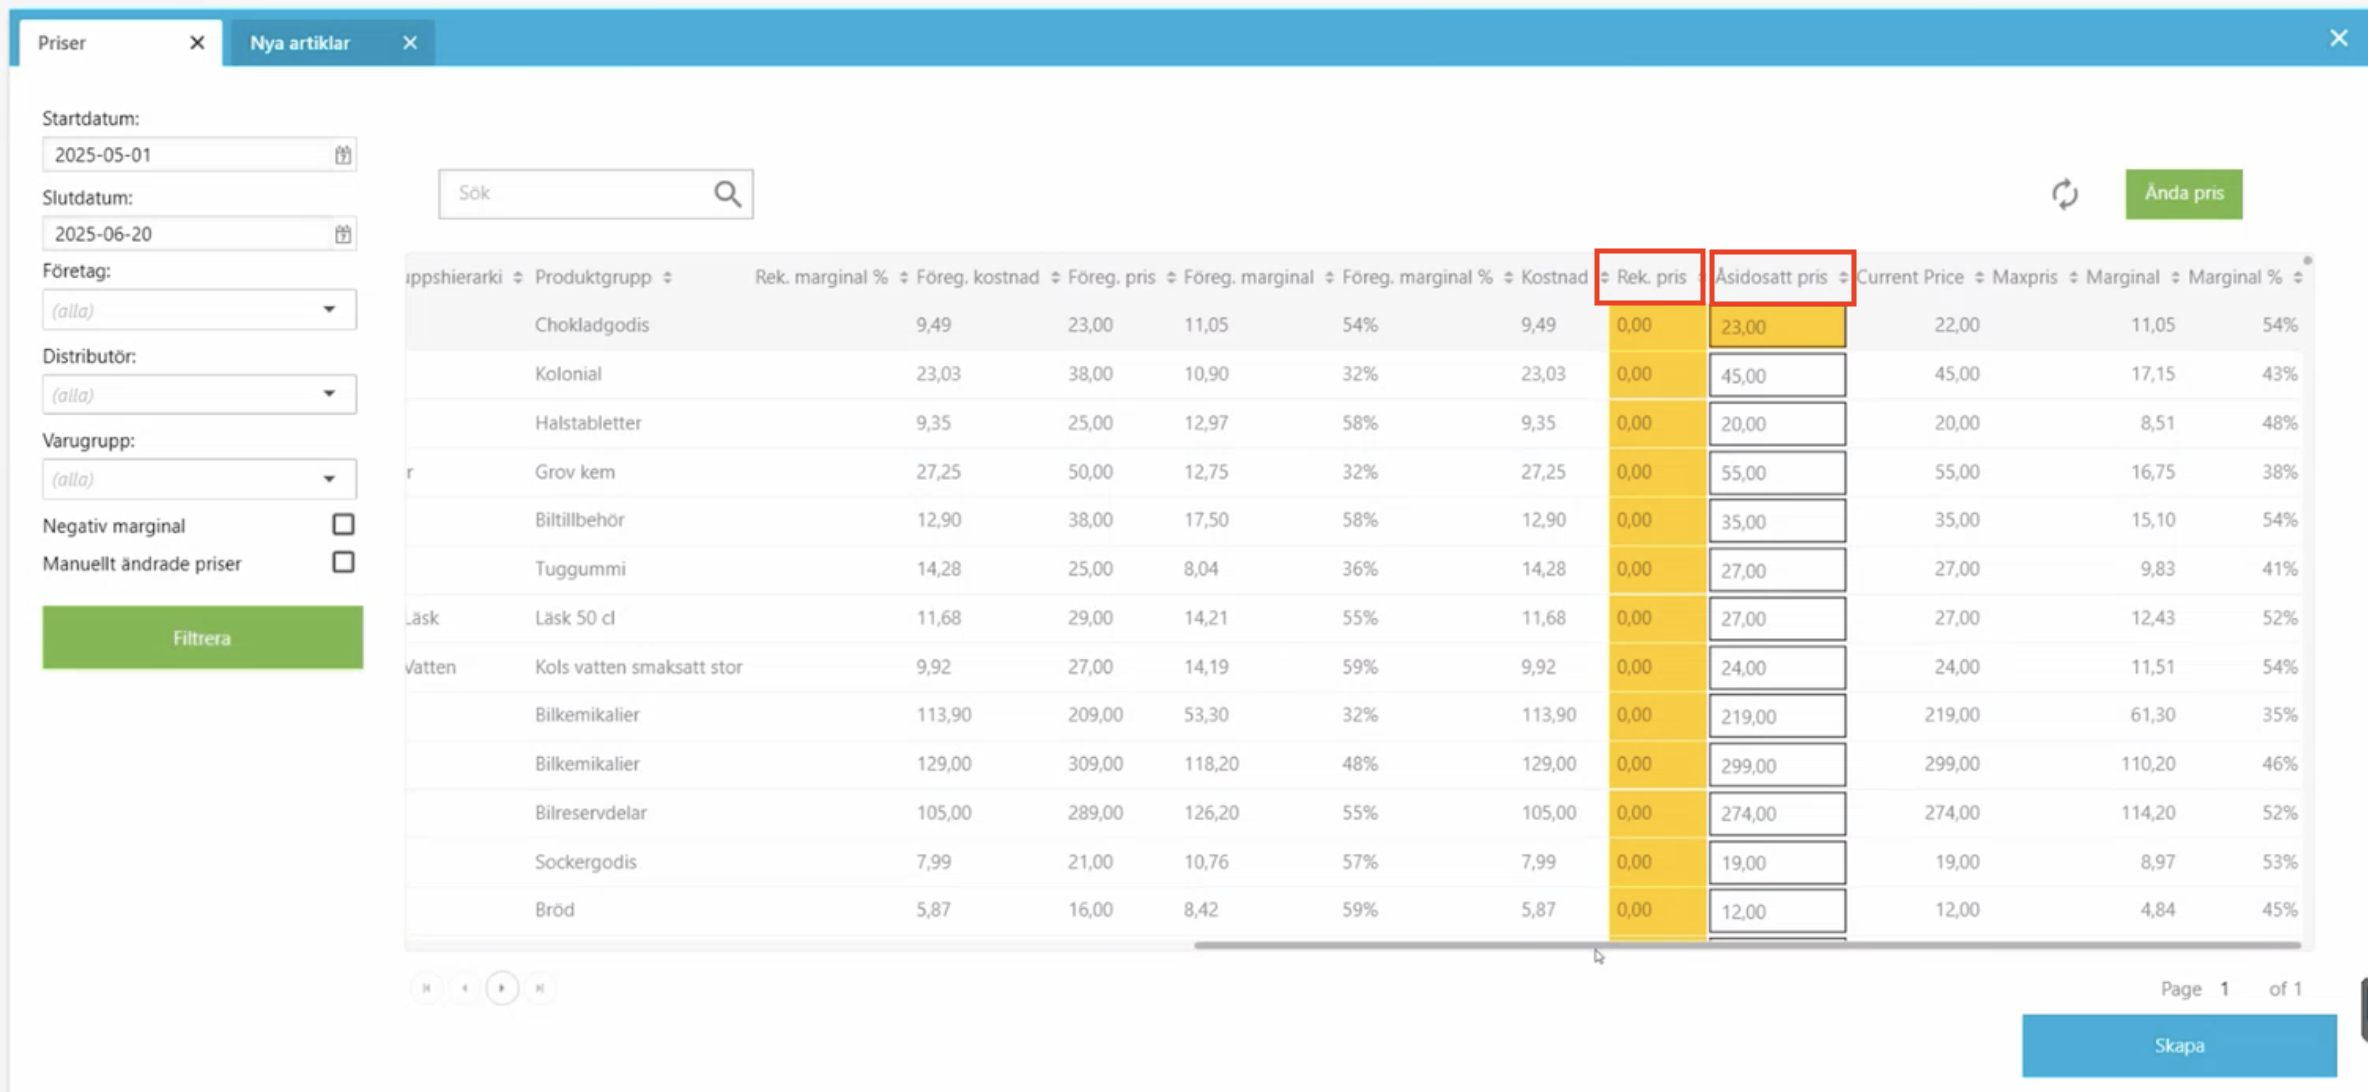
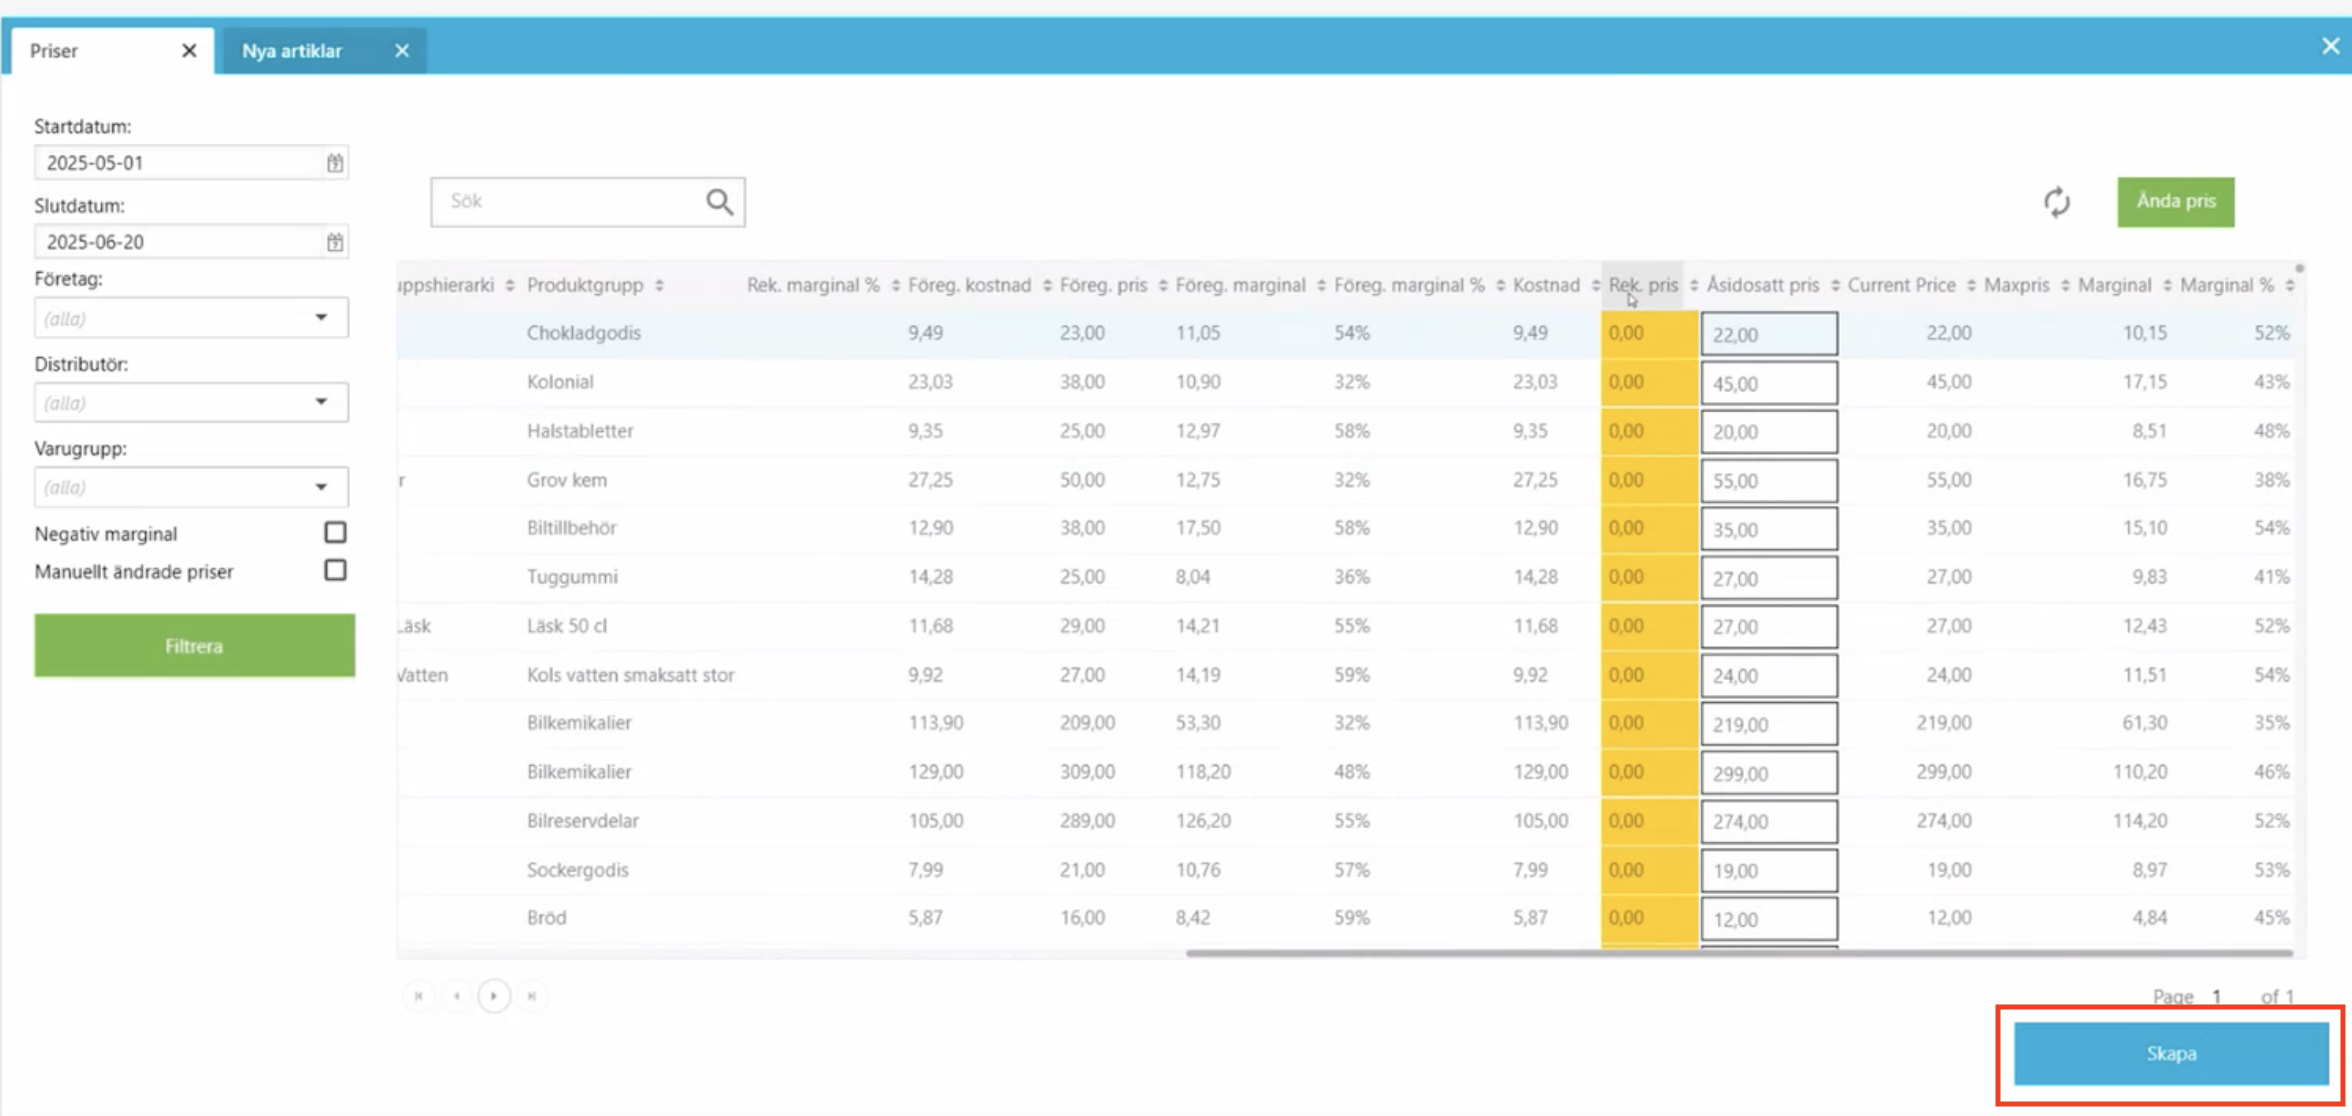
Then to update the price, select the row and press the Create button in the bottom right corner.
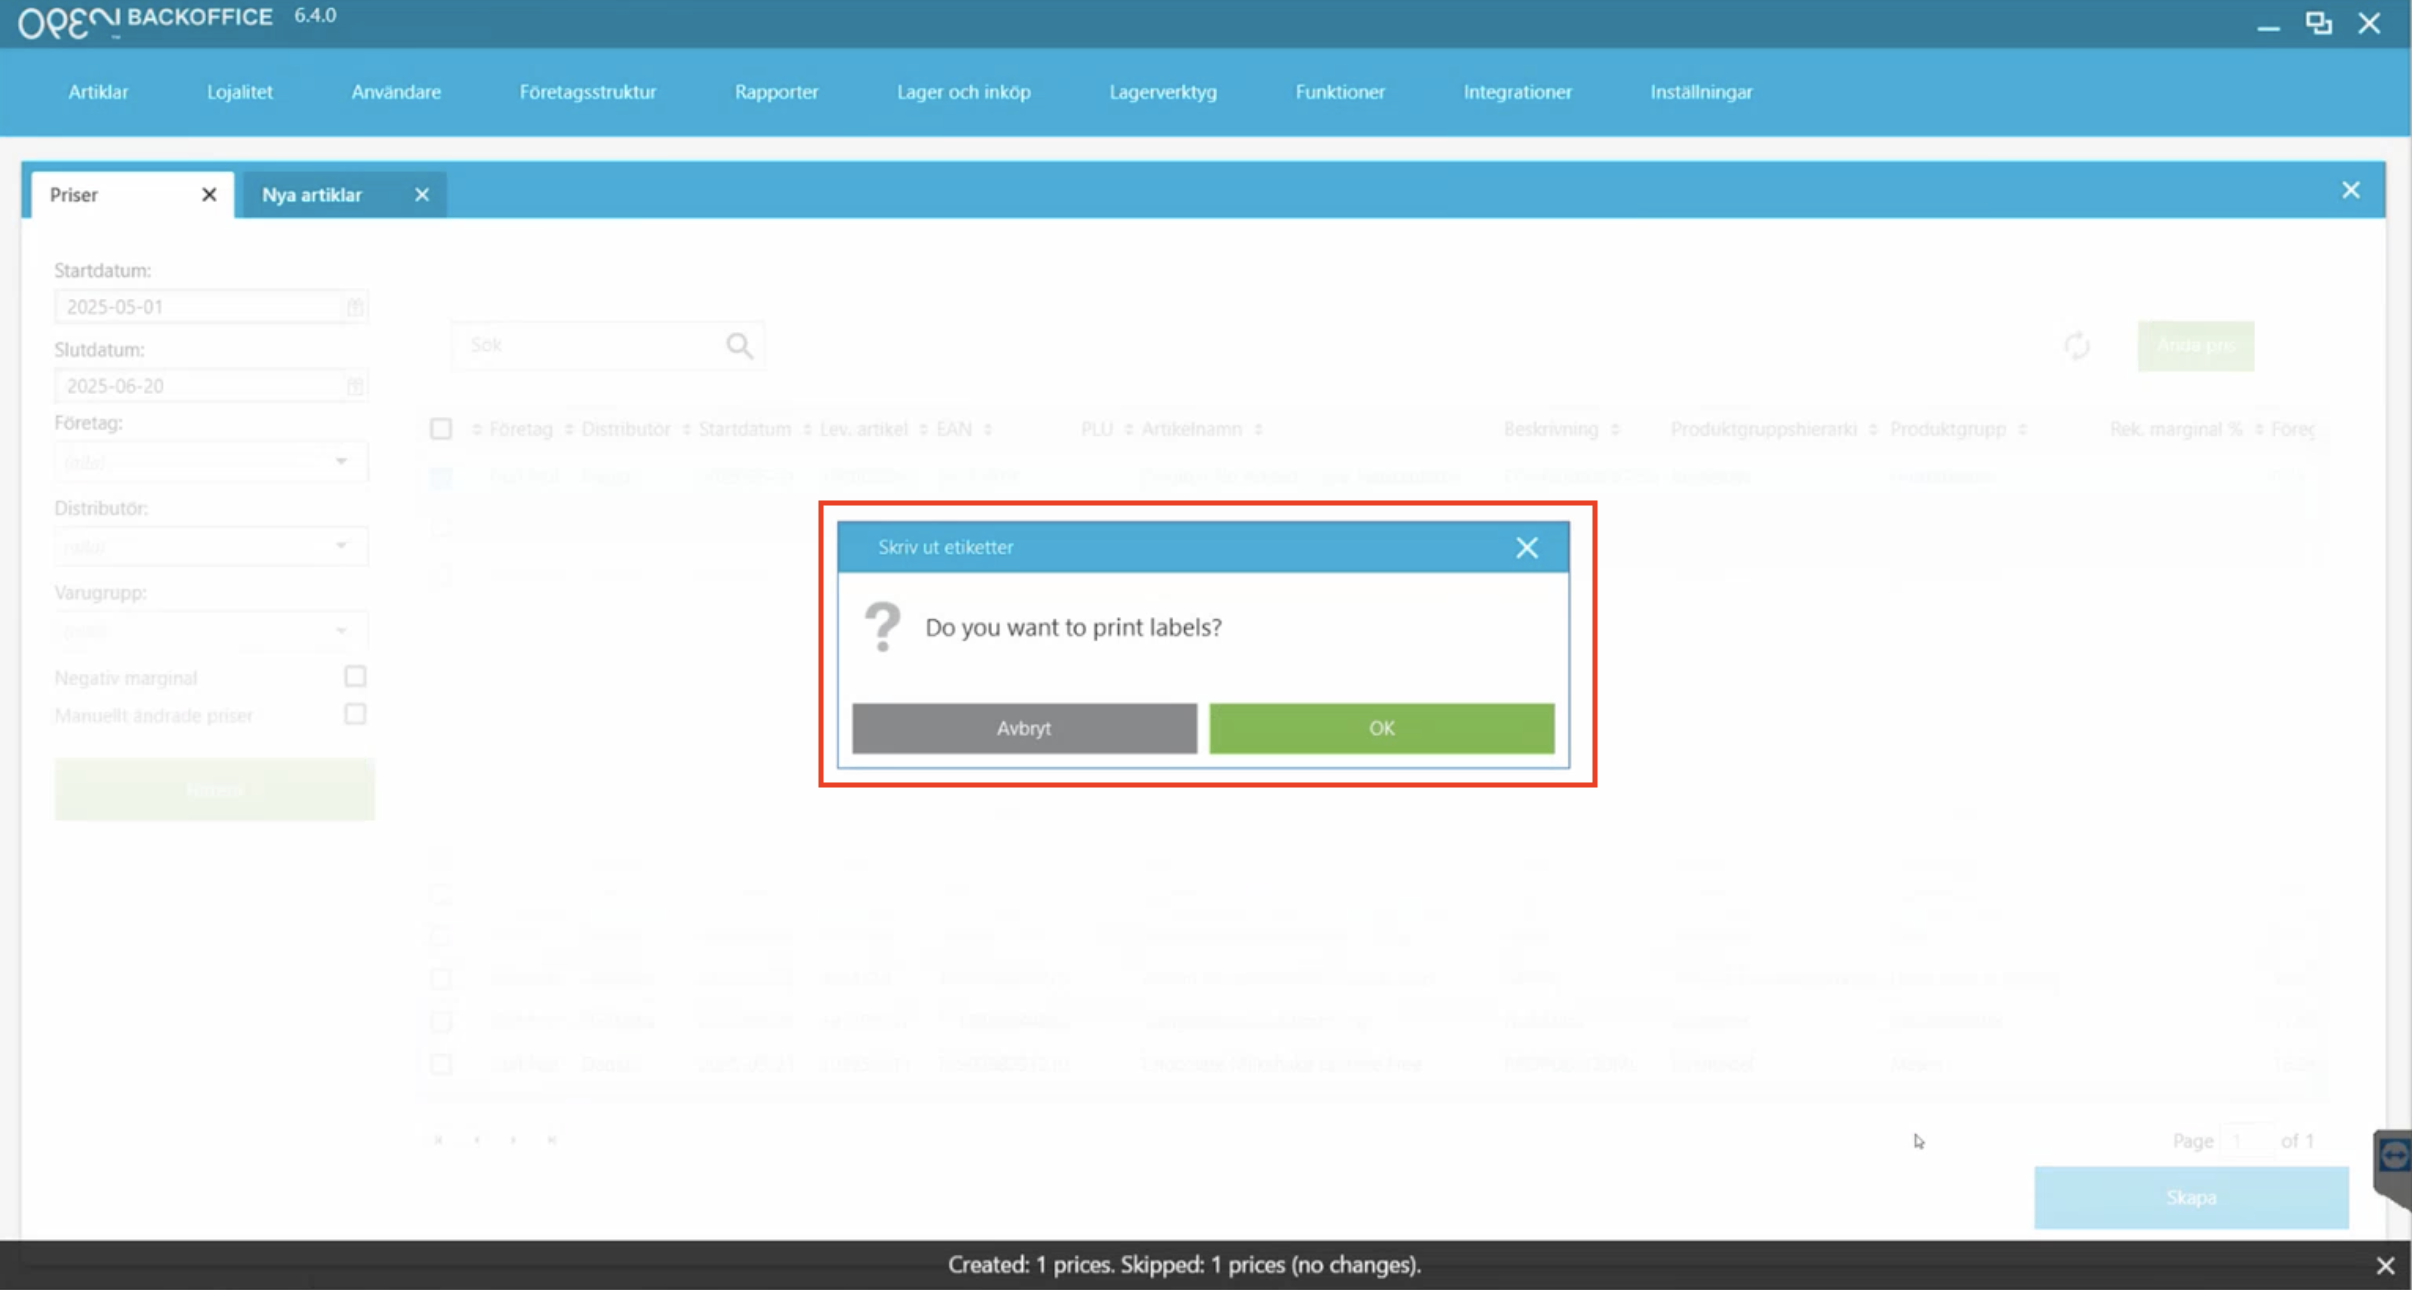
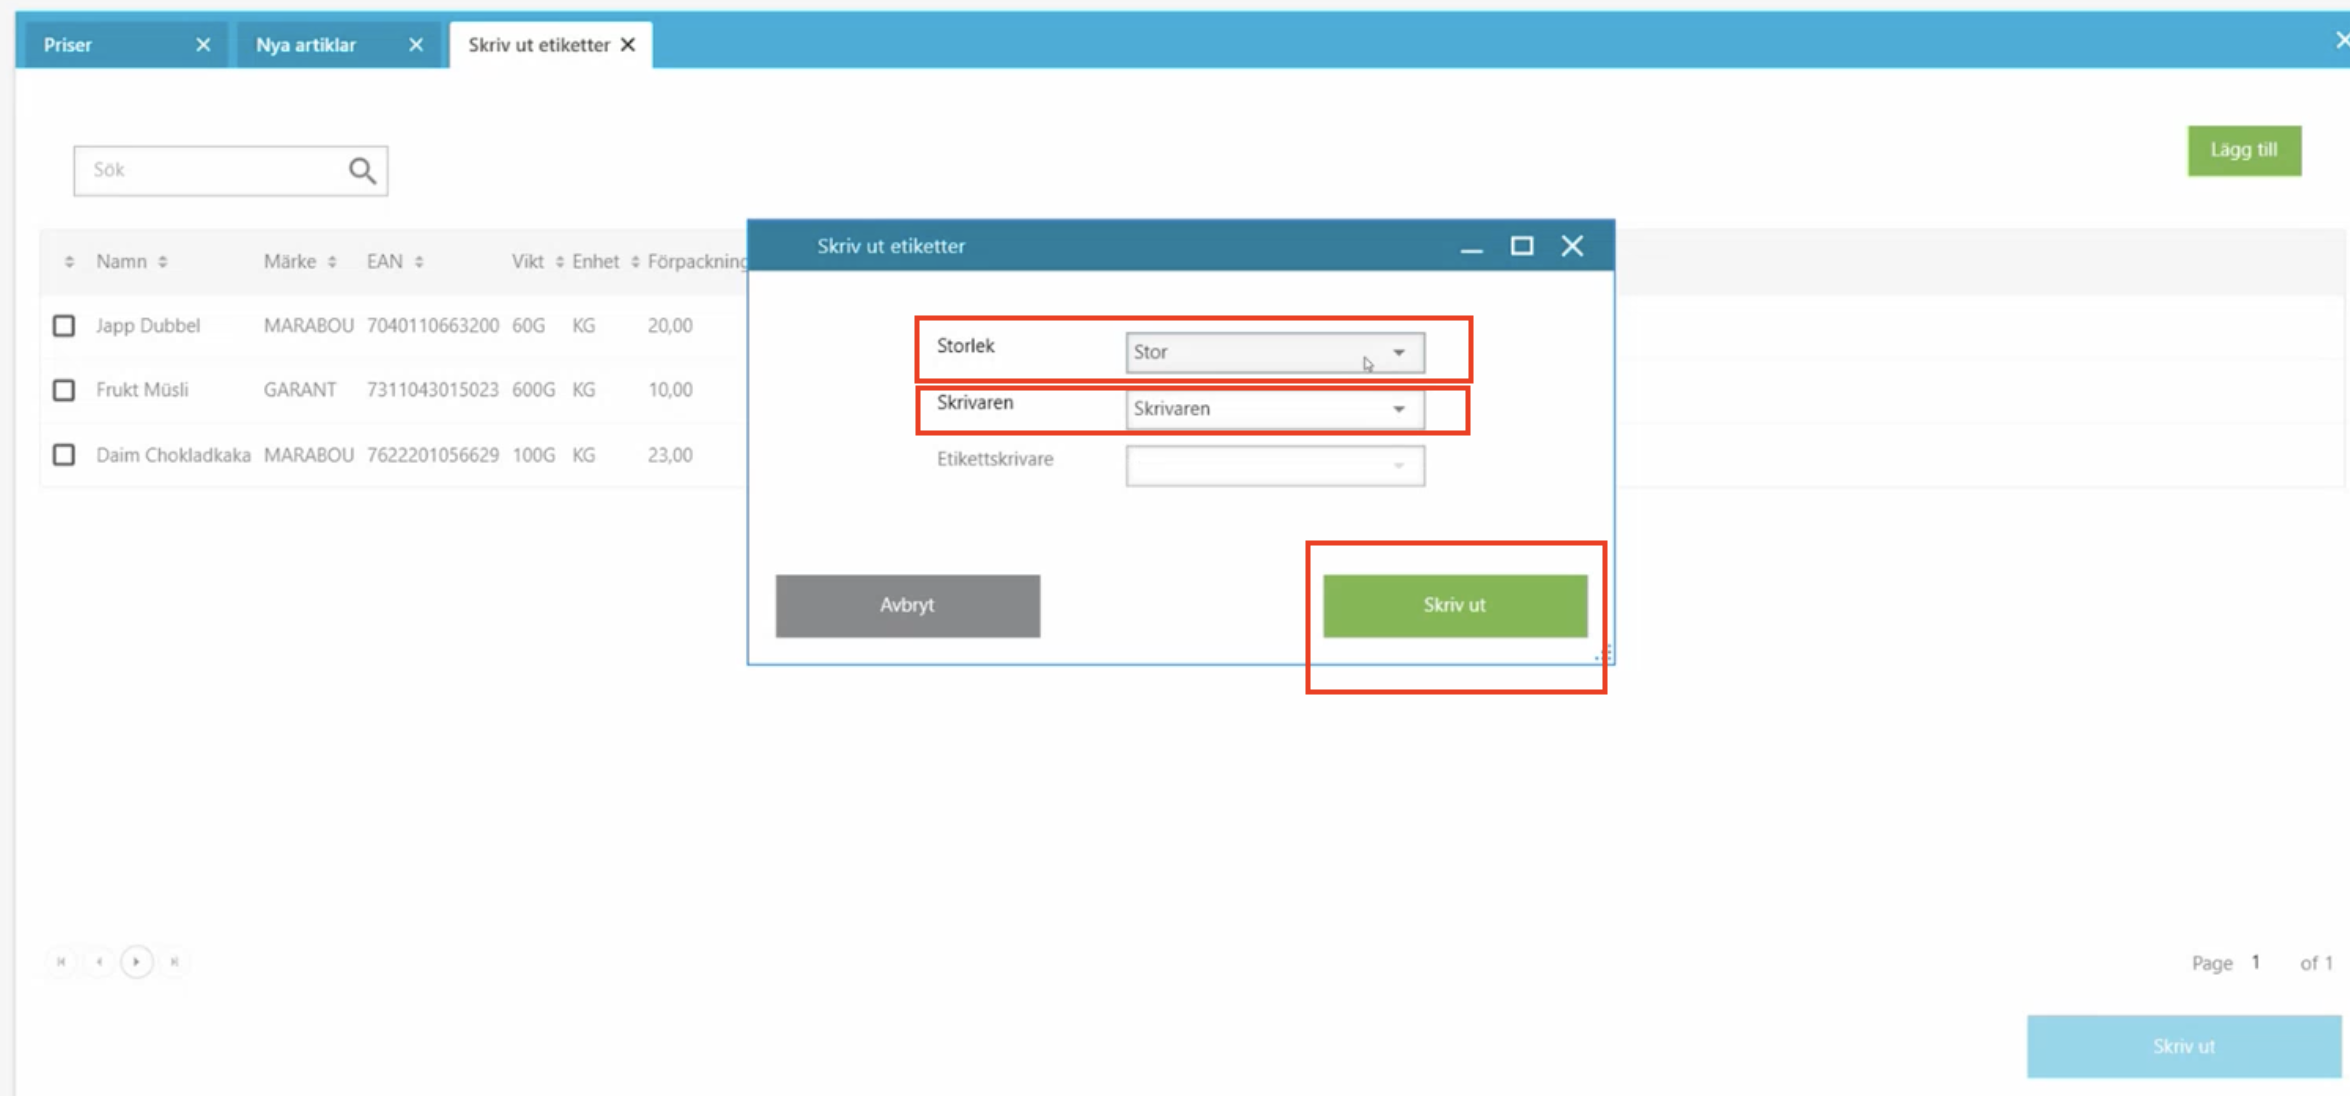
After that, you will be asked if you want to print a label. If you press Ok, if you have updated the price of, for example, two finished articles, those articles are automatically added to the Print labels tab, but you can also add multiple articles by clicking the add button above the rows on the right.
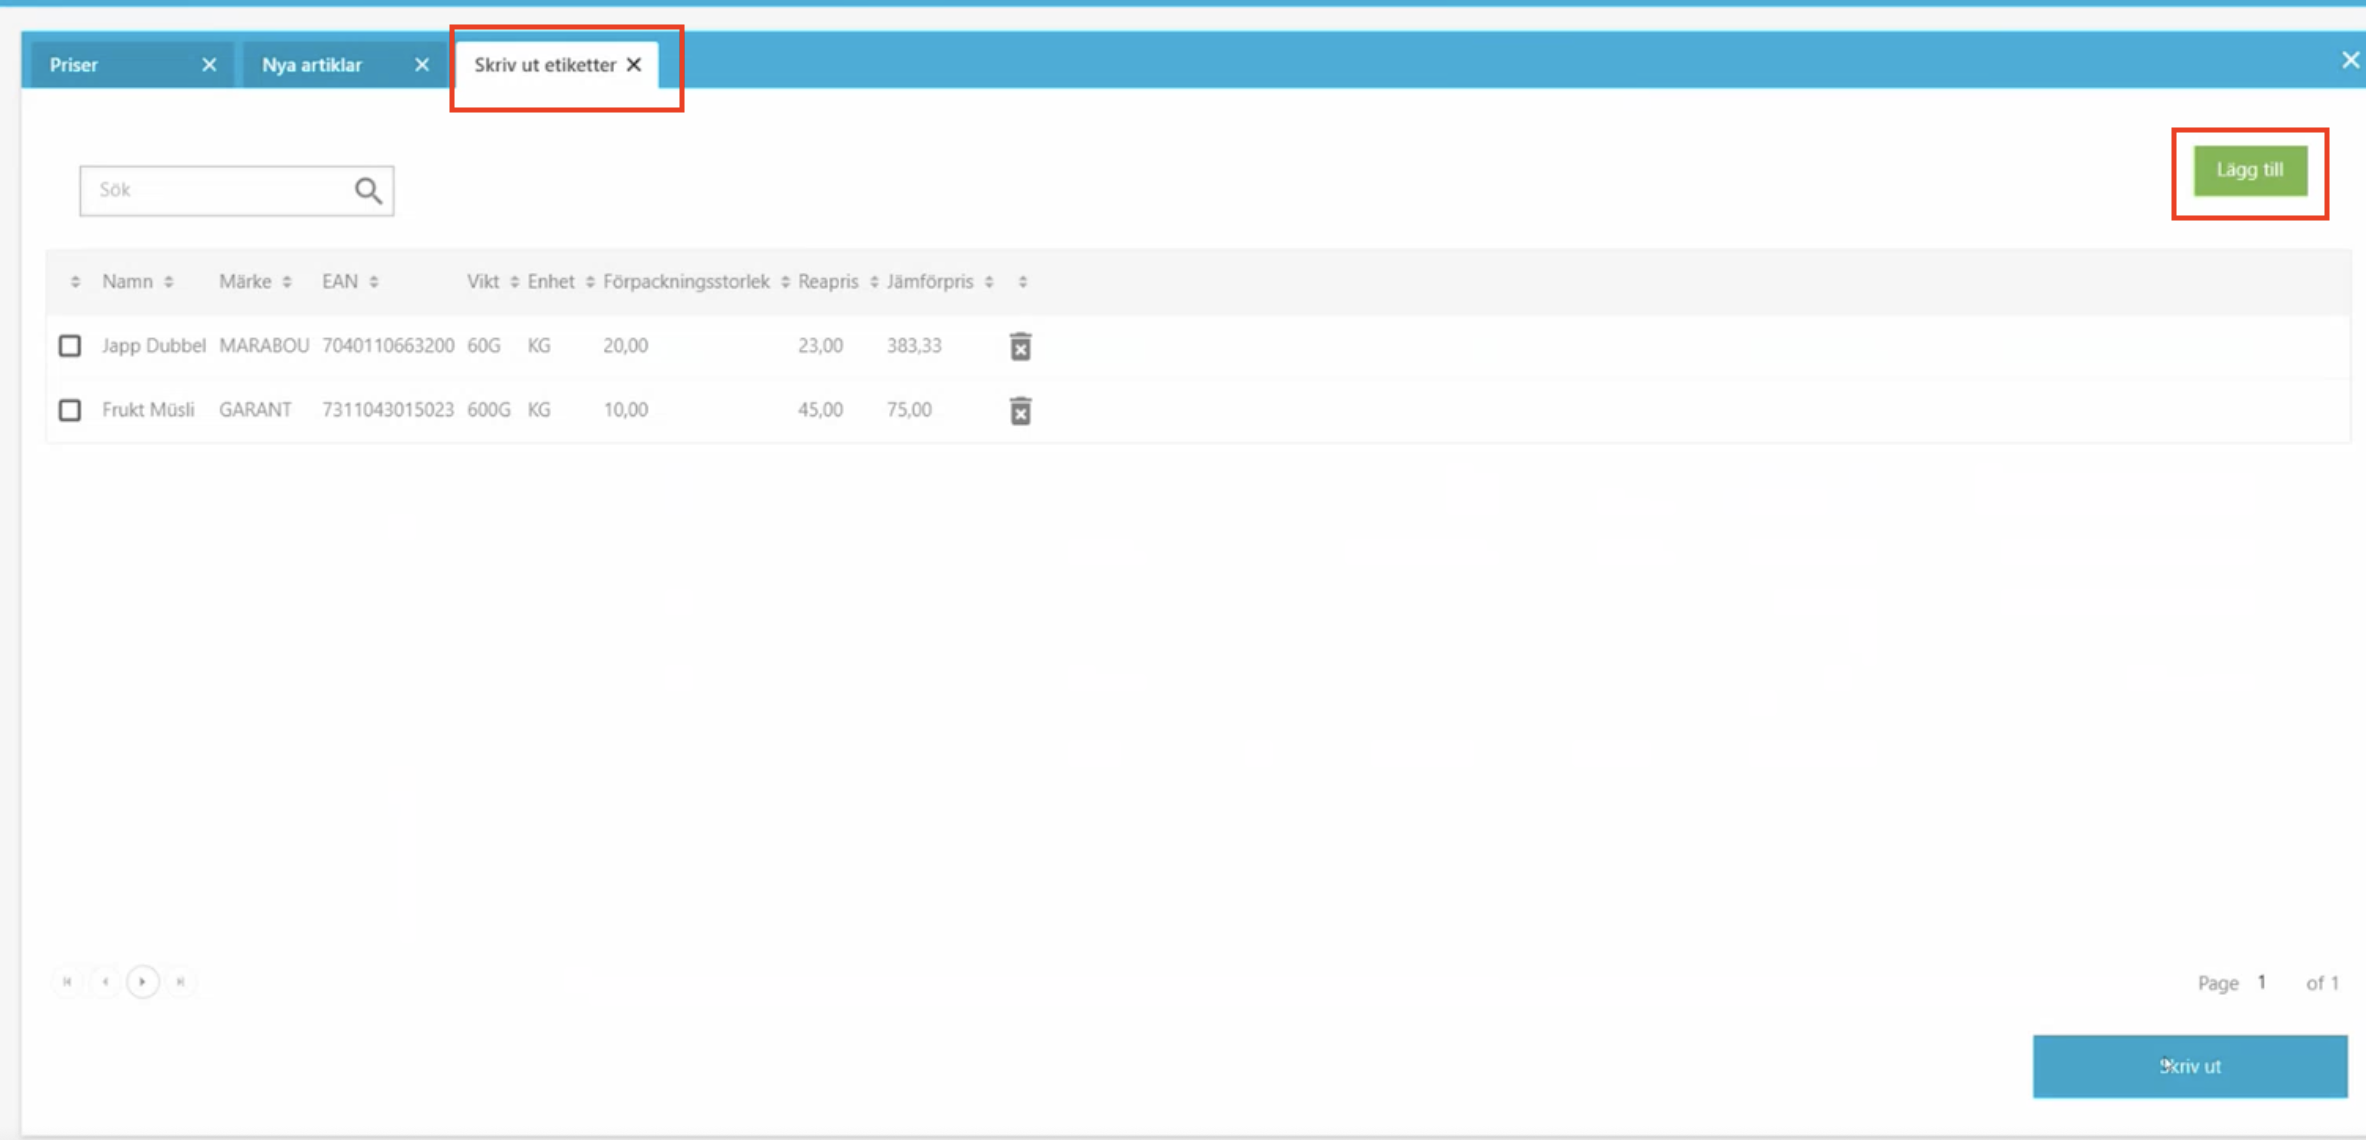
Then you print the articles by clicking Print. You can then choose which printer they should be printed on and what size the labels should be.
4.2 New articles
Under the New articles tab, which means that the articles either did not exist at all before or they are not in your price list. When the price is set, click create and they will be included.
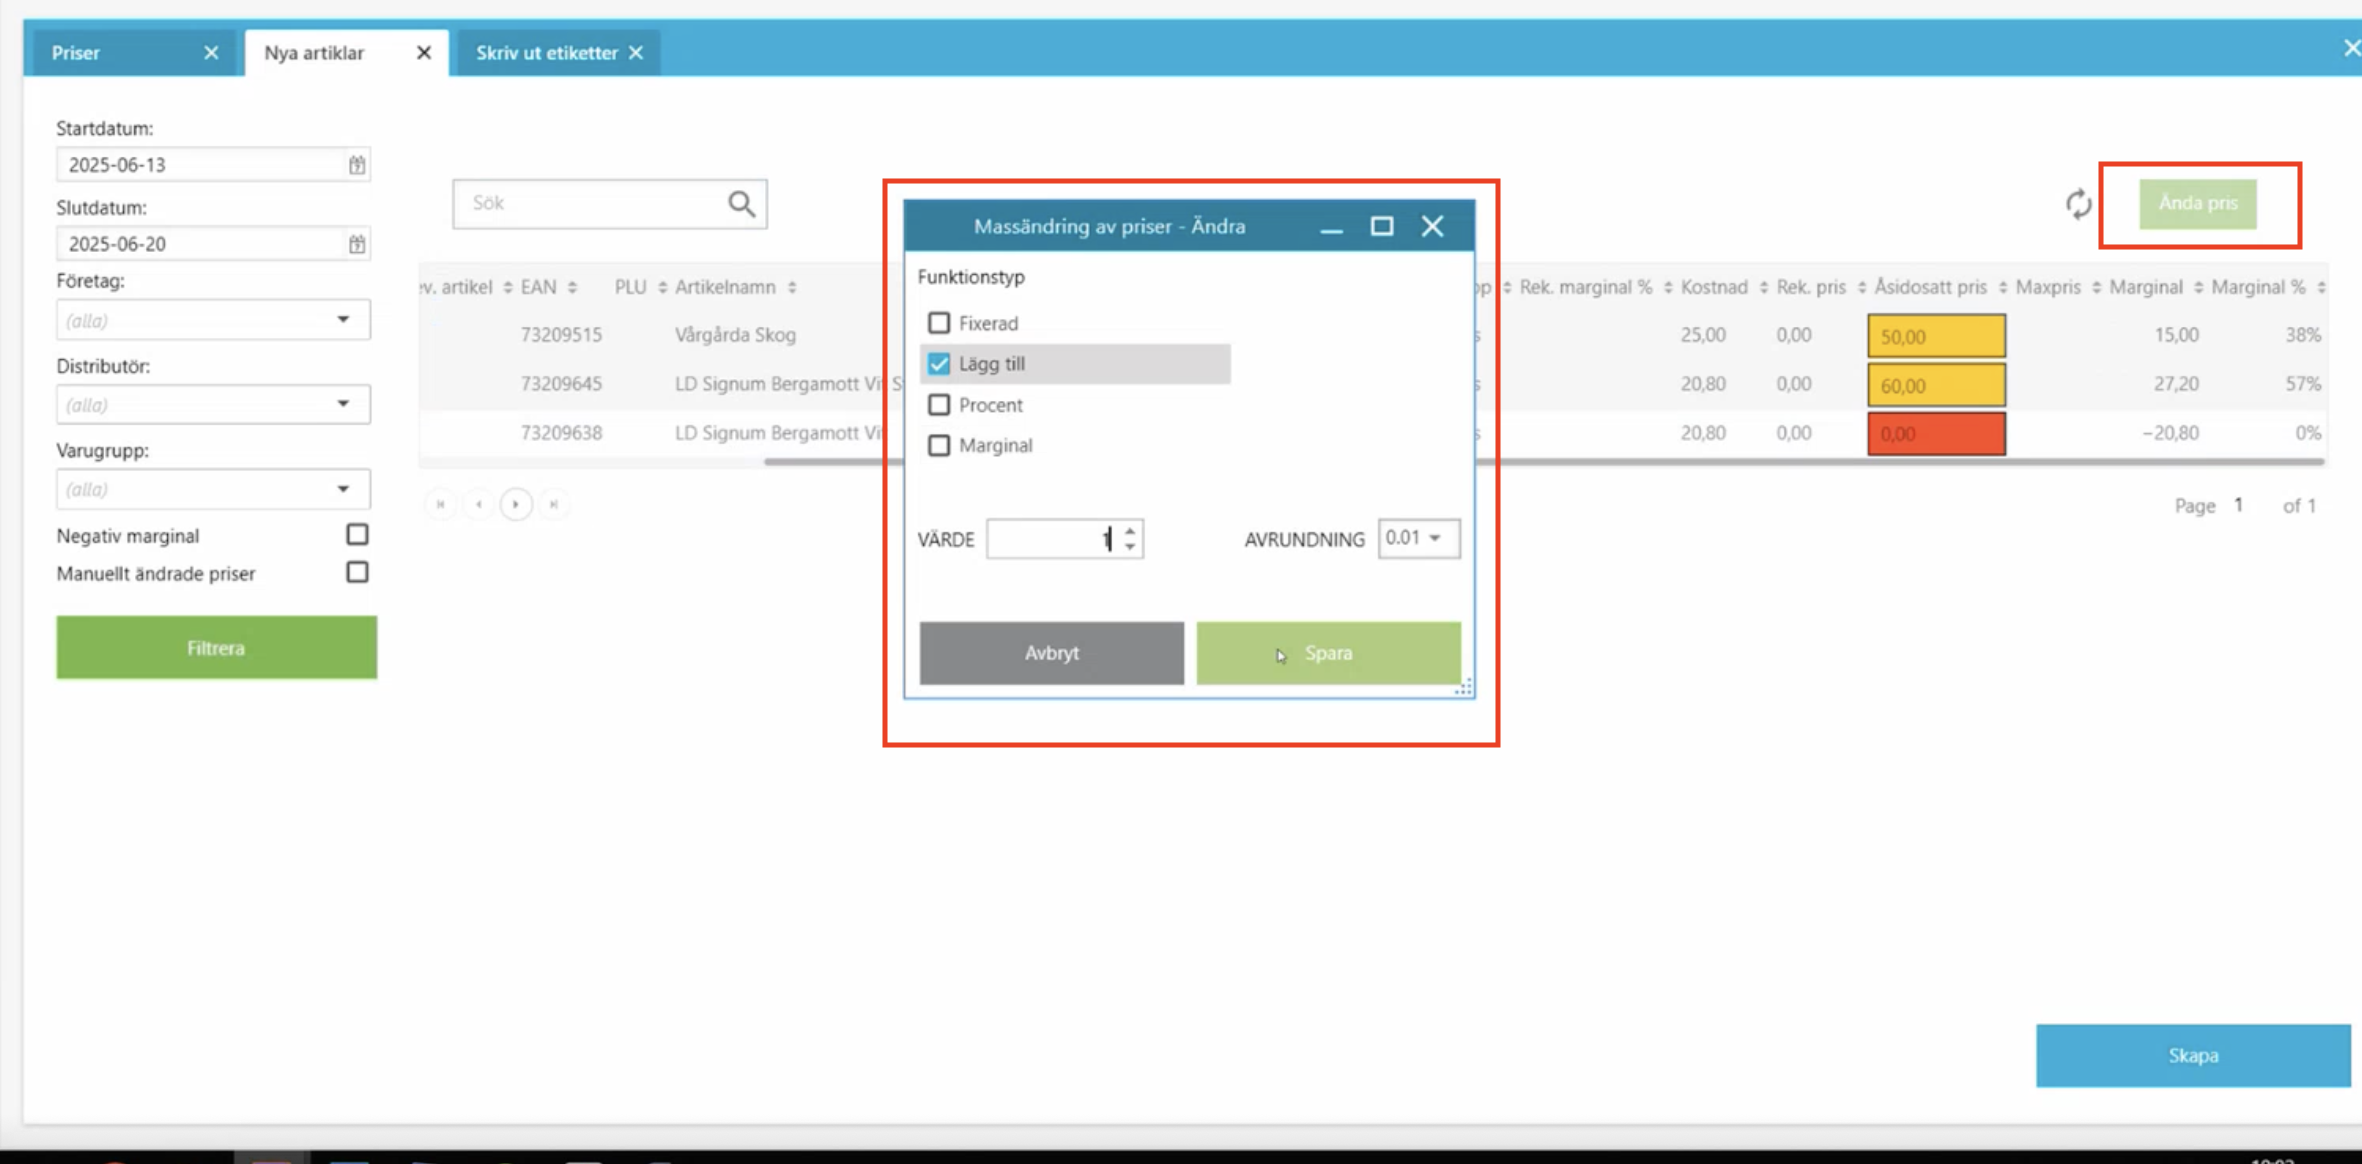
4.2.1 Shortcut to mass edit prices (dialog box)
You can also mass edit the price from here, then click change price. A dialog box will appear and you can add, for example, one krona from the recommended price.
