Kitchen tickets for table orders
If you run a restaurant where guests order food at the table and pay afterwards, you can customise the kitchen tickets to suit your needs.
Overview of kitchen ticket settings for table orders
For more layout settings, see this guide.
Access the layout settings for table orders here: Settings -> Kitchen tickets
| Setting | Optional font size | Explanation |
|---|---|---|
| Print servings | ✅ | Always enabled, adjust font size as needed |
| Print upcoming servings | ✅ | Prints both ‘forwarded’ and ‘waiting’ servings on the ticket |
| Hide upcoming servings on follow-up kitchen tickets | ✅ | Will only print e.g. “Serving 2 Forward” without any article details |
| Content of correction ticket | Choose between including whole order or only changed articles on correction ticket |

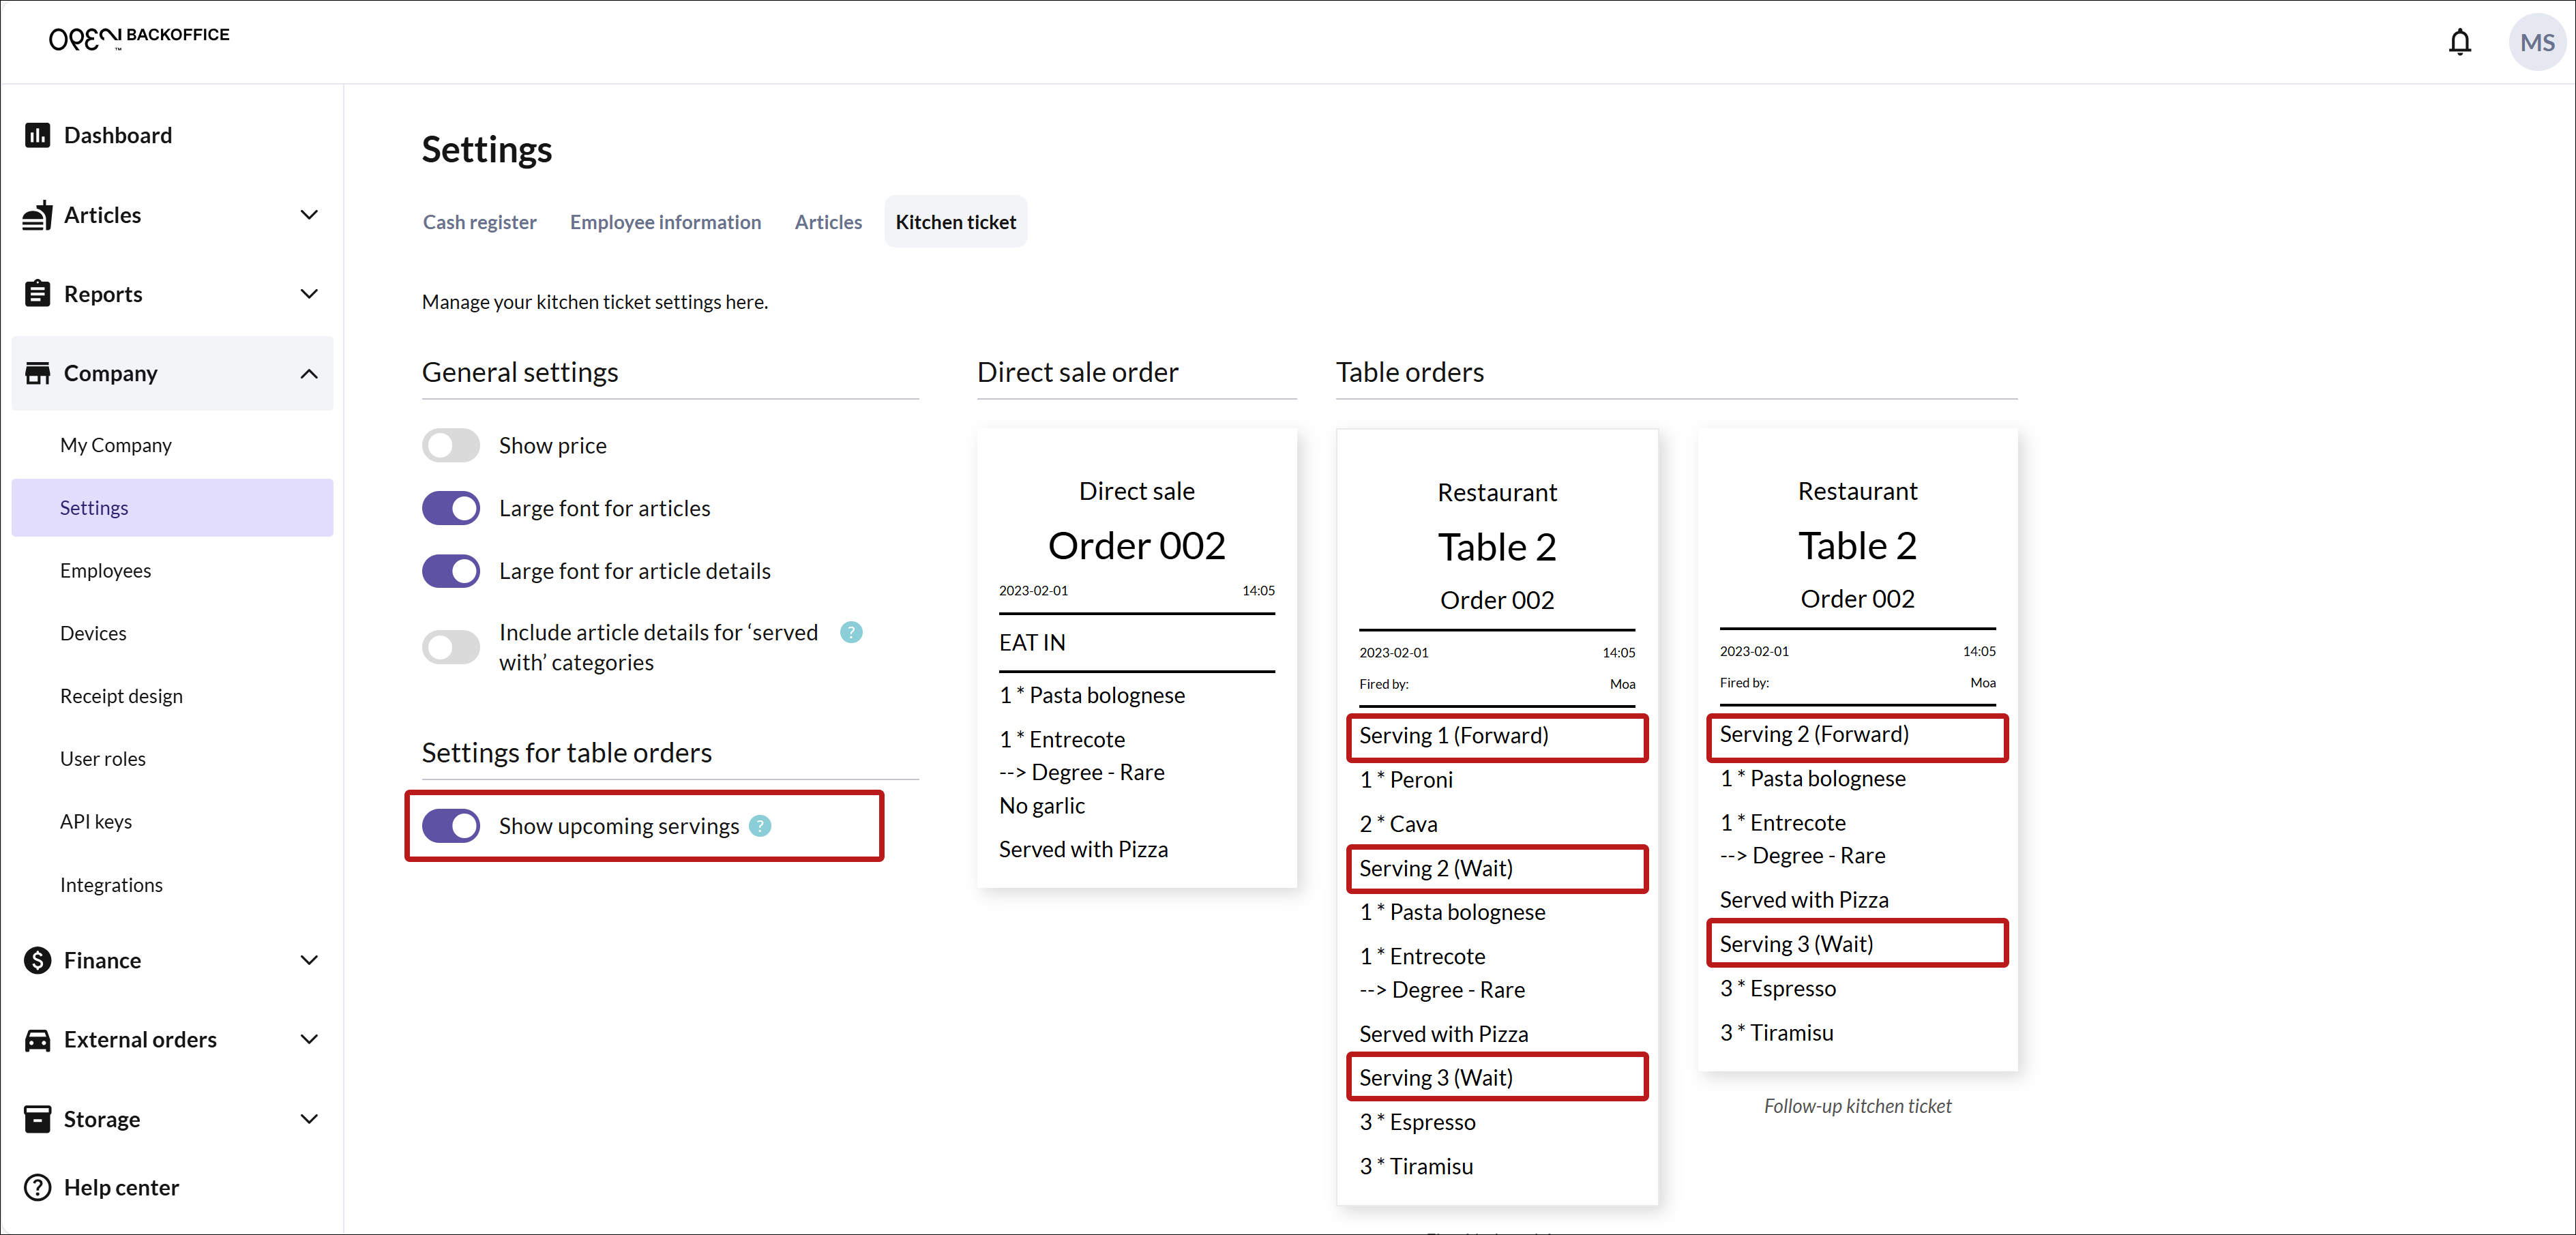
Show upcoming servings on the kitchen ticket
If your guests often order a whole menu with for example starter, main course and dessert at once, the kitchen needs to know the whole order from the beginning in order to plan the preparation. For this to work, you need to enable the Show upcoming servings setting.
When the setting is turned on, the kitchen ticket will show both the serving that is 'Forward' (e.g. starter), while the upcoming servings (e.g. main course and dessert) will be marked as 'Waiting'.
Here is an example of how kitchen tickets look depending on whether the setting is off or on.

To activate the setting, follow these steps:
In BackOffice, select SETTINGS from the menu and navigate to the KITCHEN TICKETS page.
Under Settings for table orders, toggle on the Show upcoming servings setting.

Simple follow-up kitchen tickets
If your kitchen team likes to work with a main kitchen ticket for each order (which they move from the Wait board to the Forward board), you can simplify follow-up tickets.
By enabling 'Hide articles on follow-up kitchen tickets', the follow-up ticket will only show the essential details:
- Table map
- Serving info
- Status (Forward)
To activate the setting, follow these steps:
In BackOffice, select SETTINGS from the menu and navigate to the KITCHEN TICKETS page.
Under Settings for table orders, toggle on the Hide articles on follow-up kitchen tickets setting.


How to work with servings in POS
Step 1: Register the order
- Once the entire order has been received, start by registering what will be served first (e.g. drink and appetizer) on Serving 1.
- Press New Serving and enter what is to be served later, for example the main course on Serving 2.
- Press New serving again and register the dessert on Serving 3.
- Now the whole order is registered and divided by serving order.
Step 2: Forward the starter & send the order to the kitchen
- Select Serving 1 and press Fire Serving 1.
- A kitchen ticket is printed where Serving 1 is marked as “Forward” and Serving 2 & 3 as “Wait”.
Step 3: Forward main course & dessert
- When guests are ready for the main course, mark Serving 2 and press Fire Serving 2.
- A new kitchen ticket is sent out, indicating that Serving 2 should be served.
- Repeat the same procedure for the dessert by selecting Serving 3 and pressing Fire Serving 3.
Mixing dishes in servings
If a guest wants to have an appetizer with the others' main courses on Serving 2, this can easily be adjusted when you place the order in the cash register. This means that you can add anything to your servings, depending on what your guests want to eat and in what order.
Managing multiple kitchen printers
If you have multiple kitchen printers, set up different printer categories (e.g. Appetizer, Main course, Dessert) and assign them to each printer.
This way, each kitchen station gets the correct information about the total order of the table.
Handling of drink orders
If you have a specific bar printer, assign all beverages to the “Beverage” printer category.
This will allow the bar printer to only print tickets for drinks, streamlining the workflow.
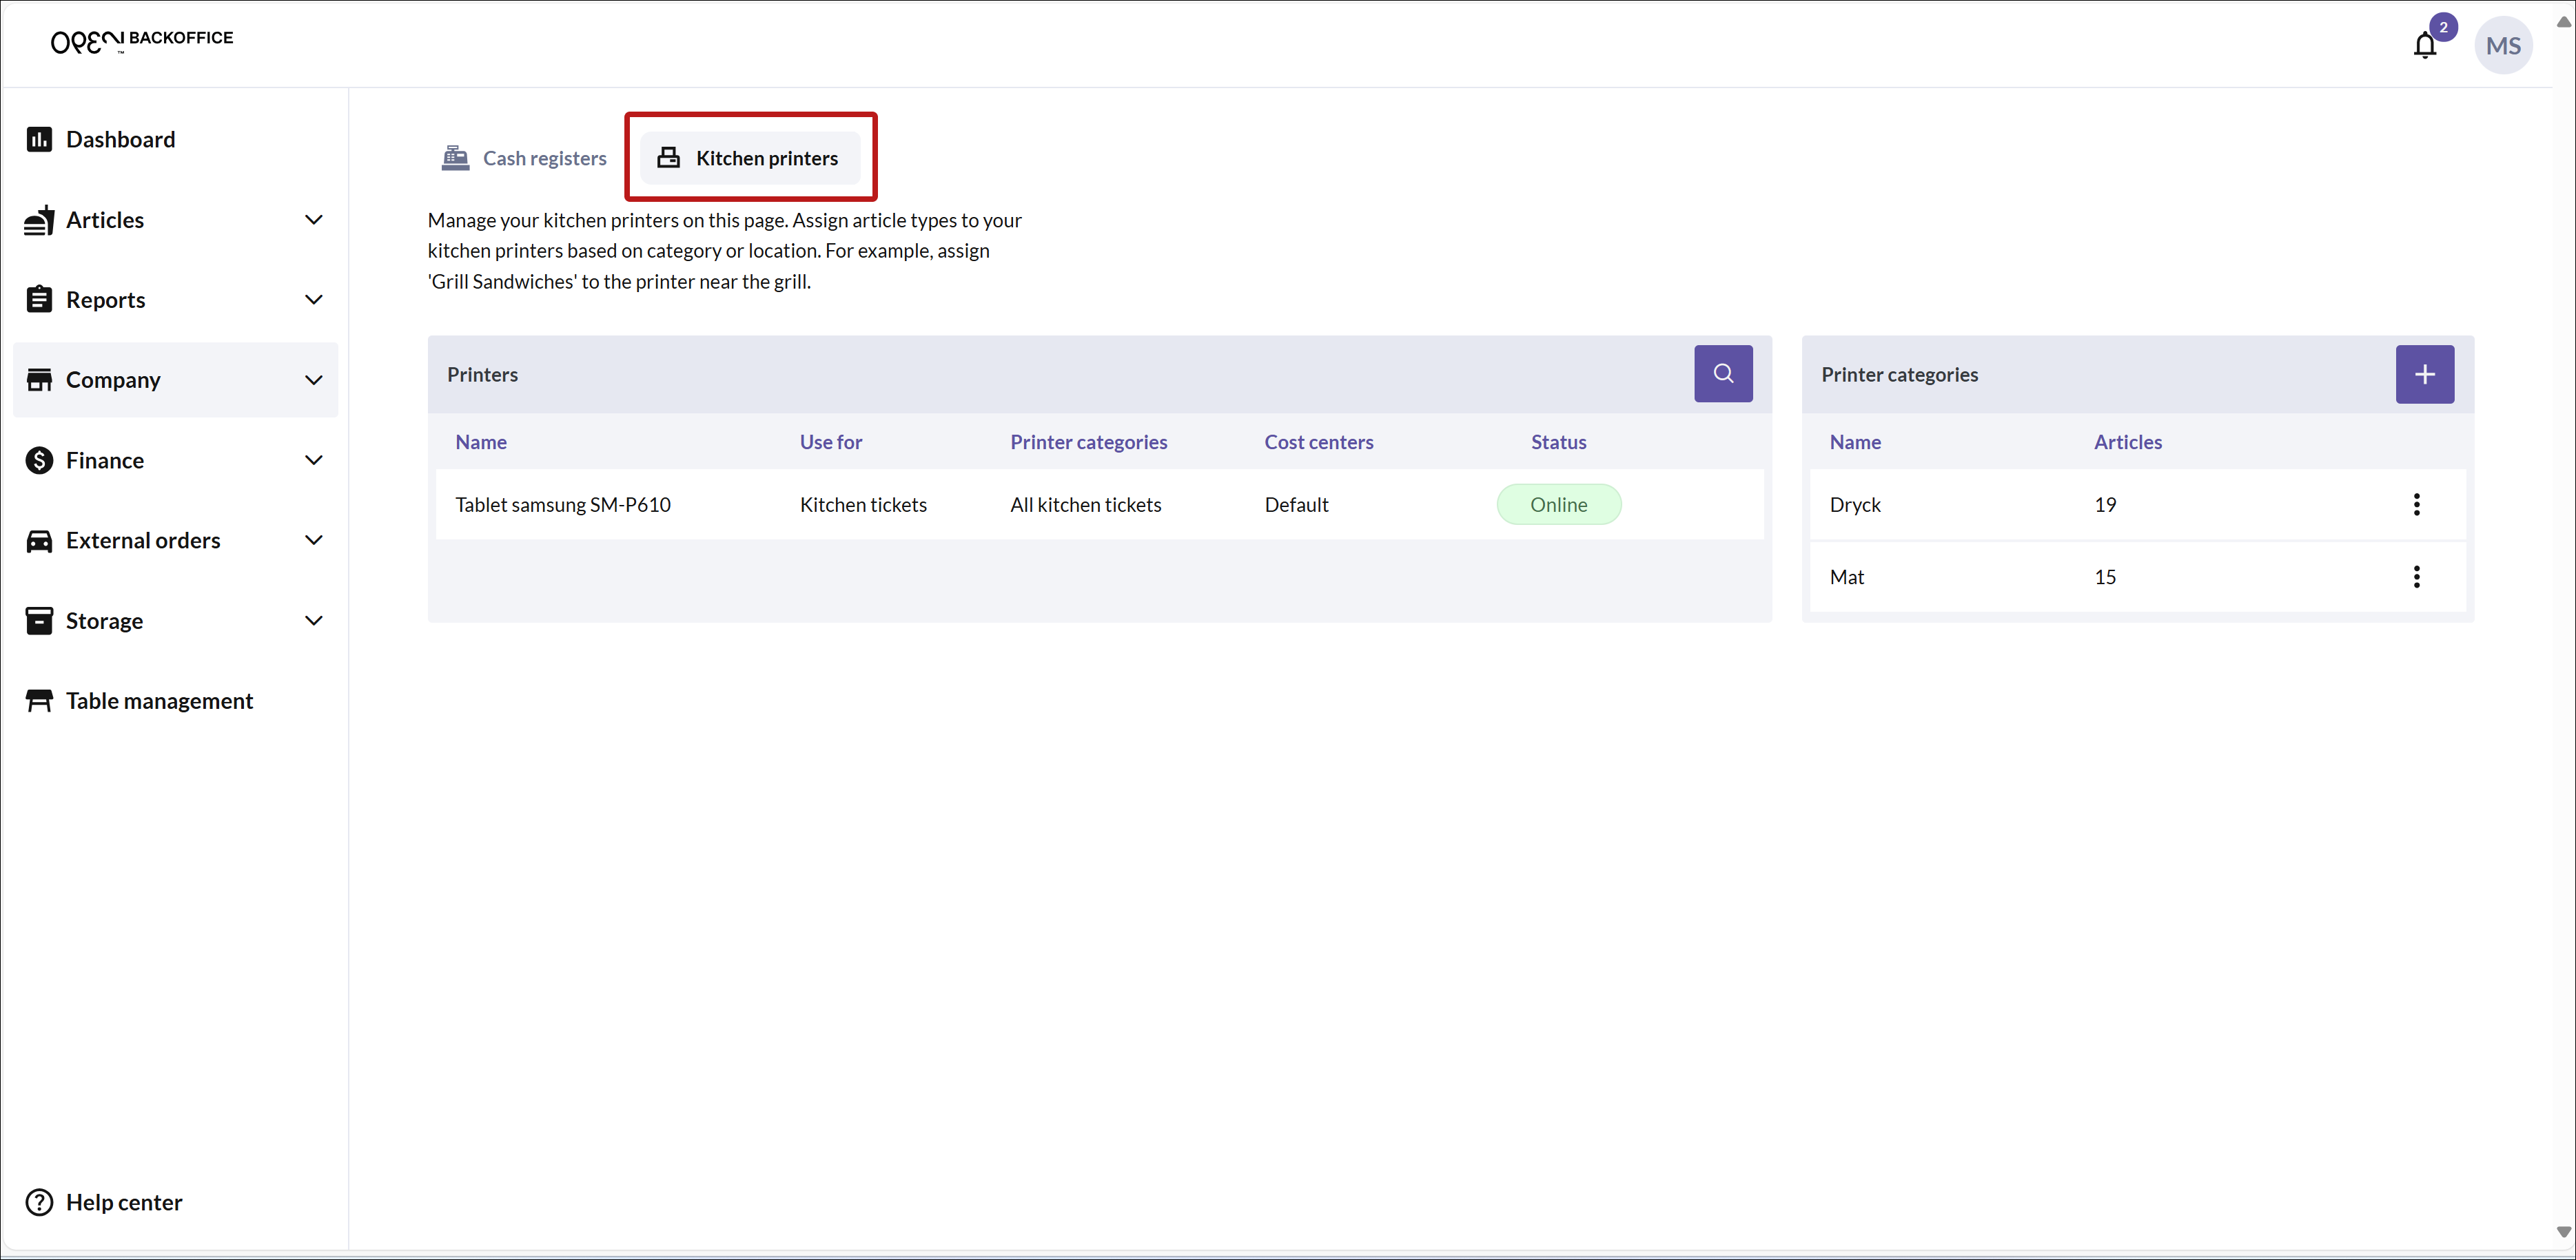
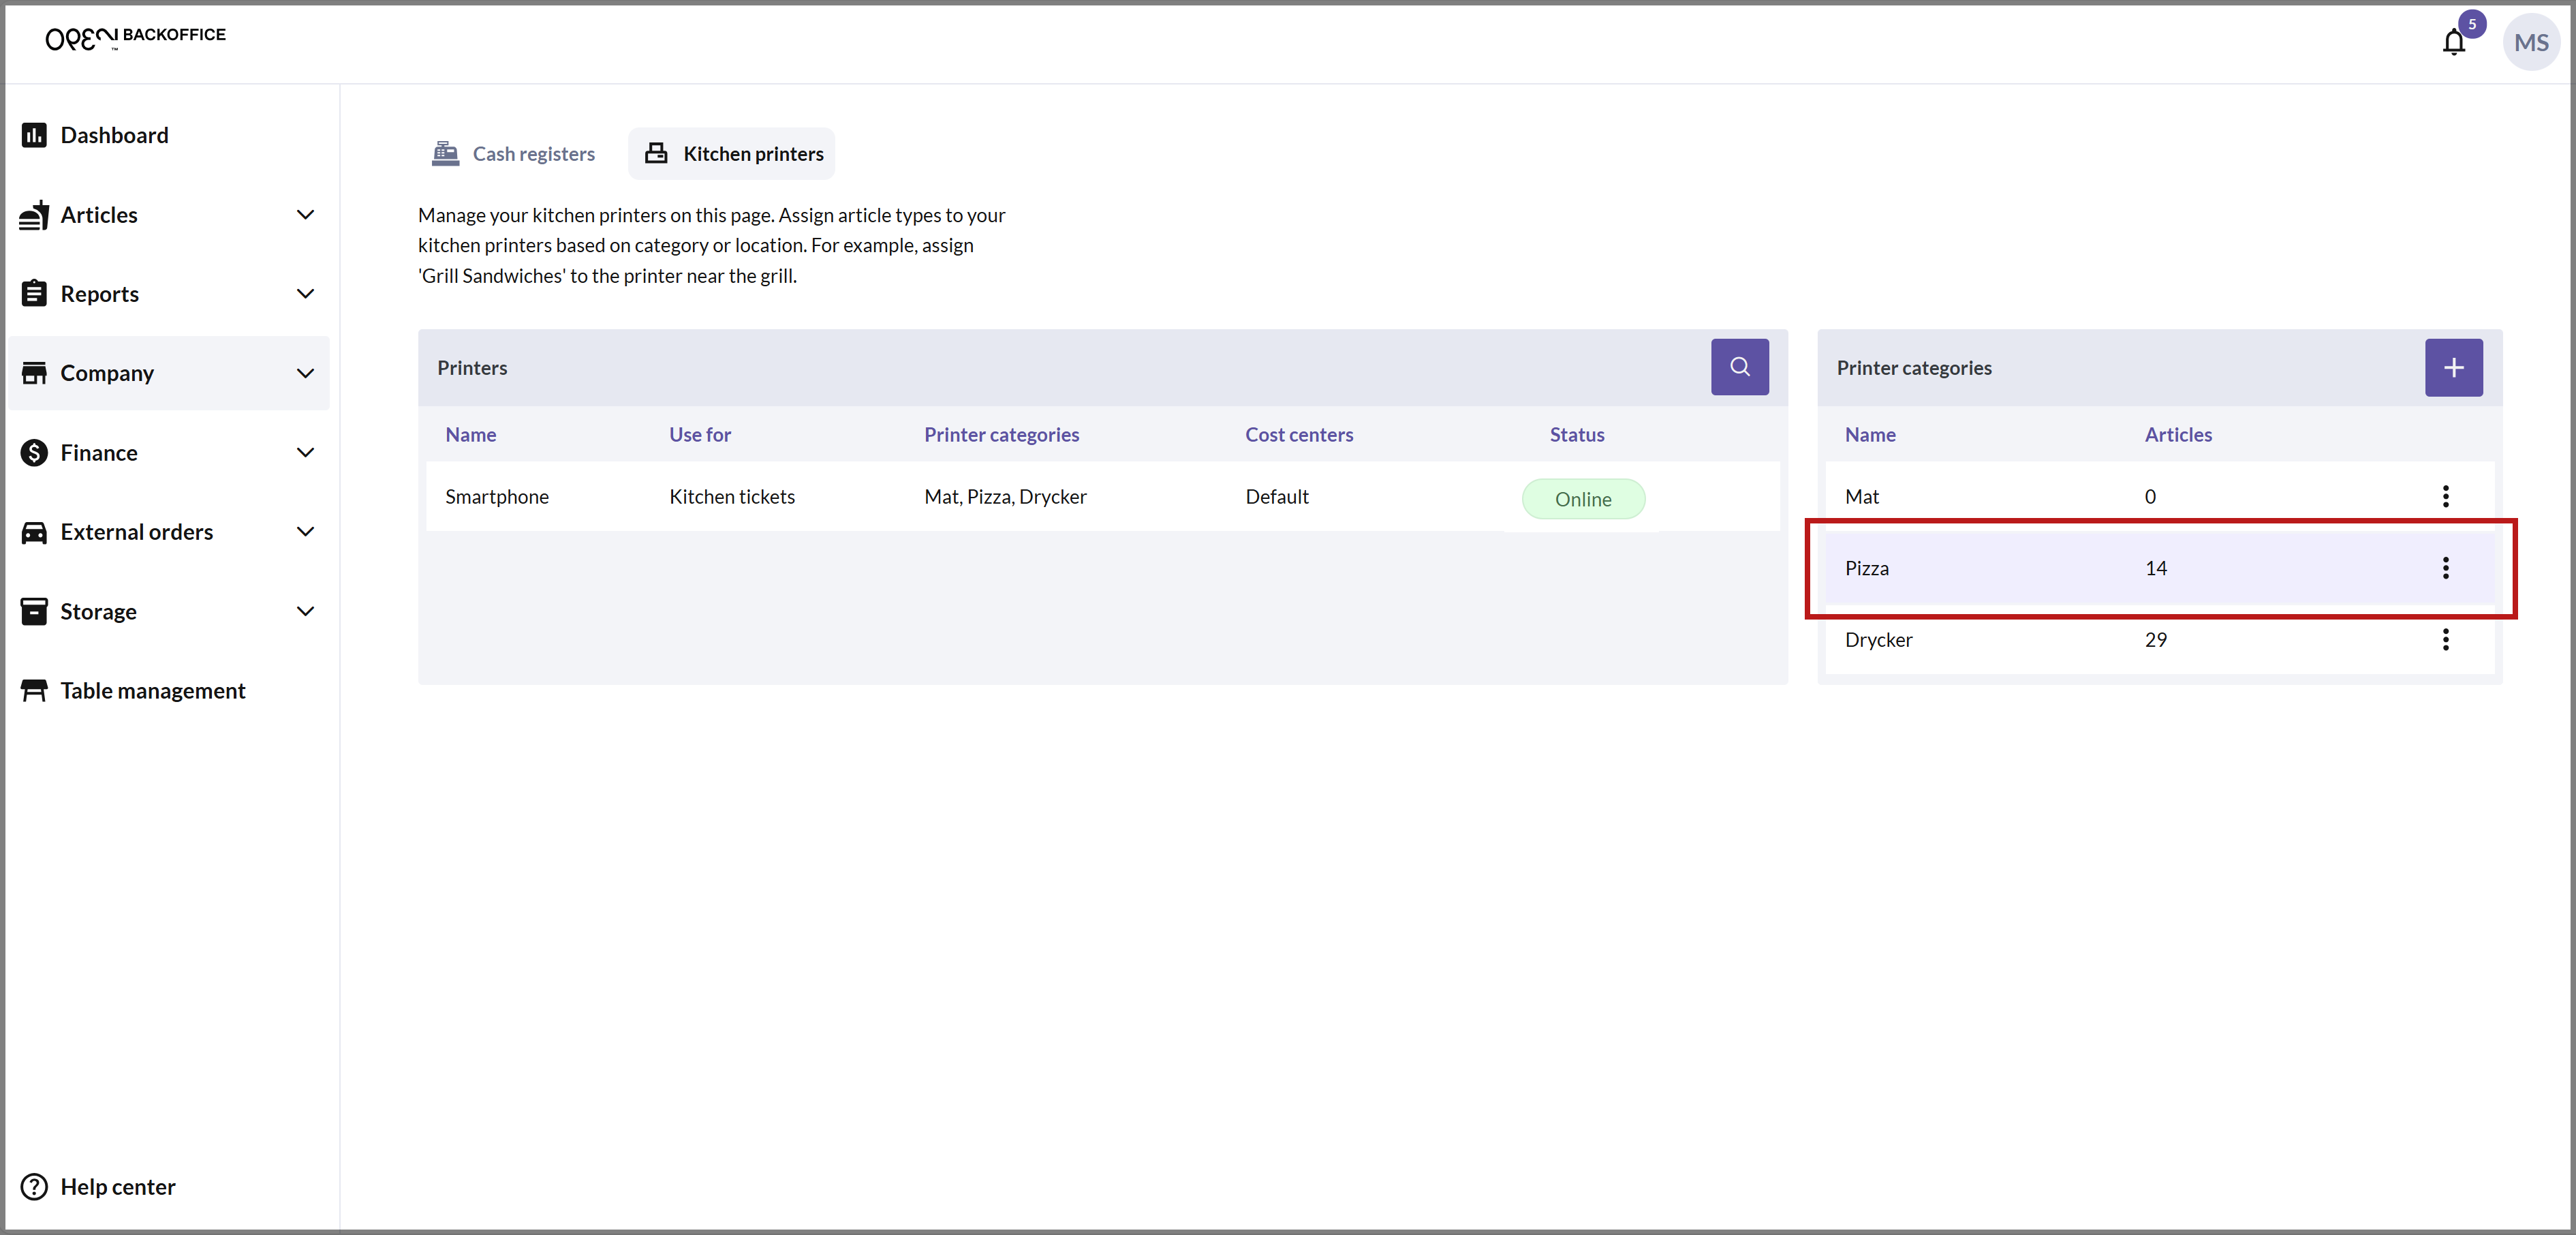
Set up printer categories for your kitchen printers
In BackOffice, select Company from the menu and navigate to the Devices page.
Choose the Kitchen printers tab.
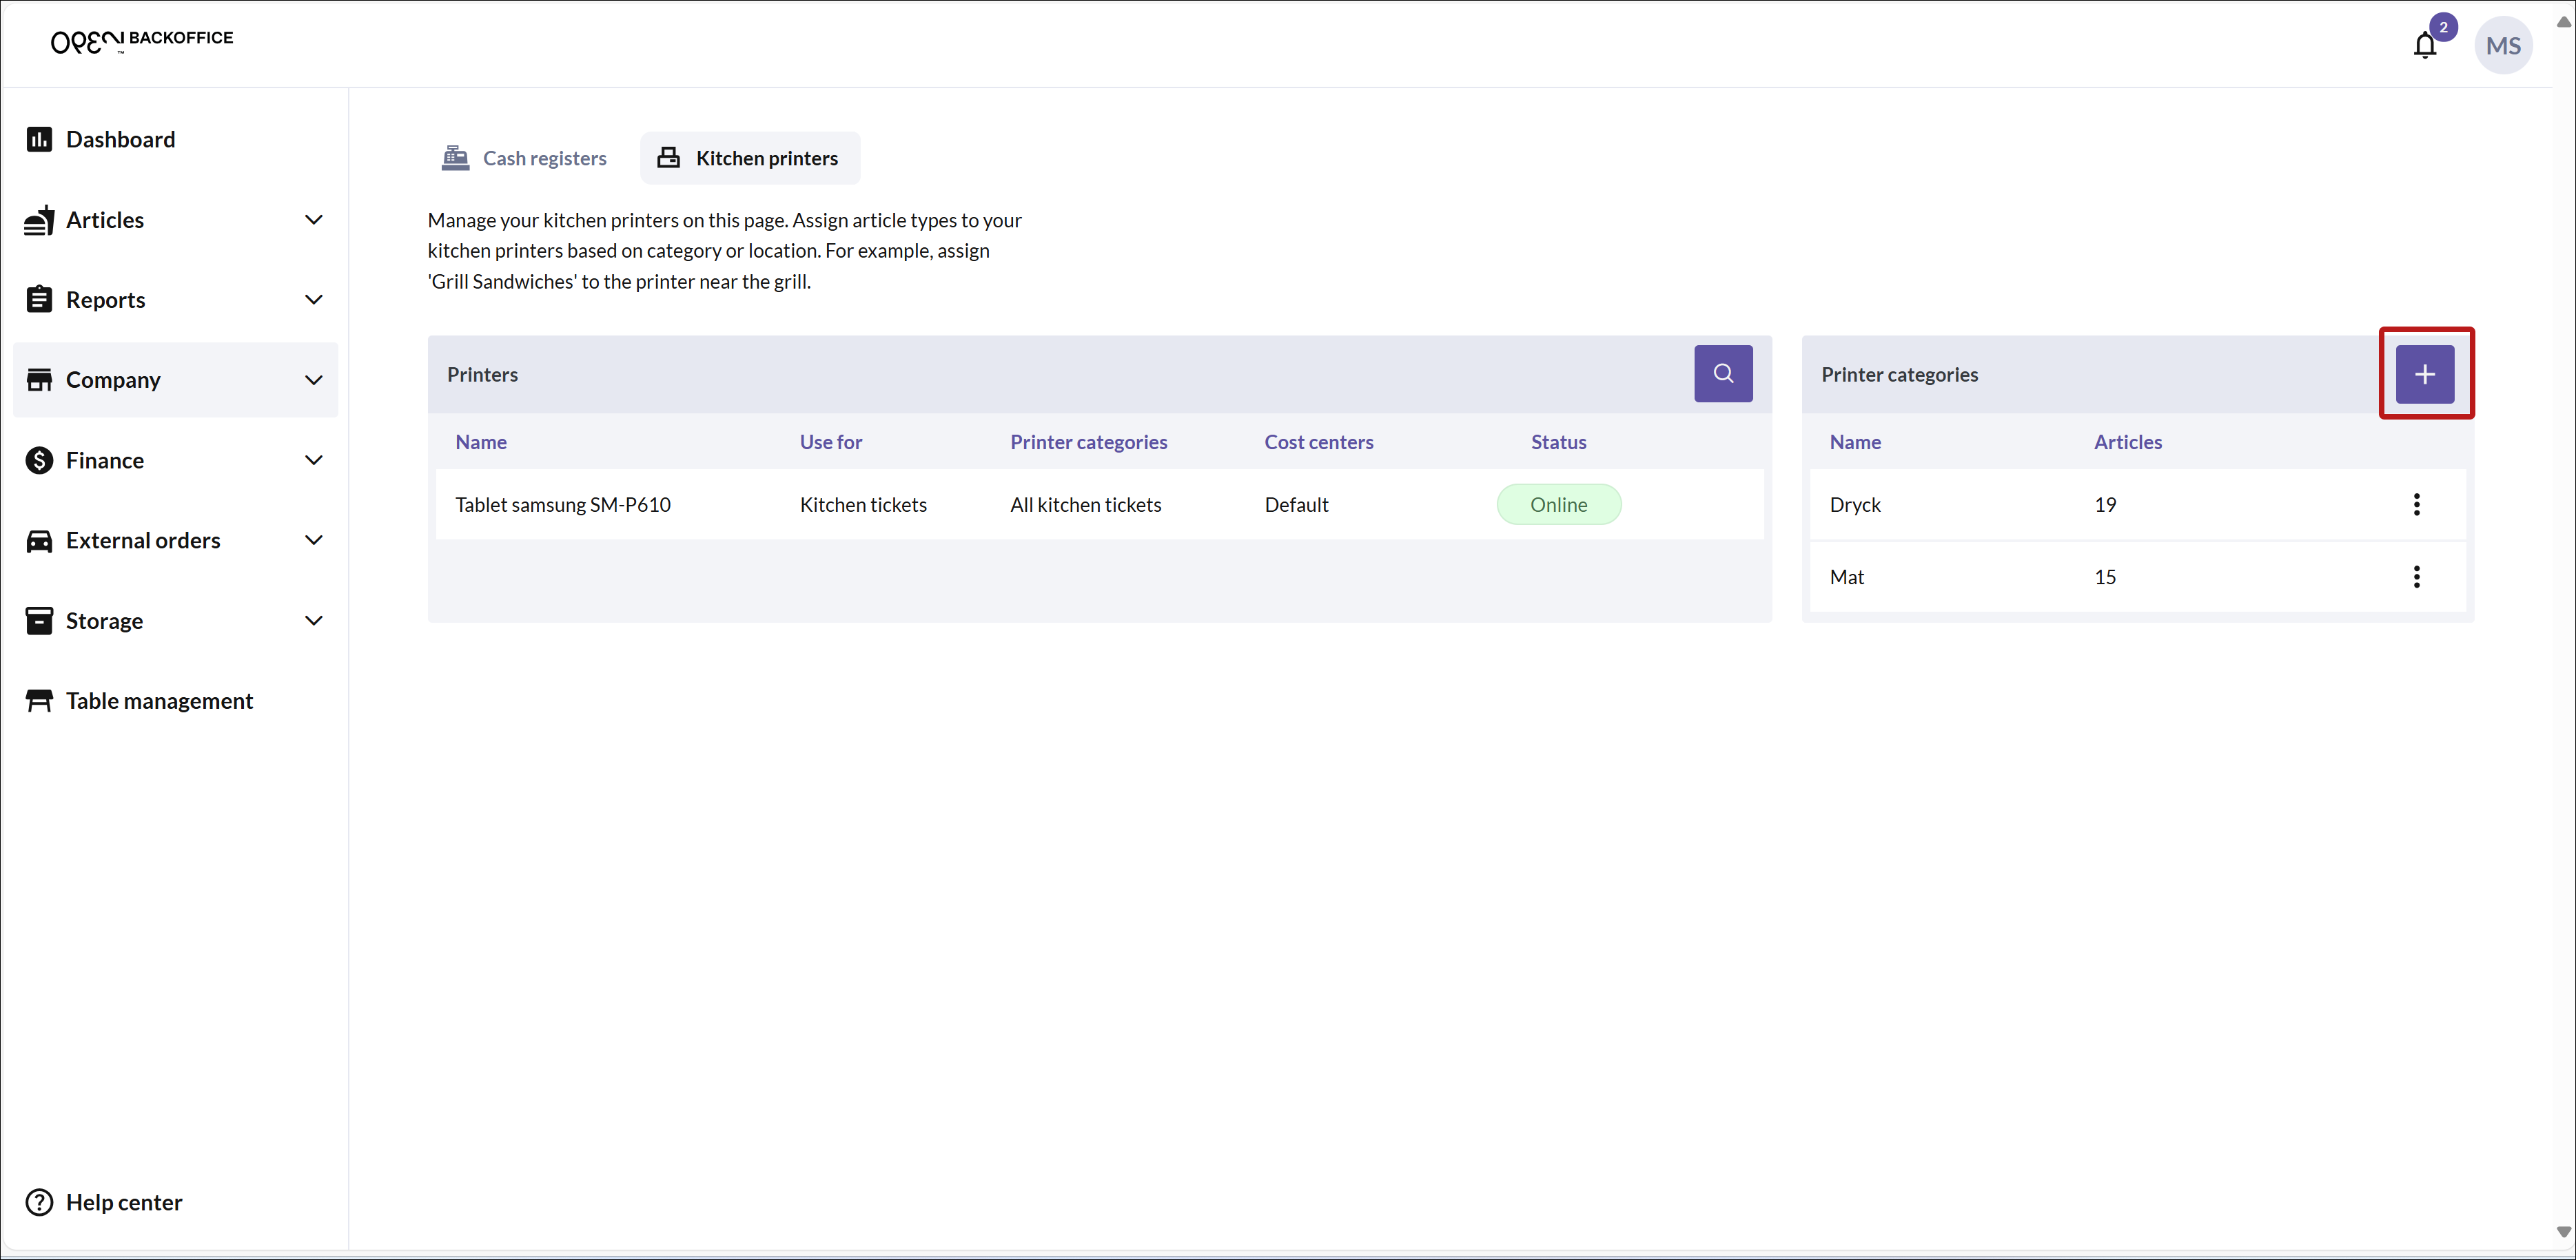
To add a new printer category, click the + button in the top right corner.
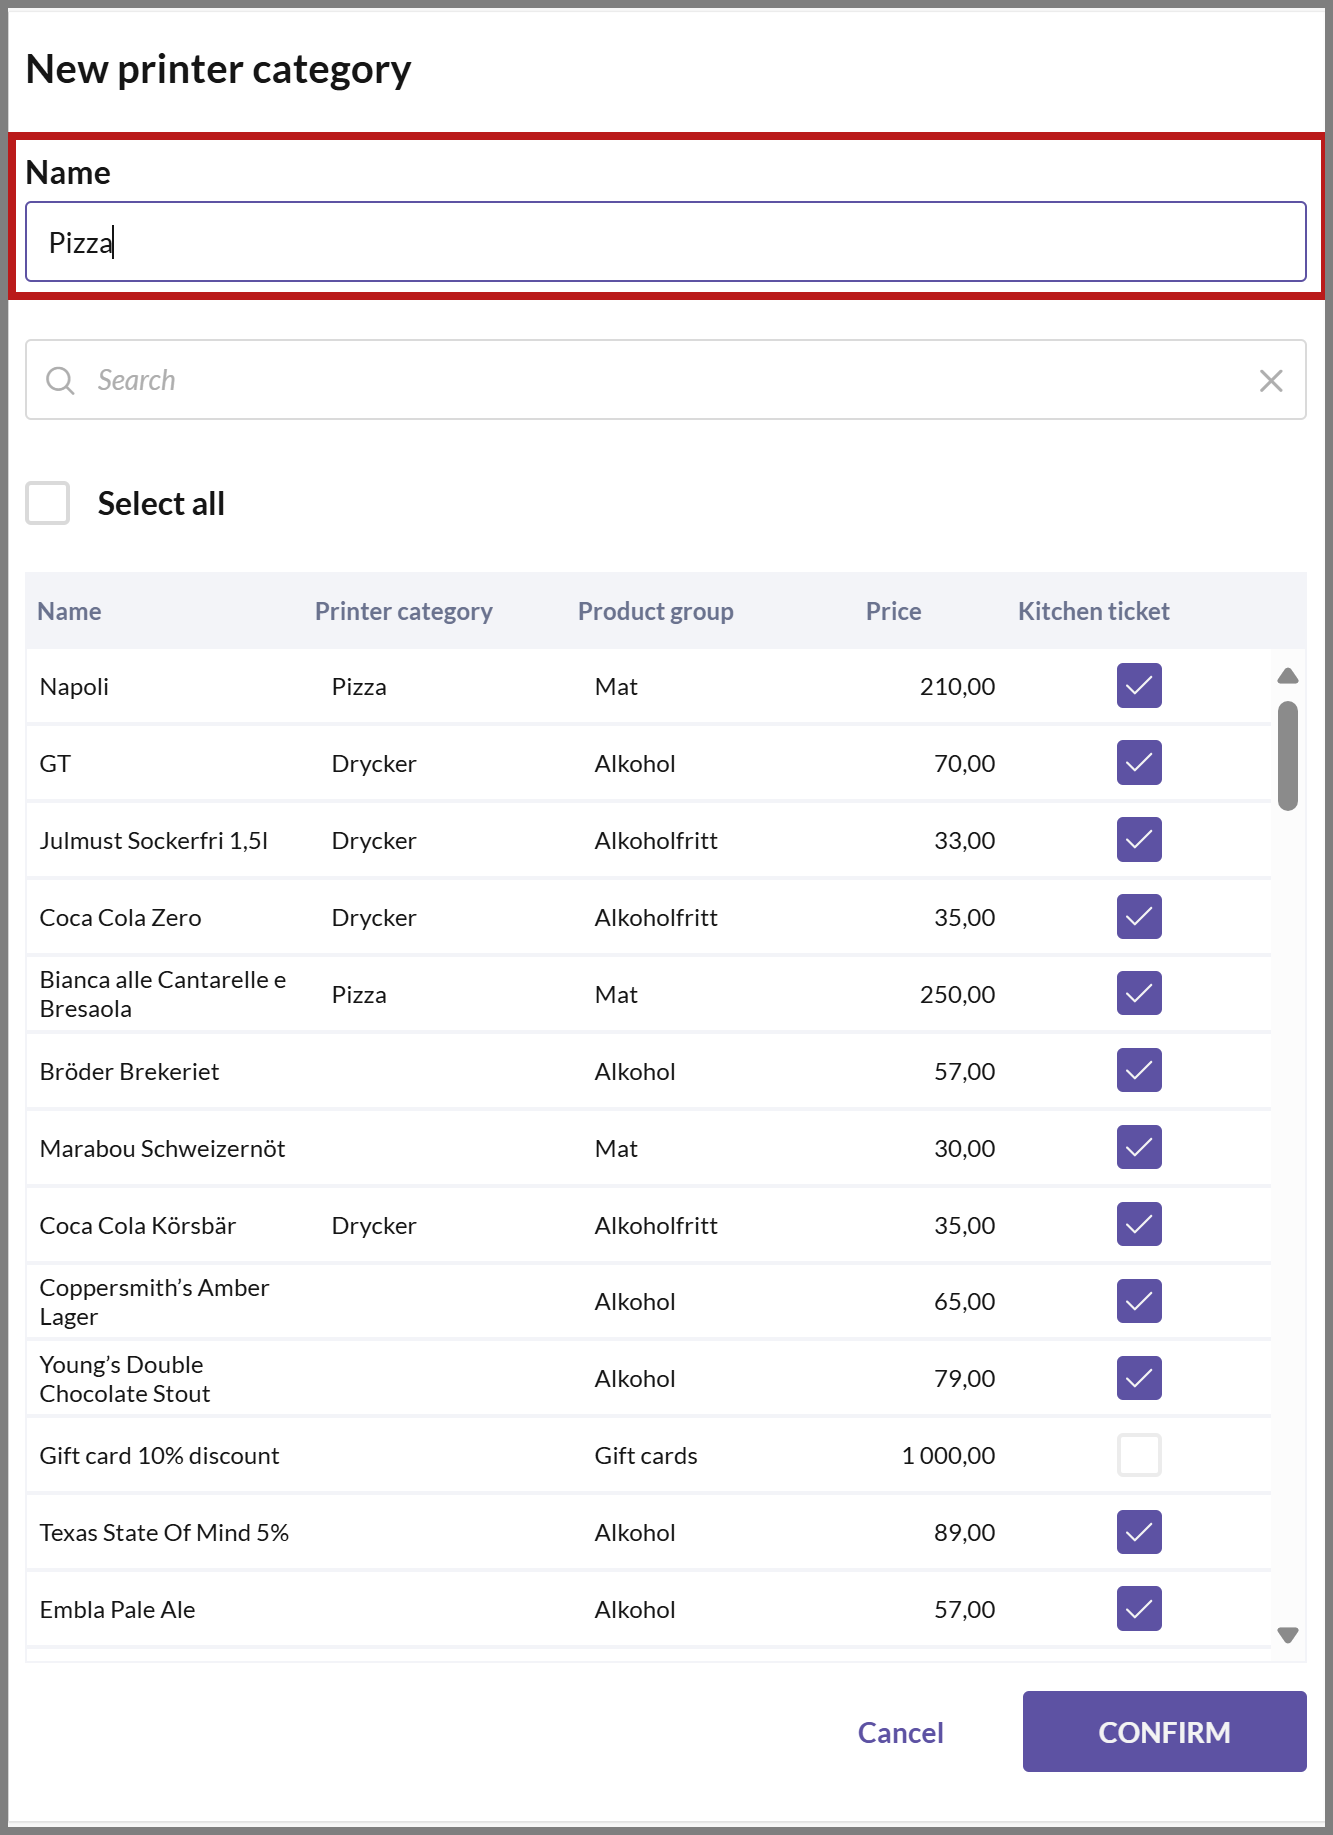
On the new page that opens, name the category and select which articles should be included.
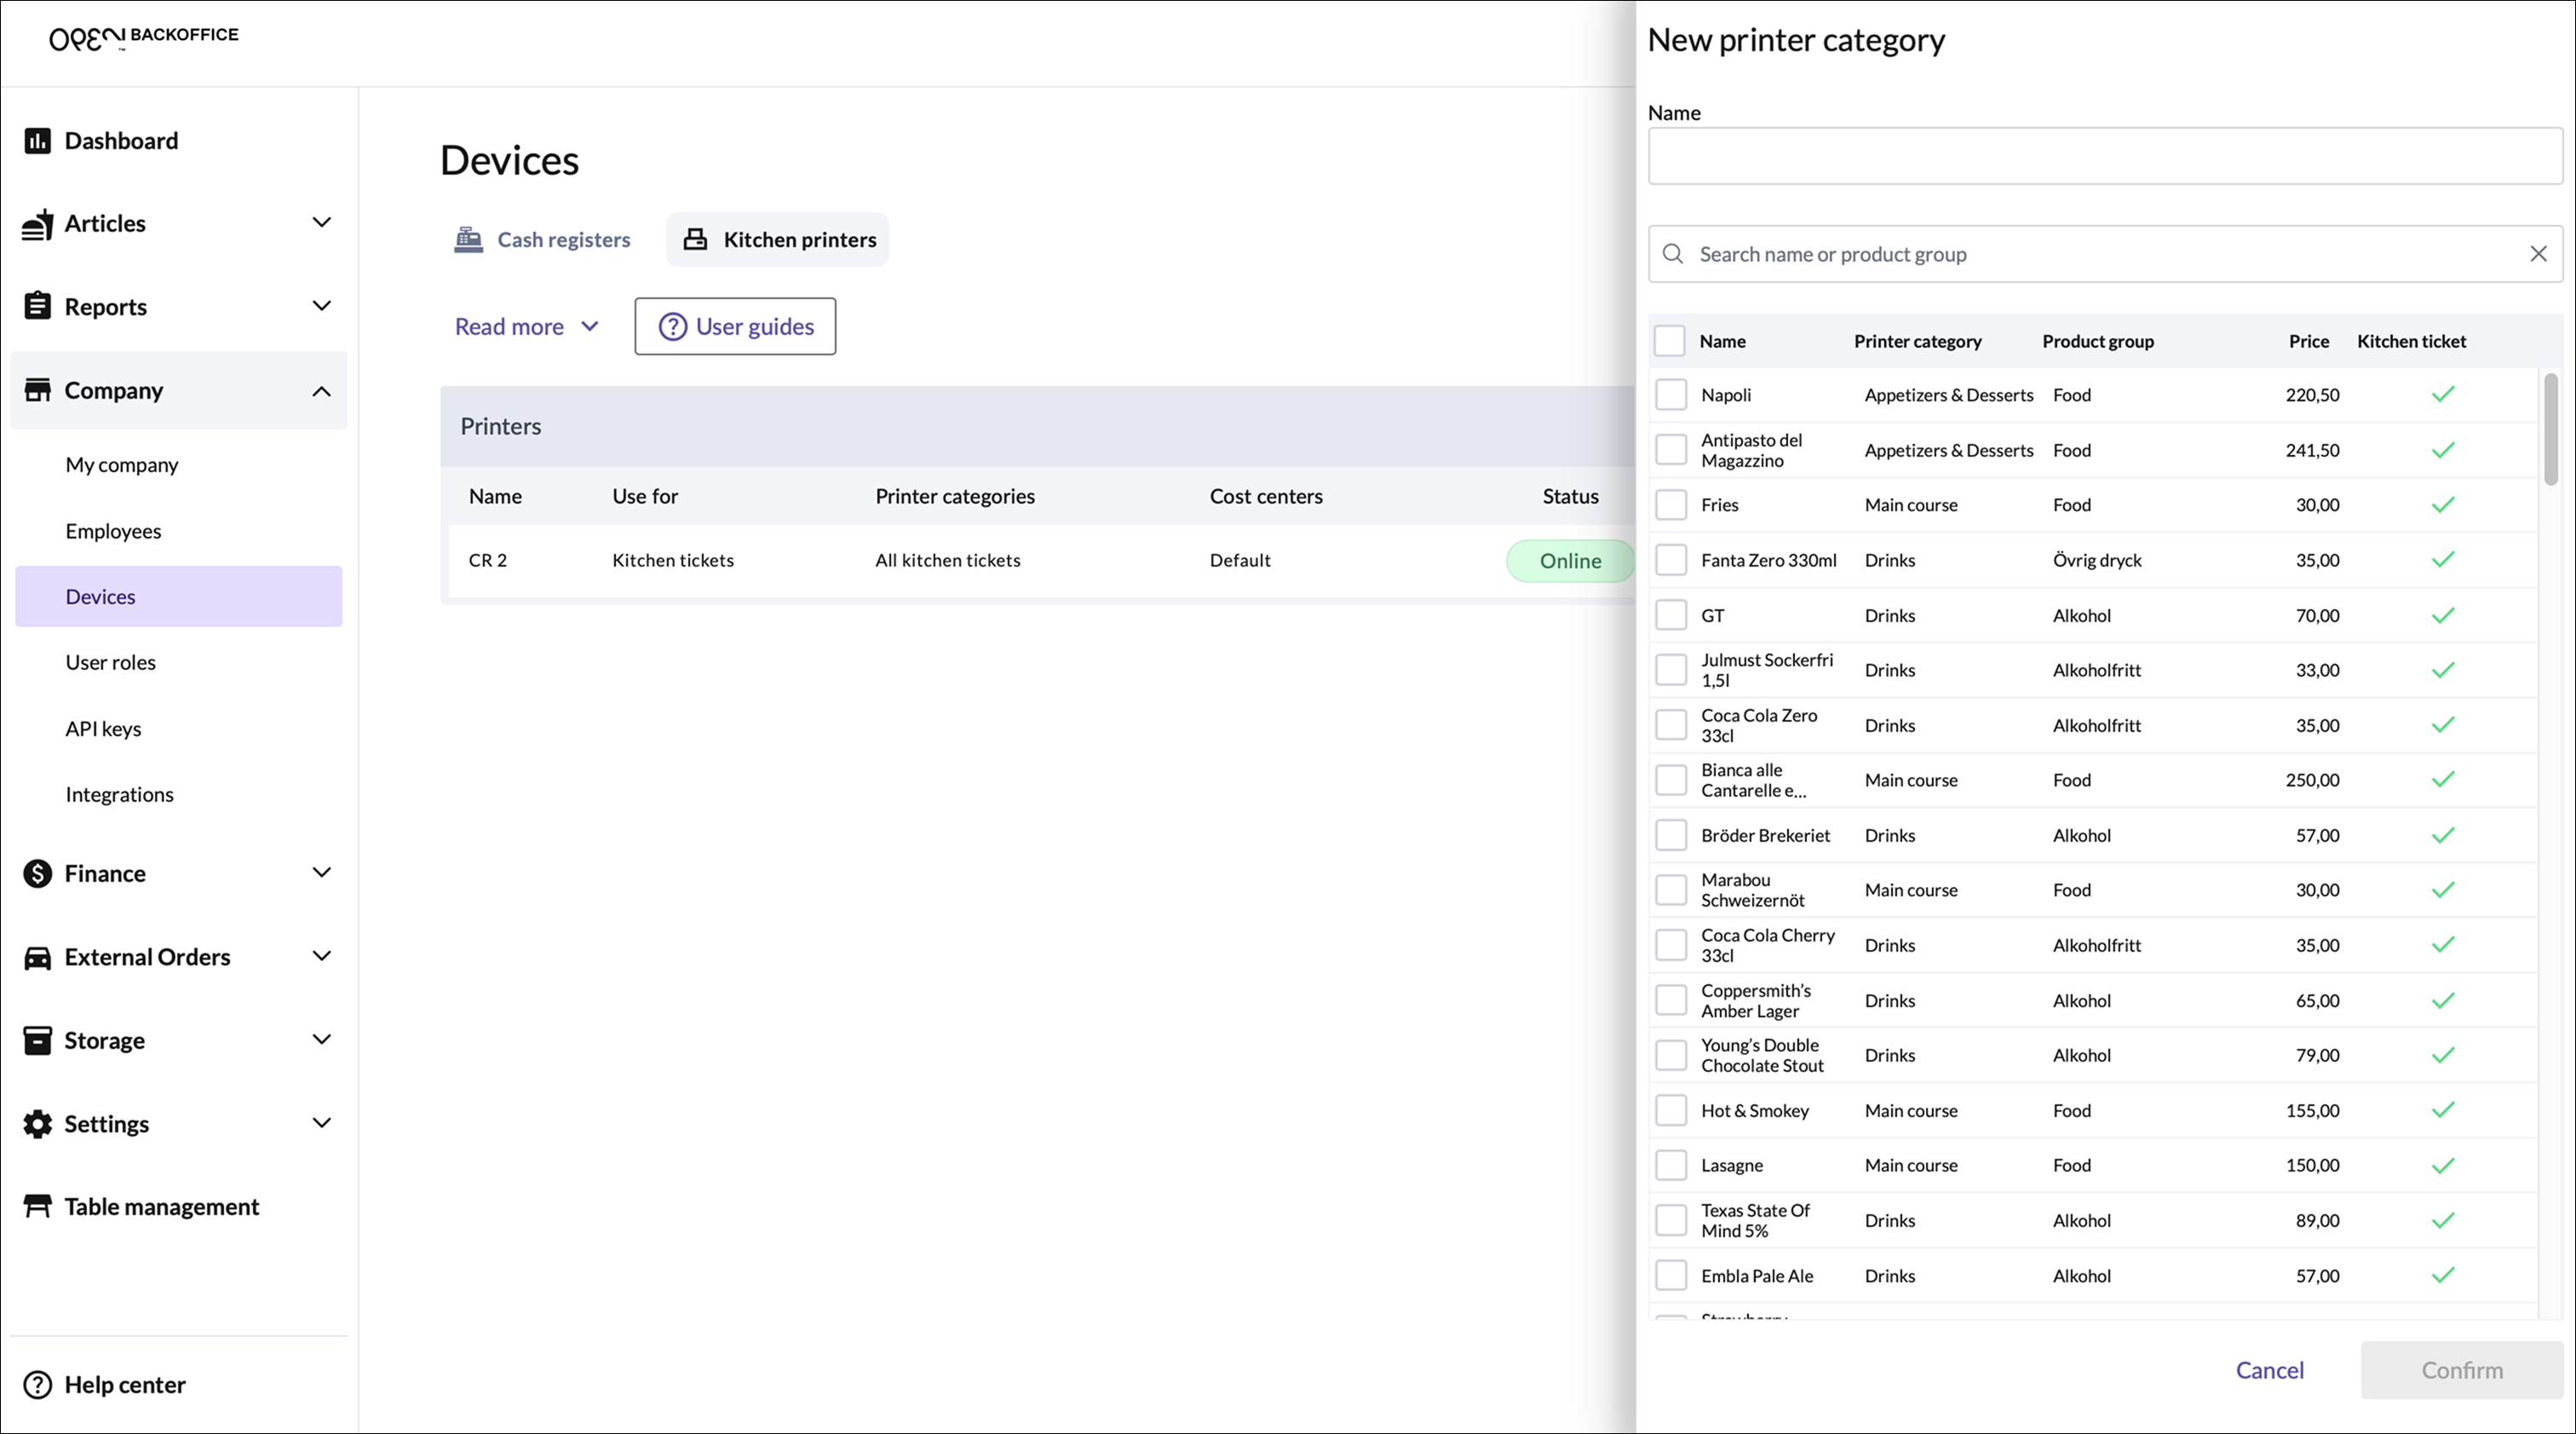
- Start by entering a name for the printer category, for example, "Pizza."
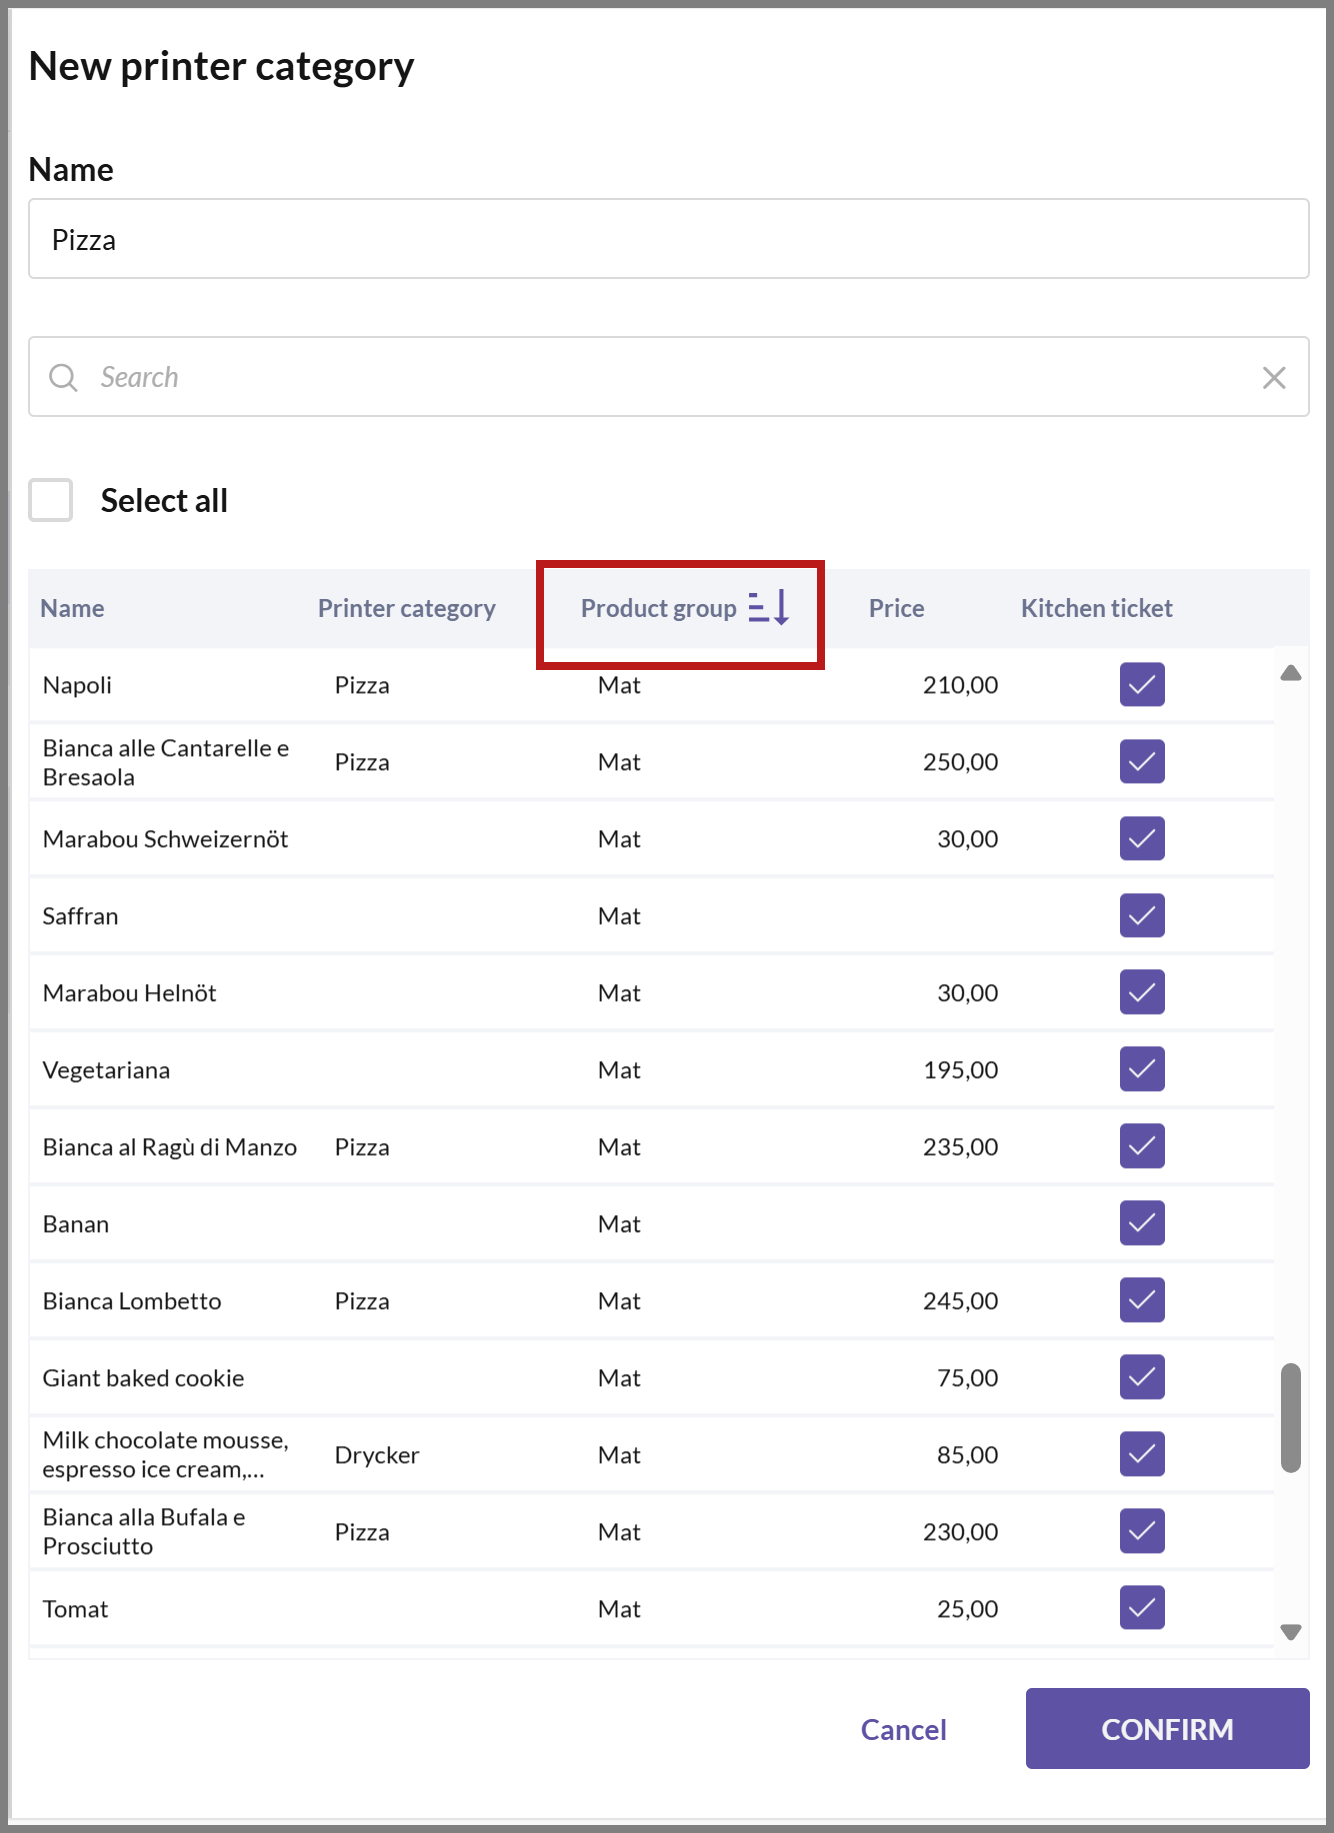
- To easily find the articles you want to add to the category, you can search for the articles or filter by product group, for example.
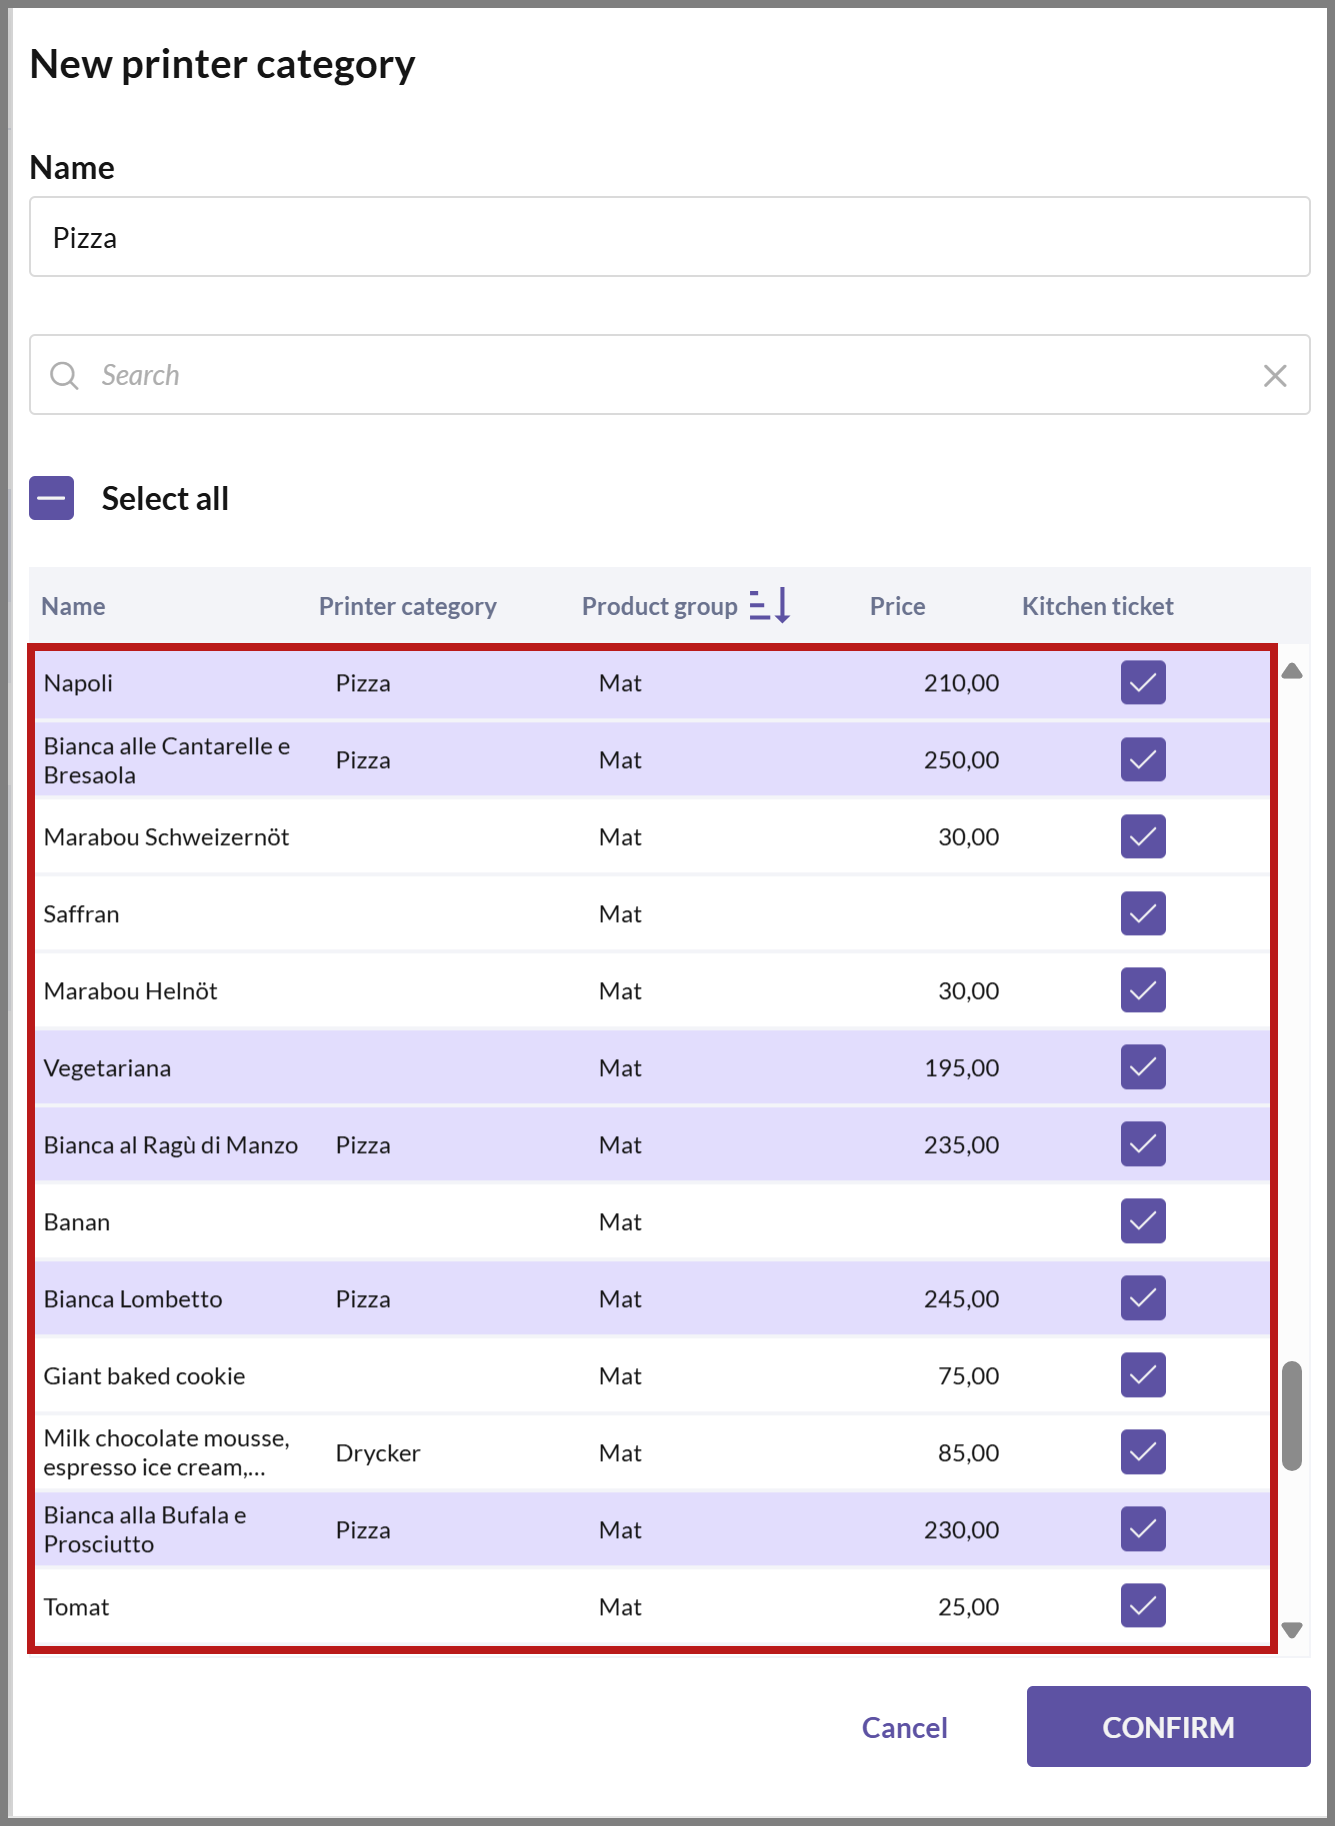
- Select the articles you want to add by clicking on them. The article rows will then be highlighted in pink. When you select an article for the category, the Print kitchen ticket setting is automatically activated..
- Once you're done, click on CONFIRM.
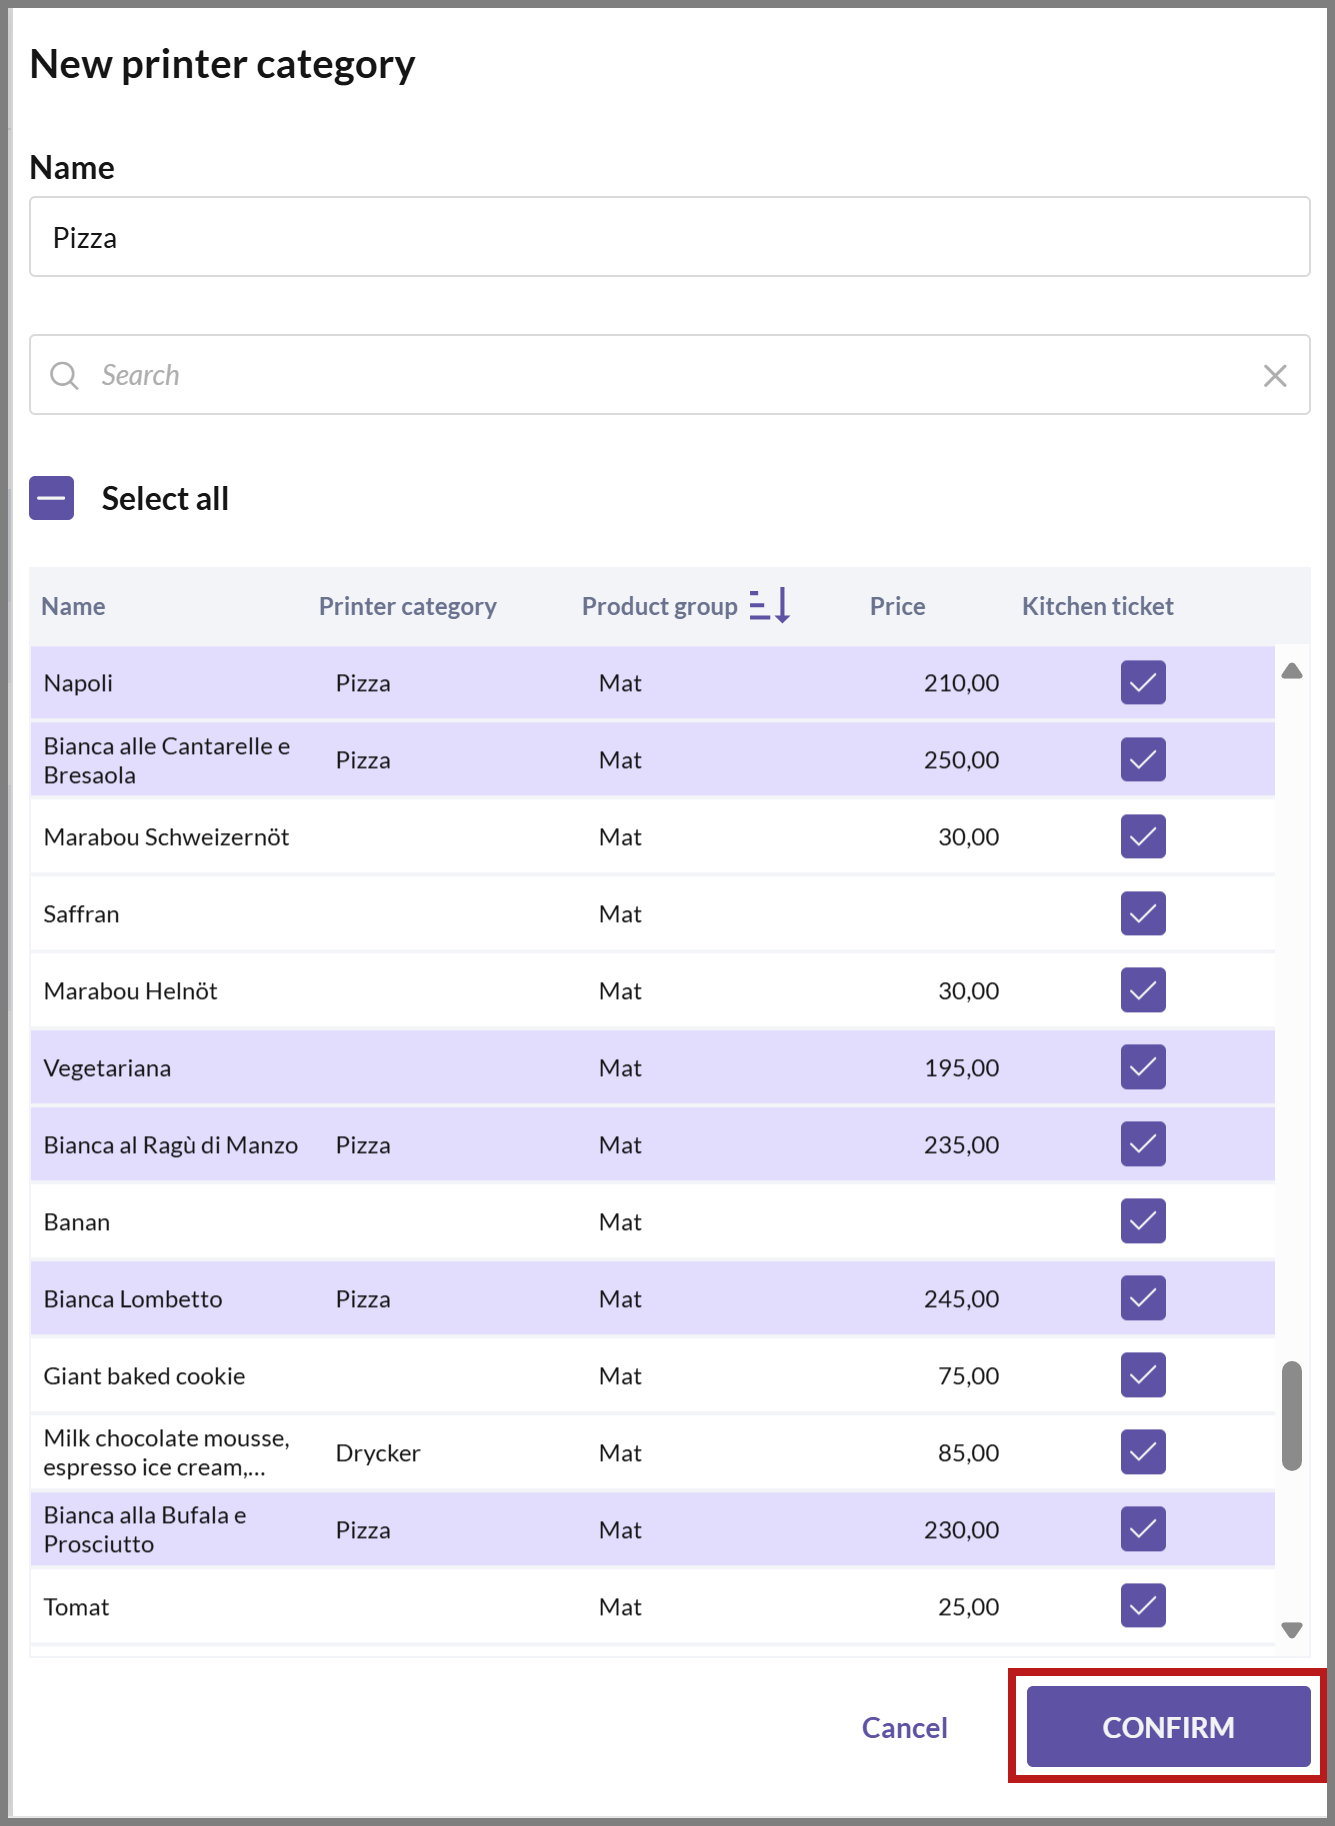
You can now see your created category in the list on the right.
Make sure to assign the printer category to the appropriate kitchen printer from the printer settings.


If you need help configuring your kitchen printer, see the guides Install Star TCP143IV printer (via Cloud) and Install Star mC-Print3 printer (via Cloud).