OPEN Order setup guide
OPEN Order is your online ordering solution — a webshop where guests can order for dine-in, pickup, or delivery. This guide walks you through setting it up in BackOffice, step by step: from preparing your cash register to publishing your menu and taking payments.
Follow the sections in order the first time you set up. Once you're up and running, you can jump to any section to change an individual setting.
Prerequesites - done by OPEN:
Set up the following licenses:
- OPEN Order Module license
- Global API license
Move the Site in question from GlobalAPI endpoint pos-gateway2 to pos-gateway1.
QR codes
QR codes for your tables for QR ordering can be made with any "QR code creator" online. URL to use for creating QR codes: https://order.one.openpos.tech/restaurant/restaurantAlias/qr/table/tableNumber
Note
Replace “restaurantAlias” and “tableNumber” with the actual details.
Before you start: set up a cash register ID for each order store
Every restaurant location you connect to OPEN Order needs its own cash register ID in BackOffice. Each cash register ID becomes one OPEN Order store — whether you run a single restaurant or several locations.
Create a new cash register ID
- Go to Company structure → Cash registers.
- Click New.
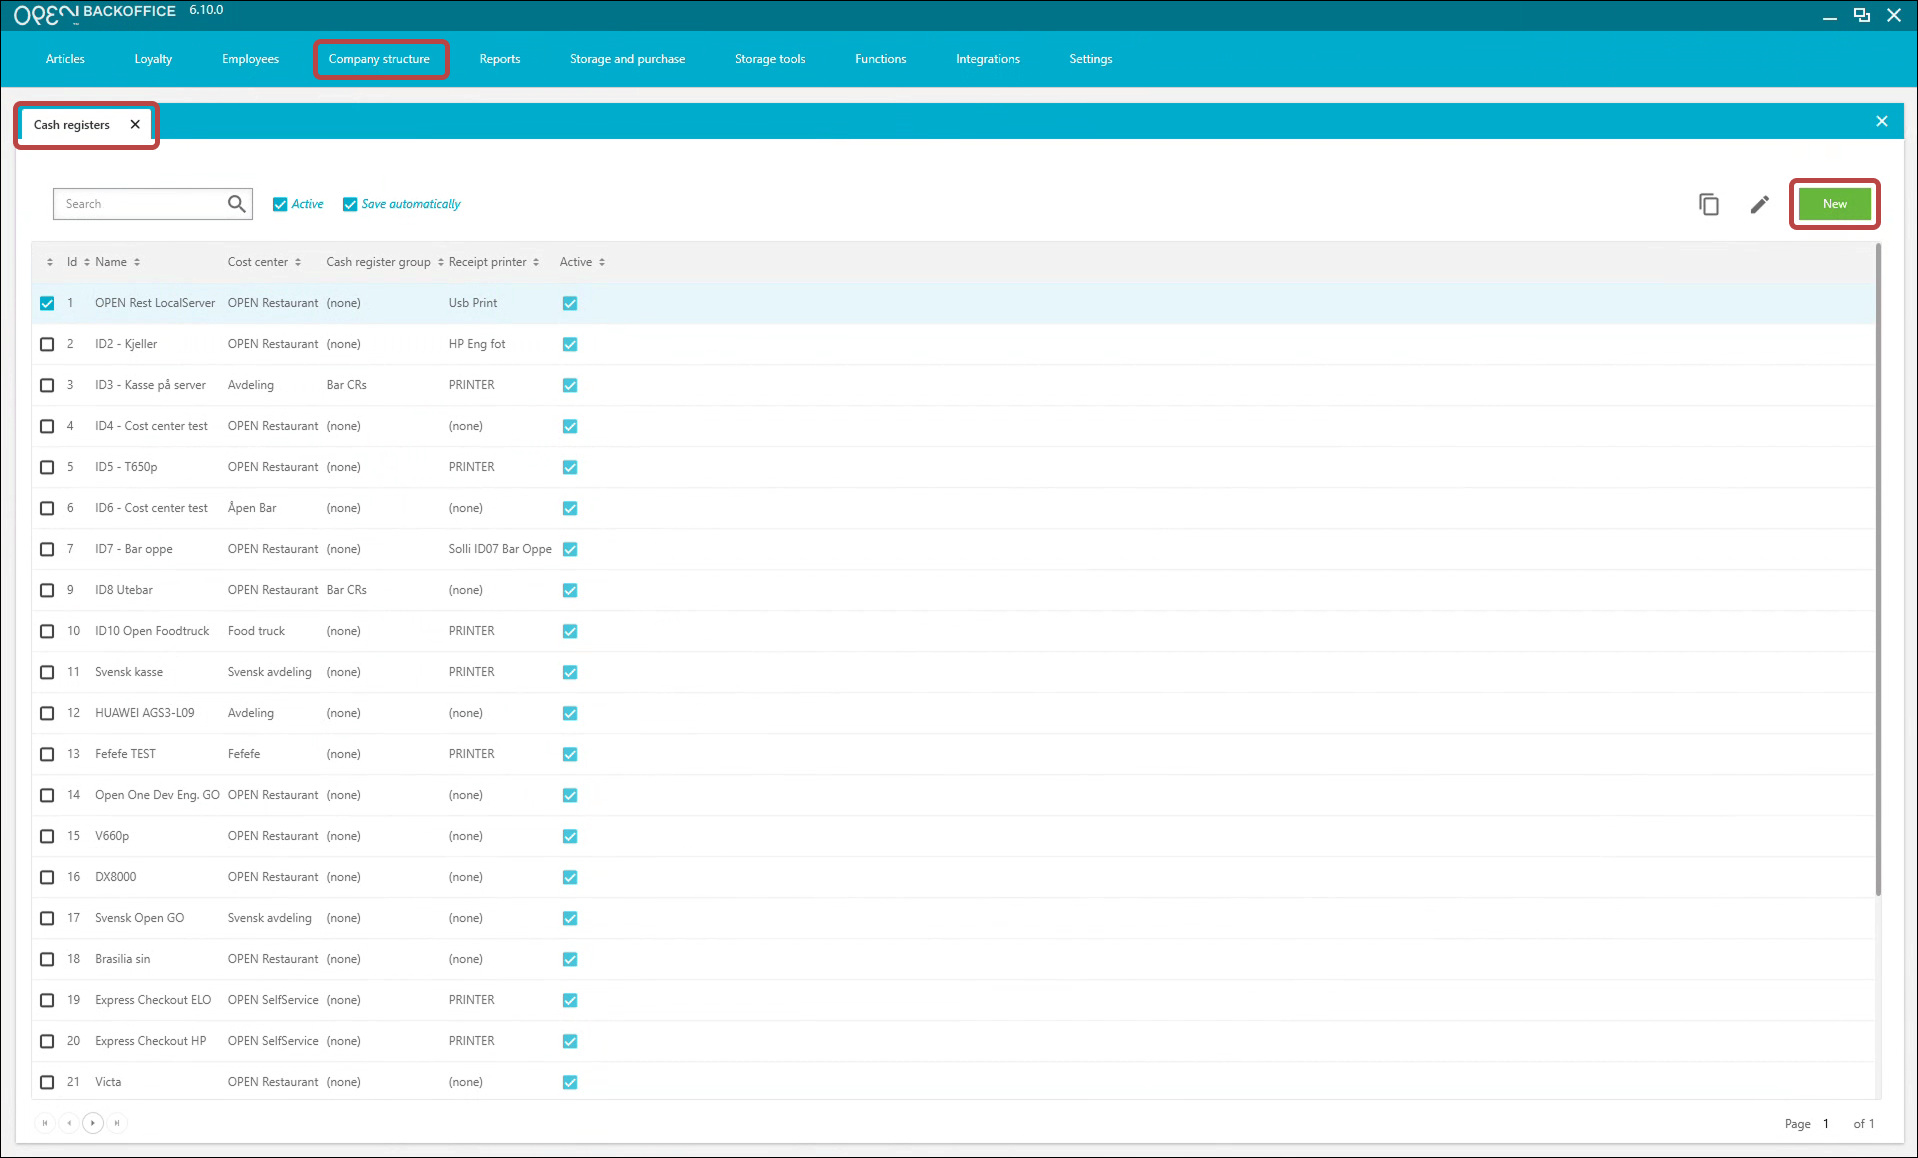

- Fill in the settings (name, cost center, cash register group, and so on).

1. Activate OPEN Order in BackOffice
Mandatory settings
To get OPEN Order up and running, you must complete these four settings:
- Enable OPEN Order
- Enable at least one delivery type
- Set a default employee ID
- Show in list on customer site
Enable Open order
- Go to Settings → Settings → Open order → Activation.
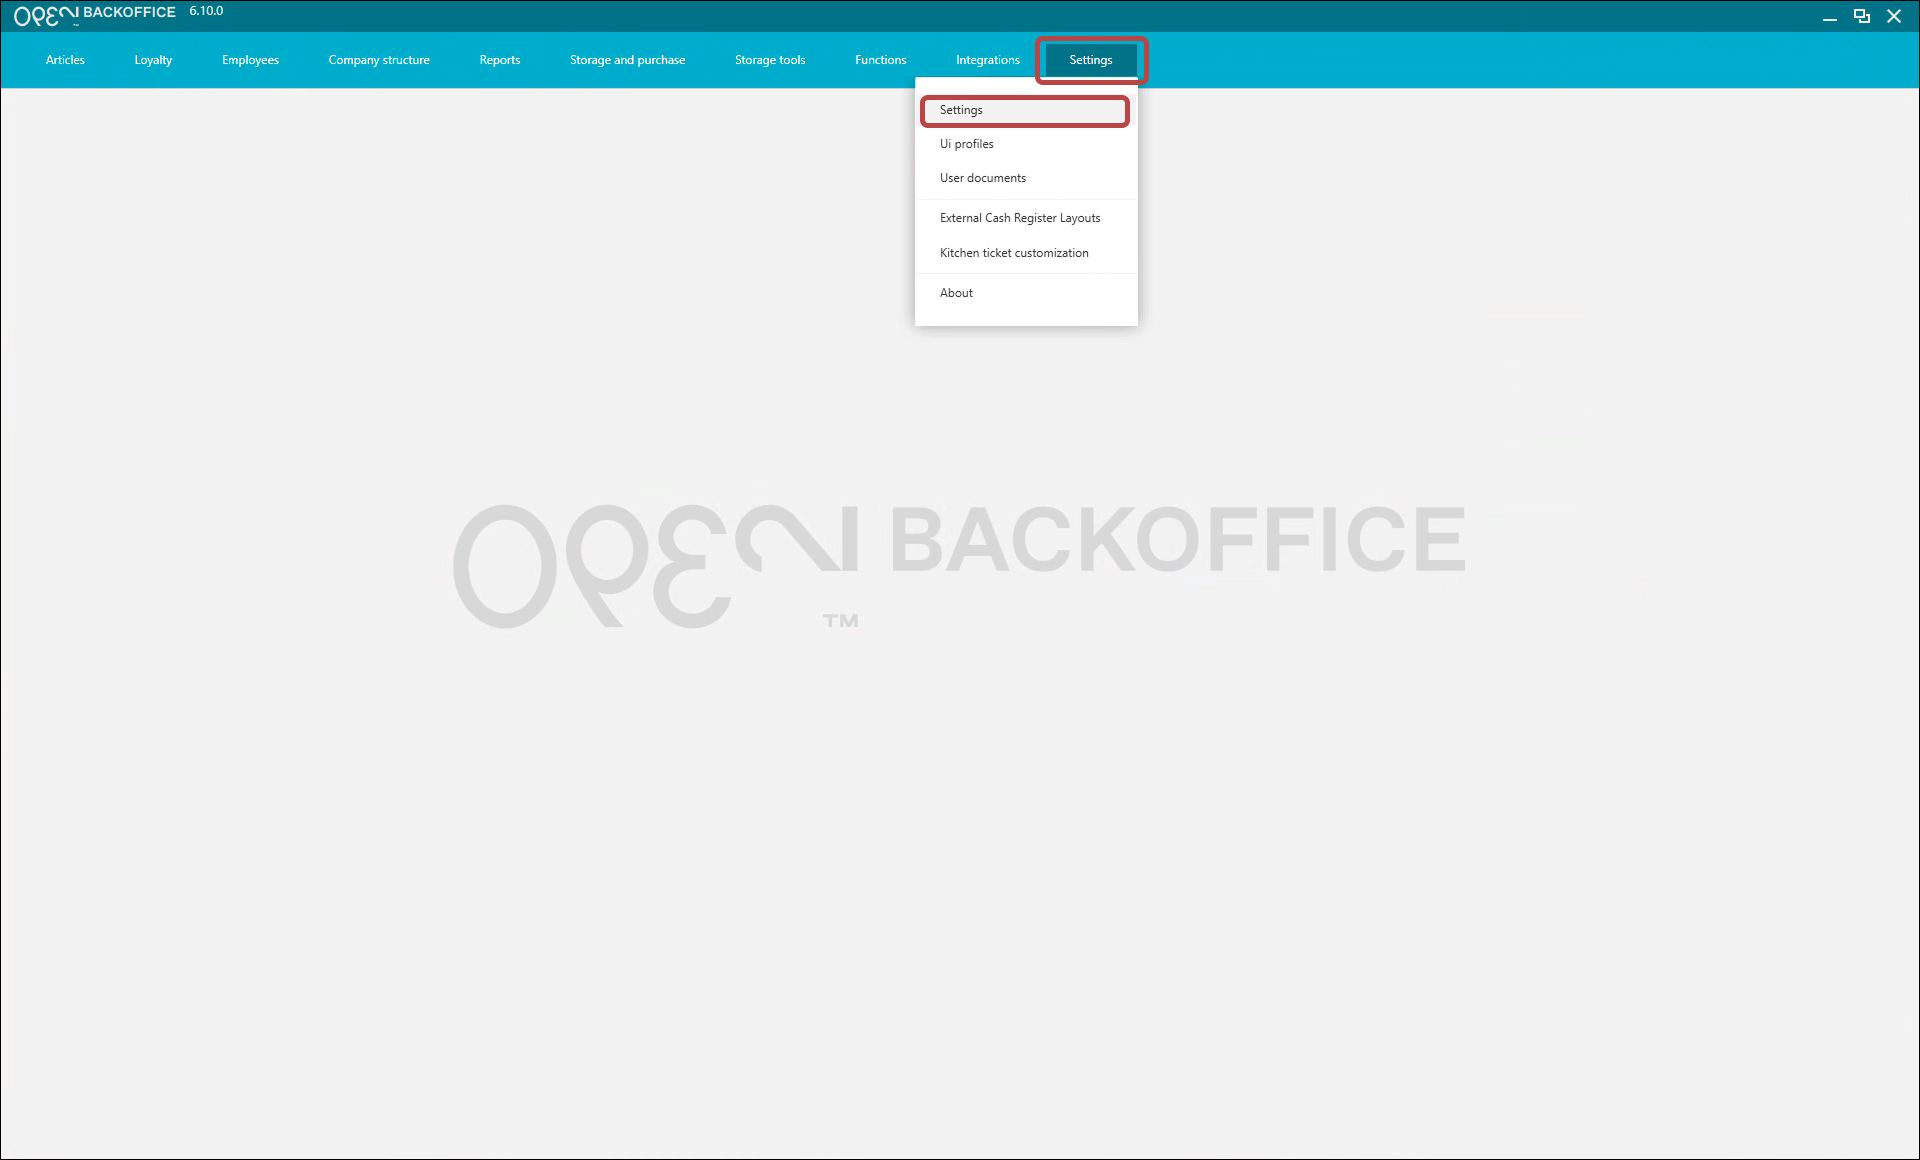
- Click Enable Open order.
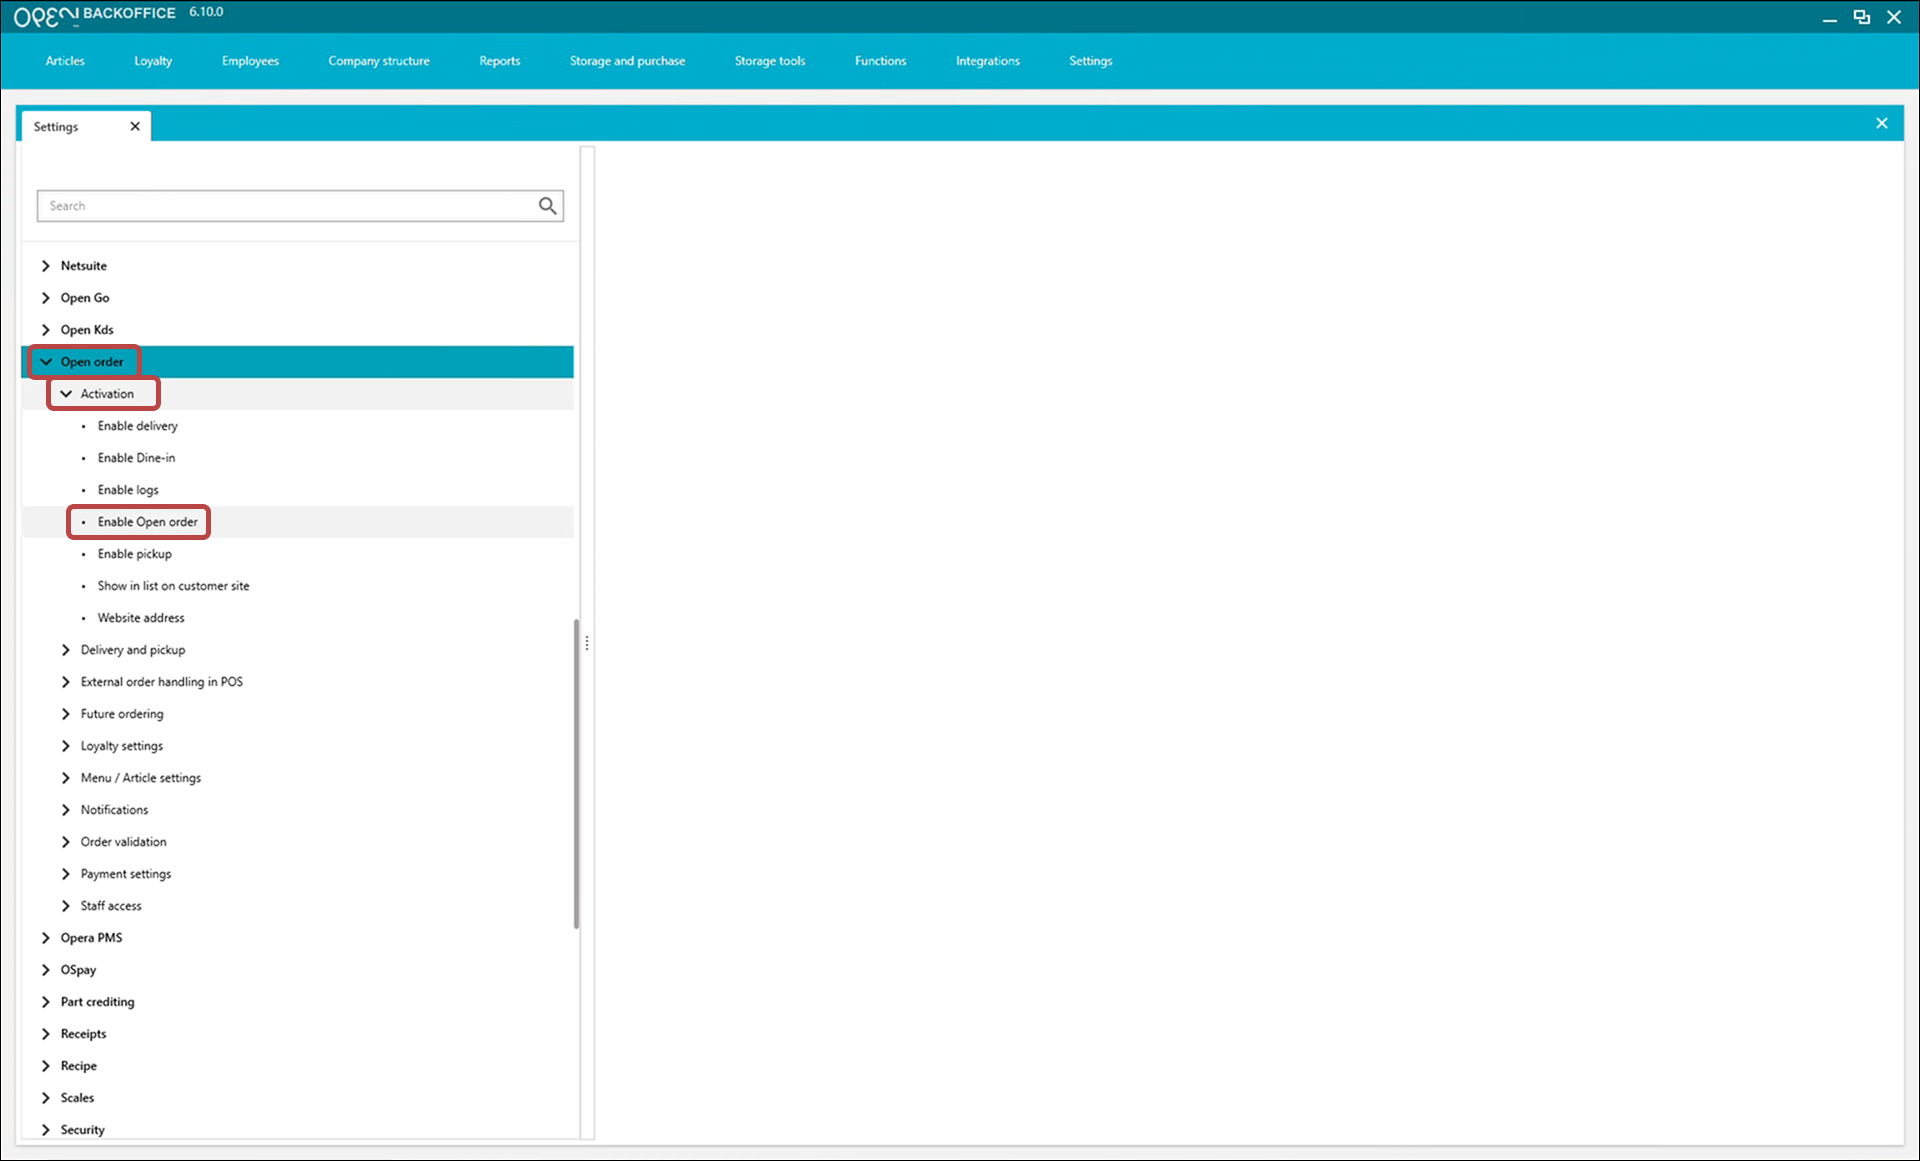


- Your OPEN Order stores are listed here. To create a new one, select Click here to add new item.

- Complete the settings:
- Choose the Company.
- Choose the Cost center.
- Choose the Cash register ID for your order store.
- Under Value, tick the box to set it to true and enable OPEN Order.

Show in list on customer site
You can choose how — and whether — your order store appears on OPEN's shared ordering site: https://order.one.openpos.tech/. This is optional. You'll get a unique URL for your restaurant either way.
- Go to Settings → Settings → Open order → Activation.
- Click Show in list on customer site.
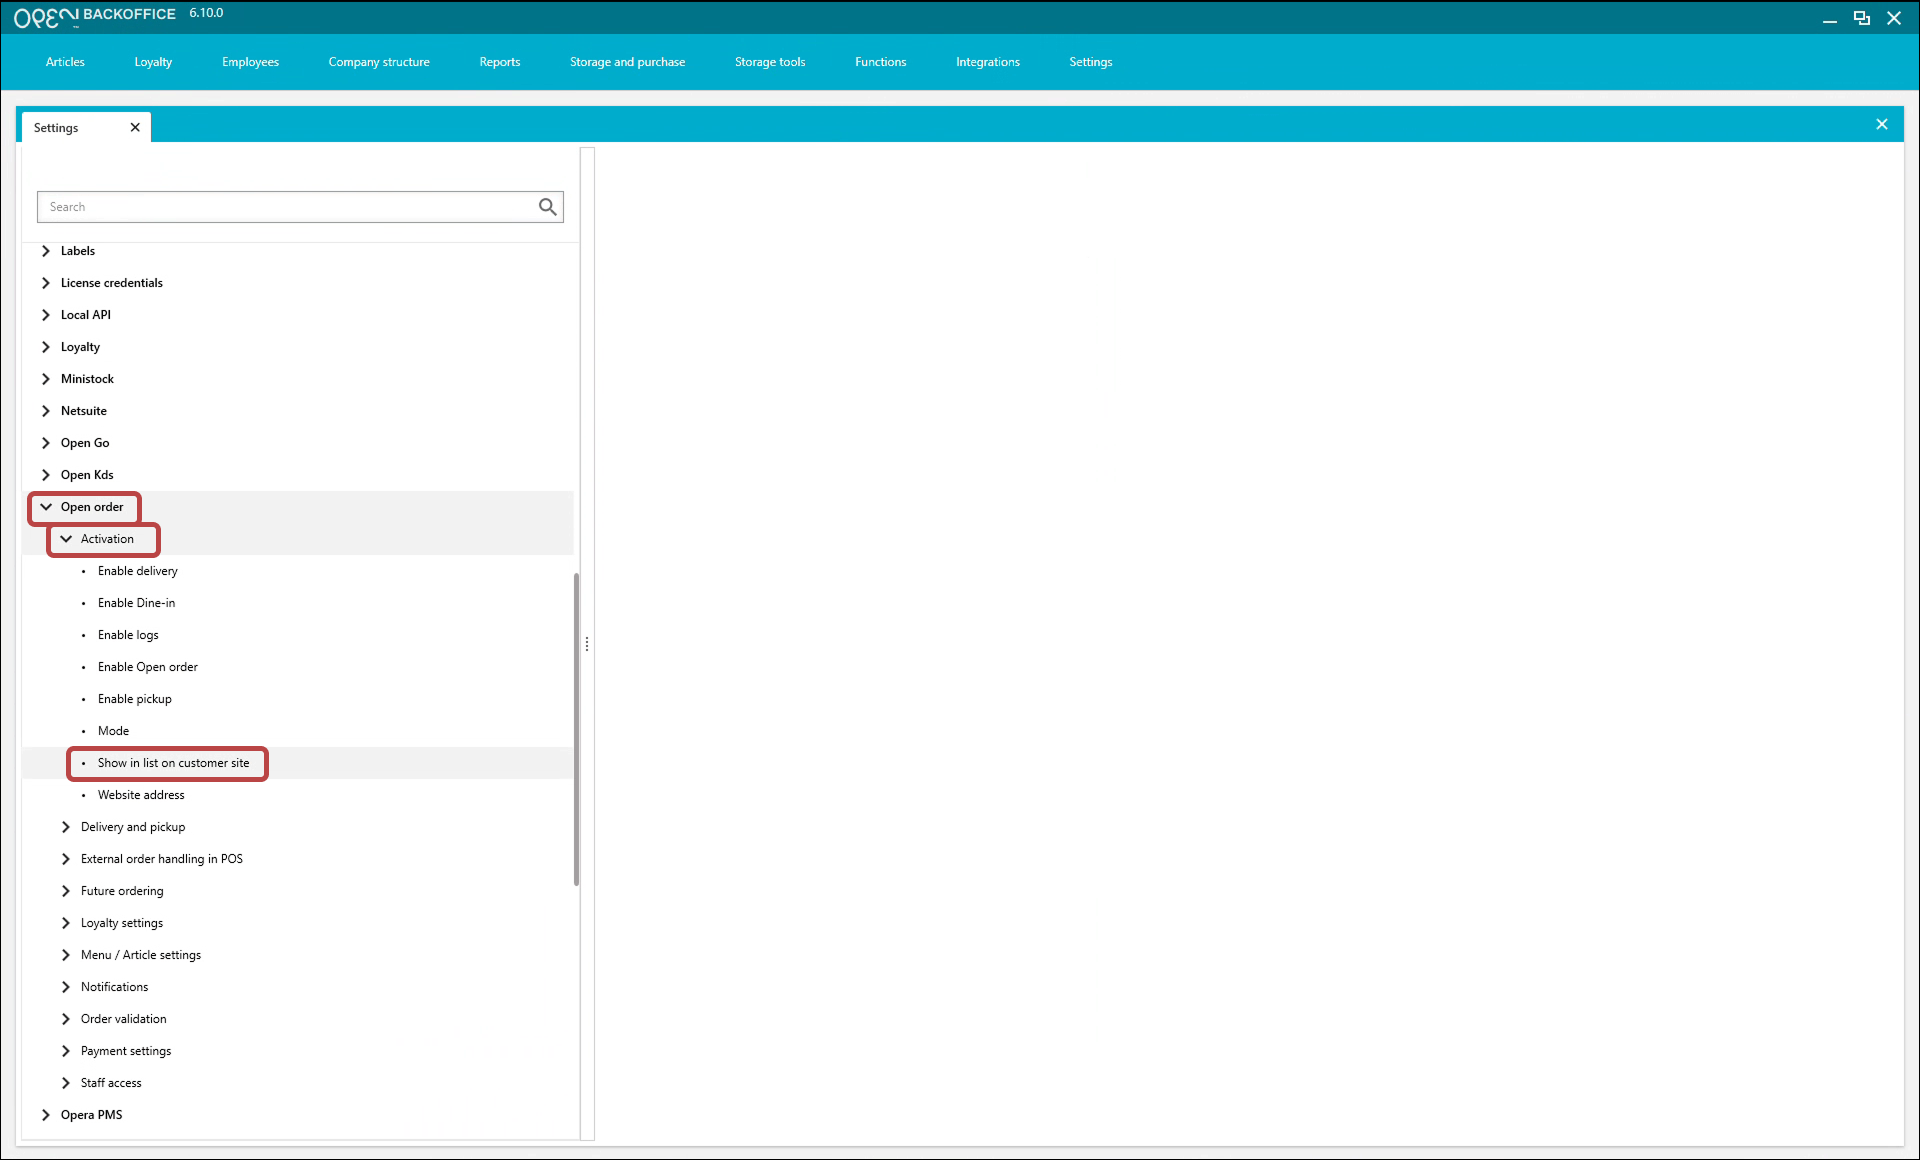

- To set up a new order store, select Click here to add new item.

- For each store, choose an option:
- ShowSingle — for a single store.
- ShowWithAll — for a restaurant chain shown as one joint option. Guests can then choose between your locations.
- Hide — if you don't want your store on the shared OPEN Order site.

How the restaurant name appears
- ShowSingle uses the name of the cash register you created for OPEN Order.
- ShowWithAll uses the parent company in your One company hierarchy as the chain name, then the cash register name for each store.
Choose your delivery types
Enable at least one delivery type for your order site: dine-in, pickup, or delivery.
- Go to Settings → Settings → Open order → Activation.
- Click Enable Delivery, Enable Pickup, or Enable Dine-in.
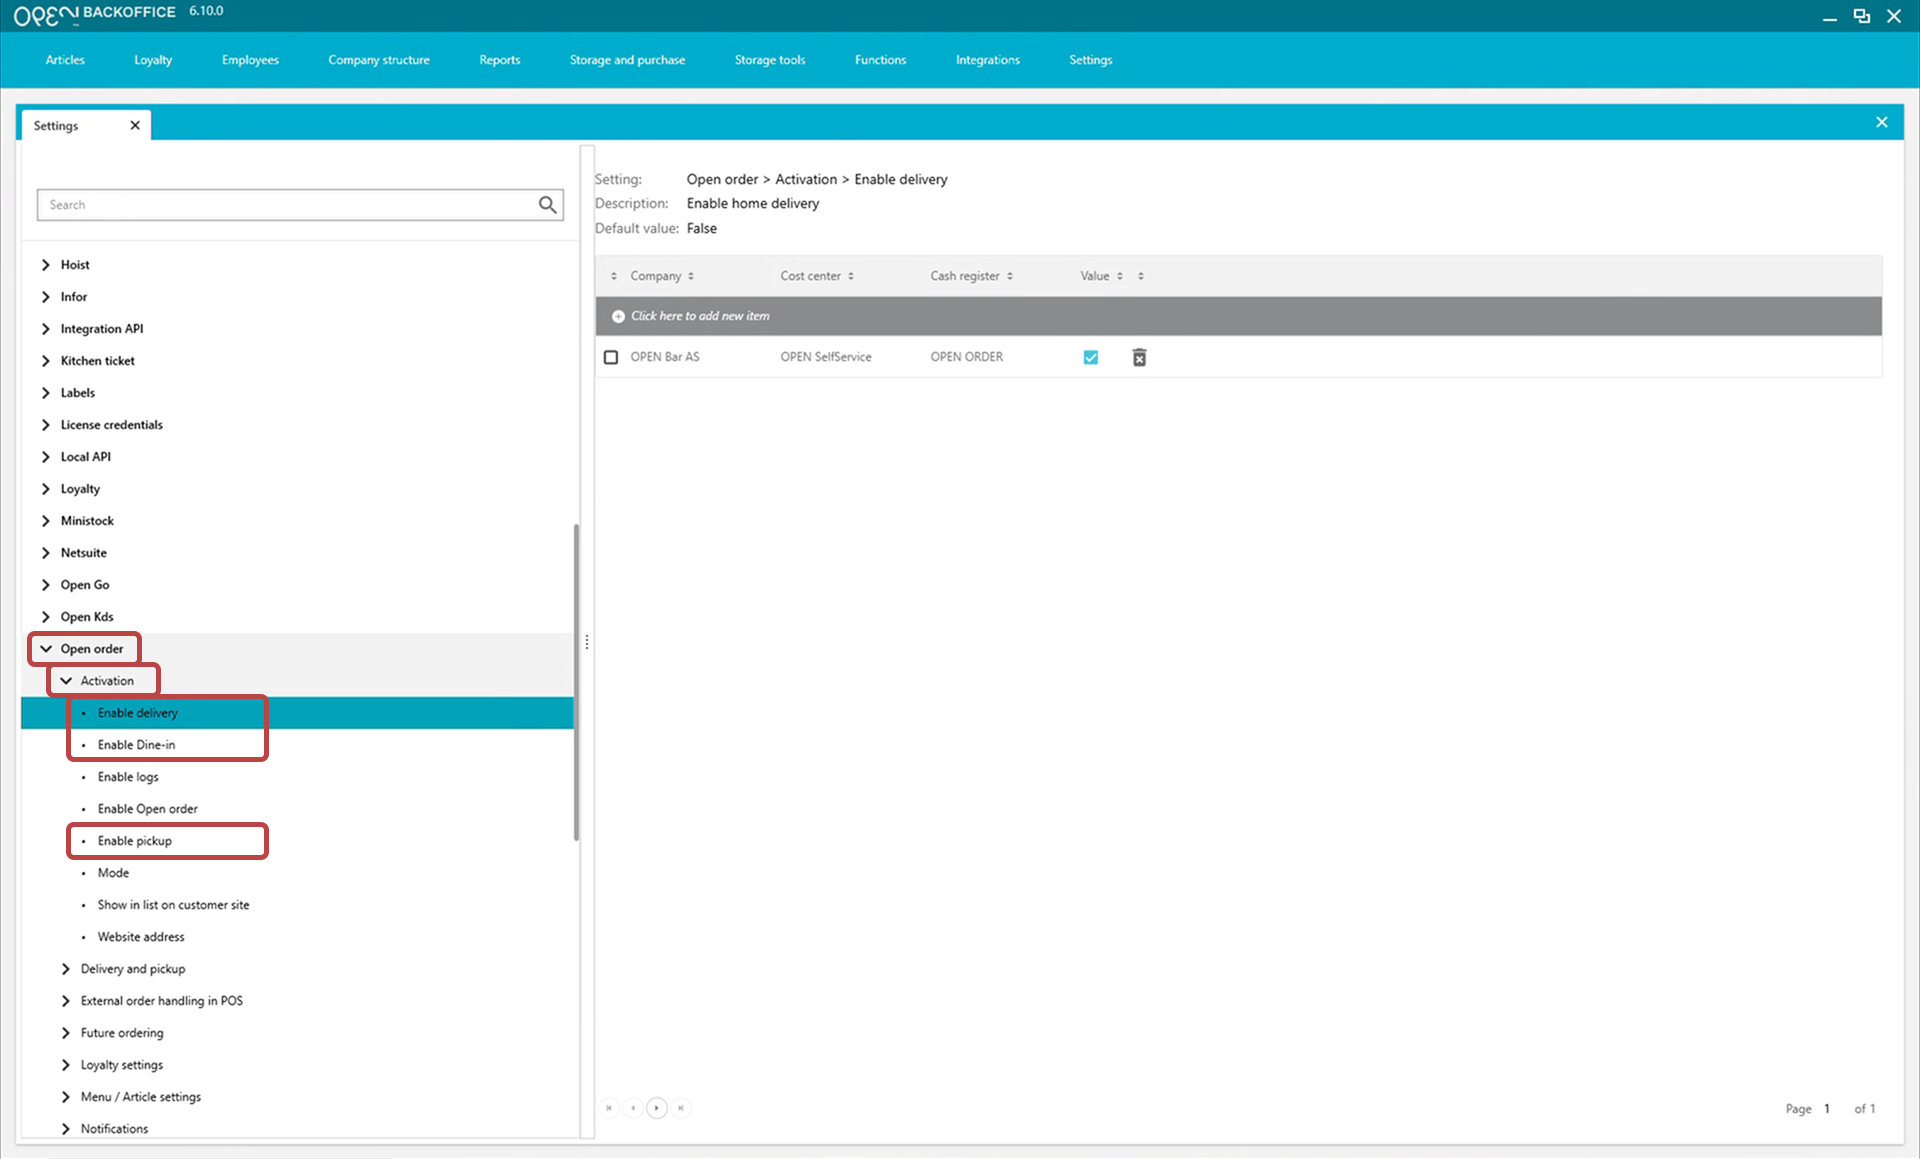

- To set up a new order store, select Click here to add new item.

- For the relevant order store, tick the box under Value to enable the delivery type.

Set a default employee ID
- Go to Settings → Settings → Open order → External order handling in POS.
- Open Default employee ID.
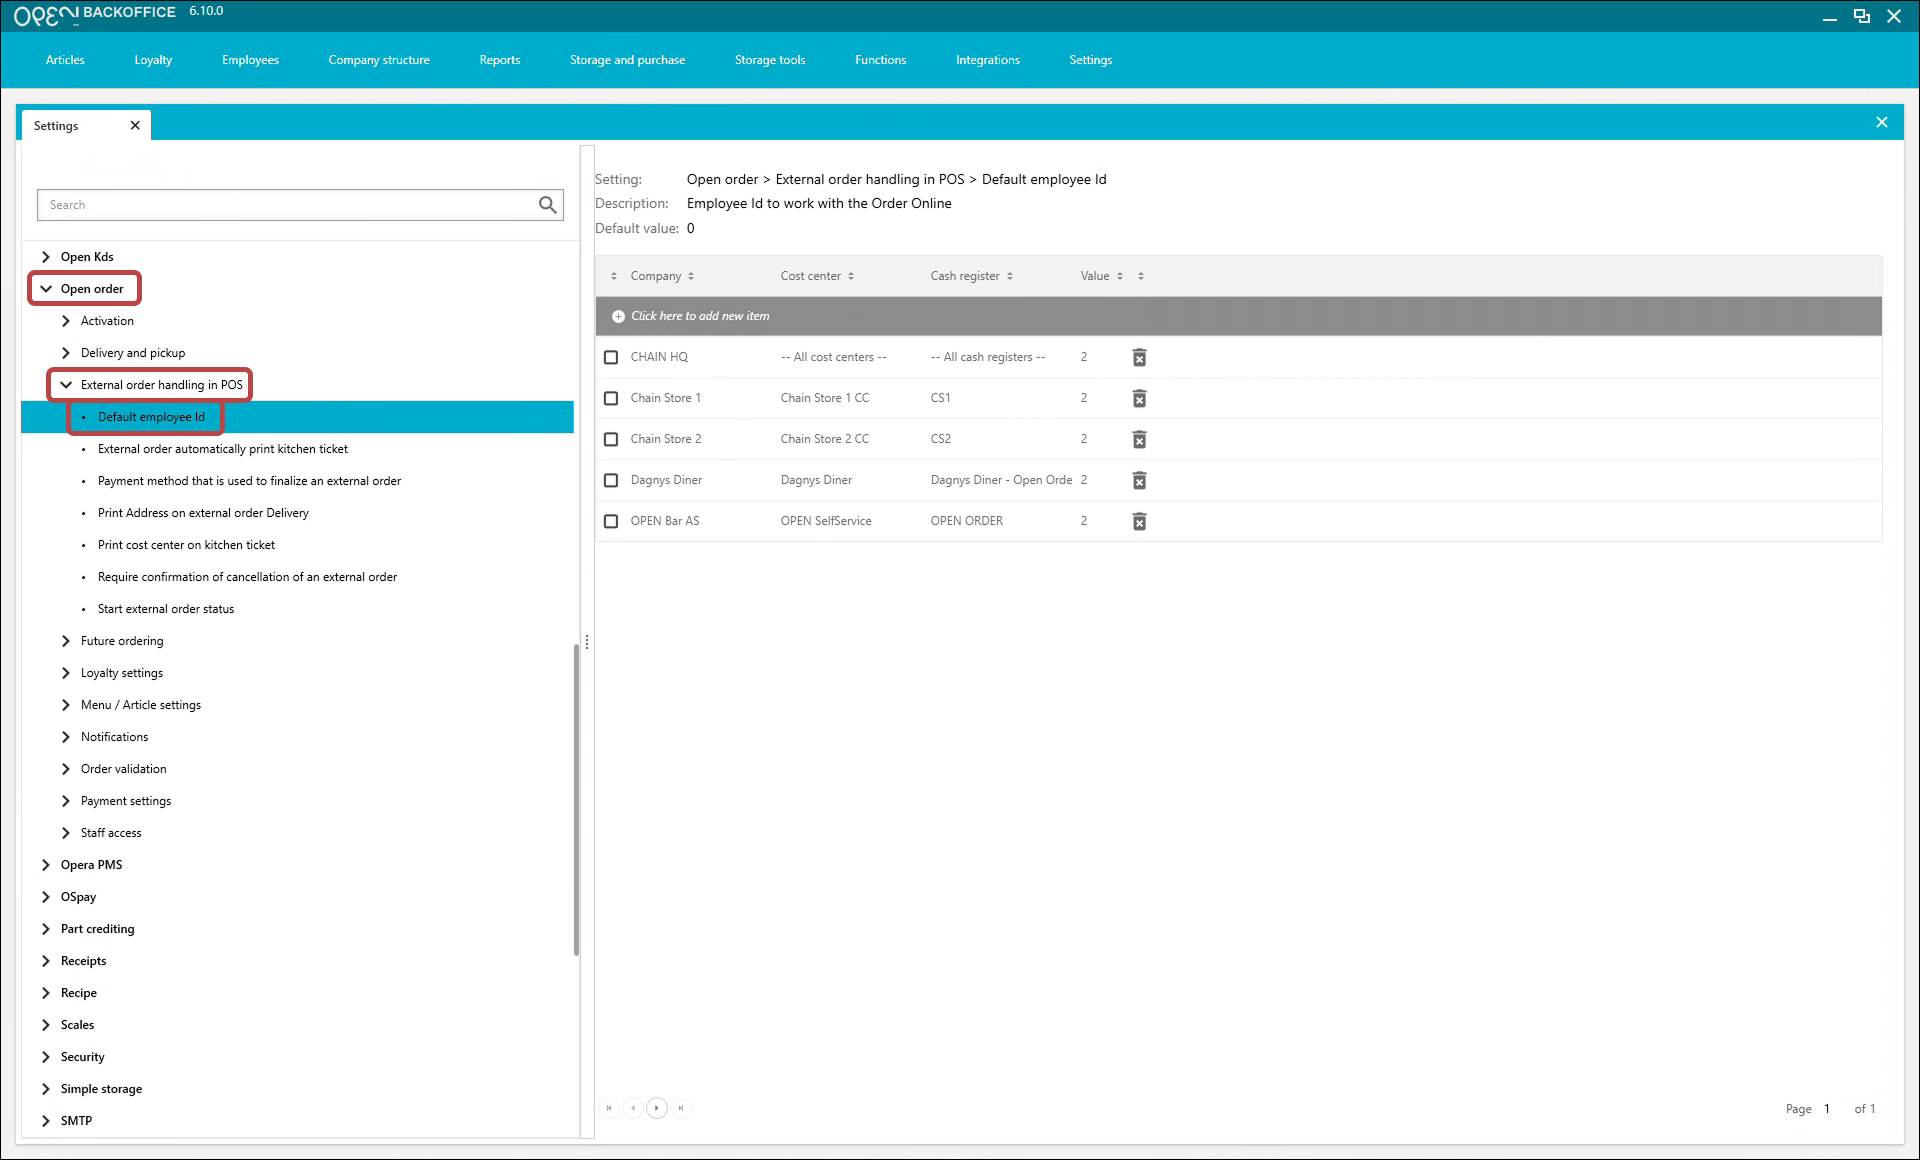

- To set up a new order store, select Click here to add new item.

- For each order store, enter the ID (under Value) of the employee who will handle online orders.

Find your employee IDs
Go to Employees in BackOffice to see all your employees and their IDs.

Your store-specific URL
When OPEN Order is enabled for a cash register, OPEN generates a store-specific URL for that location:
https://order.one.openpos.tech/restaurant/XX-YY-restaurantname
- XX — Site ID
- YY — Cash register ID
- /restaurant/ is only included if you've set up a company hierarchy for OPEN Order.
TIP
- Companies with OPEN Order should use GlobalAPI: pos-gateway1.one.openpos.tech
- Companies without OPEN Order should use: pos-gateway2.one.openpos.tech
2. Set up your menus
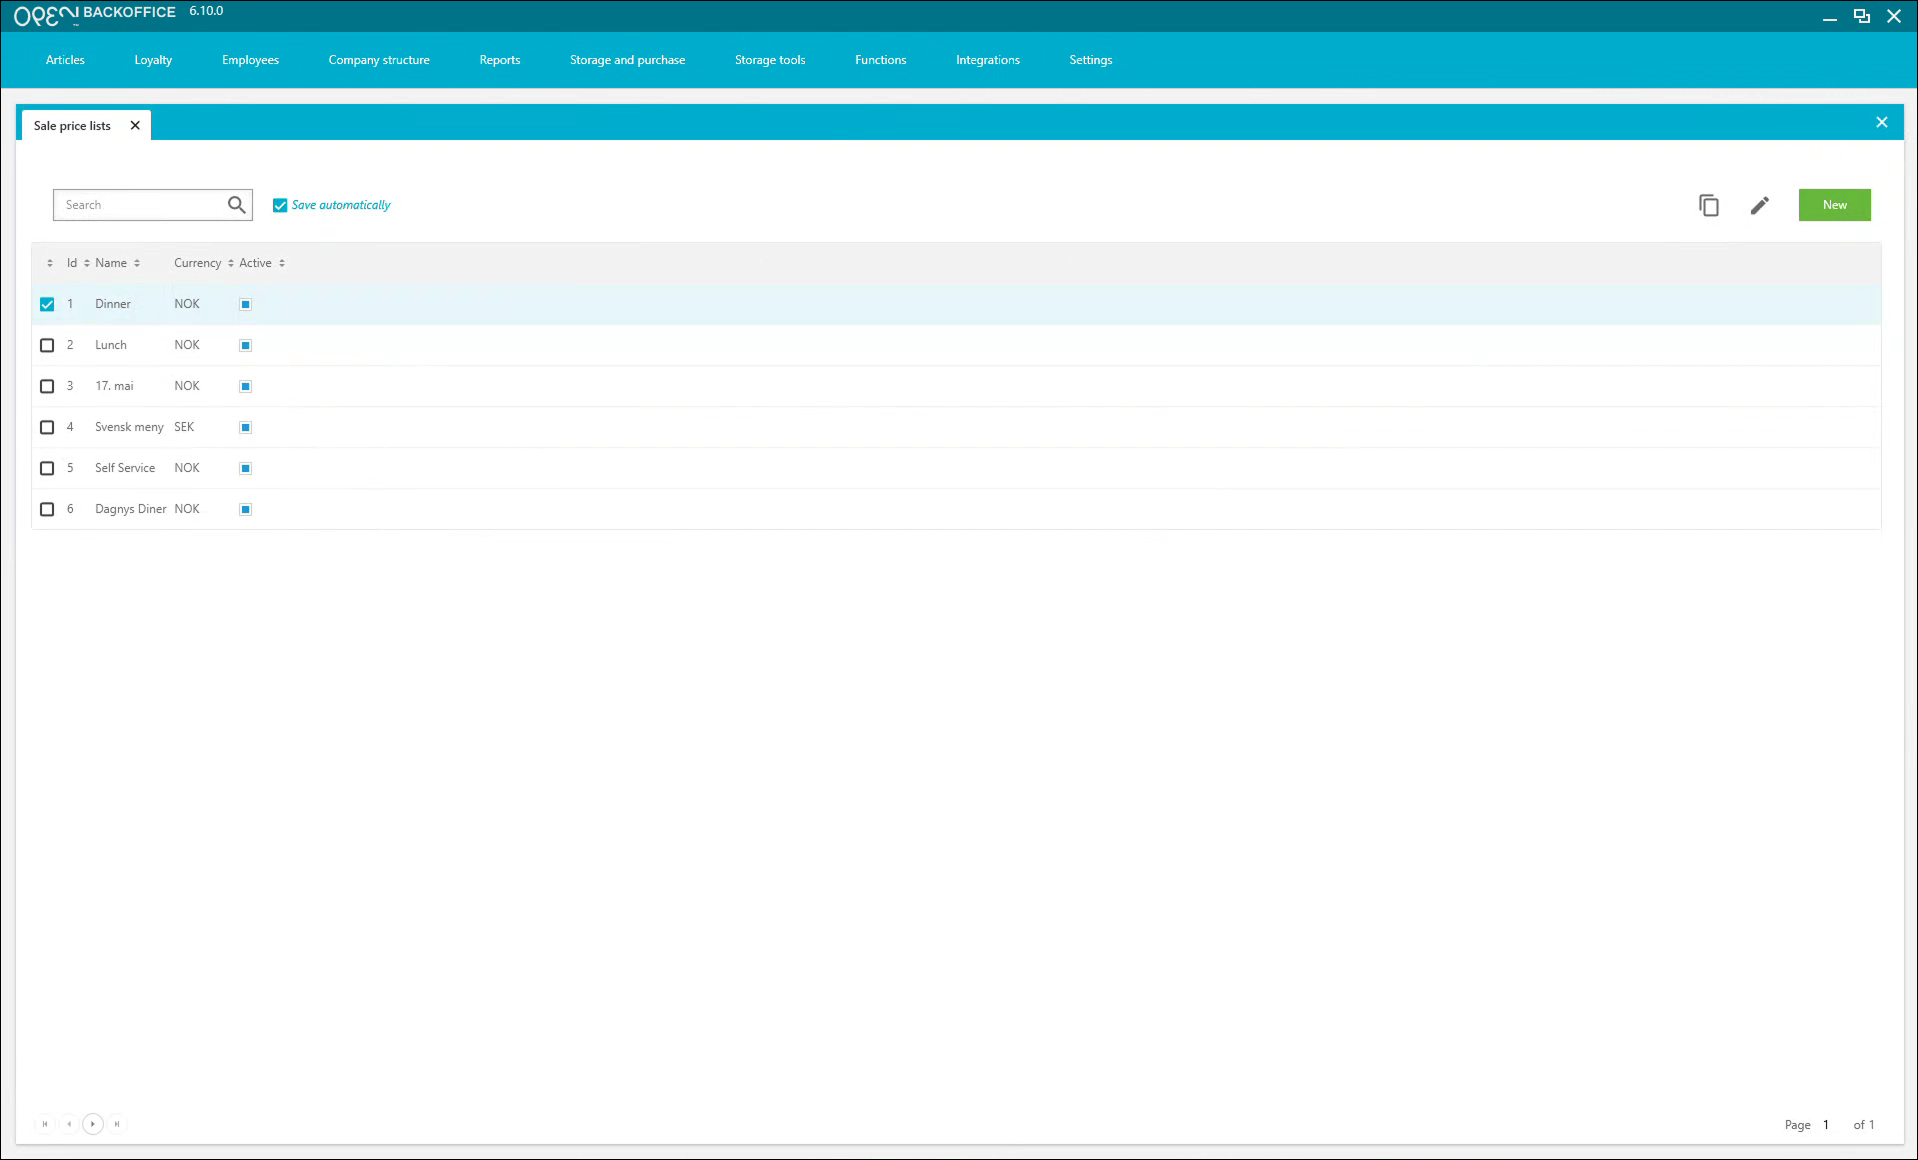
Your OPEN Order menu is based on the sale price list connected to your OPEN Order register. You can reuse the same sale price list as your regular checkout, or create a separate one just for OPEN Order.
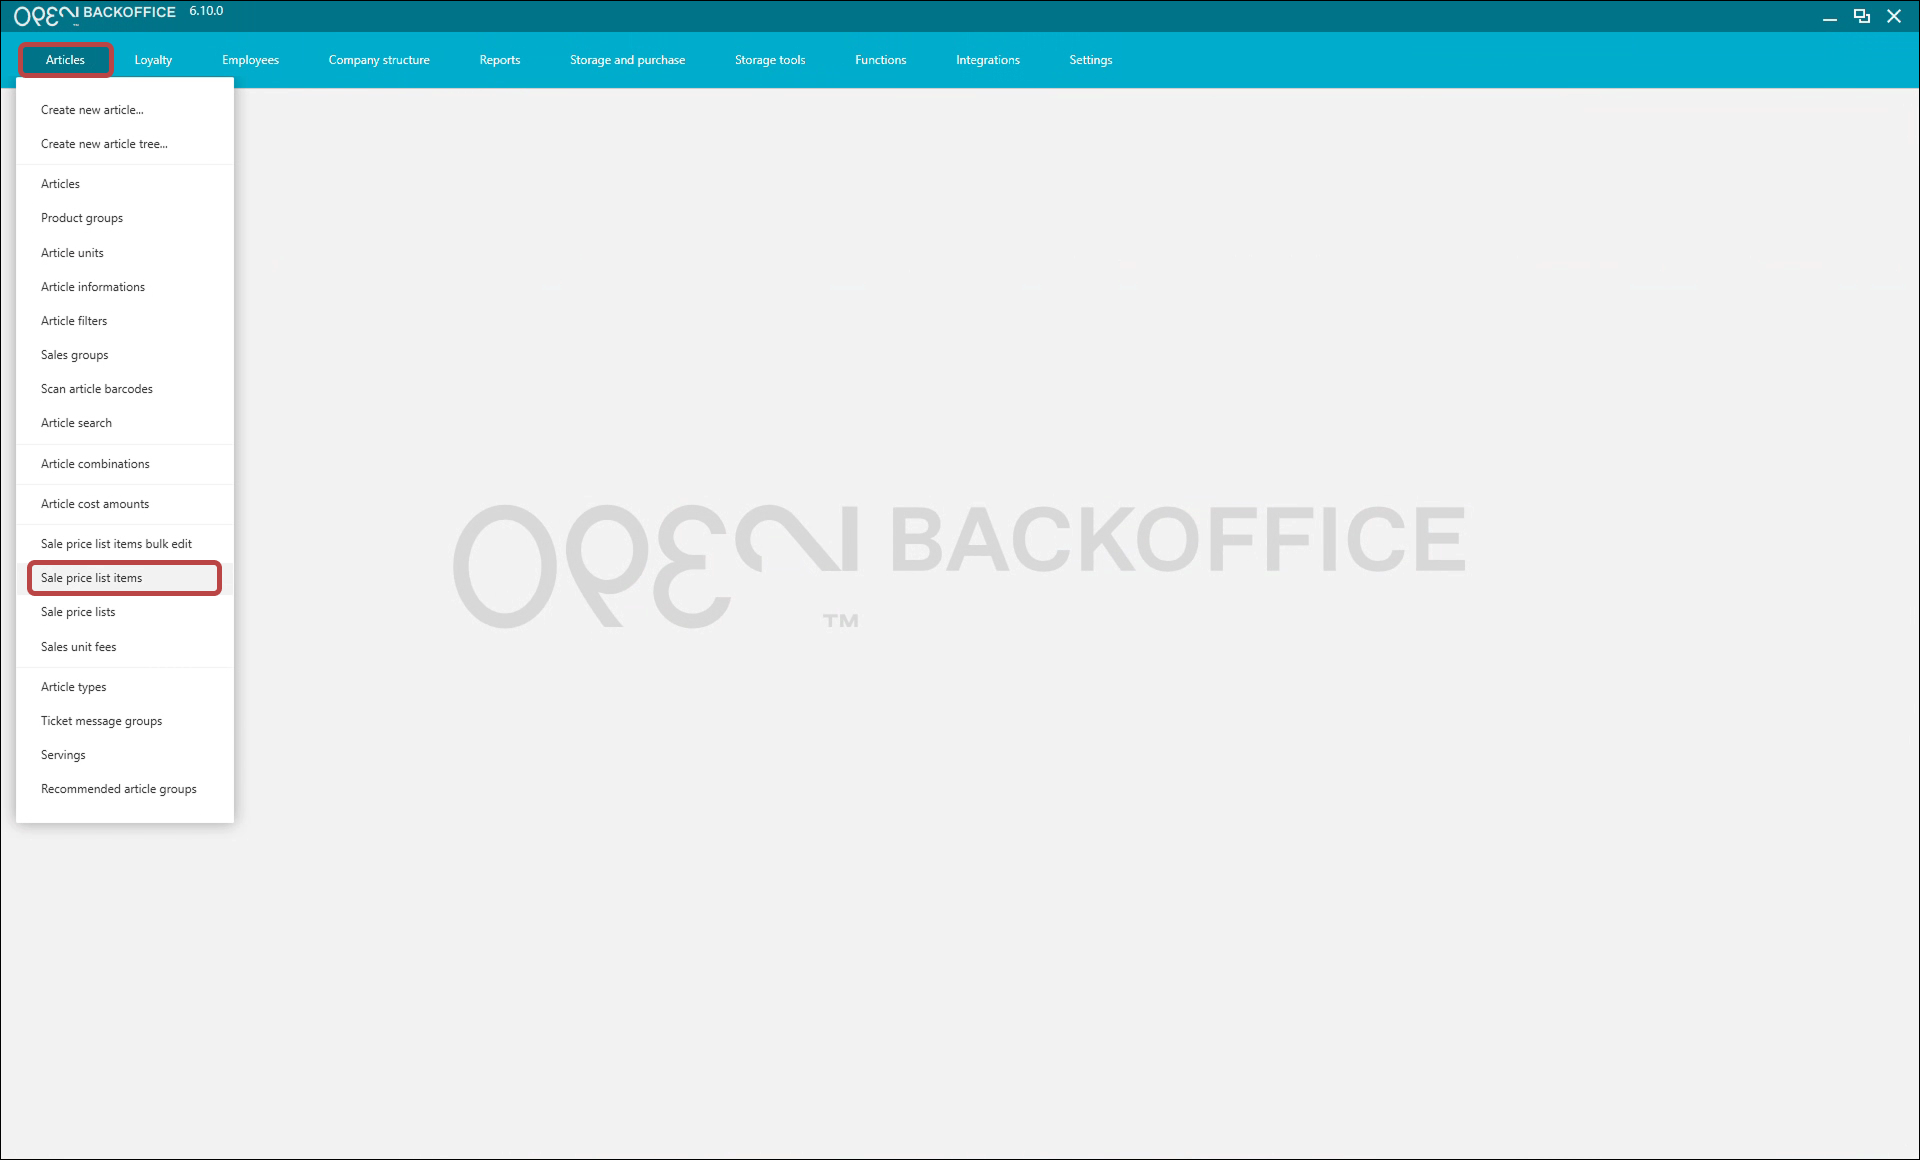
To create a new sale price list for OPEN Order, go to Articles → Sale price lists.
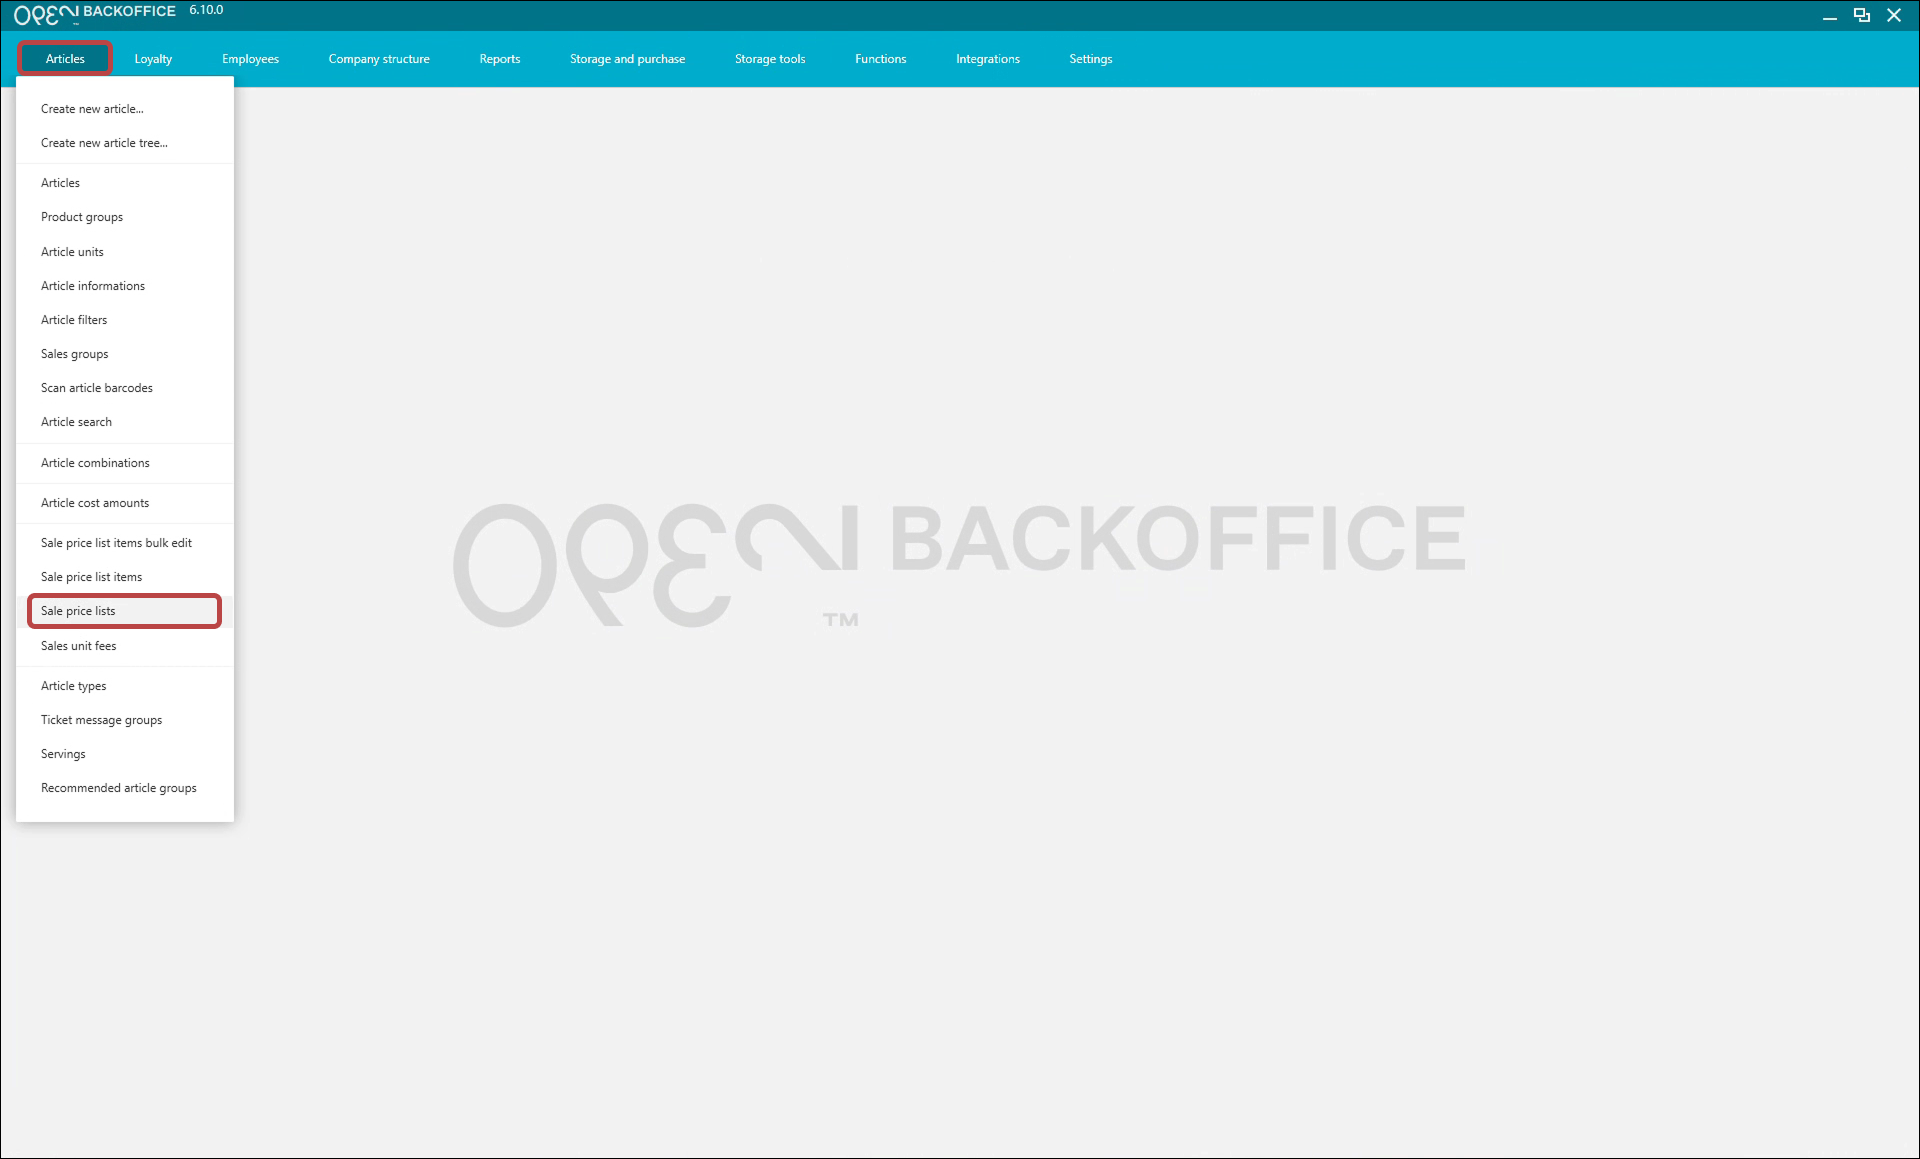
To manage which articles are included, go to Articles → Sale price list items.
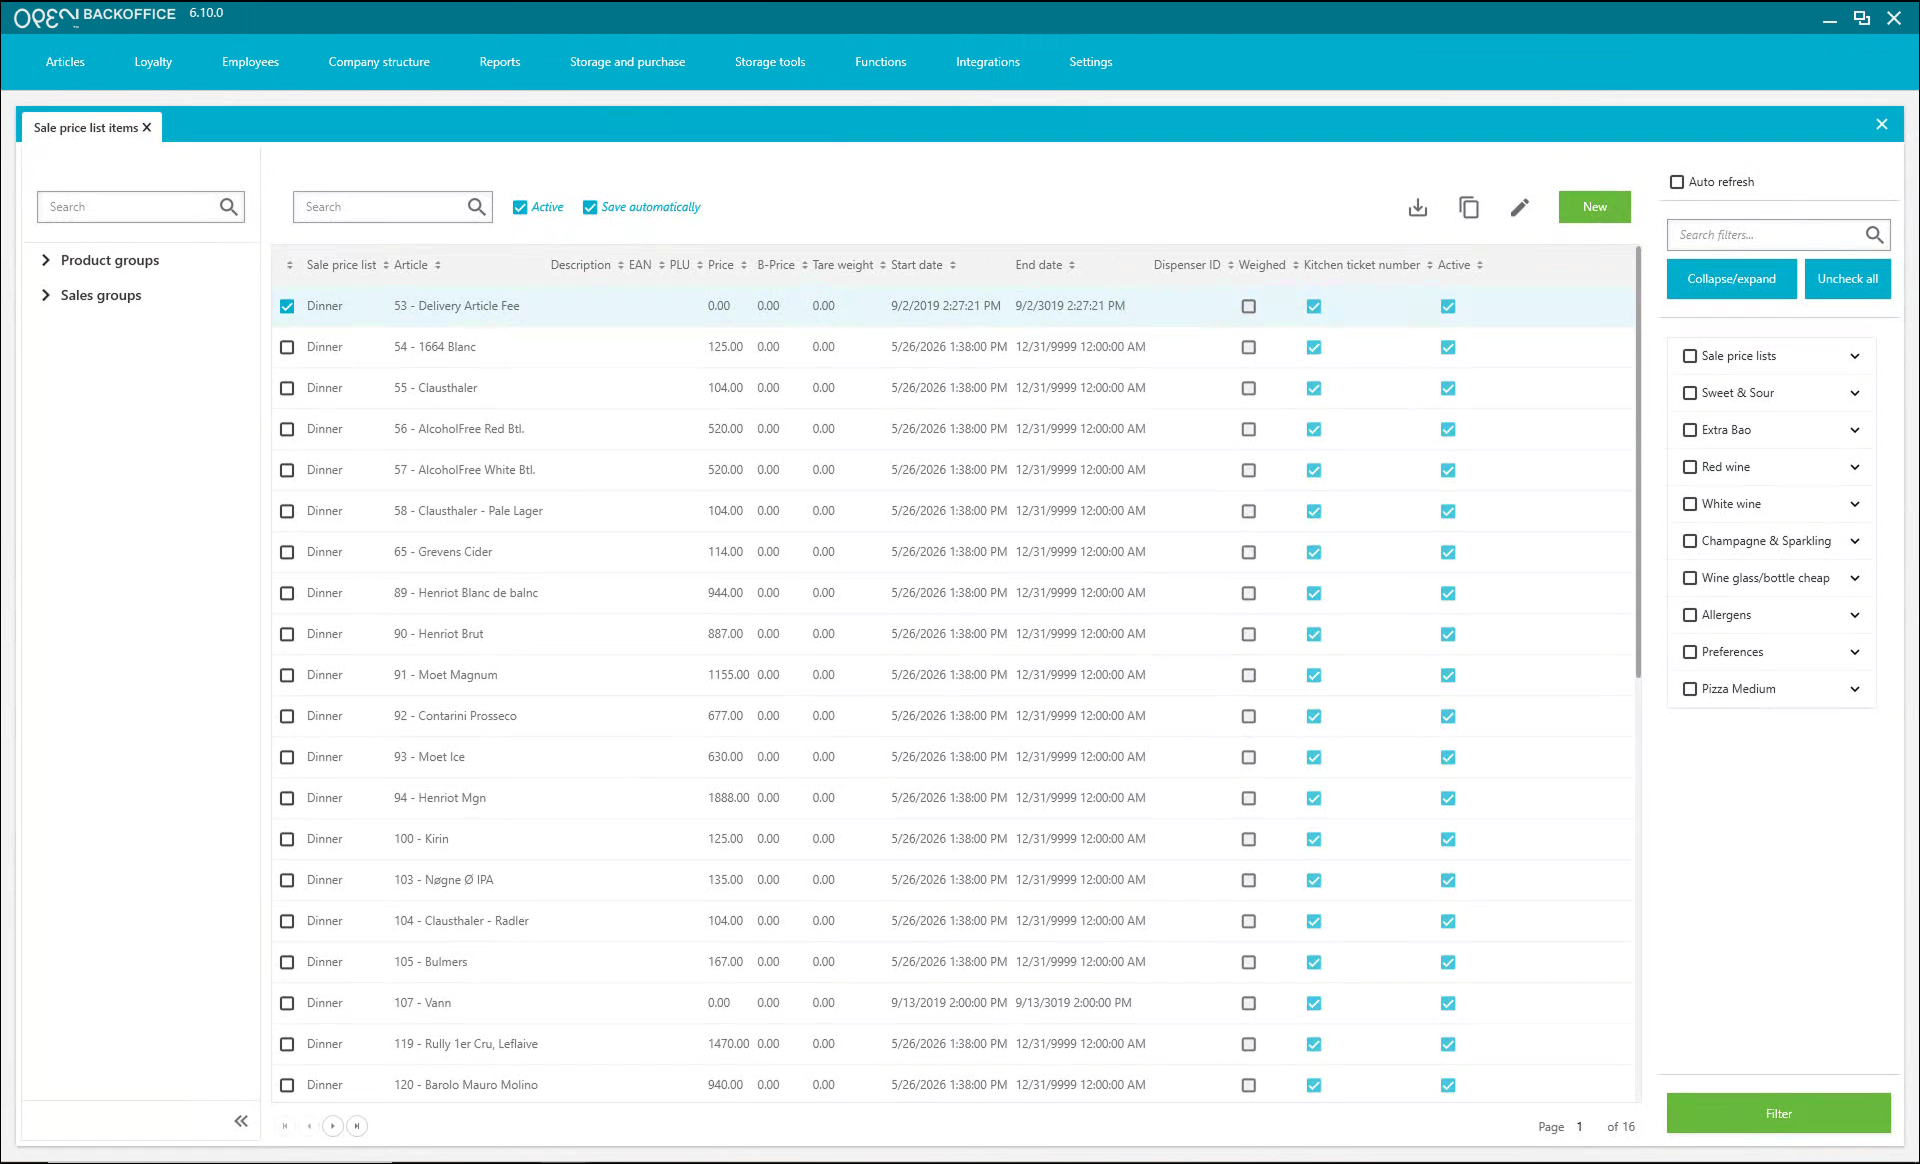


Much of the OPEN Order logic is set at article level or product group level.


These settings are especially important to consider:
Description
Description is a field on the article in BackOffice. Whatever you write here is the article information guests see in OPEN Order.

Article filter values — allergens and preferences
Allergens and preferences linked to an article appear in OPEN Order, where guests can use them to filter the menu. Set up allergens and preferences under Article filters, then connect them to each article at article level.

Sales group
Just like in the regular cash register, sales groups group your articles in OPEN Order too. Name them logically so guests can scroll through the menu easily.

Take away not allowed
Articles tagged Take away not allowed appear only in dine-in mode — not in pickup or delivery. This tag exists at both article and product group level, so you can exclude a whole product group at once instead of tagging every article.

Images
Add an image per article to show in OPEN Order.

You can also set a default image for a whole product group. For example, use one image for every article in the COFFEE group instead of photographing each coffee.

3. Schedules & opening hours
Every OPEN Order store needs a schedule in BackOffice. A schedule sets opening hours for each weekday, and you can add exceptions for holidays and similar dates. The schedule appears on your webshop and decides whether guests can order — or whether you only display your menu for information.
Create a new schedule
- Go to Company structure → Schedule.
- Edit an existing schedule, or click New to create one.
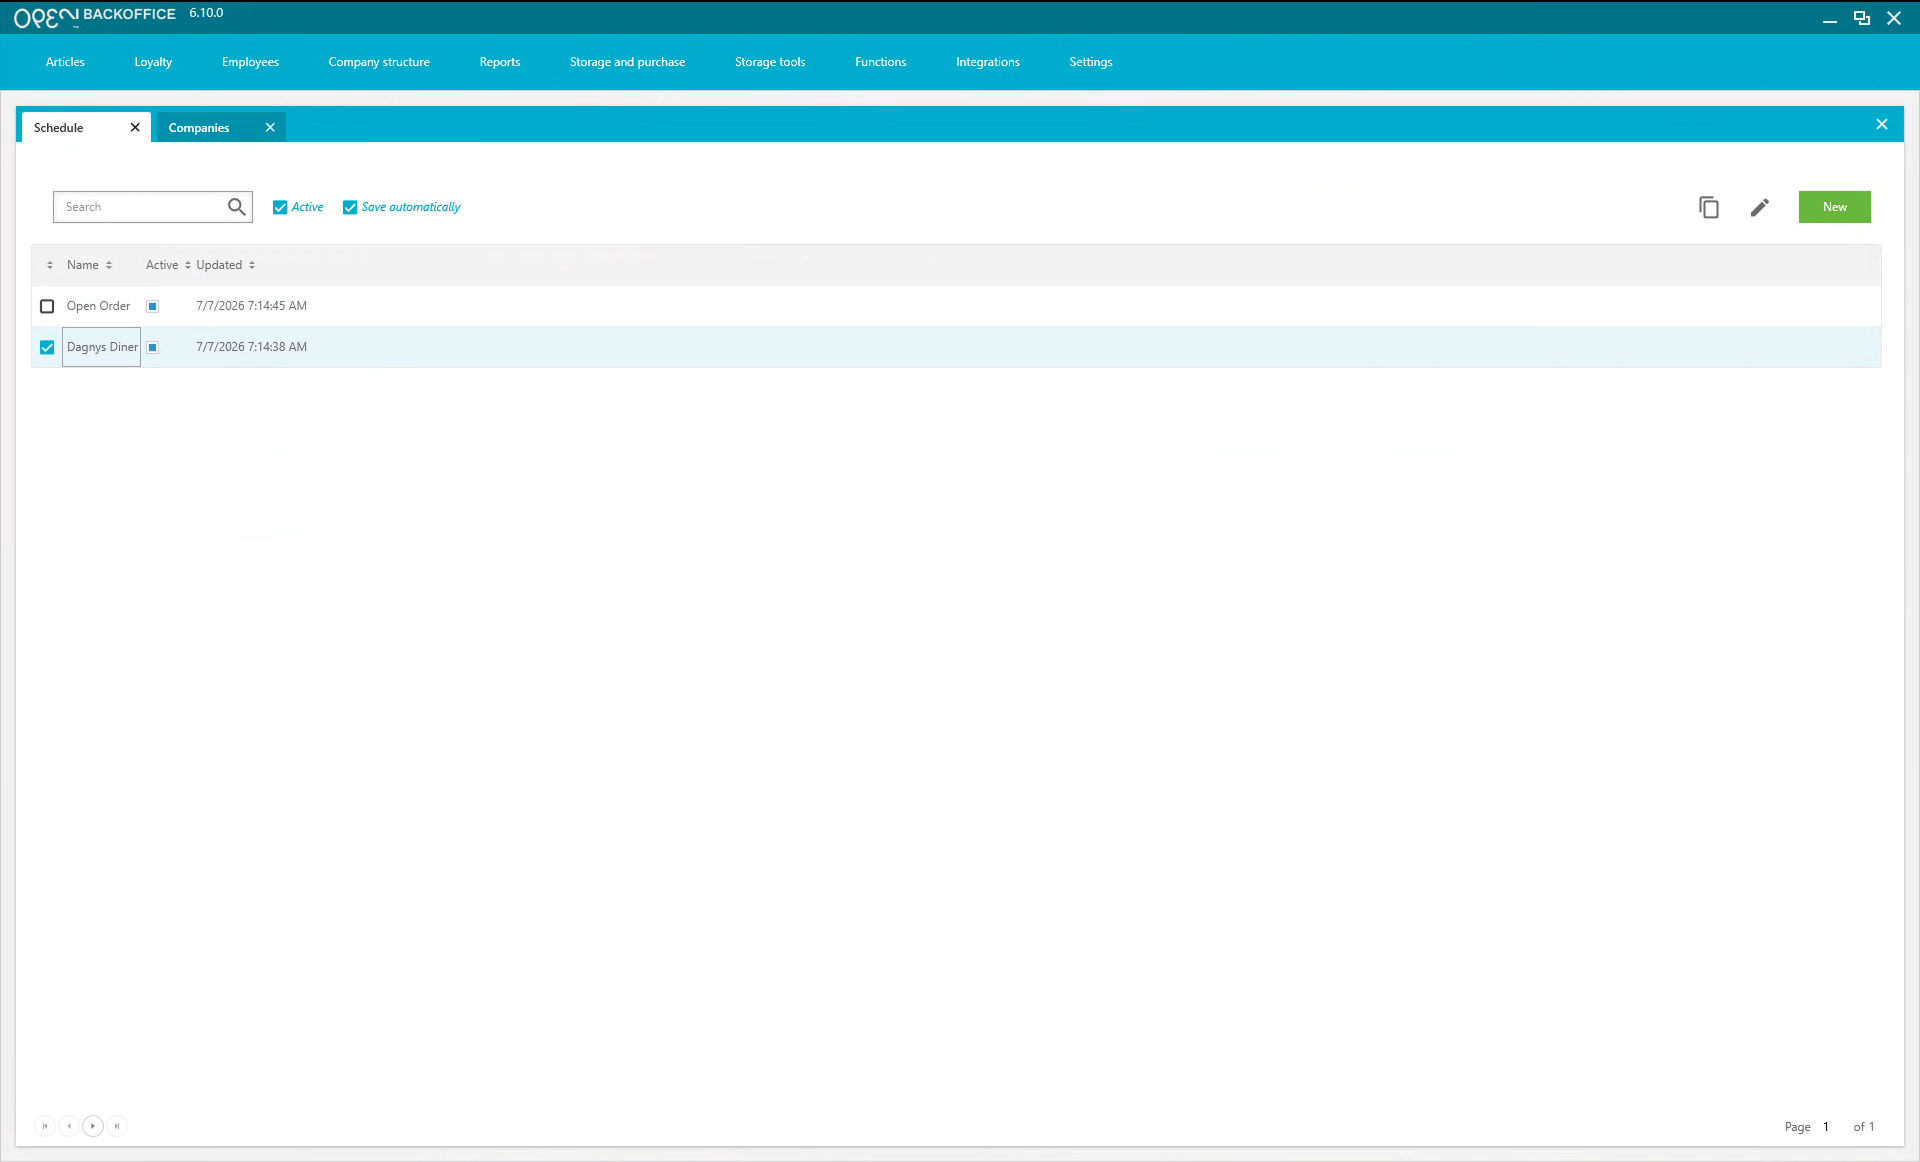

- Complete the settings.

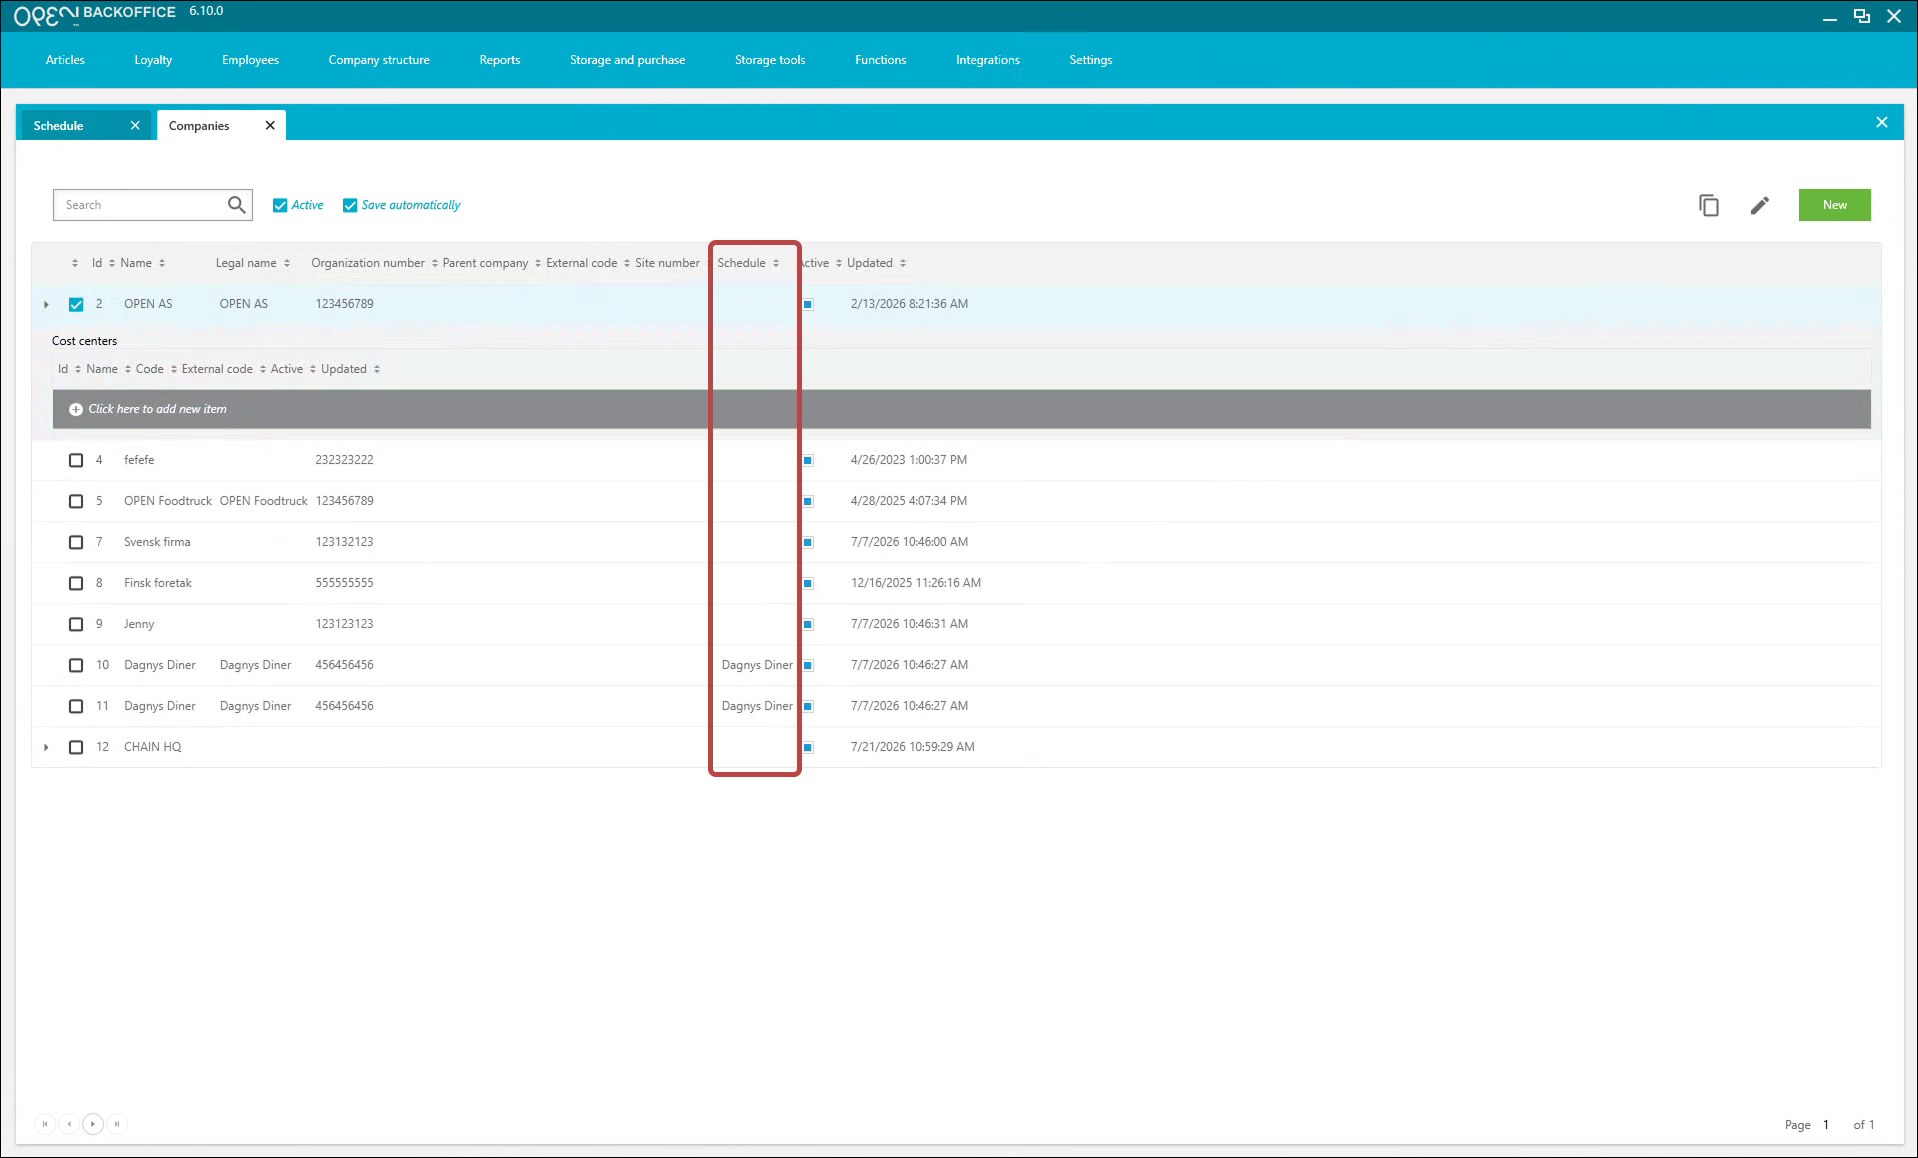
- Go to Company structure → Company.
- Connect the schedule to the matching company.

Sell articles only at certain times
If some articles are only available at certain times (for example, selling alcohol only after 5 pm), you can handle this in a few ways. OPEN Order supports the following options from OPEN One:
Product group sales hours

At product group level, you can set Sell from / to times. Outside those hours, the articles in that group don't appear in OPEN Order at all.
This helps when you have legal limits on when a product can be sold — for example, serving liquor only after a certain time of day. It's also useful when the kitchen closes at 22:00 but you still want guests to keep ordering drinks, just not food.
Custom layout schedule
OPEN Order supports the cash register layout editor for custom layouts, and you can set a custom layout to appear only on specific days or times. For example, if your cafeteria only has waffles on Friday lunches, you can show a waffle layout only on Fridays between 9:30 and 11:30.
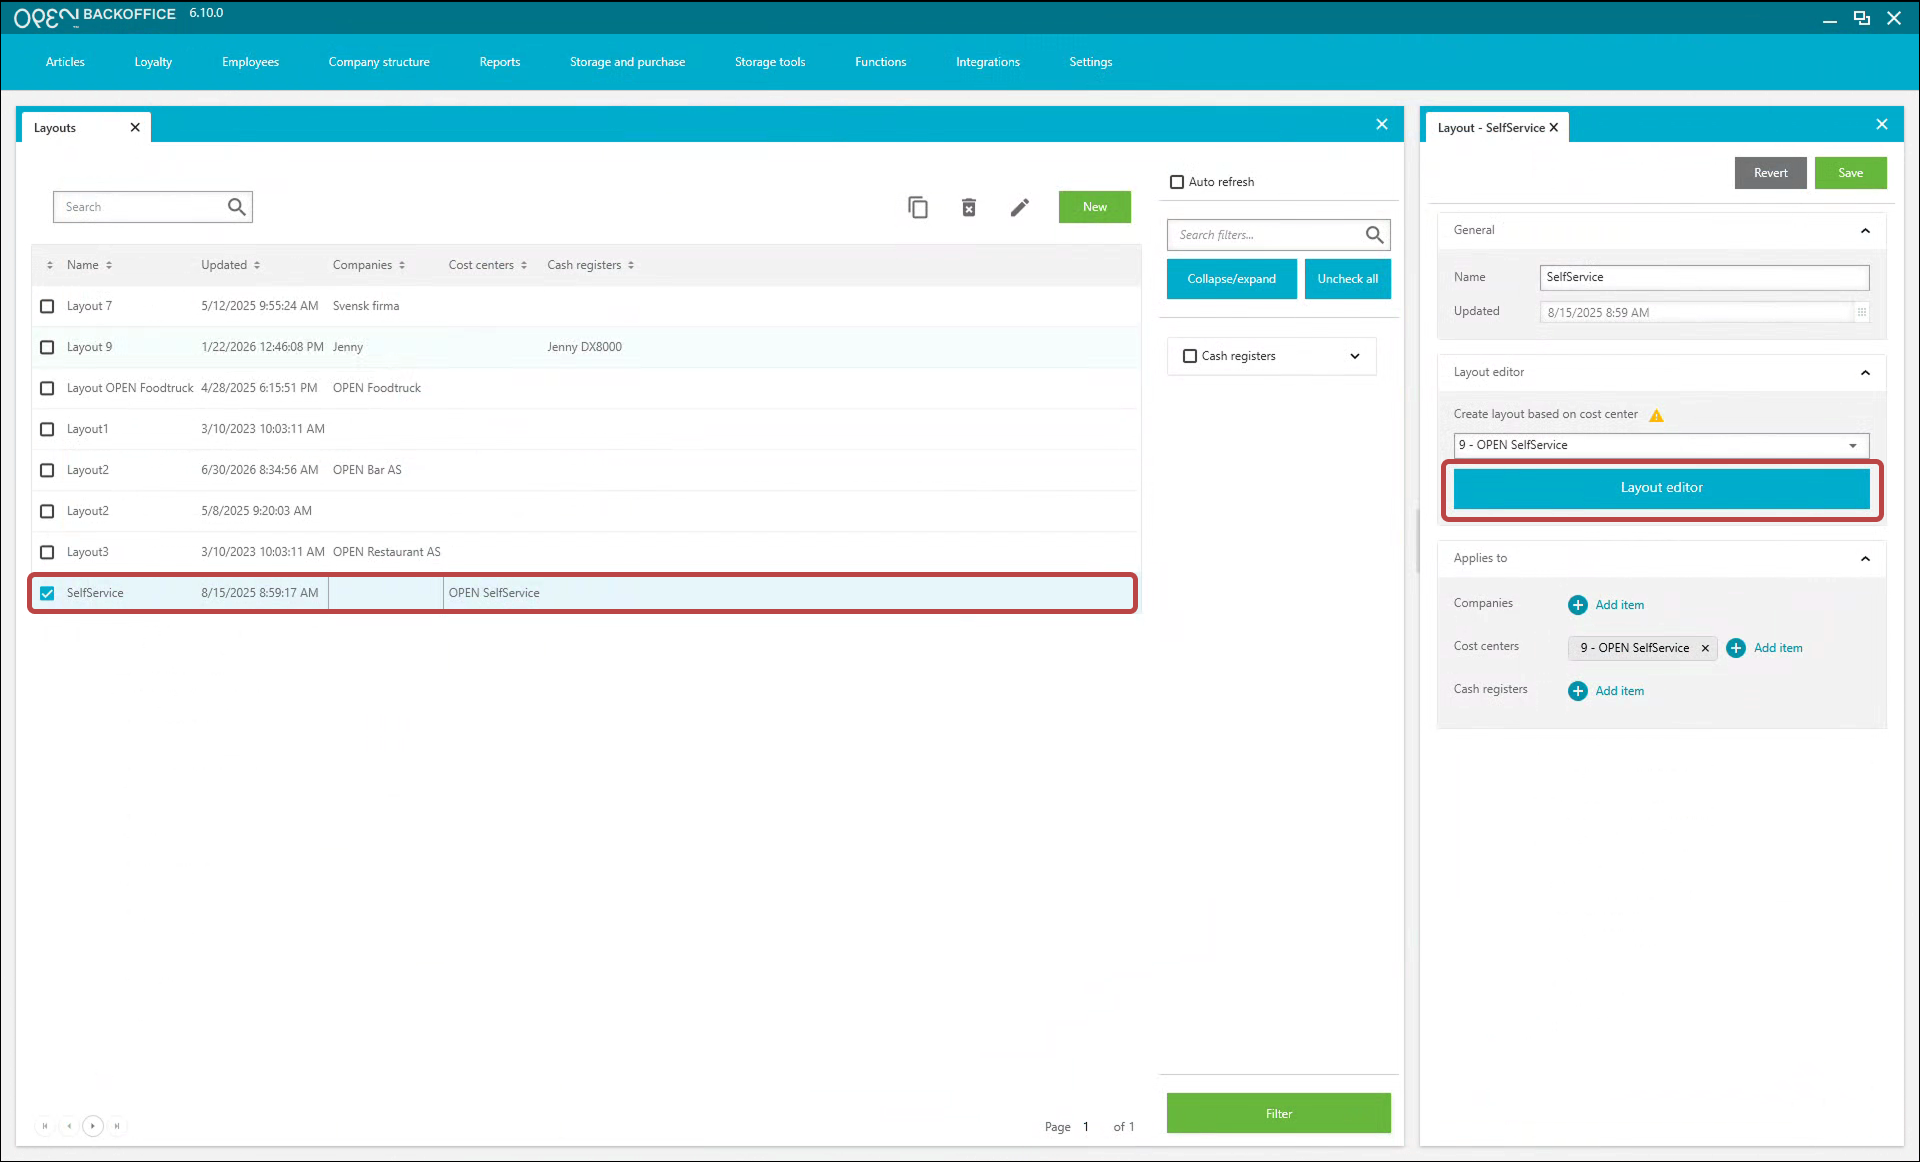
- Go to Company → Cash register layouts.
- Choose an existing layout for your OPEN Order register, or create a new one.
- Click Layout editor.
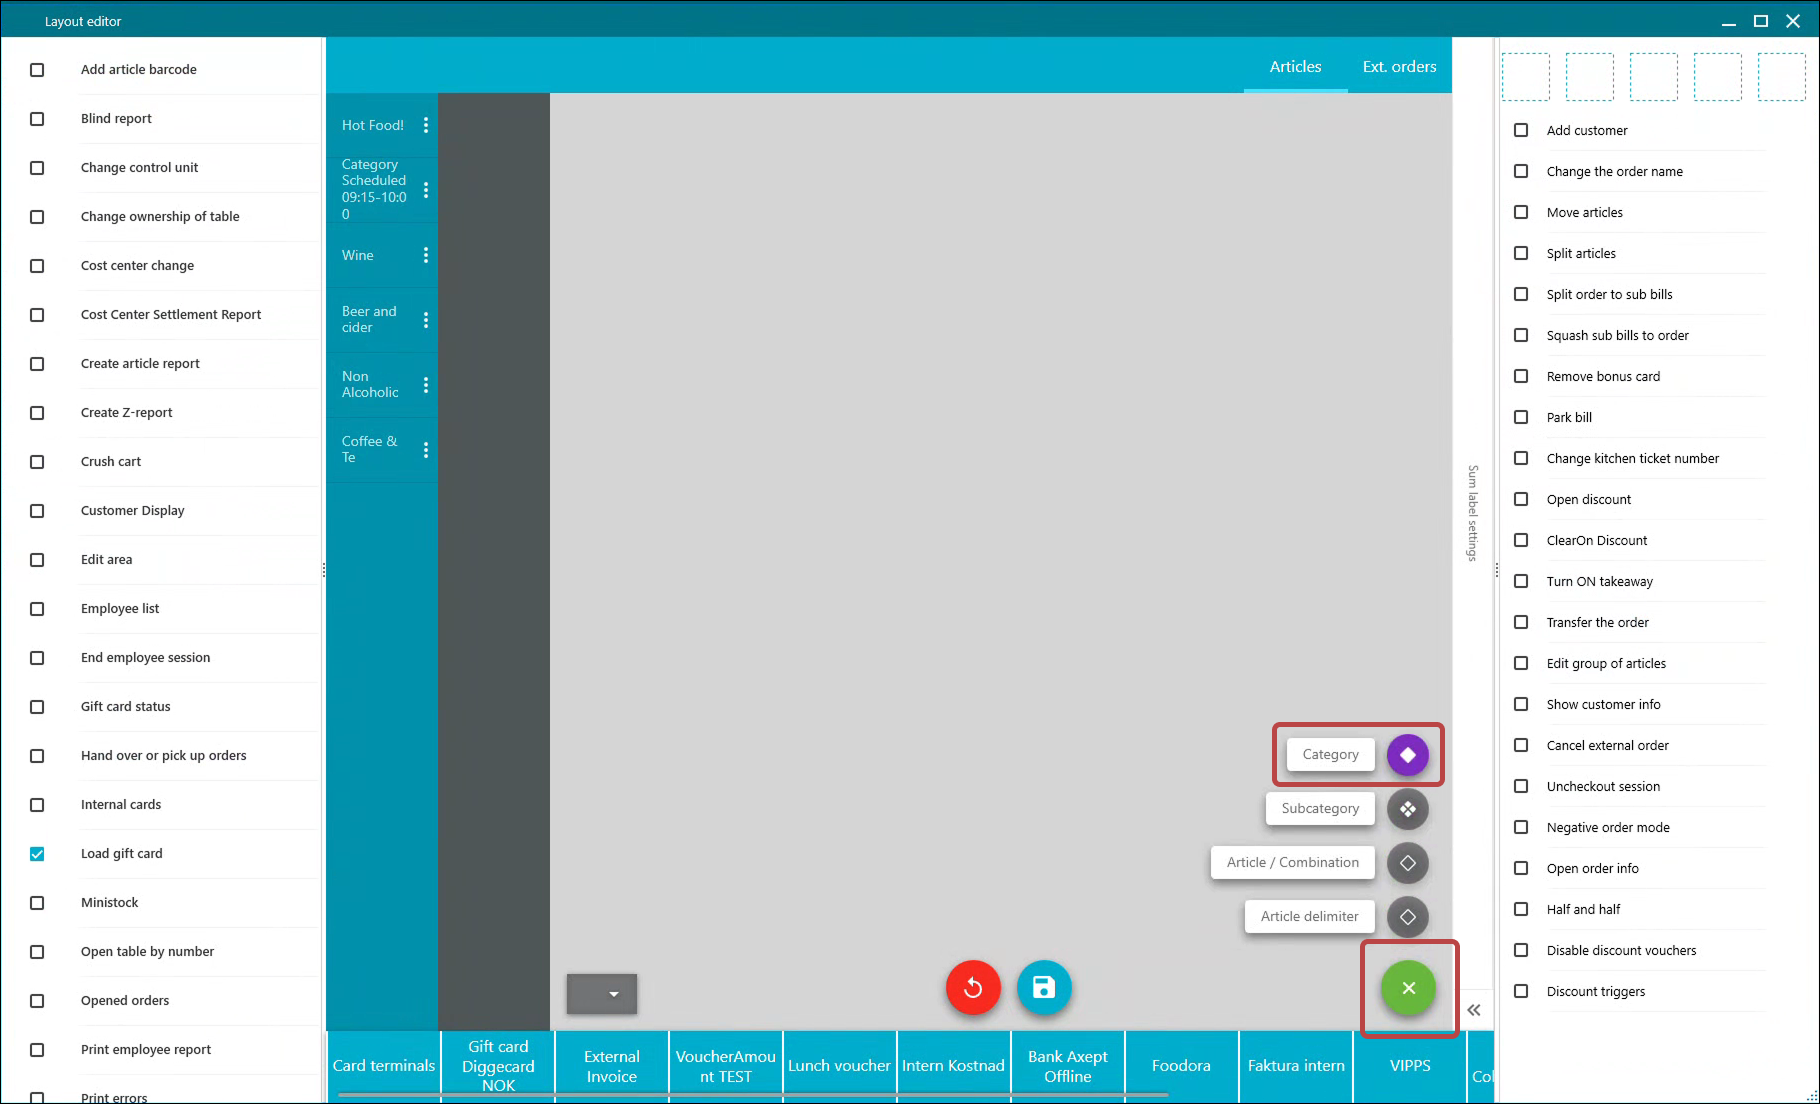
- In the new view, click the plus in the bottom-right corner and select Category.


- Name the category and choose which days and times it will be visible. Click OK.

- A subcategory with the same name is created automatically. Select it.
- Click plus and add an article.
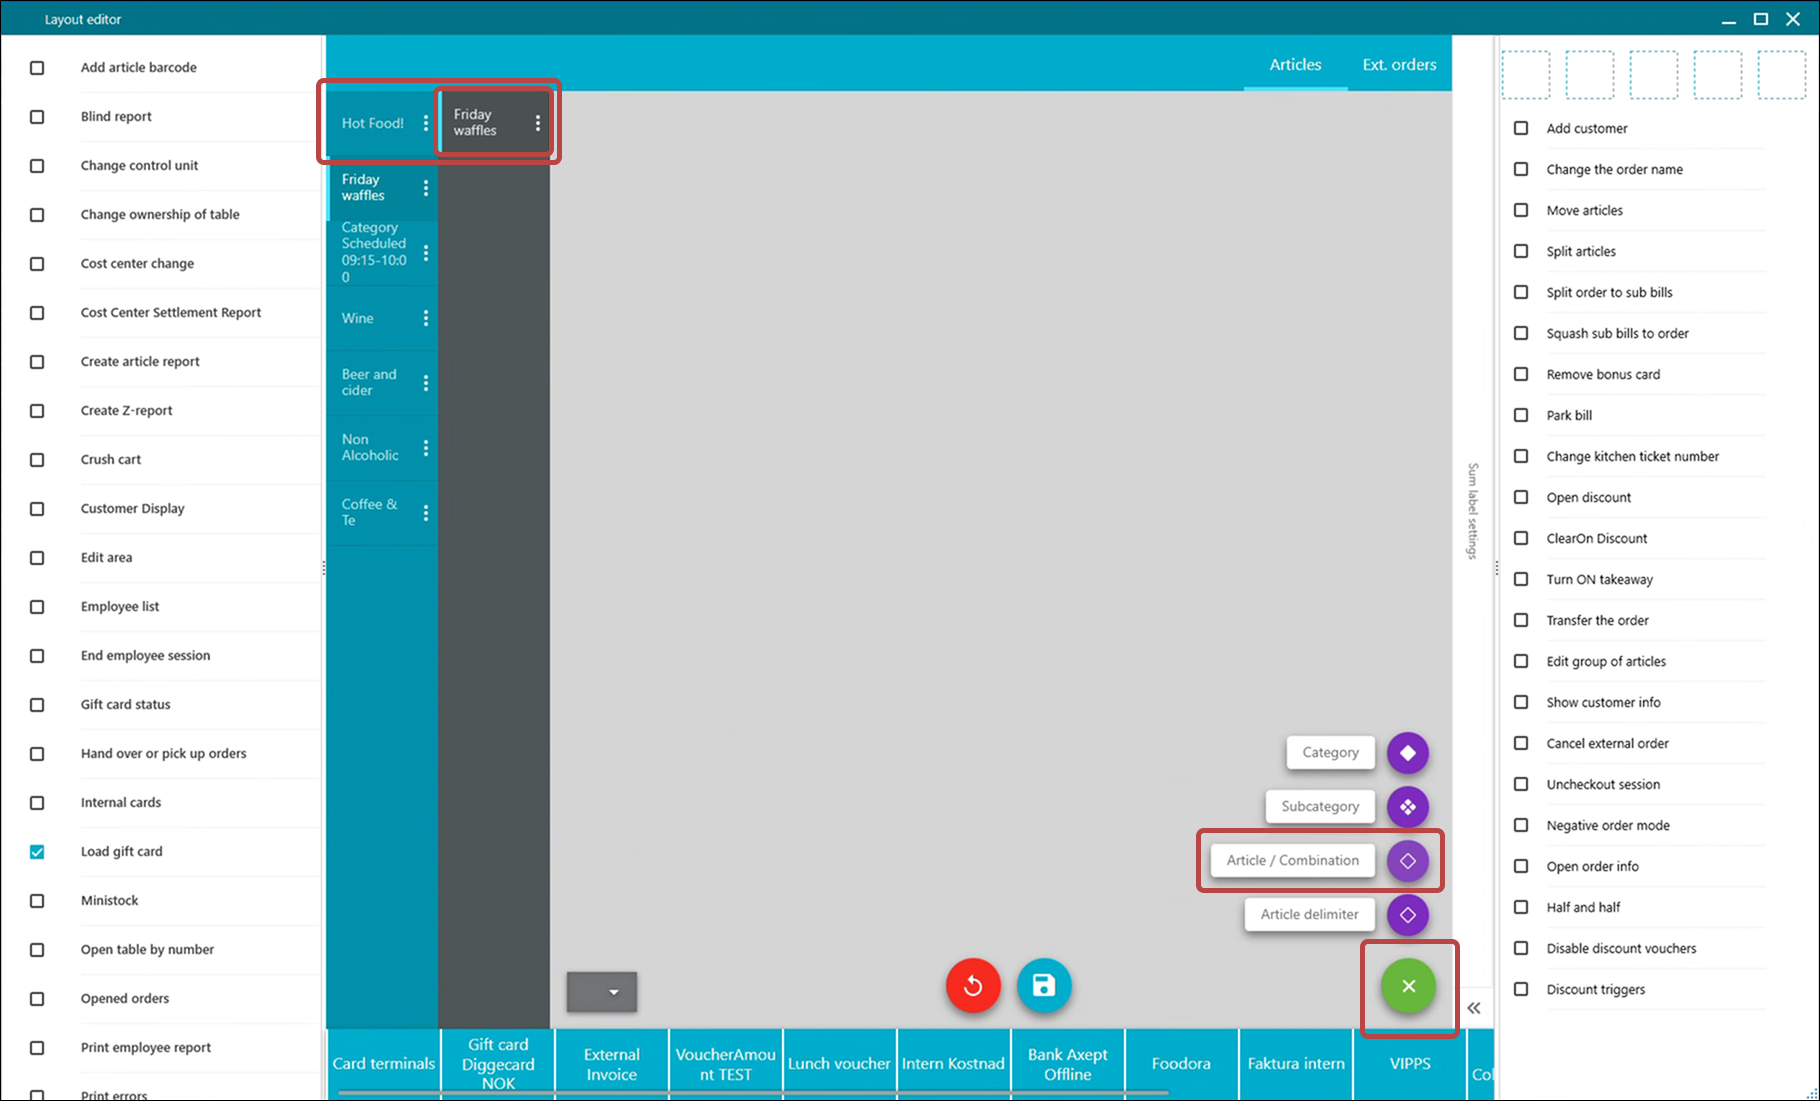

- In the new dialog, search for and select the articles to add to your category. Click OK.

The category and its articles now appear in OPEN Order only on the days and times you chose.

Price list schedule

At cost center level, you can set up a schedule for sale price list switch, which is also supported by OPEN Order. This is useful when you have different prices and availability for lunch and dinner service.
4. Webshop layout
You set up your webshop's look in BackOffice — colors, fonts, font size, and some image choices.
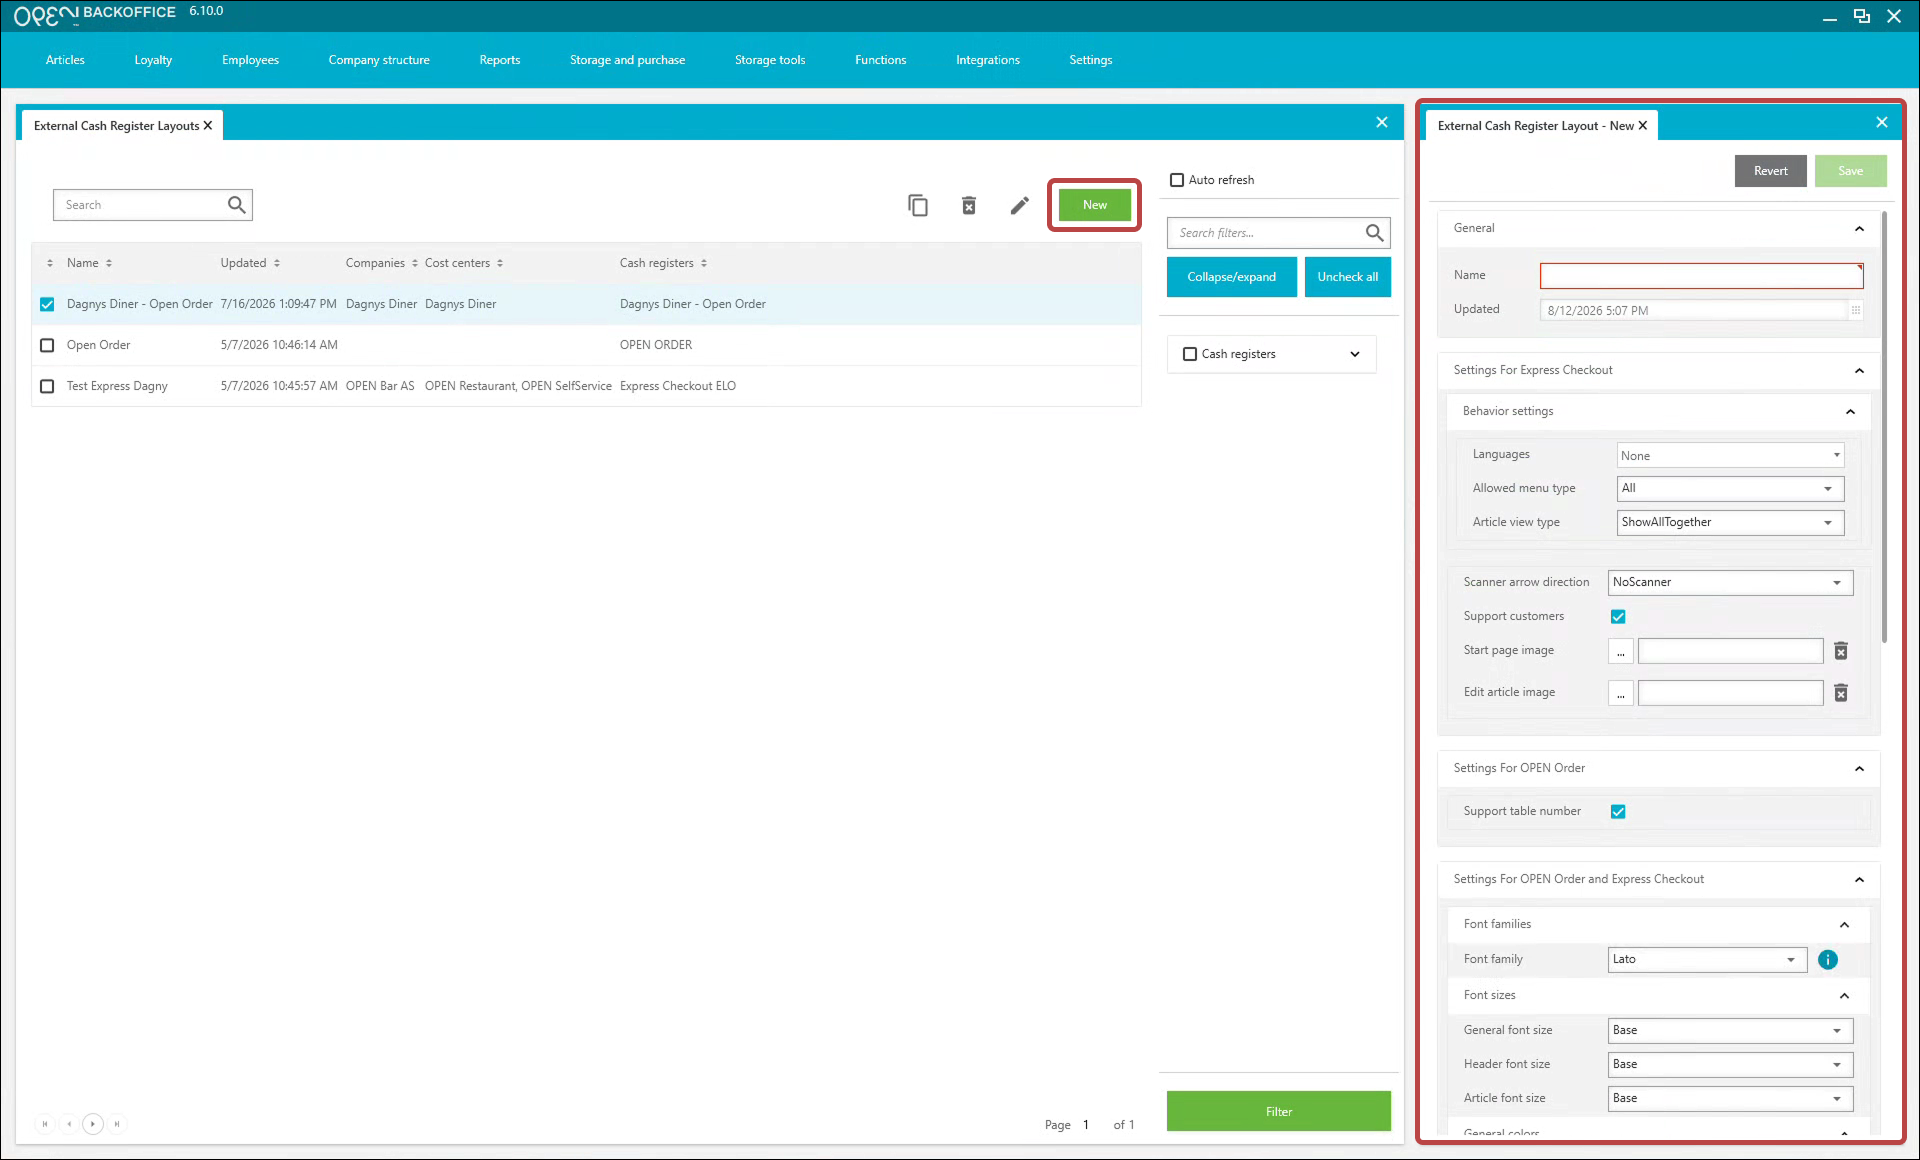
- Go to Settings → External cash register layouts.
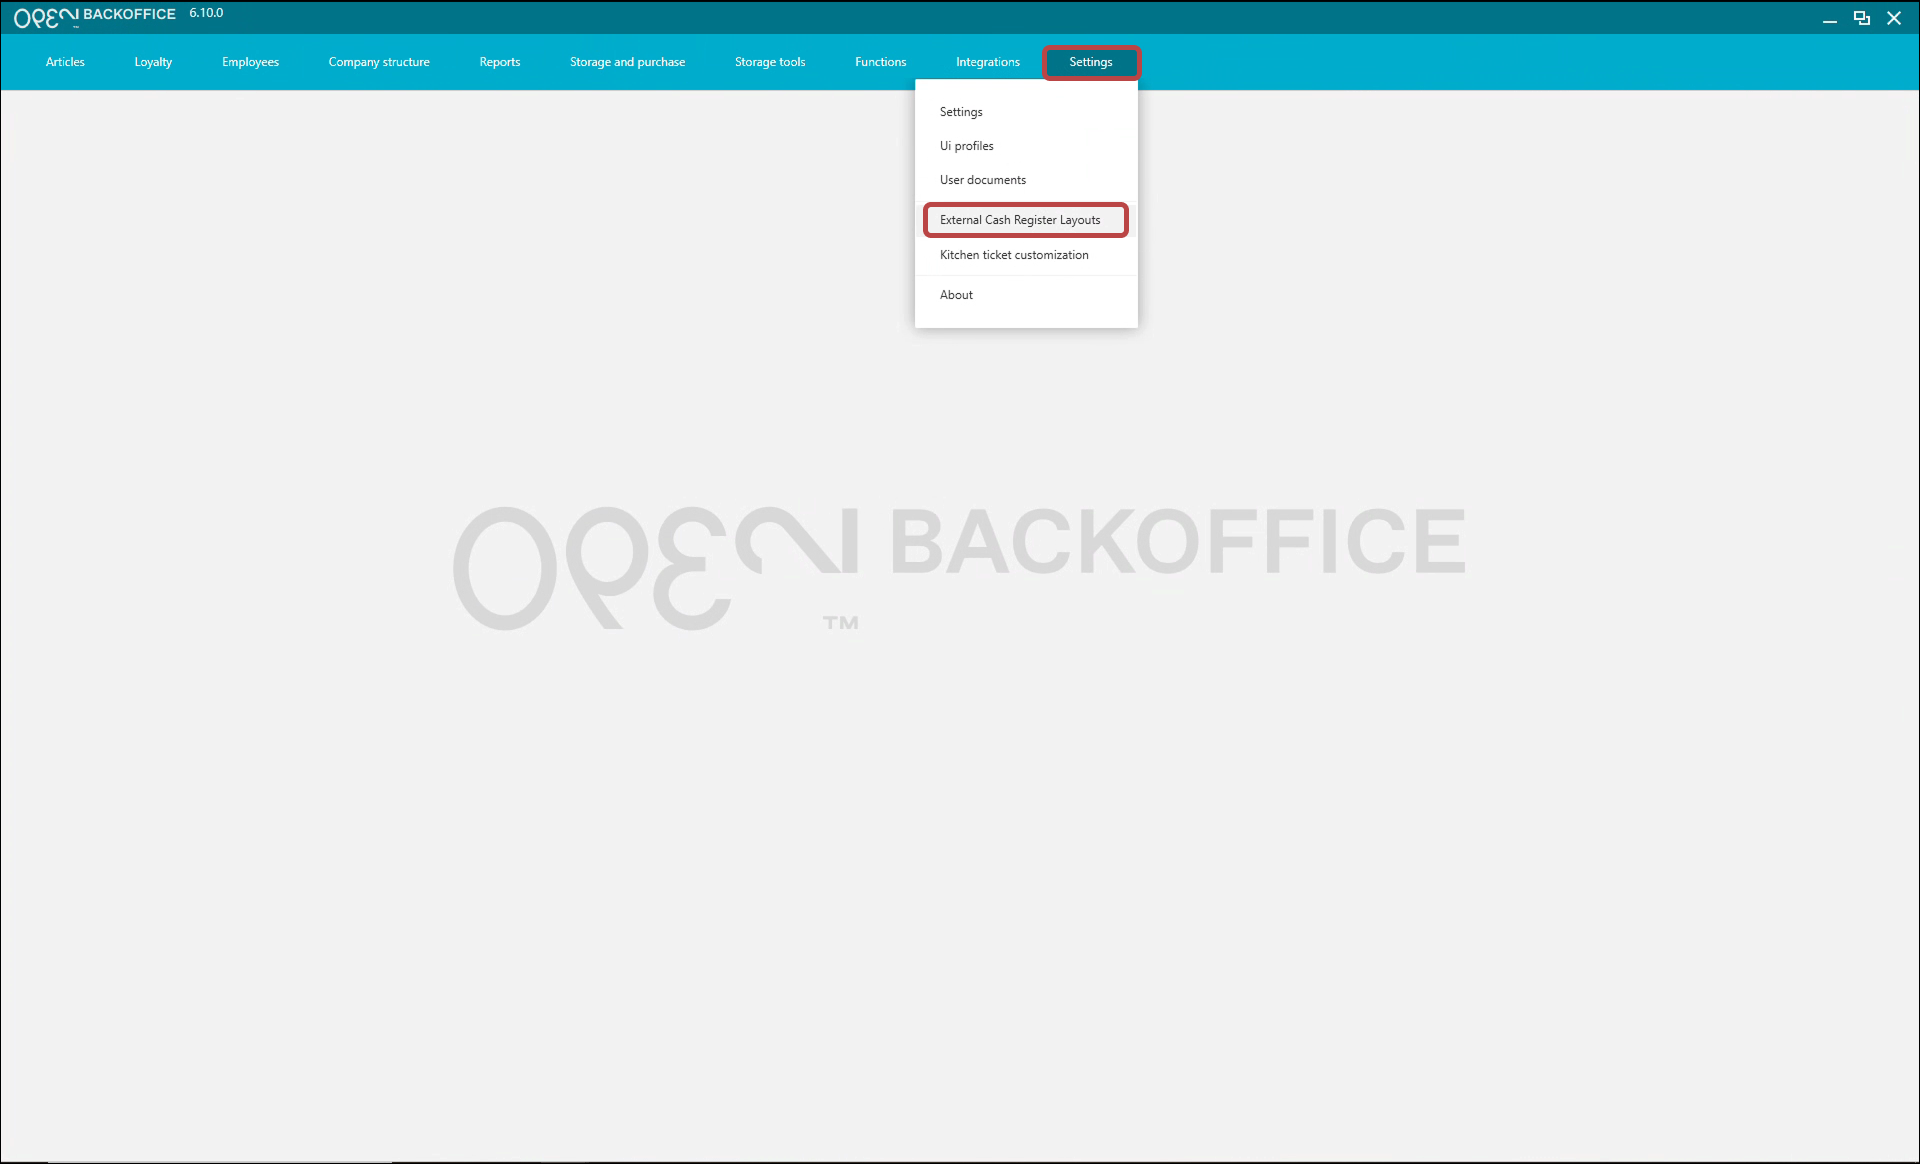
- Click New and complete the settings.
INFO
Not all settings apply to OPEN Order — some are specific to Express Checkout.
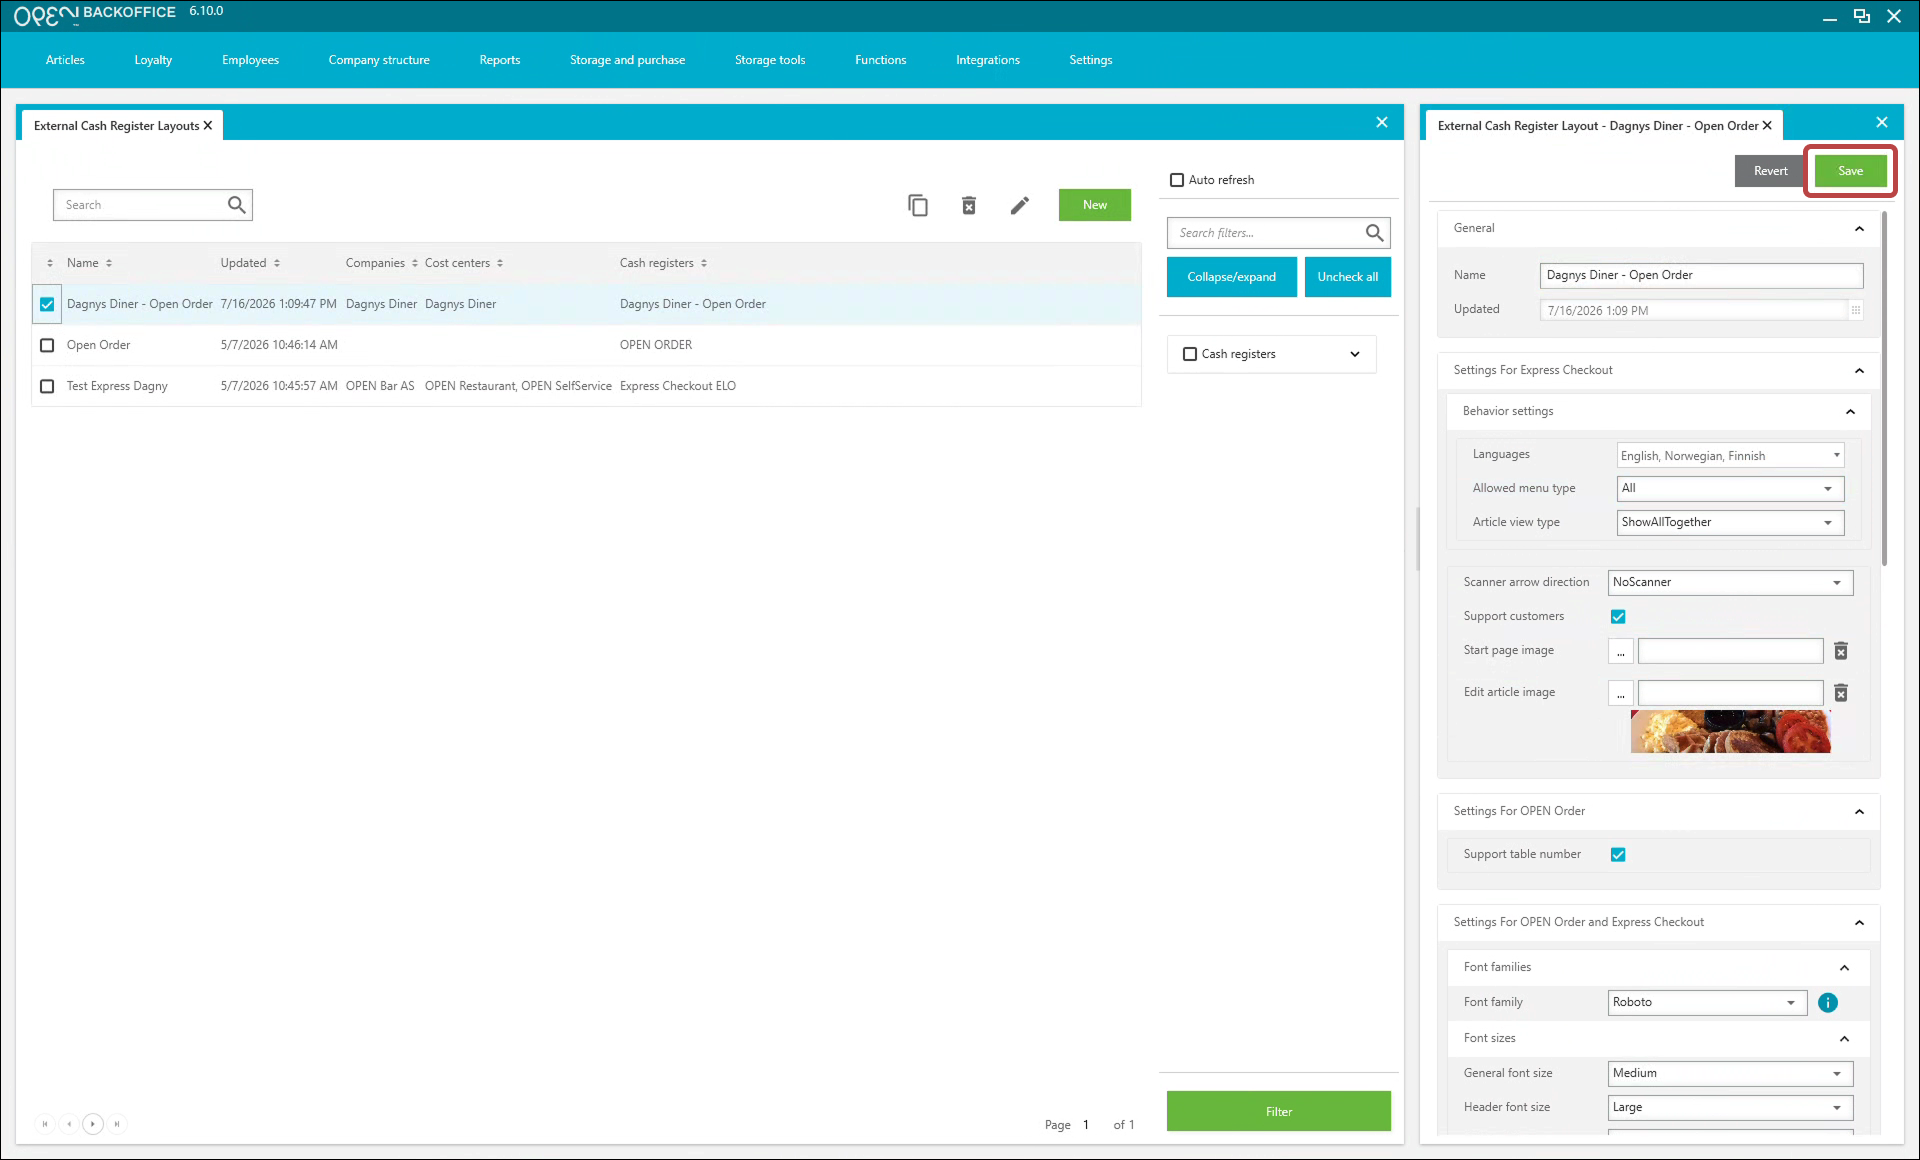
- Save your layout.


TIP
- Logo image appears in your webshop.
- Company logo image appears if you list your store in OPEN's shared restaurant list: https://order.one.openpos.tech/
5. Delivery
To offer delivery, create a delivery zone for your company in BackOffice.
Create delivery zone
- Go to Functions → Delivery zone.
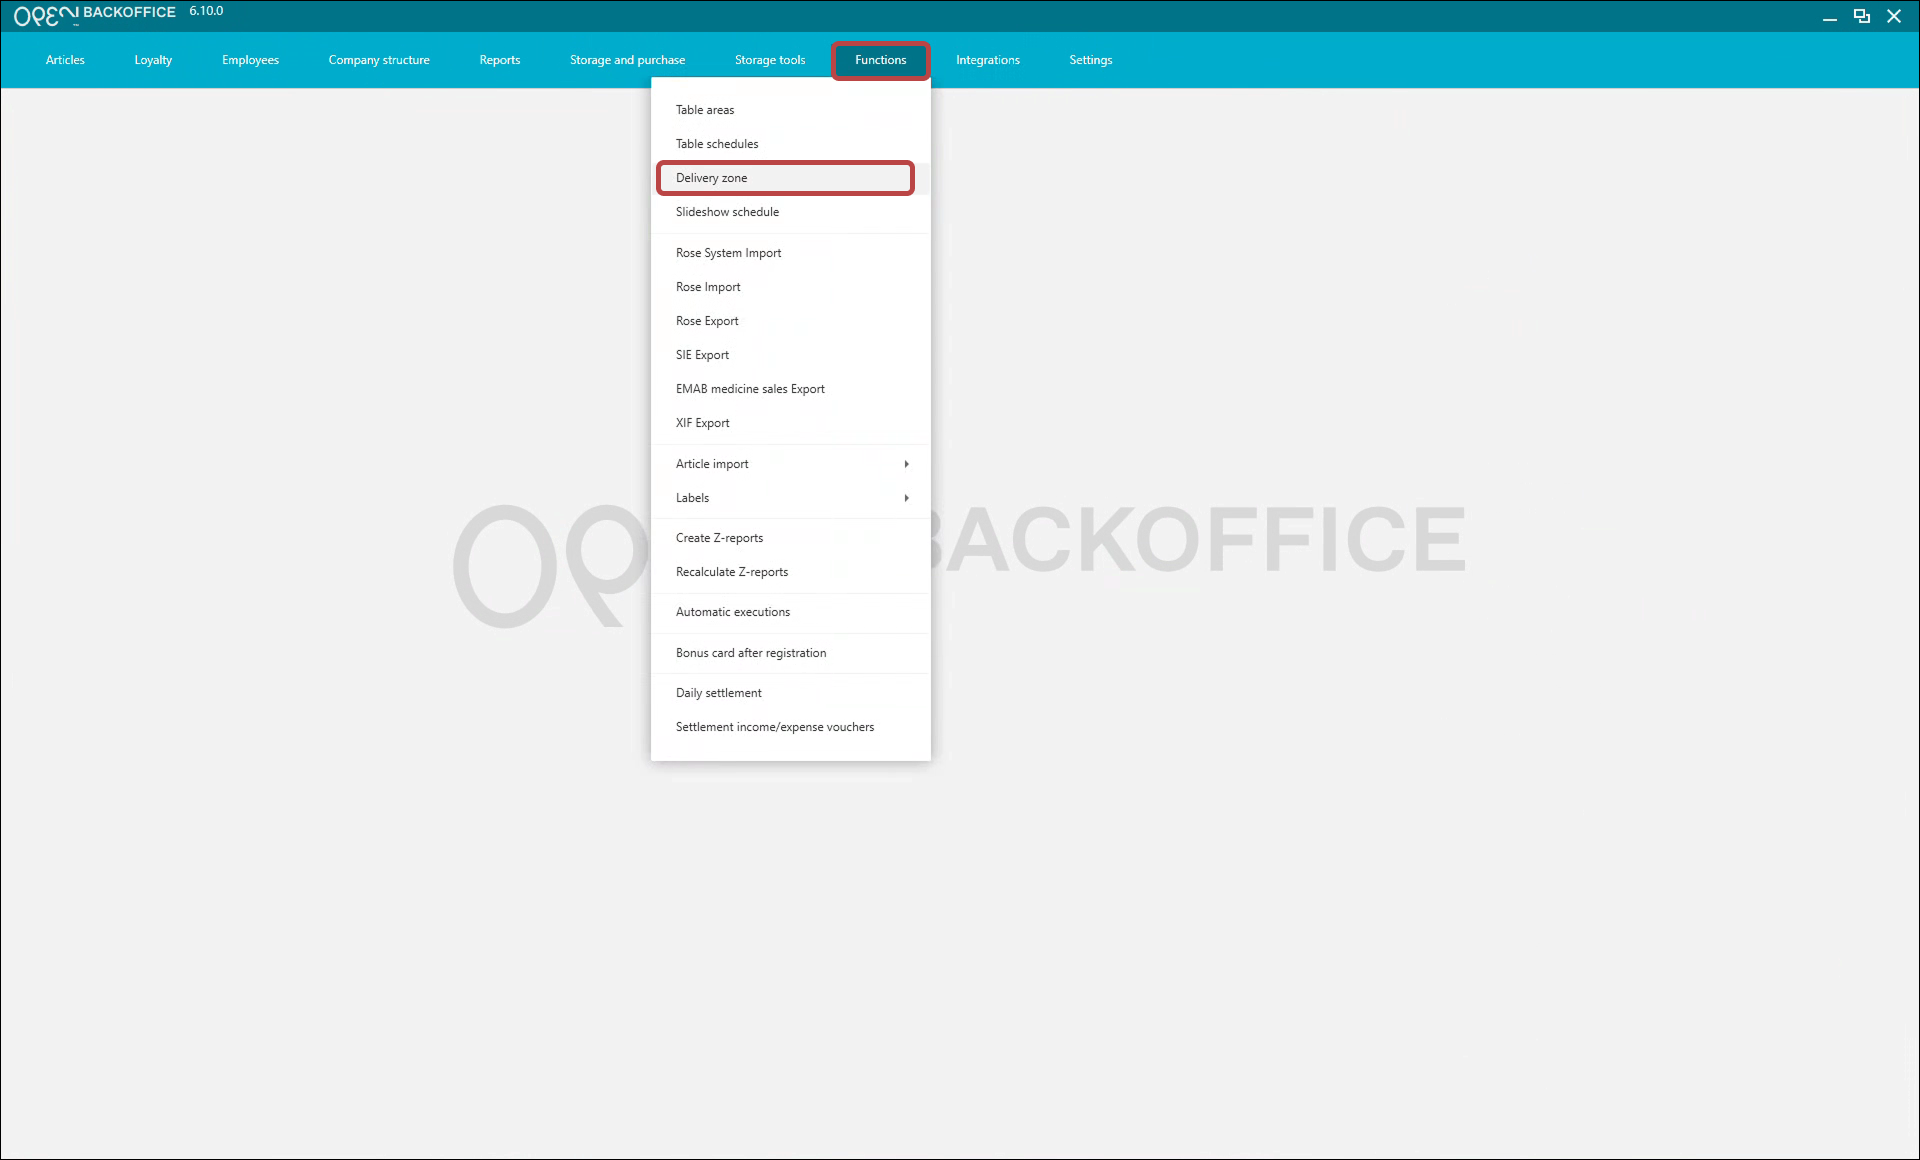
- Click New.
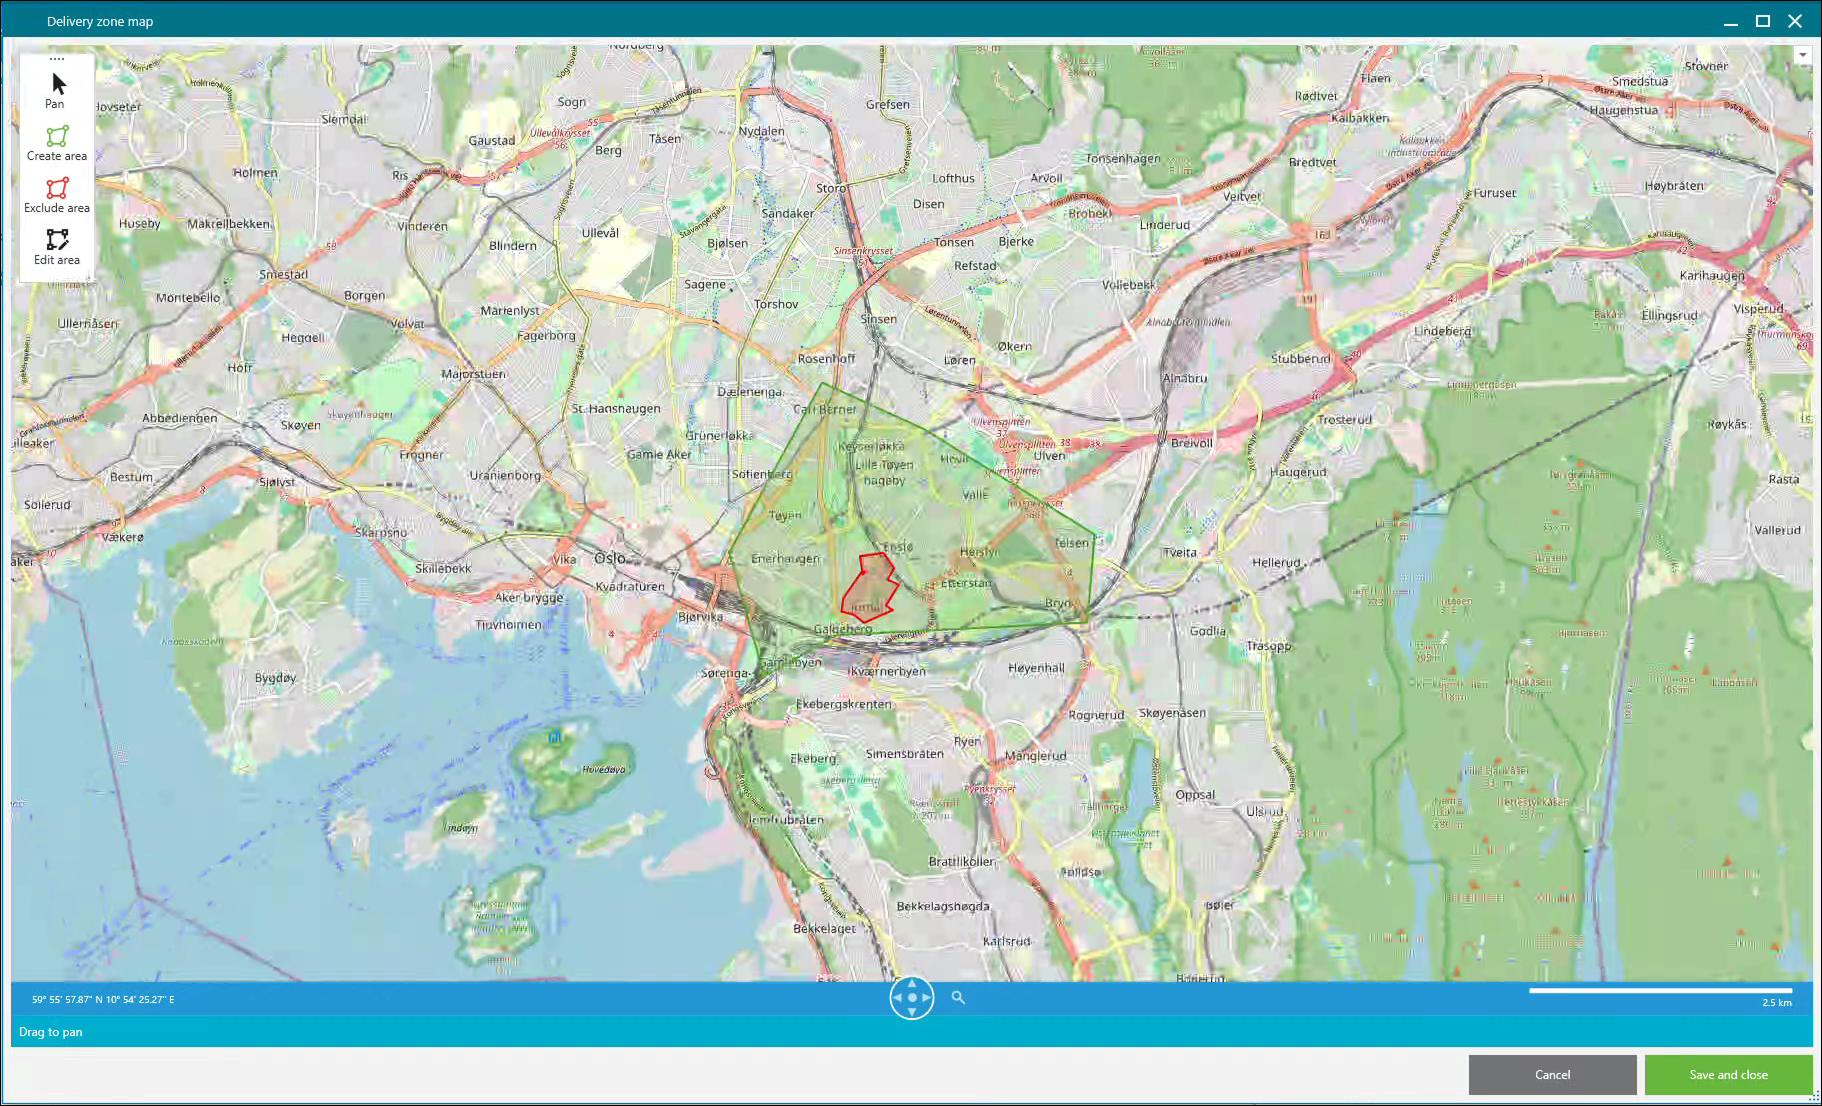
- Enter a name, then click Edit map.
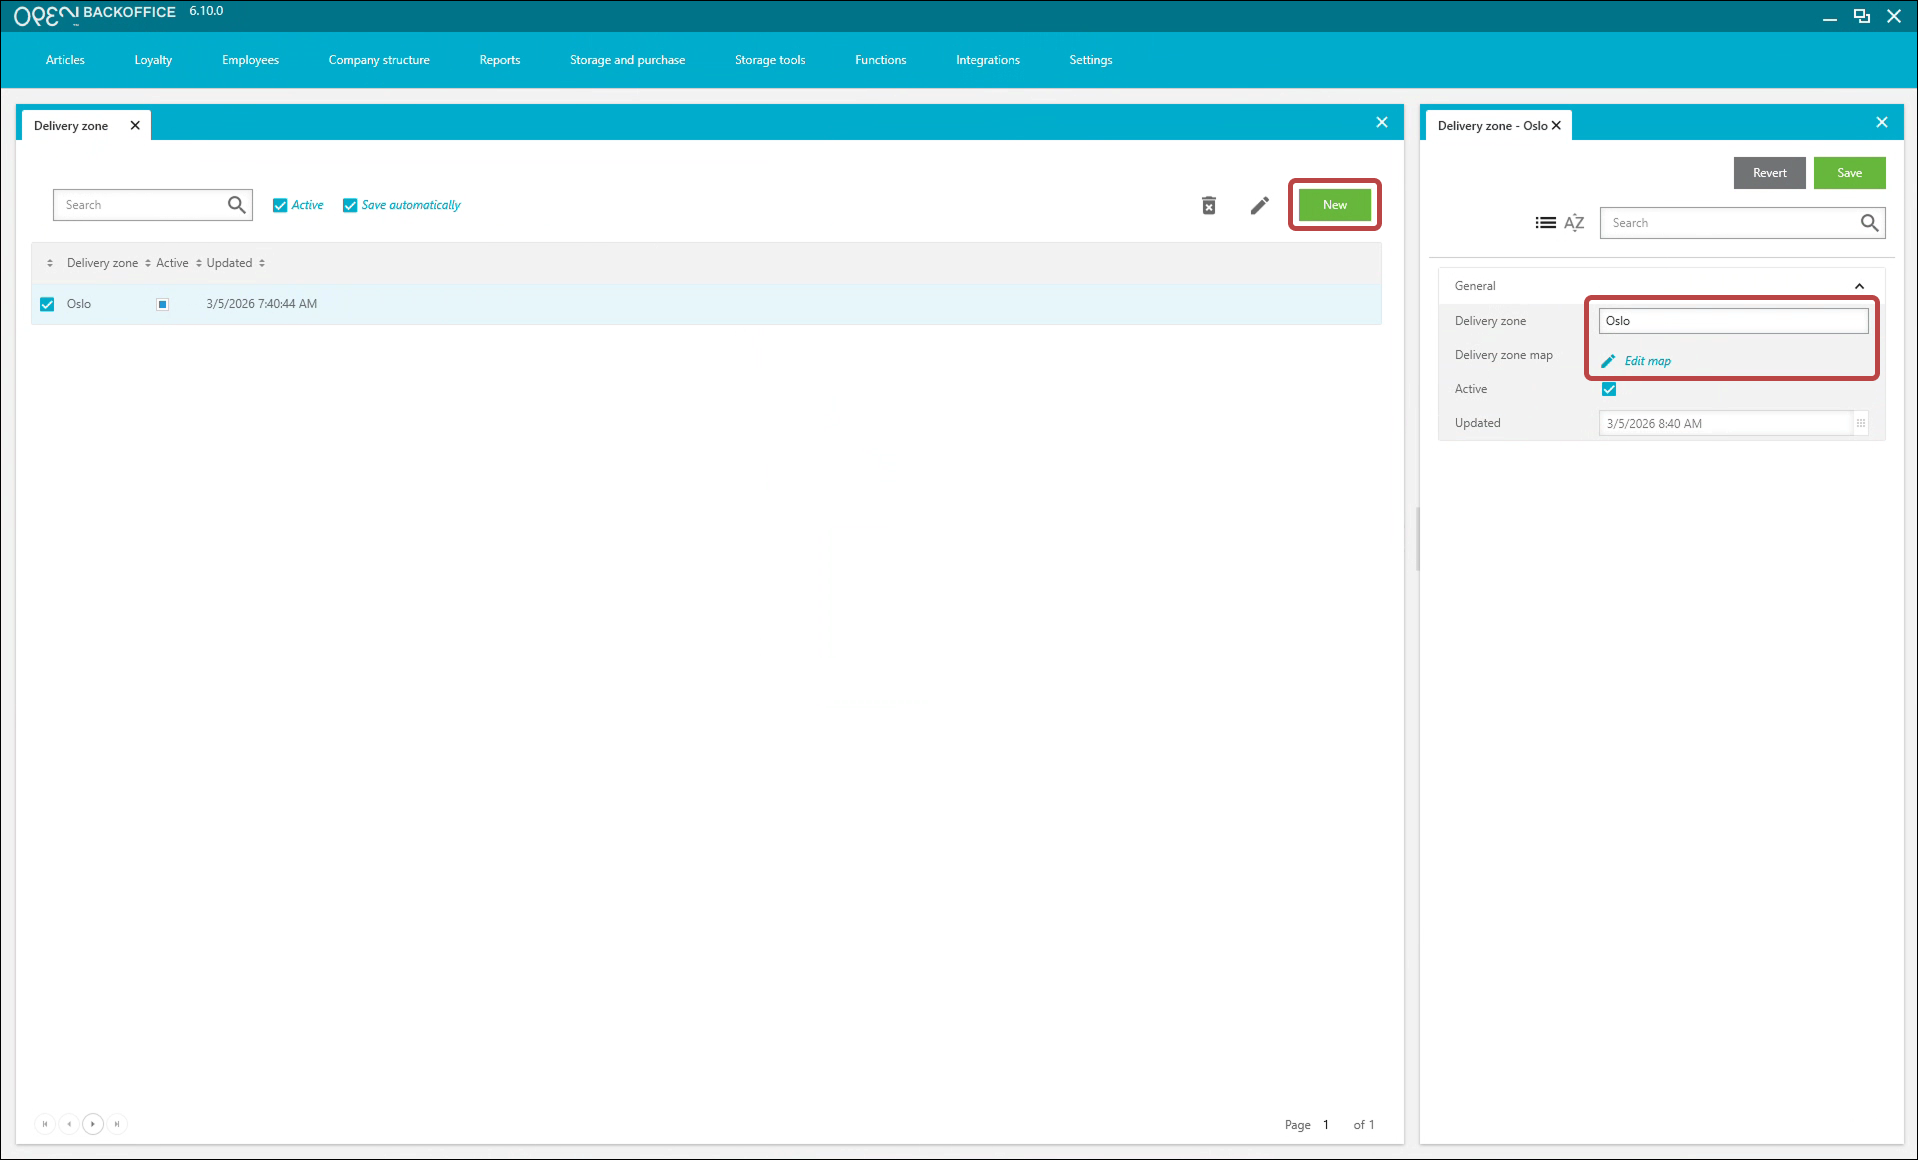
- Create your delivery area in the new window:
- Choose Create area and mark out the area point by point.
- Double-click to close the area.
- Save your changes.


Connect delivery zone to your company
- Go to Company structure -> Company.
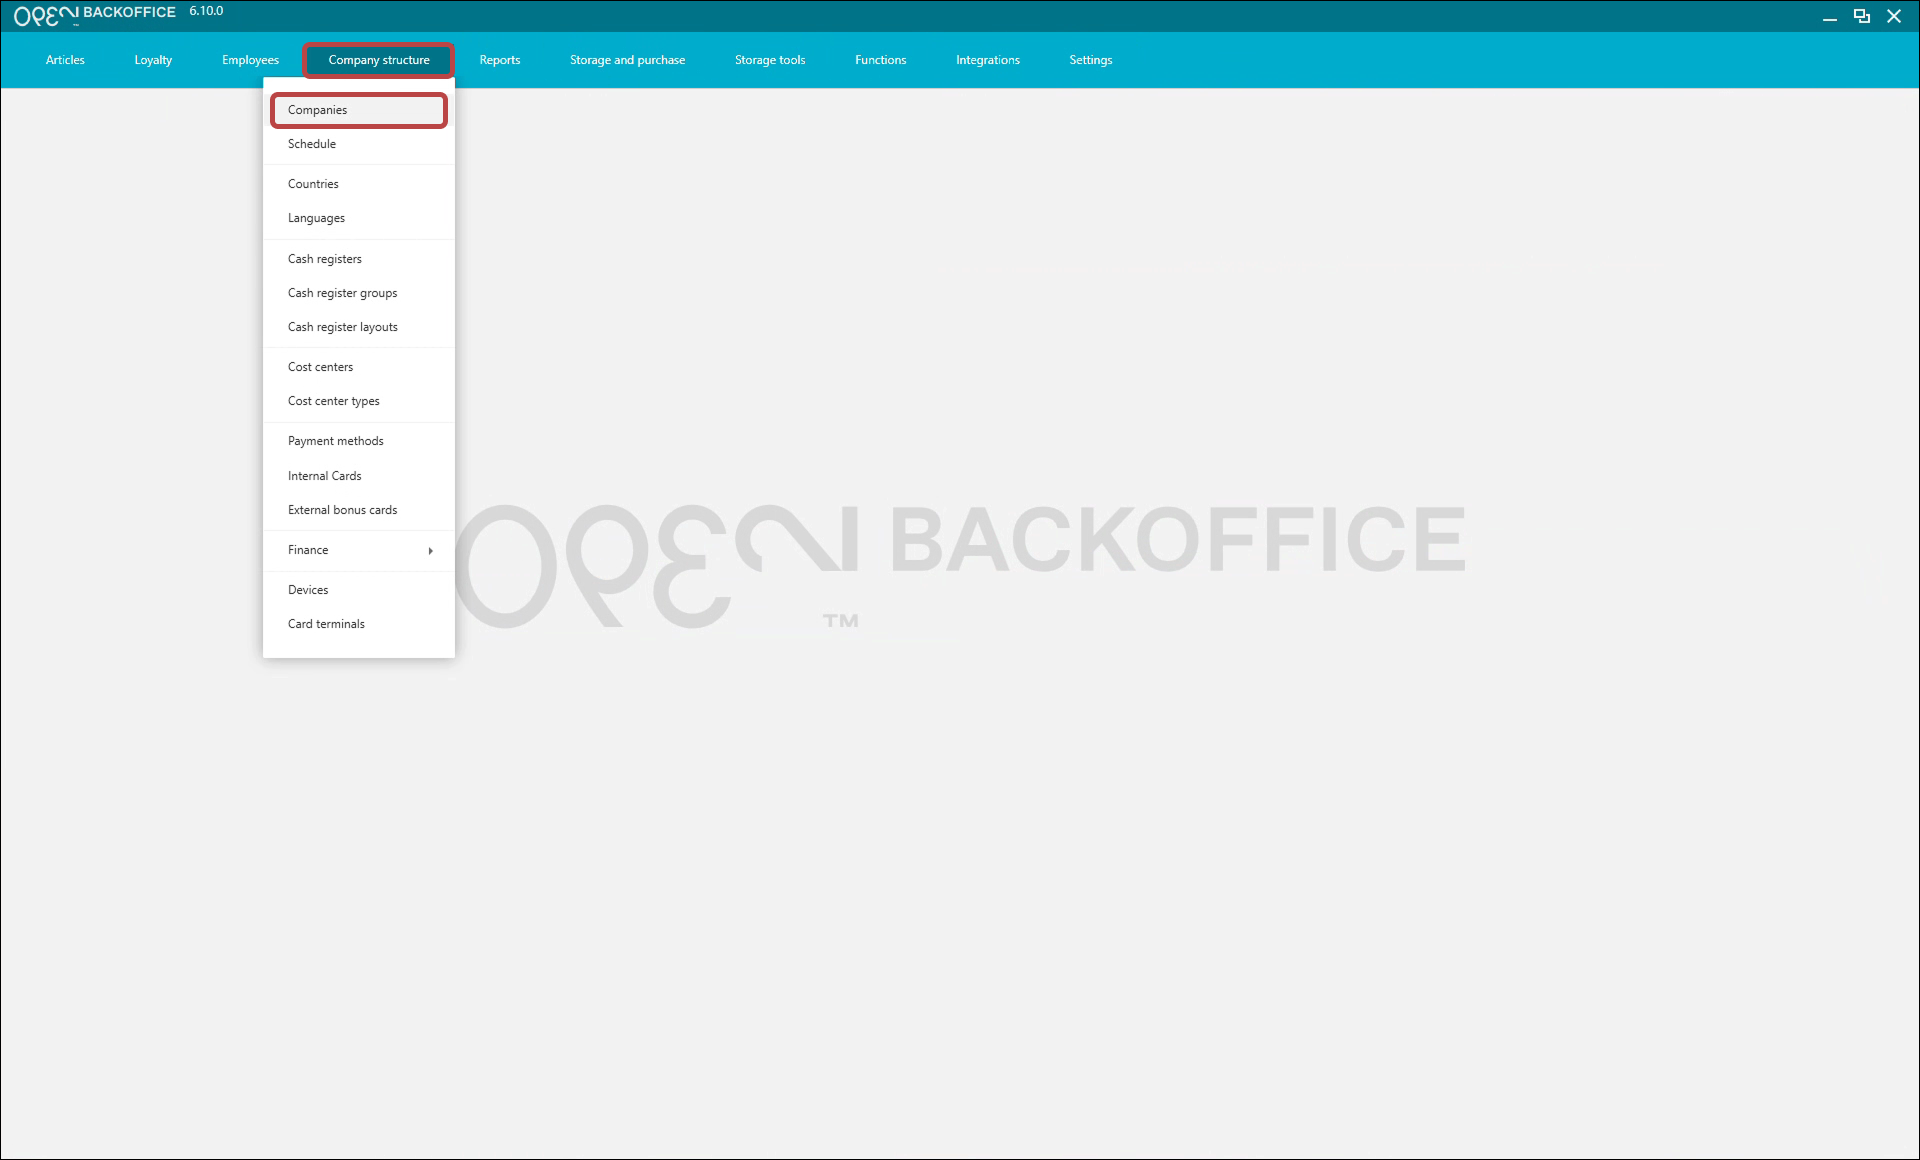
- Choose your company and click Edit.
- Use the search field to locate the Delivery zone field and choose your delivery zone.
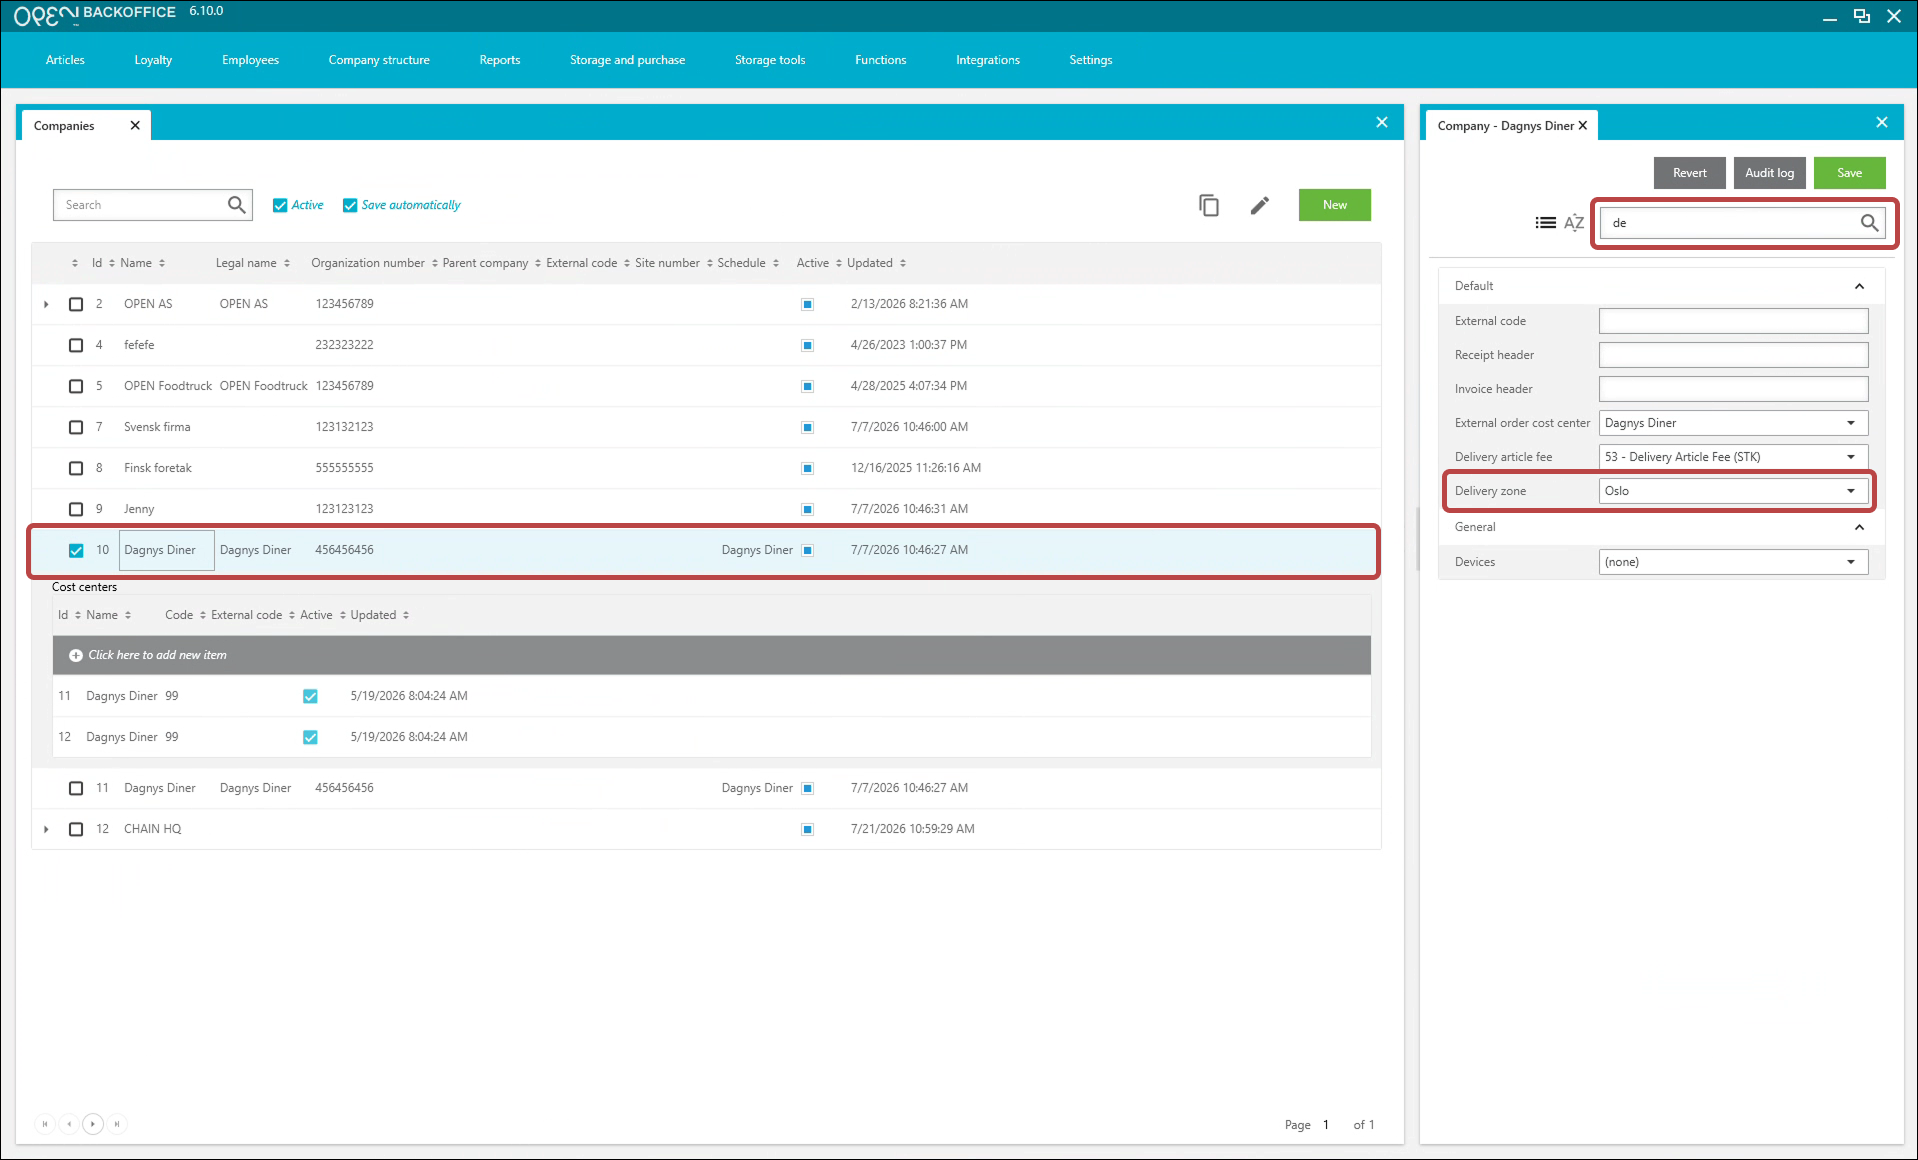
- Save your changes.


6. Future ordering (supported from OPEN One 6.10.0)
You can find orders for future dates in BackOffice under Integrations → OpenOrder. This view also shows all your past orders.


What you can do here
- Cancel an order if, for some reason, you can't deliver what was ordered.
- Add notes or comments to an order, alongside any comments the guest sent when ordering.
- Make changes to an order, up until the cut-off time set in your OPEN Order settings.
INFO
Subsidy payments are not supported for future orders.
Make changes
You can change an order up until the cut-off time, which is set in your OPEN Order settings. Manage the cut-off time and cut-off days settings under Open order settings → Future ordering.
Payment
Pay later
With the pay later function, a guest can place an order without paying right away. This is useful when, for example, you're ordering food for a meeting and don't yet know how many people will attend.
- Go to Settings → Settings.
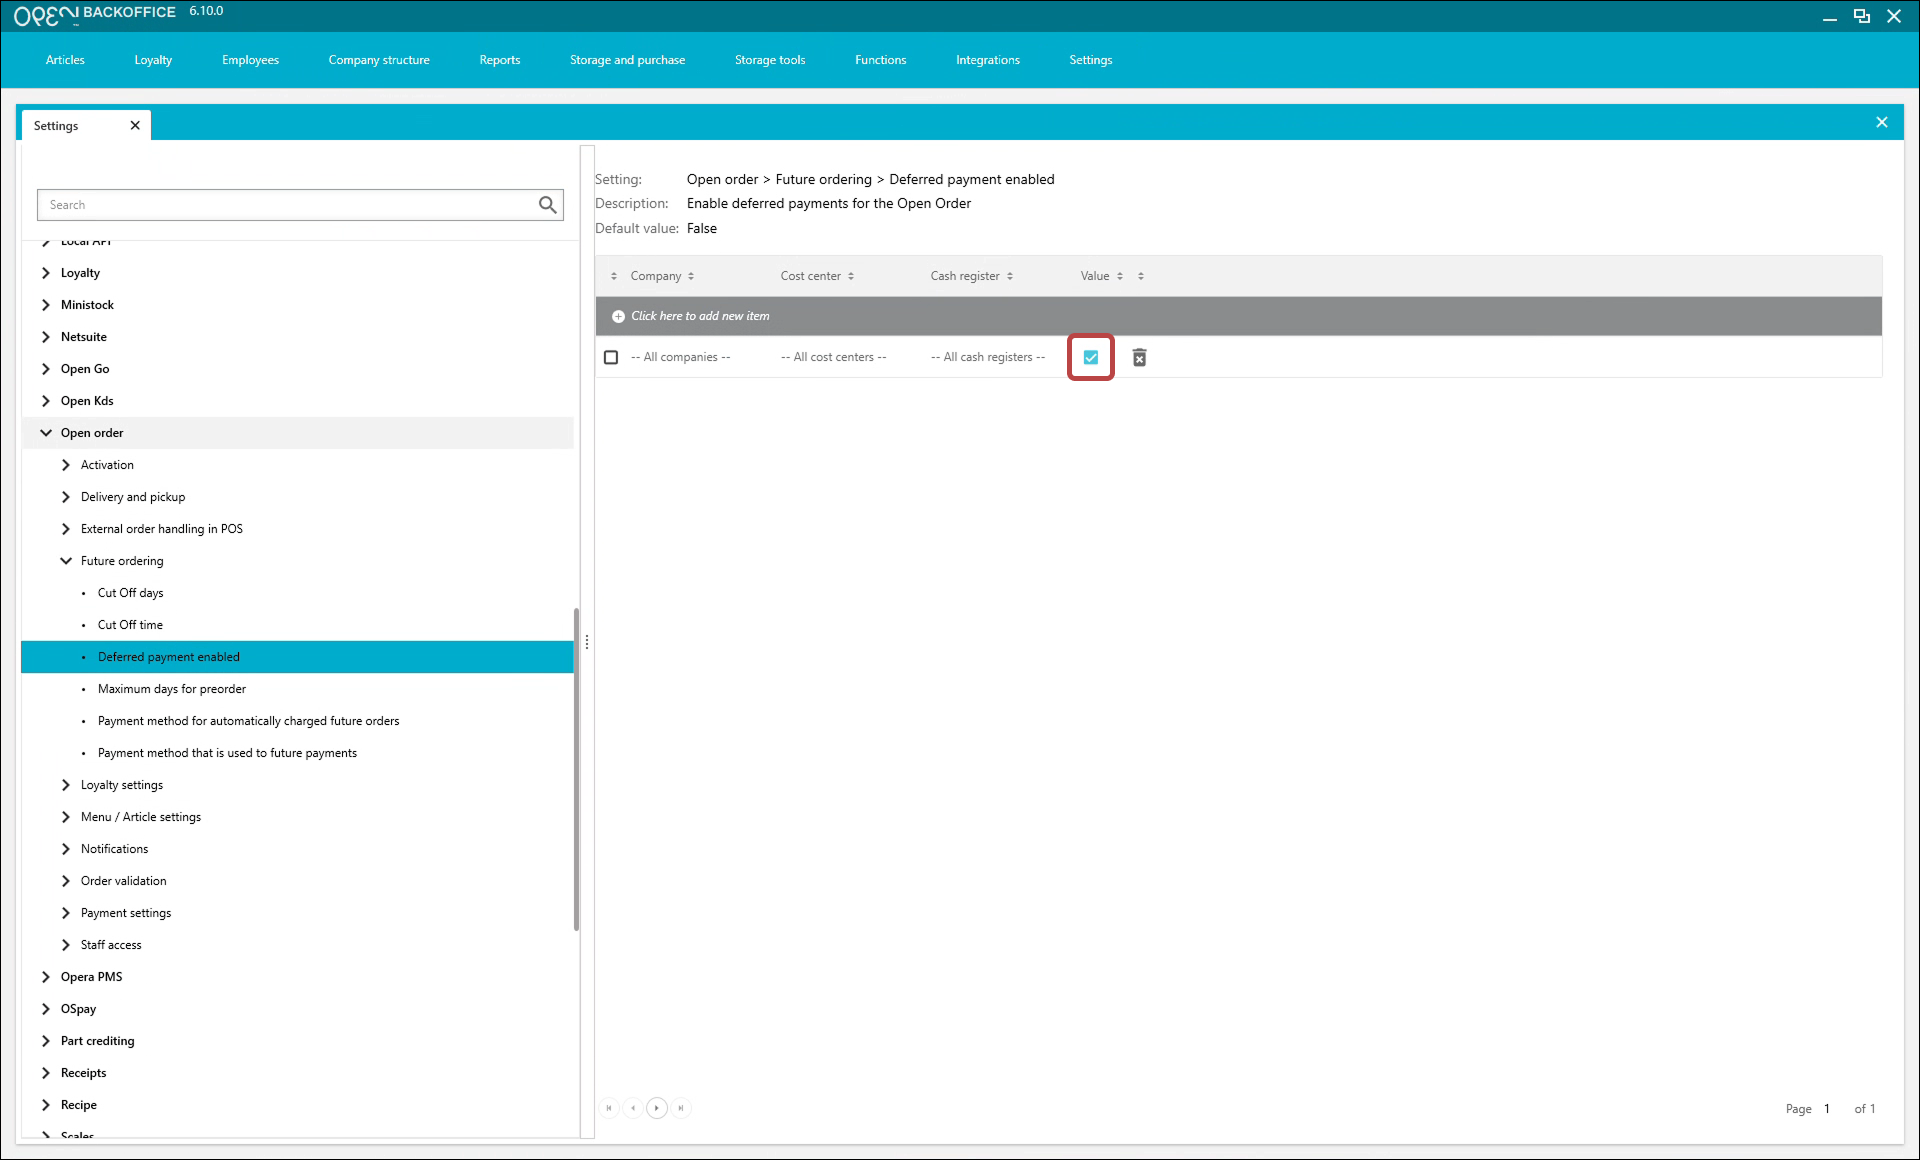
- Go to Open order → Future ordering and select Deferred payment allowed.
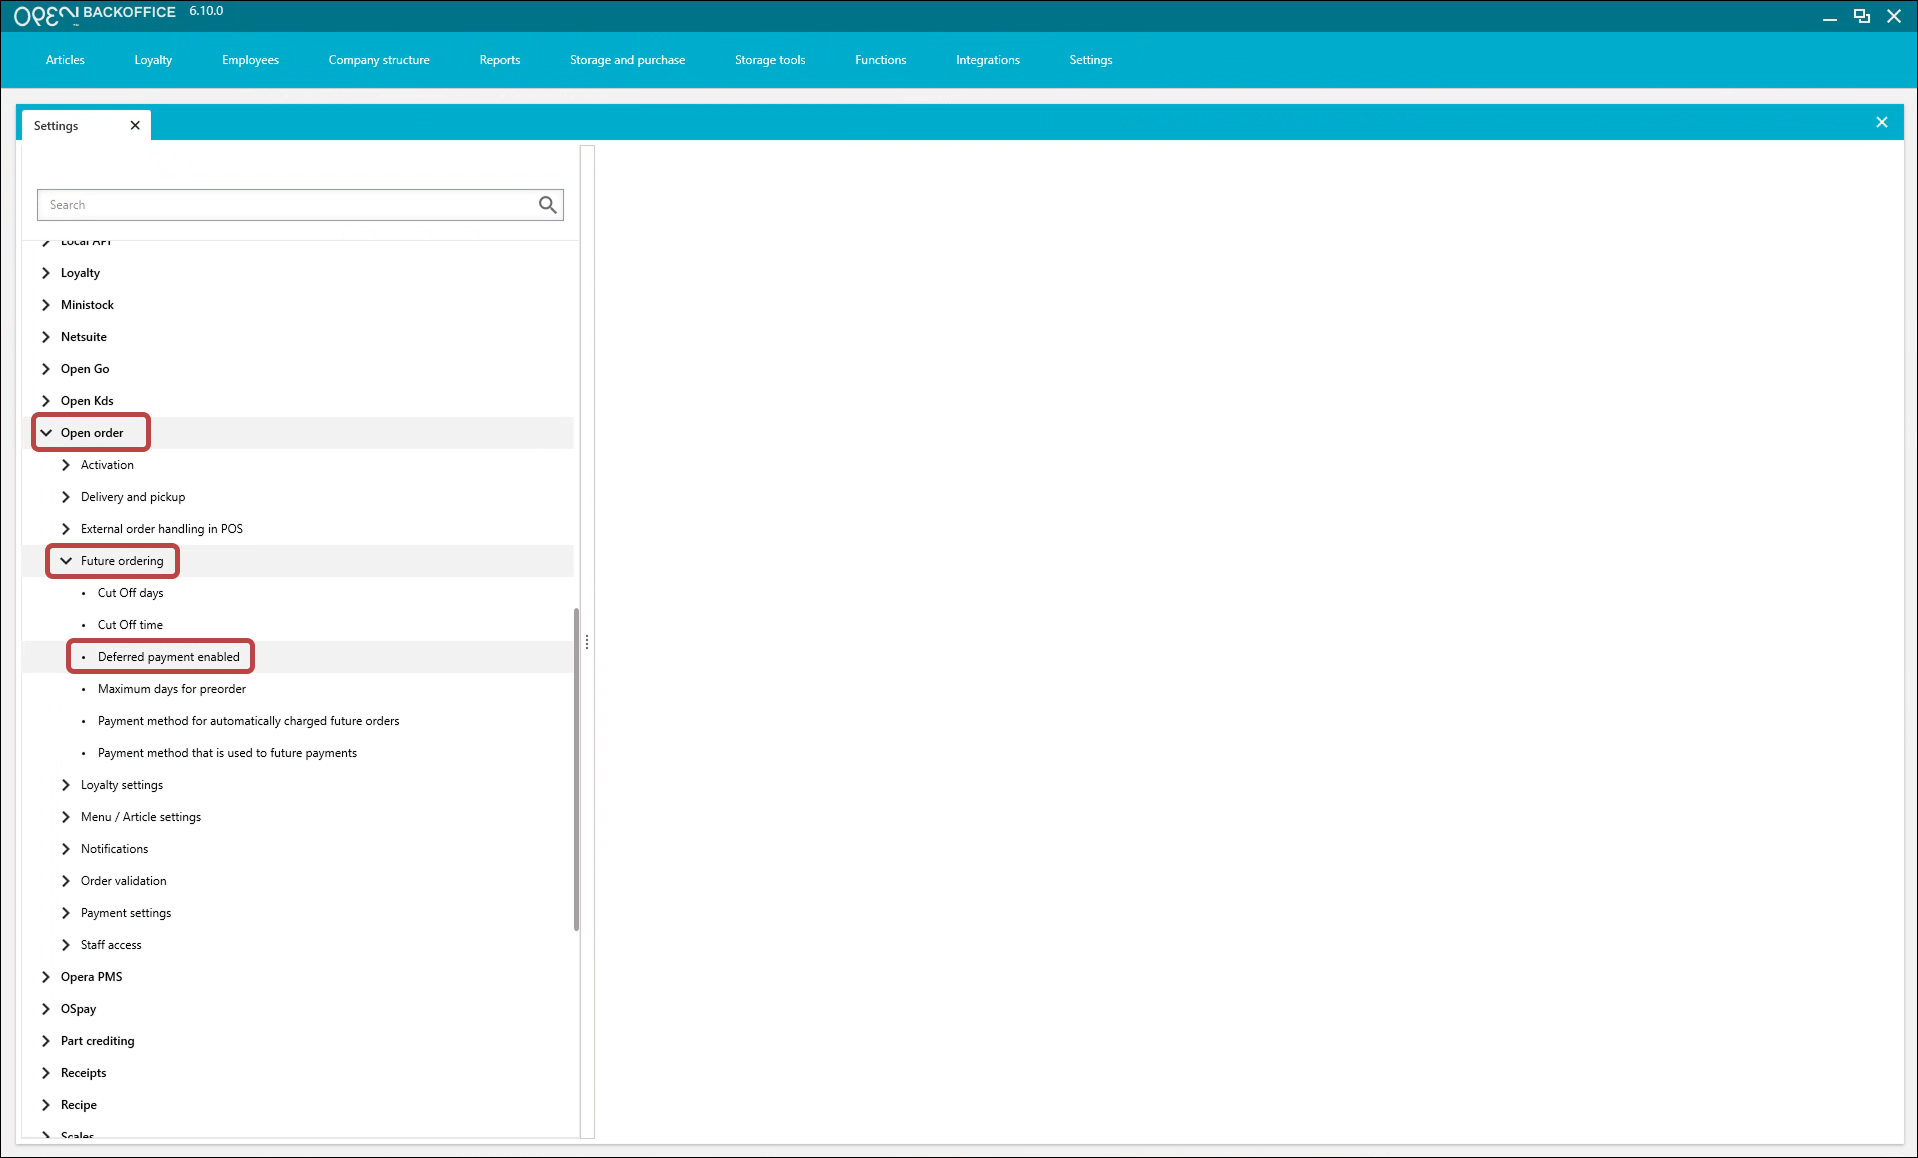
- For the relevant company, cost center, or cash register, tick the checkbox under Value.


When pay later is turned off
If you don't allow pay later, the guest must either pay before the order is delivered (up until the cut-off time), or you can enable auto charge for a certain payment method. At cut-off time, the order is charged automatically if auto charge is on — otherwise the order is cancelled.
INFO
The guest gets a notification before the cut-off time, reminding them to pay.
To choose the payment method for automatically charged future orders:
- Go to Settings → Settings.
- Go to Open order → Future ordering → Payment method for automatically charged orders.
7. Payment
Payment methods come from the company, cost center, and cash register you set up for OPEN Order. Supported payment methods are Bambora Checkout, Internal Card, and Vipps / Swish.
To set up Bambora Checkout, create a payment method in OPEN One with Way of payment: Application and Type: Bambora.
For OPEN staff only
- In SuperOffice, find the correct site and edit the OPEN Order tab.
- Add the MID and MD5 from the Bambora reseller portal here.
Settings overview
TIP
Settings in bold are mandatory.
| Setting level 1 | Setting level 2 | Default value | Description |
|---|---|---|---|
| Activate OPEN Order | Enable Open Order | False | Must be activated before your webshop can be created. |
| Enable Dine-in | False | Activate at least one of Dine-in / Pickup / Delivery. | |
| Enable Pickup | False | Activate at least one of Dine-in / Pickup / Delivery. | |
| Enable Delivery | False | Activate at least one of Dine-in / Pickup / Delivery. | |
| Enable logs | True | ||
| Show in list on customer site | False | Sets whether your webshop is listed in OPEN's restaurant list (https://order.one.openpos.tech/). Options: ShowSingle, ShowWithAll (for chains), or Hide. | |
| Delivery & pickup | Delivery time | 0 | |
| Estimated preparation | 0 | ||
| Minimum order amount | 0 | Applies to delivery orders only. | |
| Payment settings | Allow pay at pickup | False | |
| Future ordering | Maximum days for preorder | 0 | If set to 0, future ordering is turned off. |
| Cut off days | 0 | Number of days ahead guests can preorder. Cut off 0 days + 12 hours means guests can order for tomorrow until 12:00 today. | |
| Cut off time | 0 | Number of hours ahead guests can preorder. | |
| Deferred payment enabled | 0 | Sets whether guests must pay immediately for a preorder. If deferred payment is enabled, the order can be changed until cut-off time. | |
| Payment method for automatically charged future orders | 0 | Guests with "Allow auto charge" enabled are charged with this method at cut-off time if they haven't already paid manually. | |
| Staff access | Enable access from BackOffice | False | Shows the "OPEN Order" menu item in BackOffice. |
| Enable access for employees | False | Enables the STAFF part of OPEN Order, for order validation and similar. | |
| Order validation | Order validation behaviour | Disabled | Scan a receipt QR to check whether the customer has a valid receipt today. |
| Printer for print validated orders | 0 | This printer prints the order receipt on validation. | |
| Loyalty settings | Enable loyalty input | False | Lets you connect a loyalty user to an order. Required for future ordering with pay later. |
| External order handling in POS | Default employee ID | Mandatory. | |
| Start external order status | |||
| Require confirmation of cancellation of an external order | |||
| External order automatically prints kitchen ticket | |||
| Print cost centre on kitchen ticket | |||
| Print address on external order delivery | |||
| Menu / Article settings | Disallow H&H in different units |