Accounting via Tripletex
Tripletex is an all-in-one business management service designed to help streamline your company's finances, payroll, and accounting needs. Integrating OPEN Two with Tripletex makes the bookkeeping even easier.
You don't have to enter sales data manually as it is automatically transferred from the cash register to Tripletex each day. This saves time and minimizes mistakes. You get accurate financial records that helps you make better decisions and spend time on your core business.
Preparations
When you activate the integration, you will need to create a chart of accounts by choosing bookkeeping accounts for your payment methods and product groups, among other things. This is necessary for the sales data, i.e., your transactions, to be exported to Tripletex and properly recorded. If you are unsure about which bookkeeping accounts to use, you should consult your accountant.
Activate the integration
1. Navigate to the Integrations Page
In BackOffice, go to the Company menu.
Select Integrations.
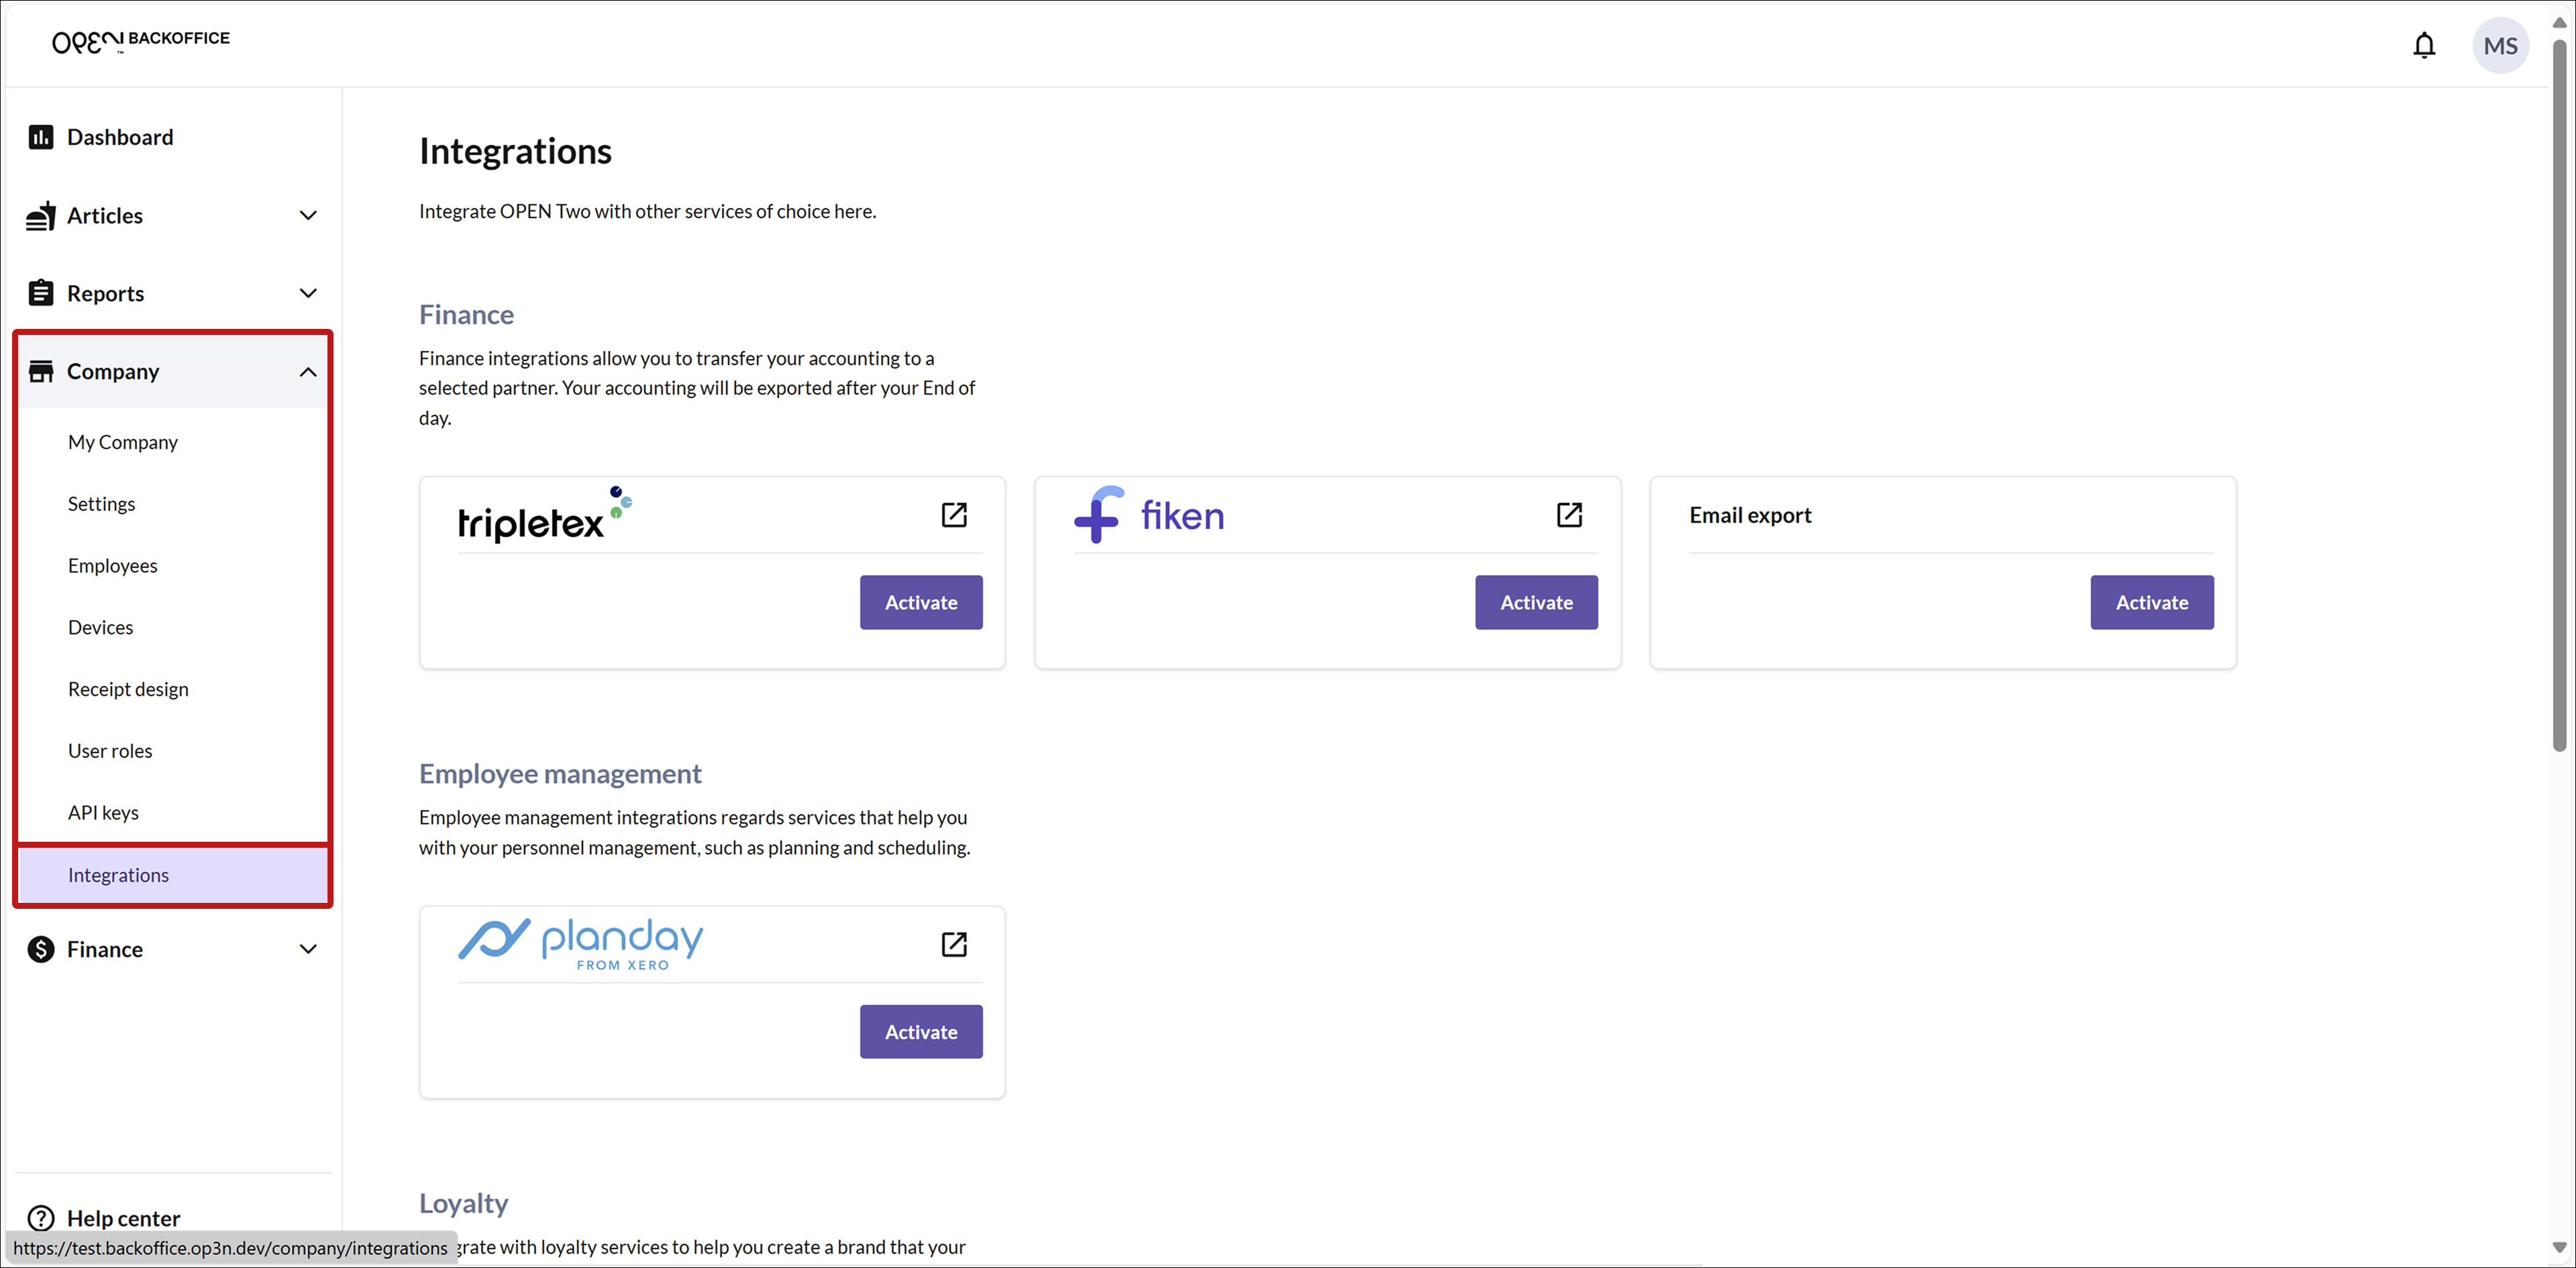

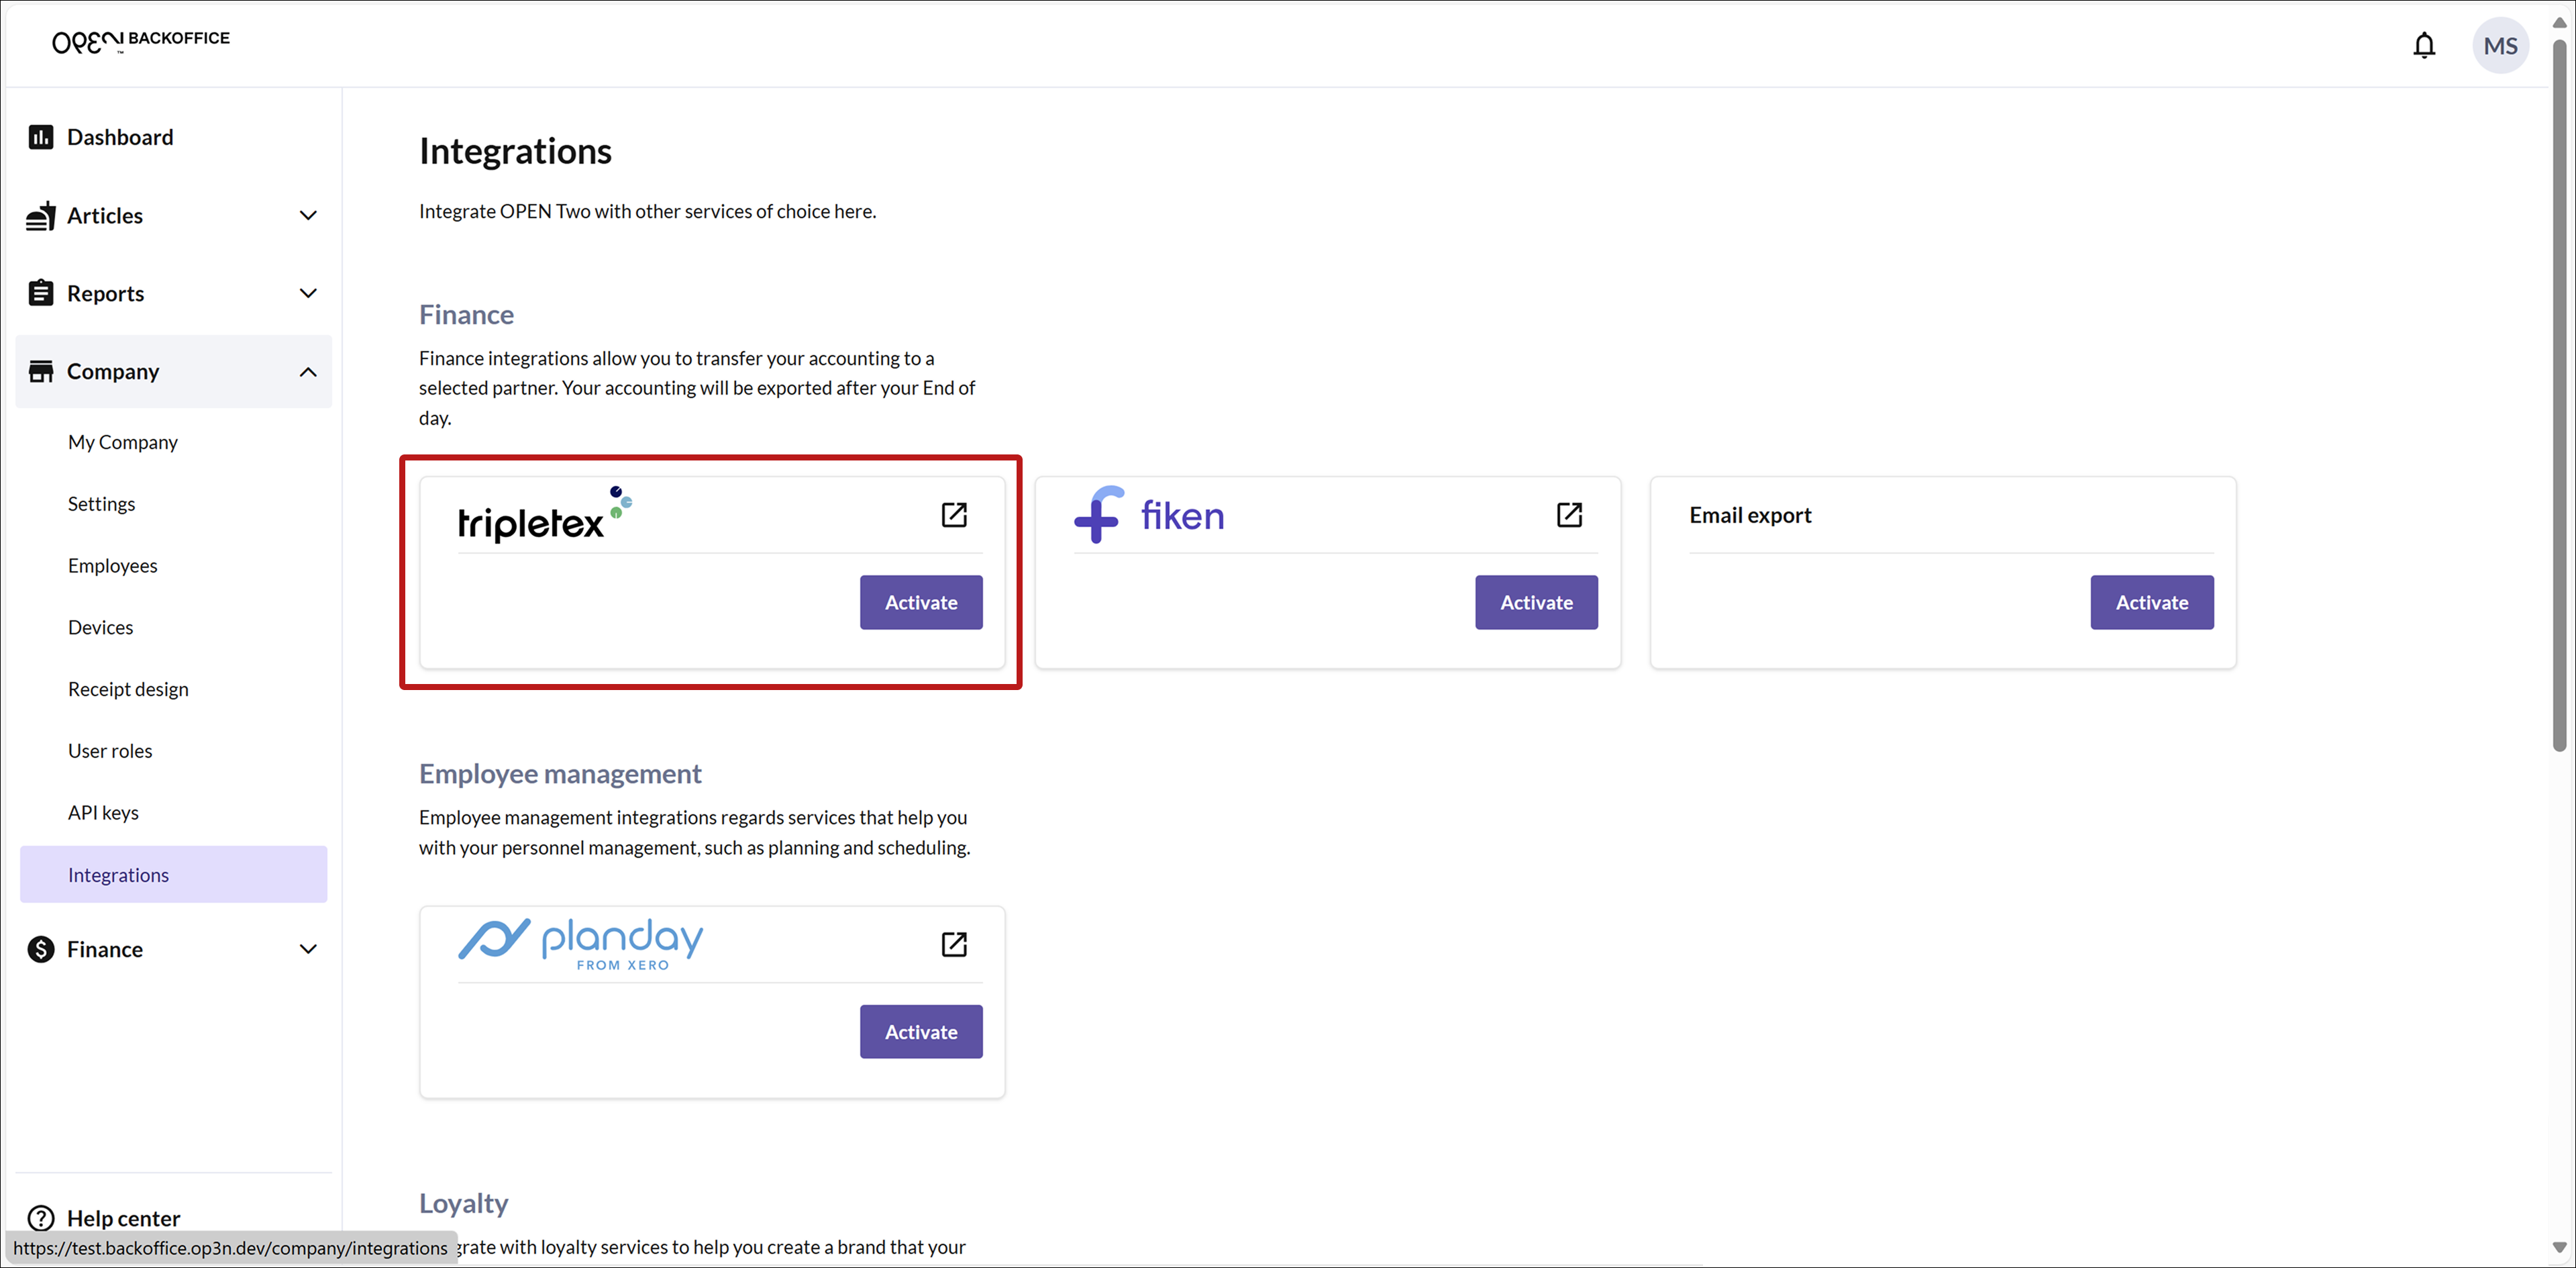
2. Activate Tripletex
Locate the Tripletex card.
Press ACTIVATE.

- In the dialog that appears, click Let's get started.

3. Create token
You will now need to create a token in Tripletex, which you will later verify in BackOffice. But don't worry, we'll guide you step by step.
- Click the Tripletex link to open Tripletex in a new page in your browser.

Sign in to Tripletex
Sign in to Tripletex.


Go to the Salary tab & select Employees
Open the Salary tab and select Employees
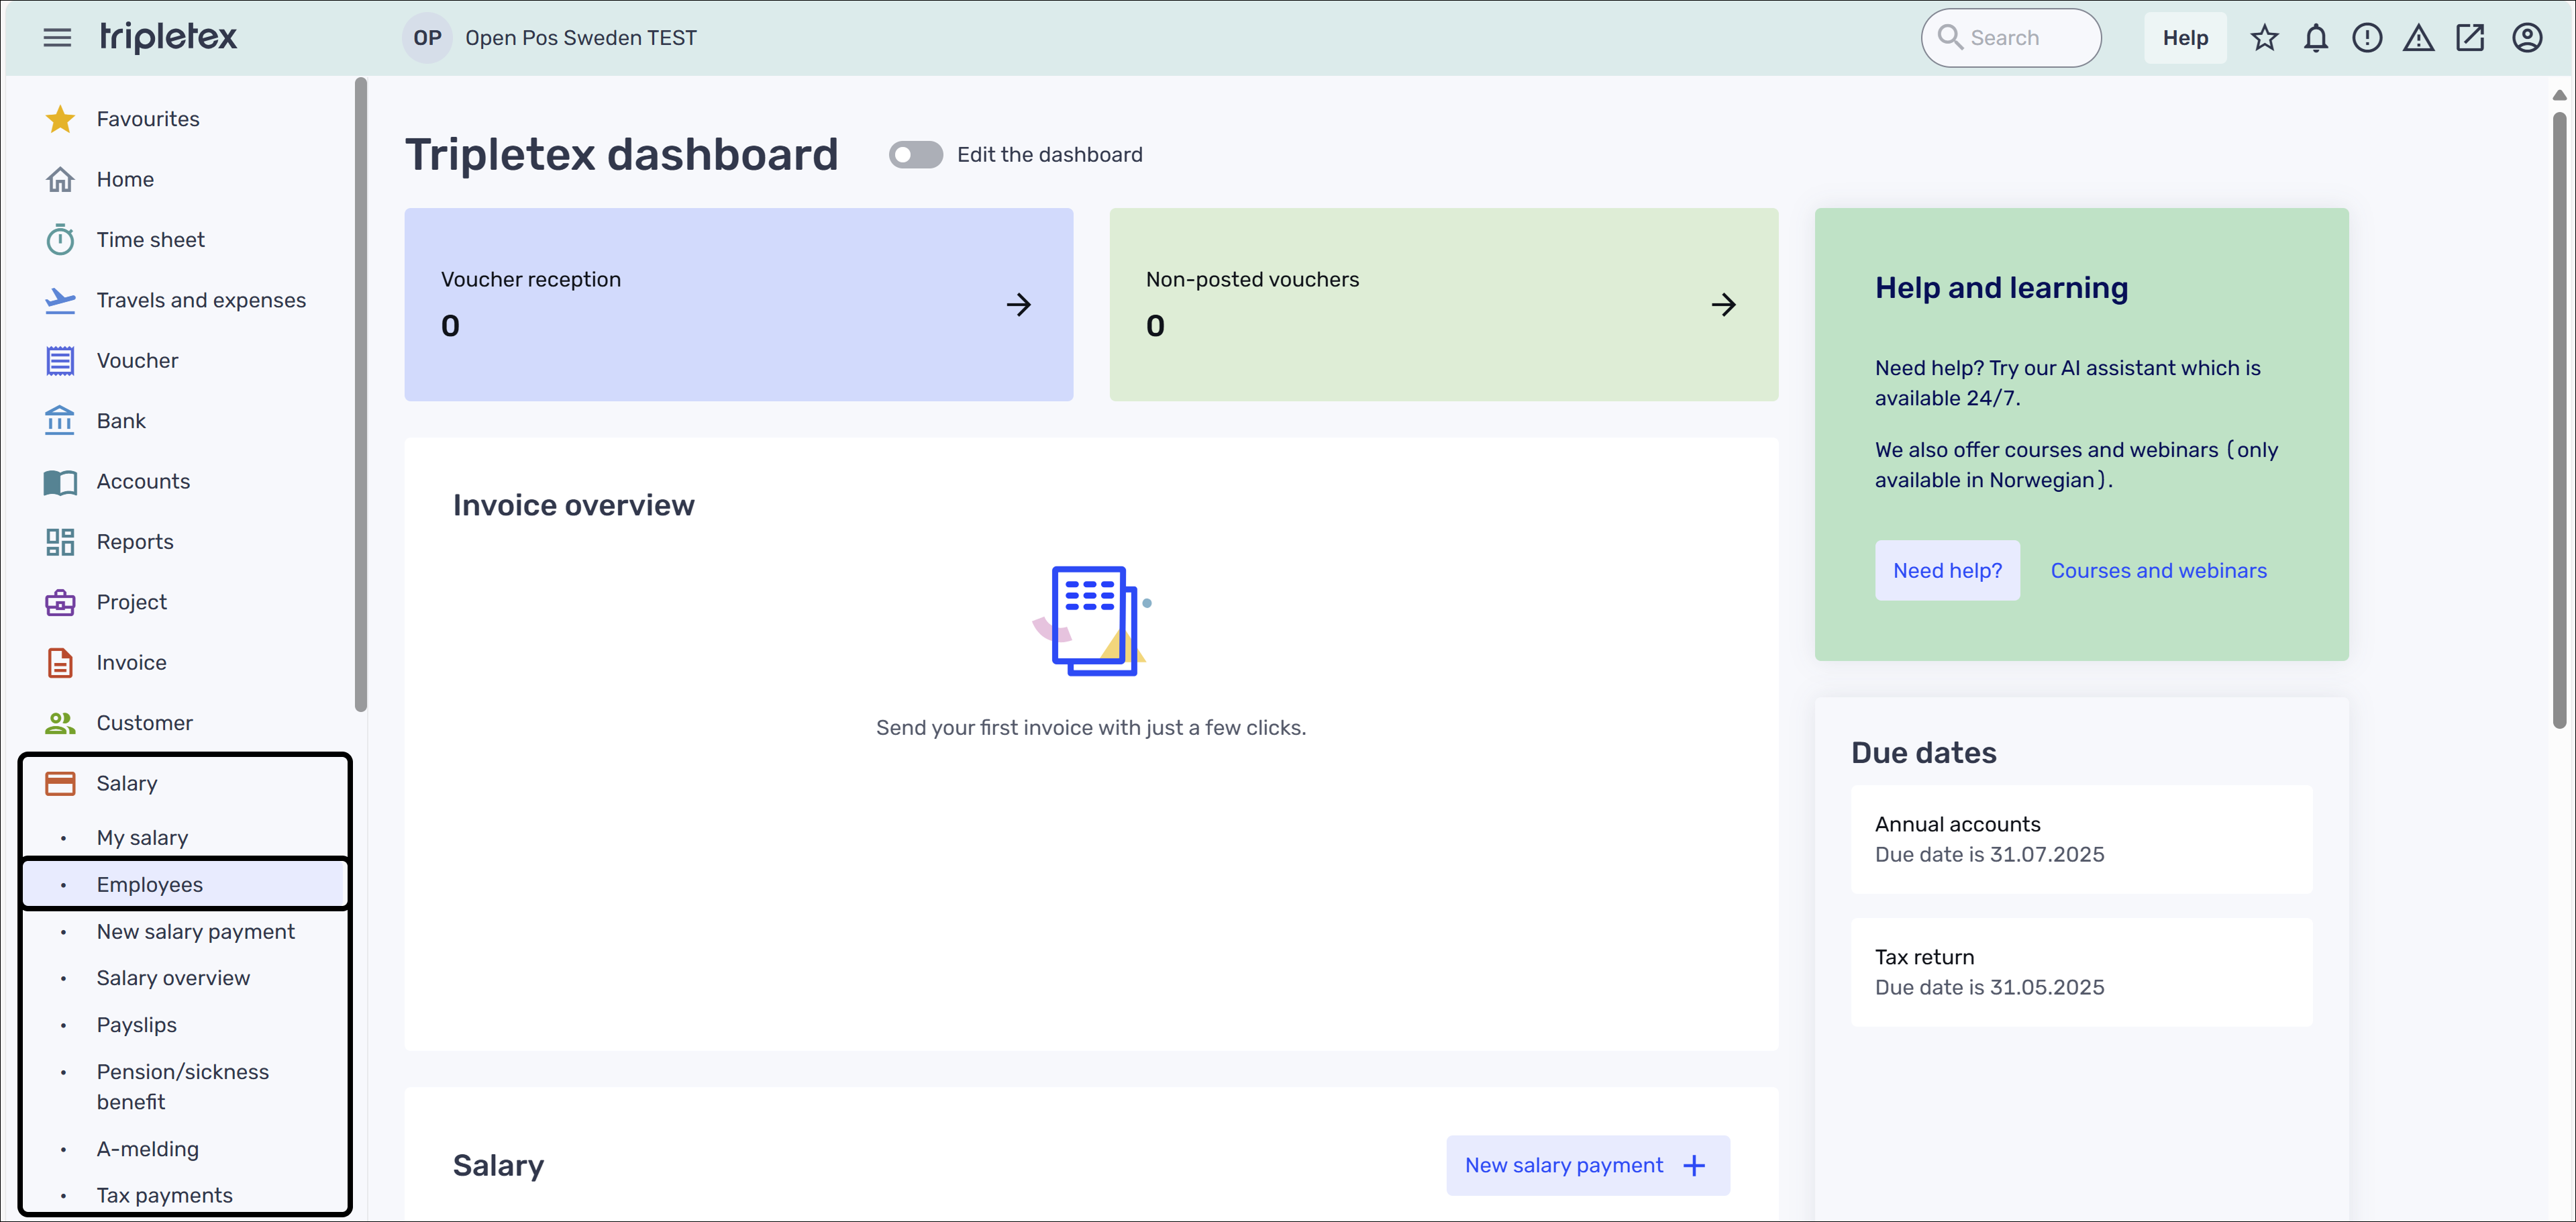
Choose the employee who will manage the integration in BackOffice.
Make sure that the employee has all entitlements assigned to their account.


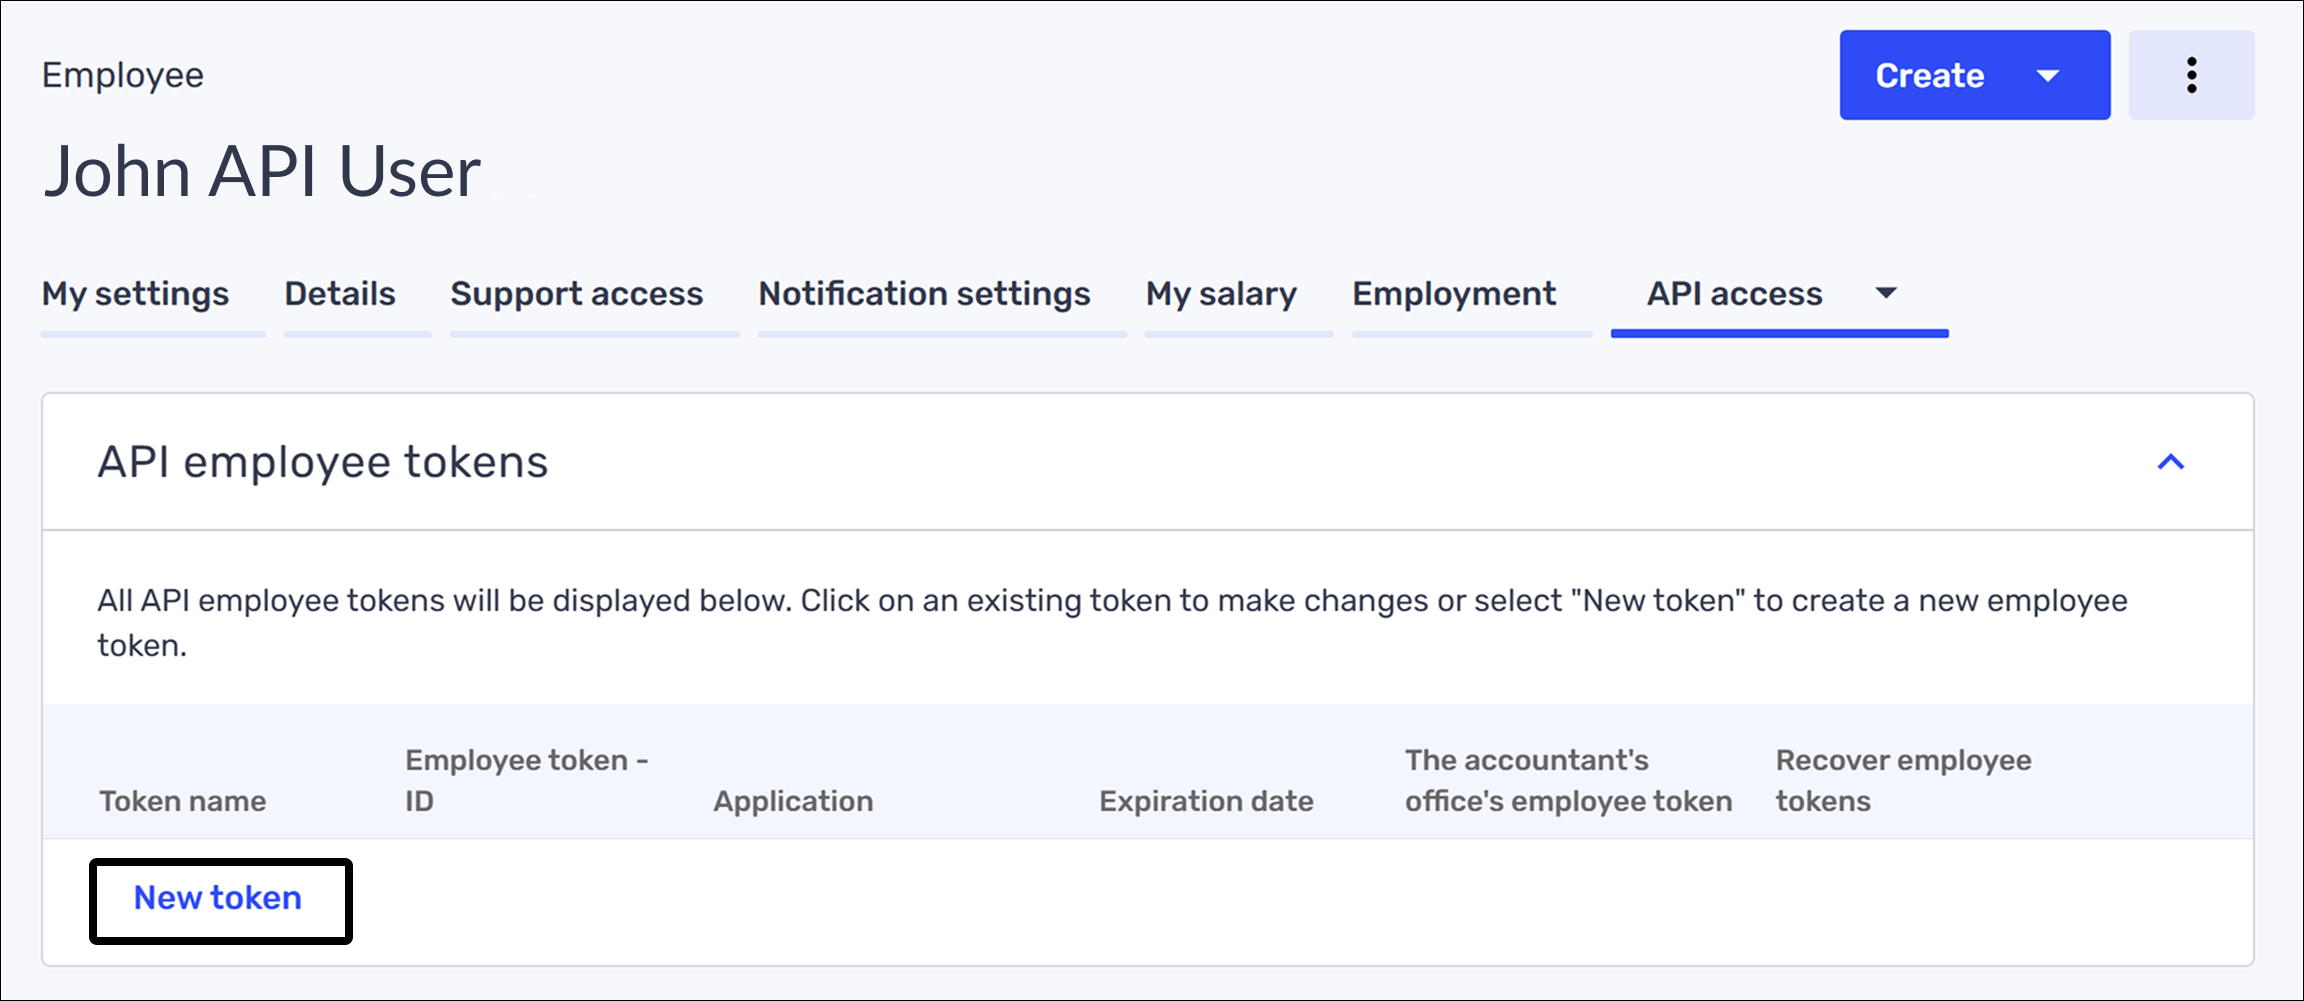
Go to API-access
Click the More dropdown (on the right) and select API-access.
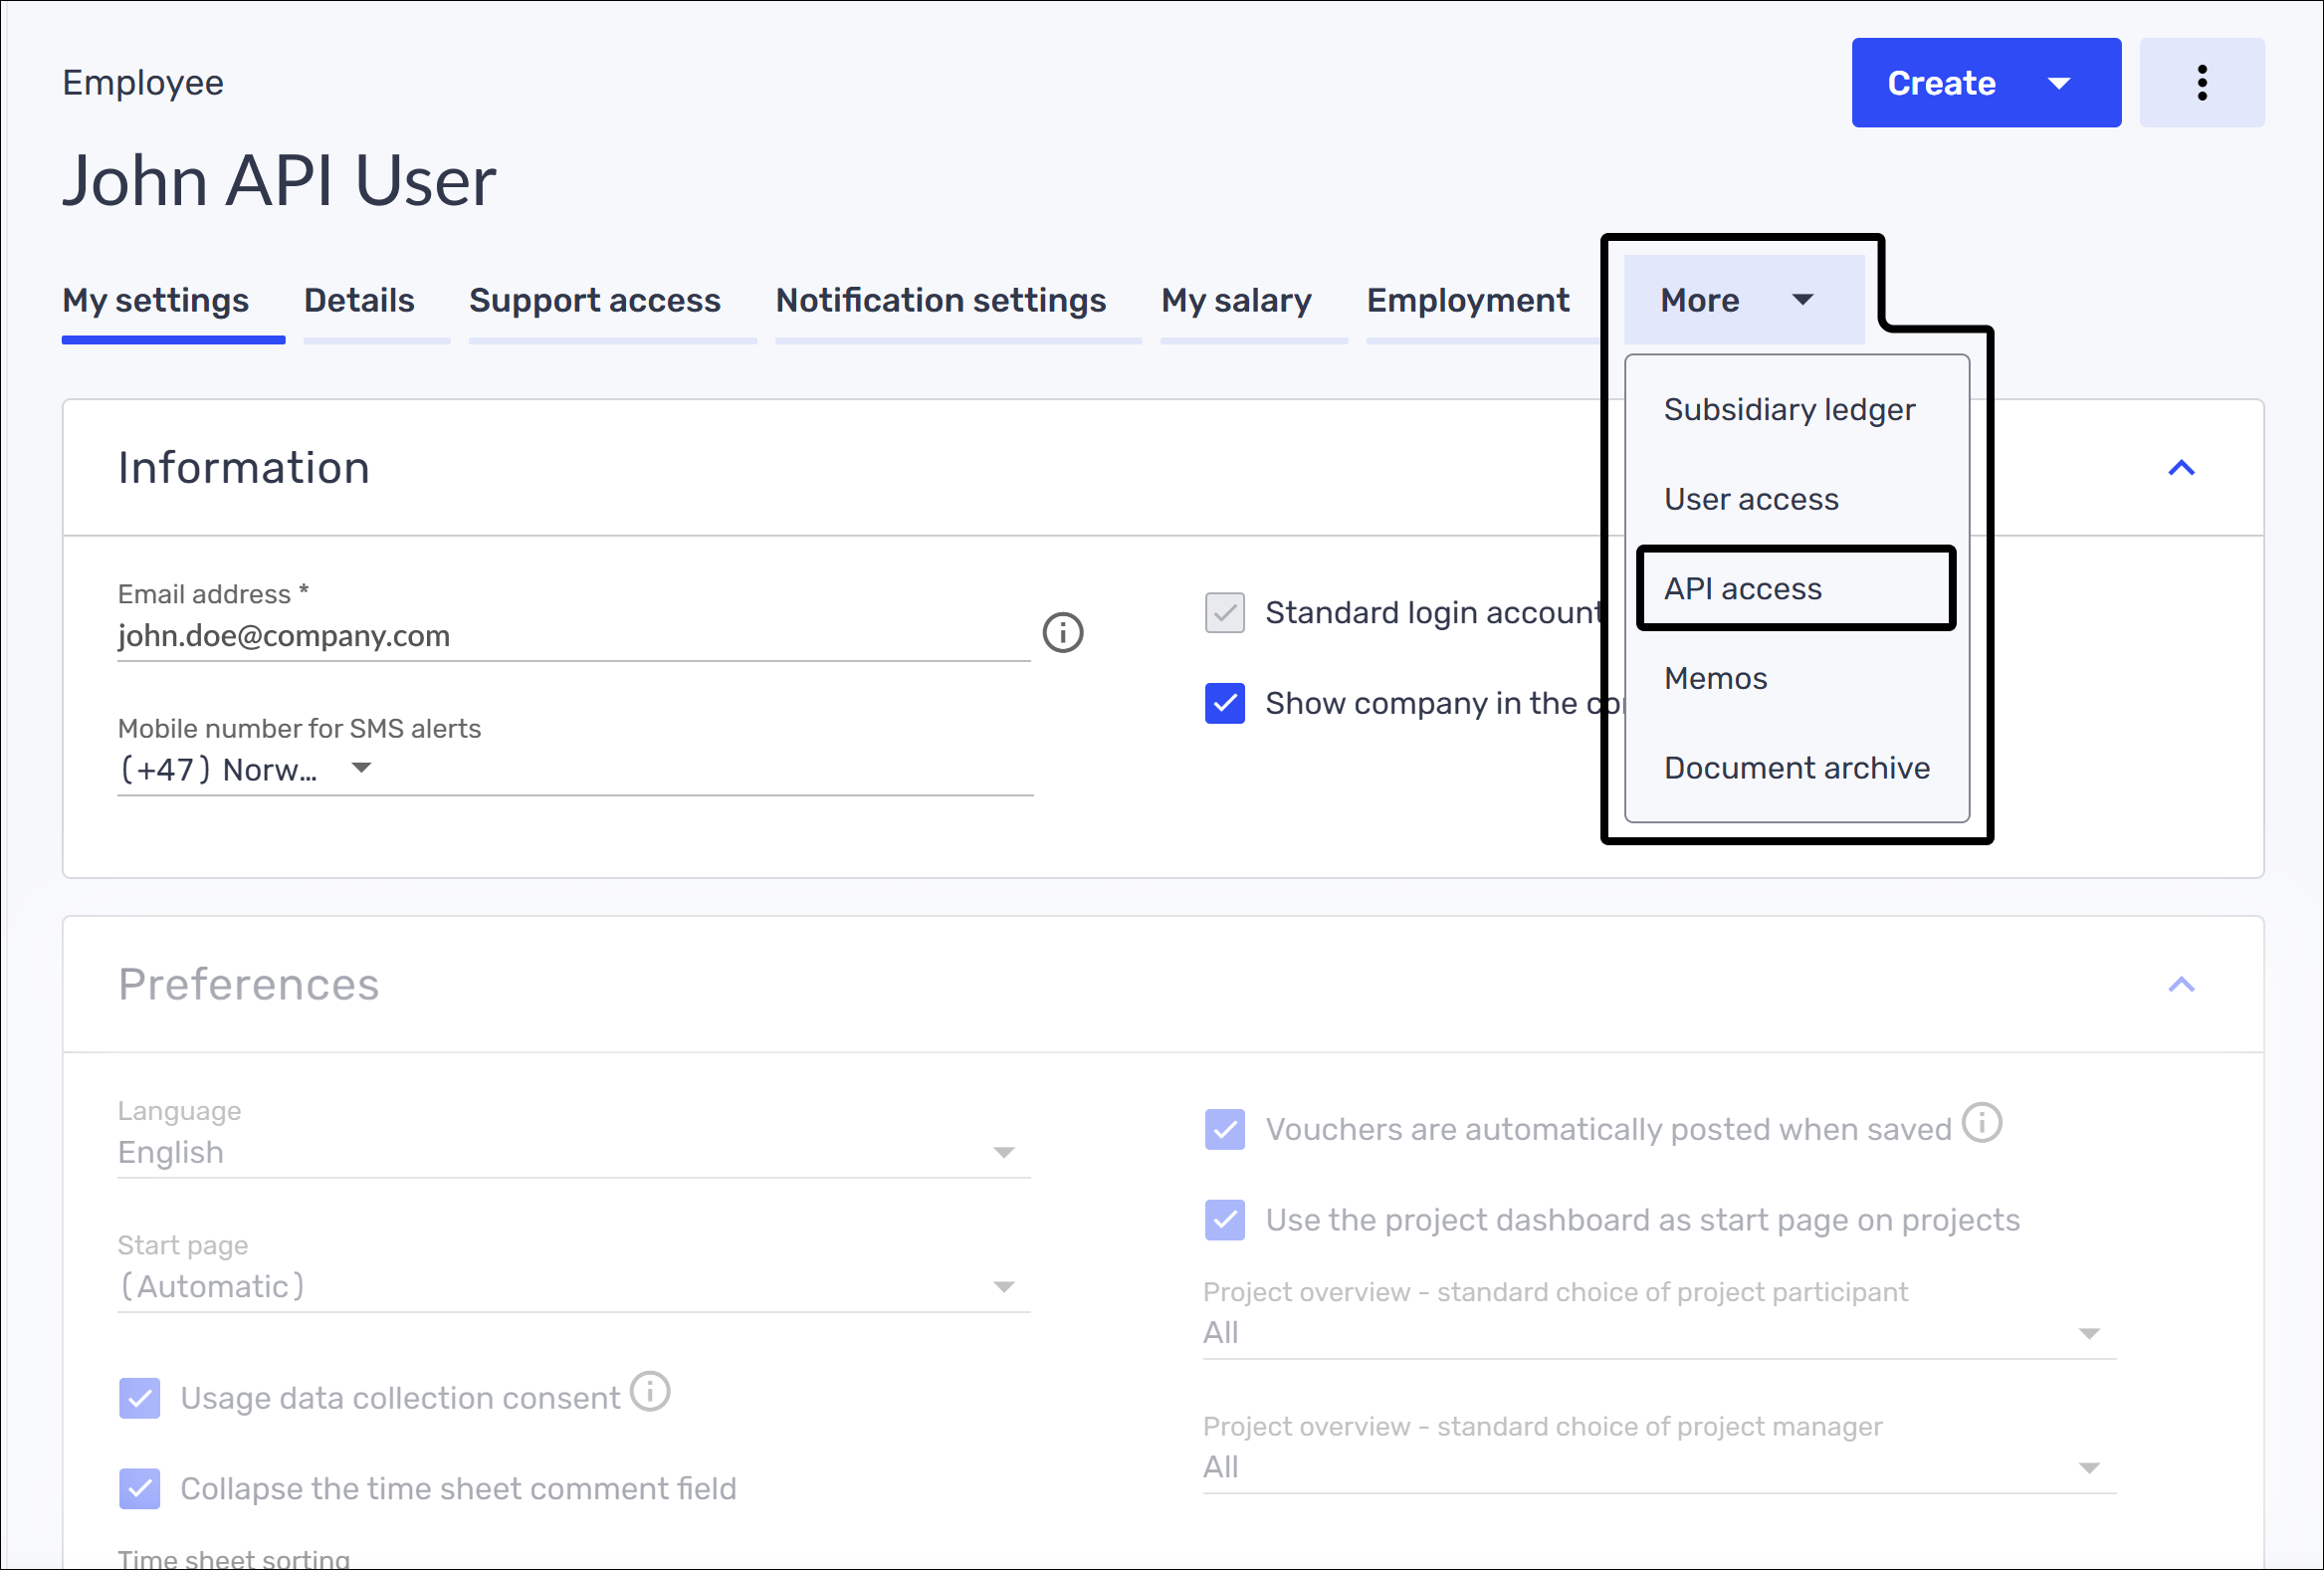

Create token
Click New token.

- Select the application OPEN_TWO from the dropdown list.
- Give the token a name, such as the employee’s name.
- Click Create token.

- Copy the token and save it securely, (it won’t be saved in Tripletex).
- Click OK and return to BackOffice.

4. Verify token
- Once back in BackOffice, paste the token and press VERIFY.

- Once your token has been verified, press Next to continue.

5. Set Your Accounting Start Date
- Enter the date from which sales data should be exported to Tripletex.
- Click NEXT to continue.

6. Configure Bookkeeping Accounts
To ensure sales data is correctly recorded in Tripletex, you need to assign bookkeeping accounts. If you are unsure of which accounts to use, please consult your accountant.
Assign Accounts for Payment Methods
- Select bookkeeping accounts for each payment method.
- Click NEXT.

Assign Accounts for Product Groups
- Select bookkeeping accounts for your product groups.
- Click NEXT.

Assign Accounts for Takeaway Product Groups
- Select bookkeeping accounts for takeaway product groups.
- Click NEXT.

Assign Accounts for Other Events
- Select bookkeeping accounts for other financial events, such as tip registration.
- Click NEXT.

The integration is now activated
Once you have selected all bookkeeping accounts, the Tripletex integration is activated. Press OK to close the dialog.
