Getting started with Promotional discounts
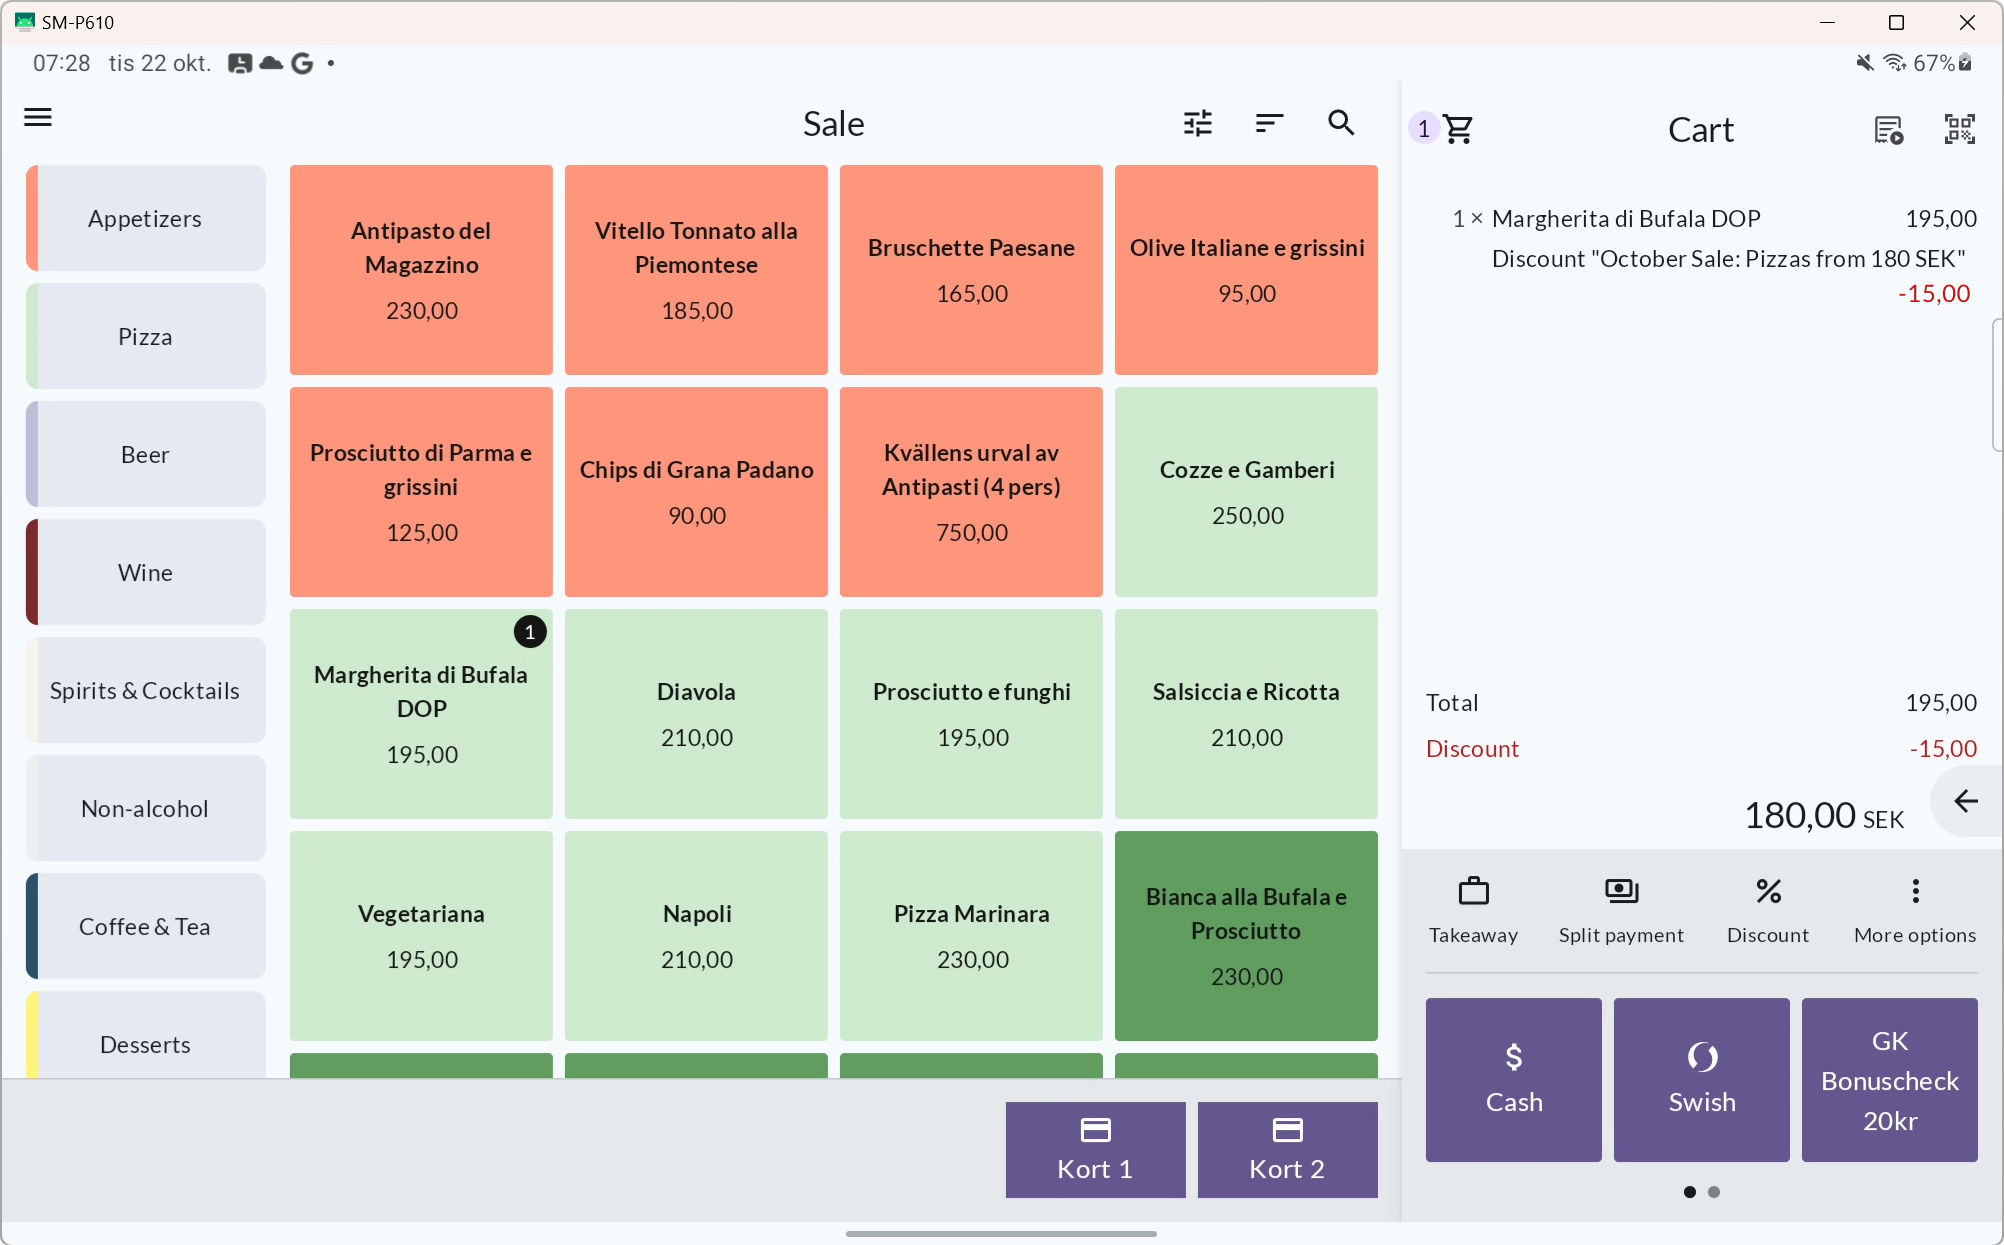
Promotional Discounts allow you to create customized discounts for specific products and time periods directly from BackOffice. These discounts can range from temporarily reduced prices on a selected list of items to fixed discounts or reduced prices for specific product combinations, such as 'Buy 3 shirts, get 20% off'. Unlike regular discounts applied at checkout, promotional discounts are managed centrally and remain valid according to the terms you define.
You can create discounts of three different types, each designed to meet your promotional needs. Whether you want to offer fixed discounts or fixed prices on certain priduct combinations, or adjust prices during special campaigns, these options provide flexibility to enhance your sales strategies.
Contact your salesperson to obtain the required license to work with Promotional discounts.
Discount types
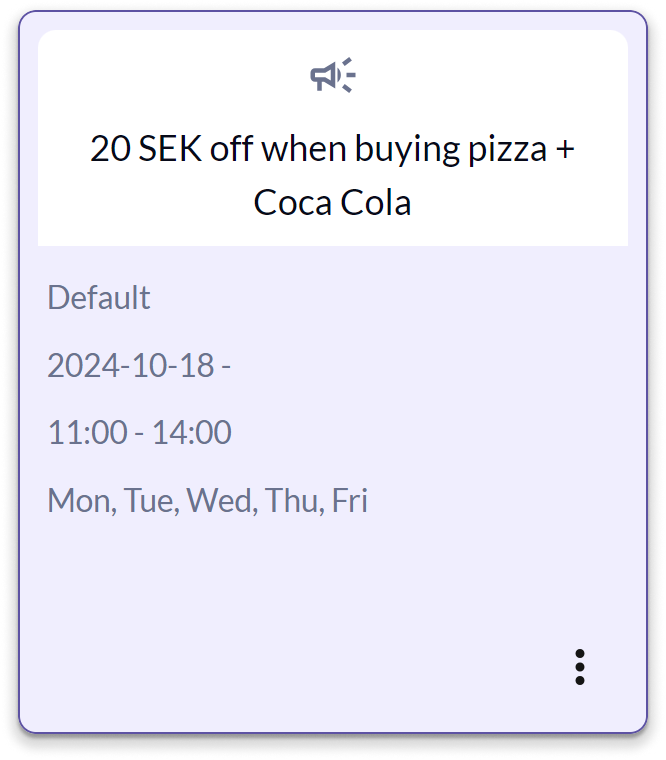
Fixed discount:
Offer a set discount (either a fixed amount or percentage) when customers purchase specific items. Perfect for promotions like "20 SEK off when buying a pizza and a Coca Cola."
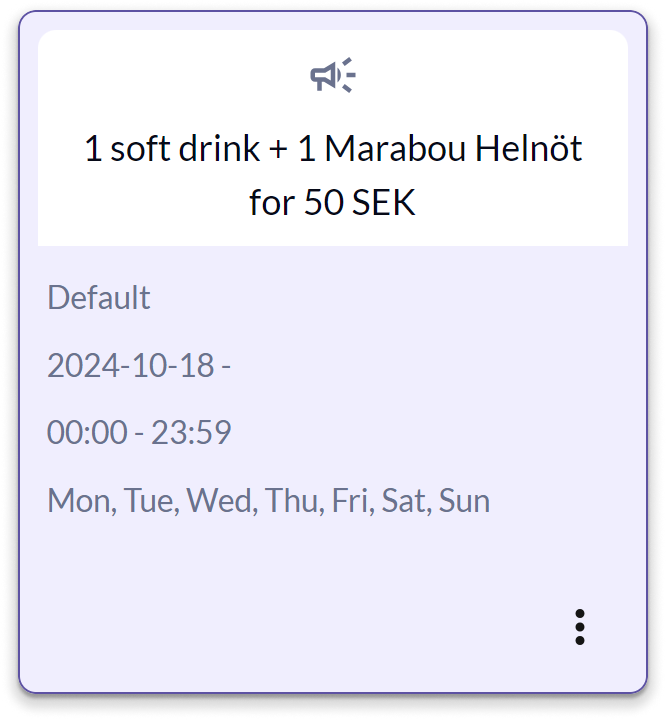
Fixed price:
Set a fixed price for a group of items, regardless of their original price. Ideal for bundle deals like "1 soft drink + 1 Marabou Helnöt for 50 SEK."
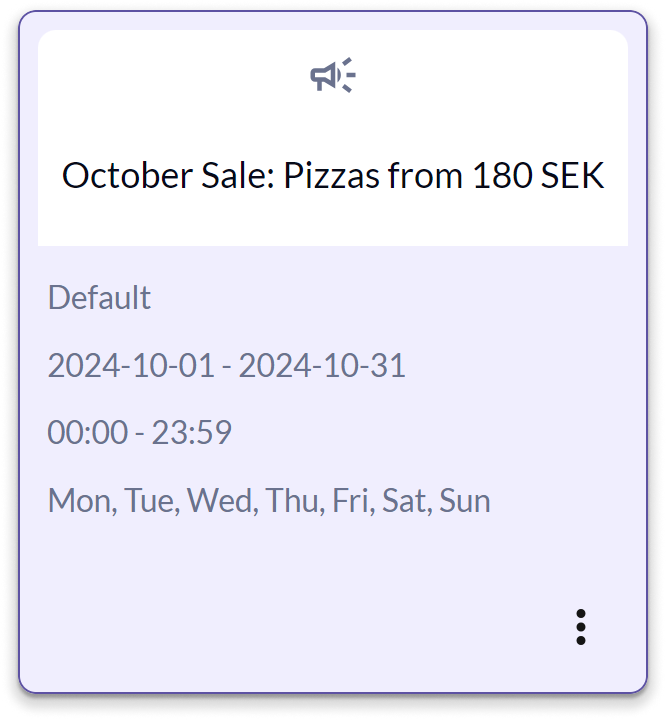
Pricelist:
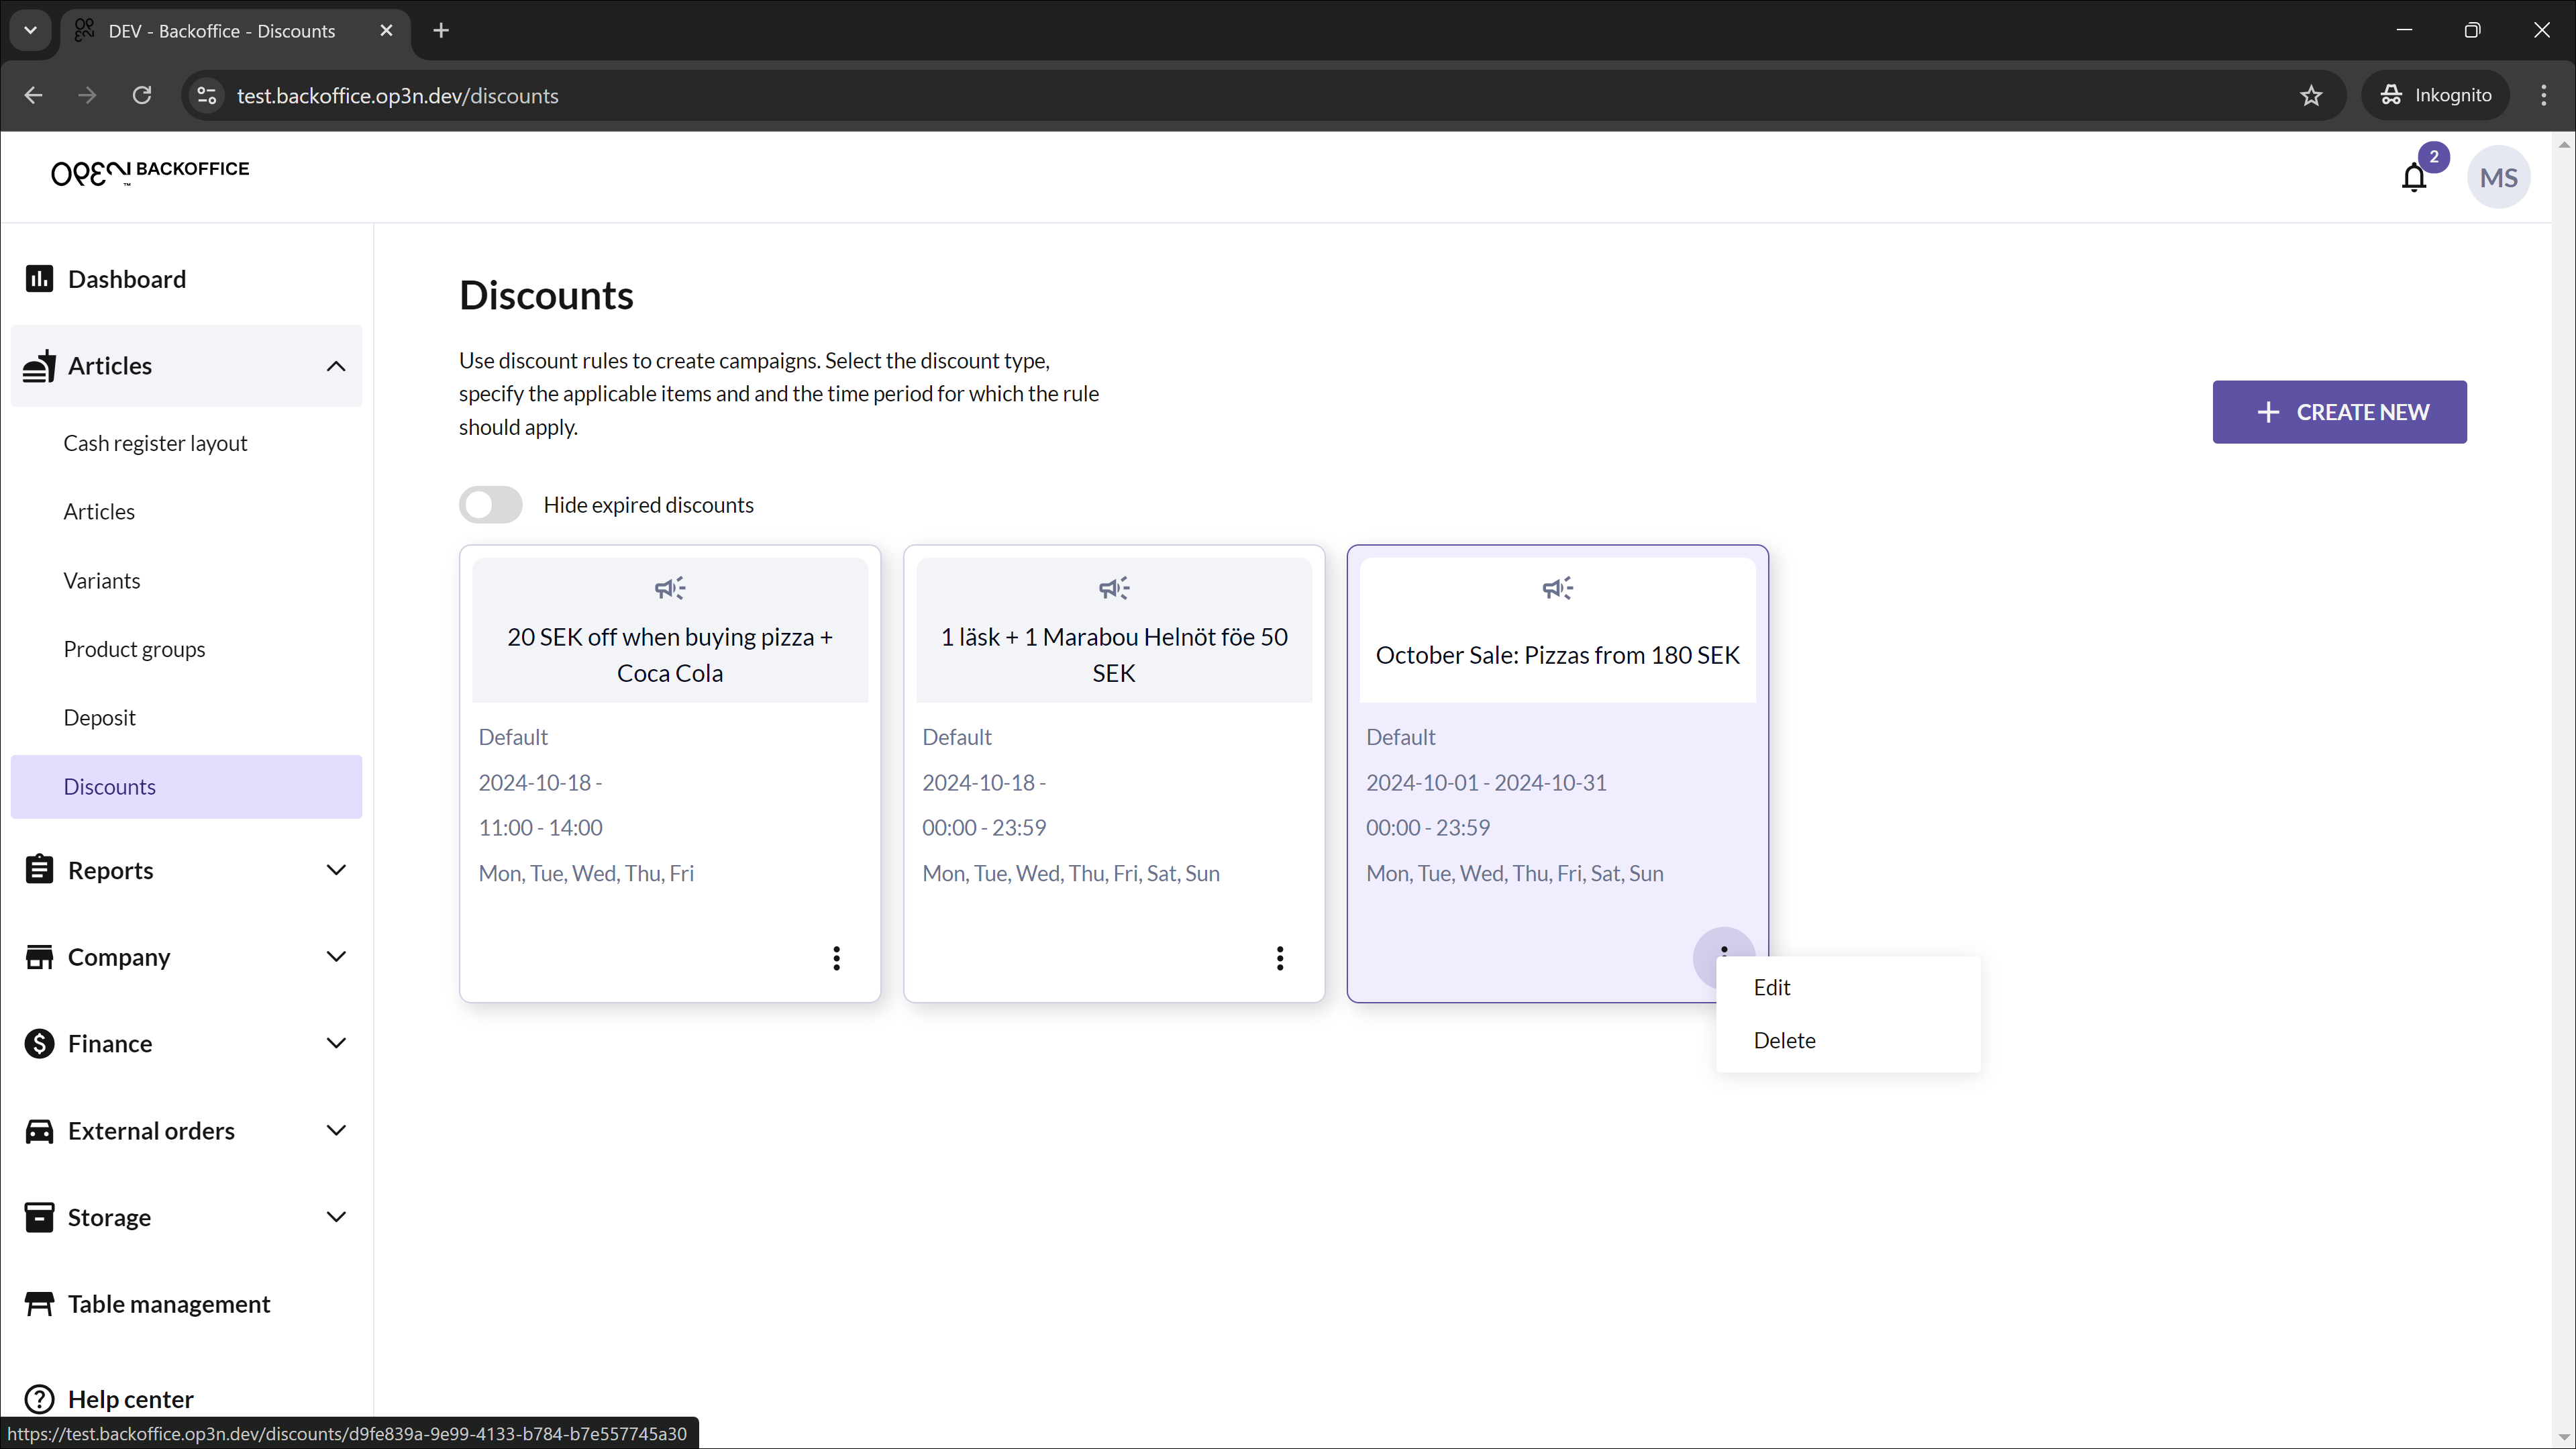
Lowers the prices of selected items for a specific time period. Great for sales events like "October Sale: Pizzas from 180 SEK."
Create a discount in only 3 steps
It's a quick and easy process to create discounts.
- Name & Type: Enter the discount name and select the discount type.
- Conditions: Set the discount conditions, such as the discount amount or price, and choose the applicable articles.
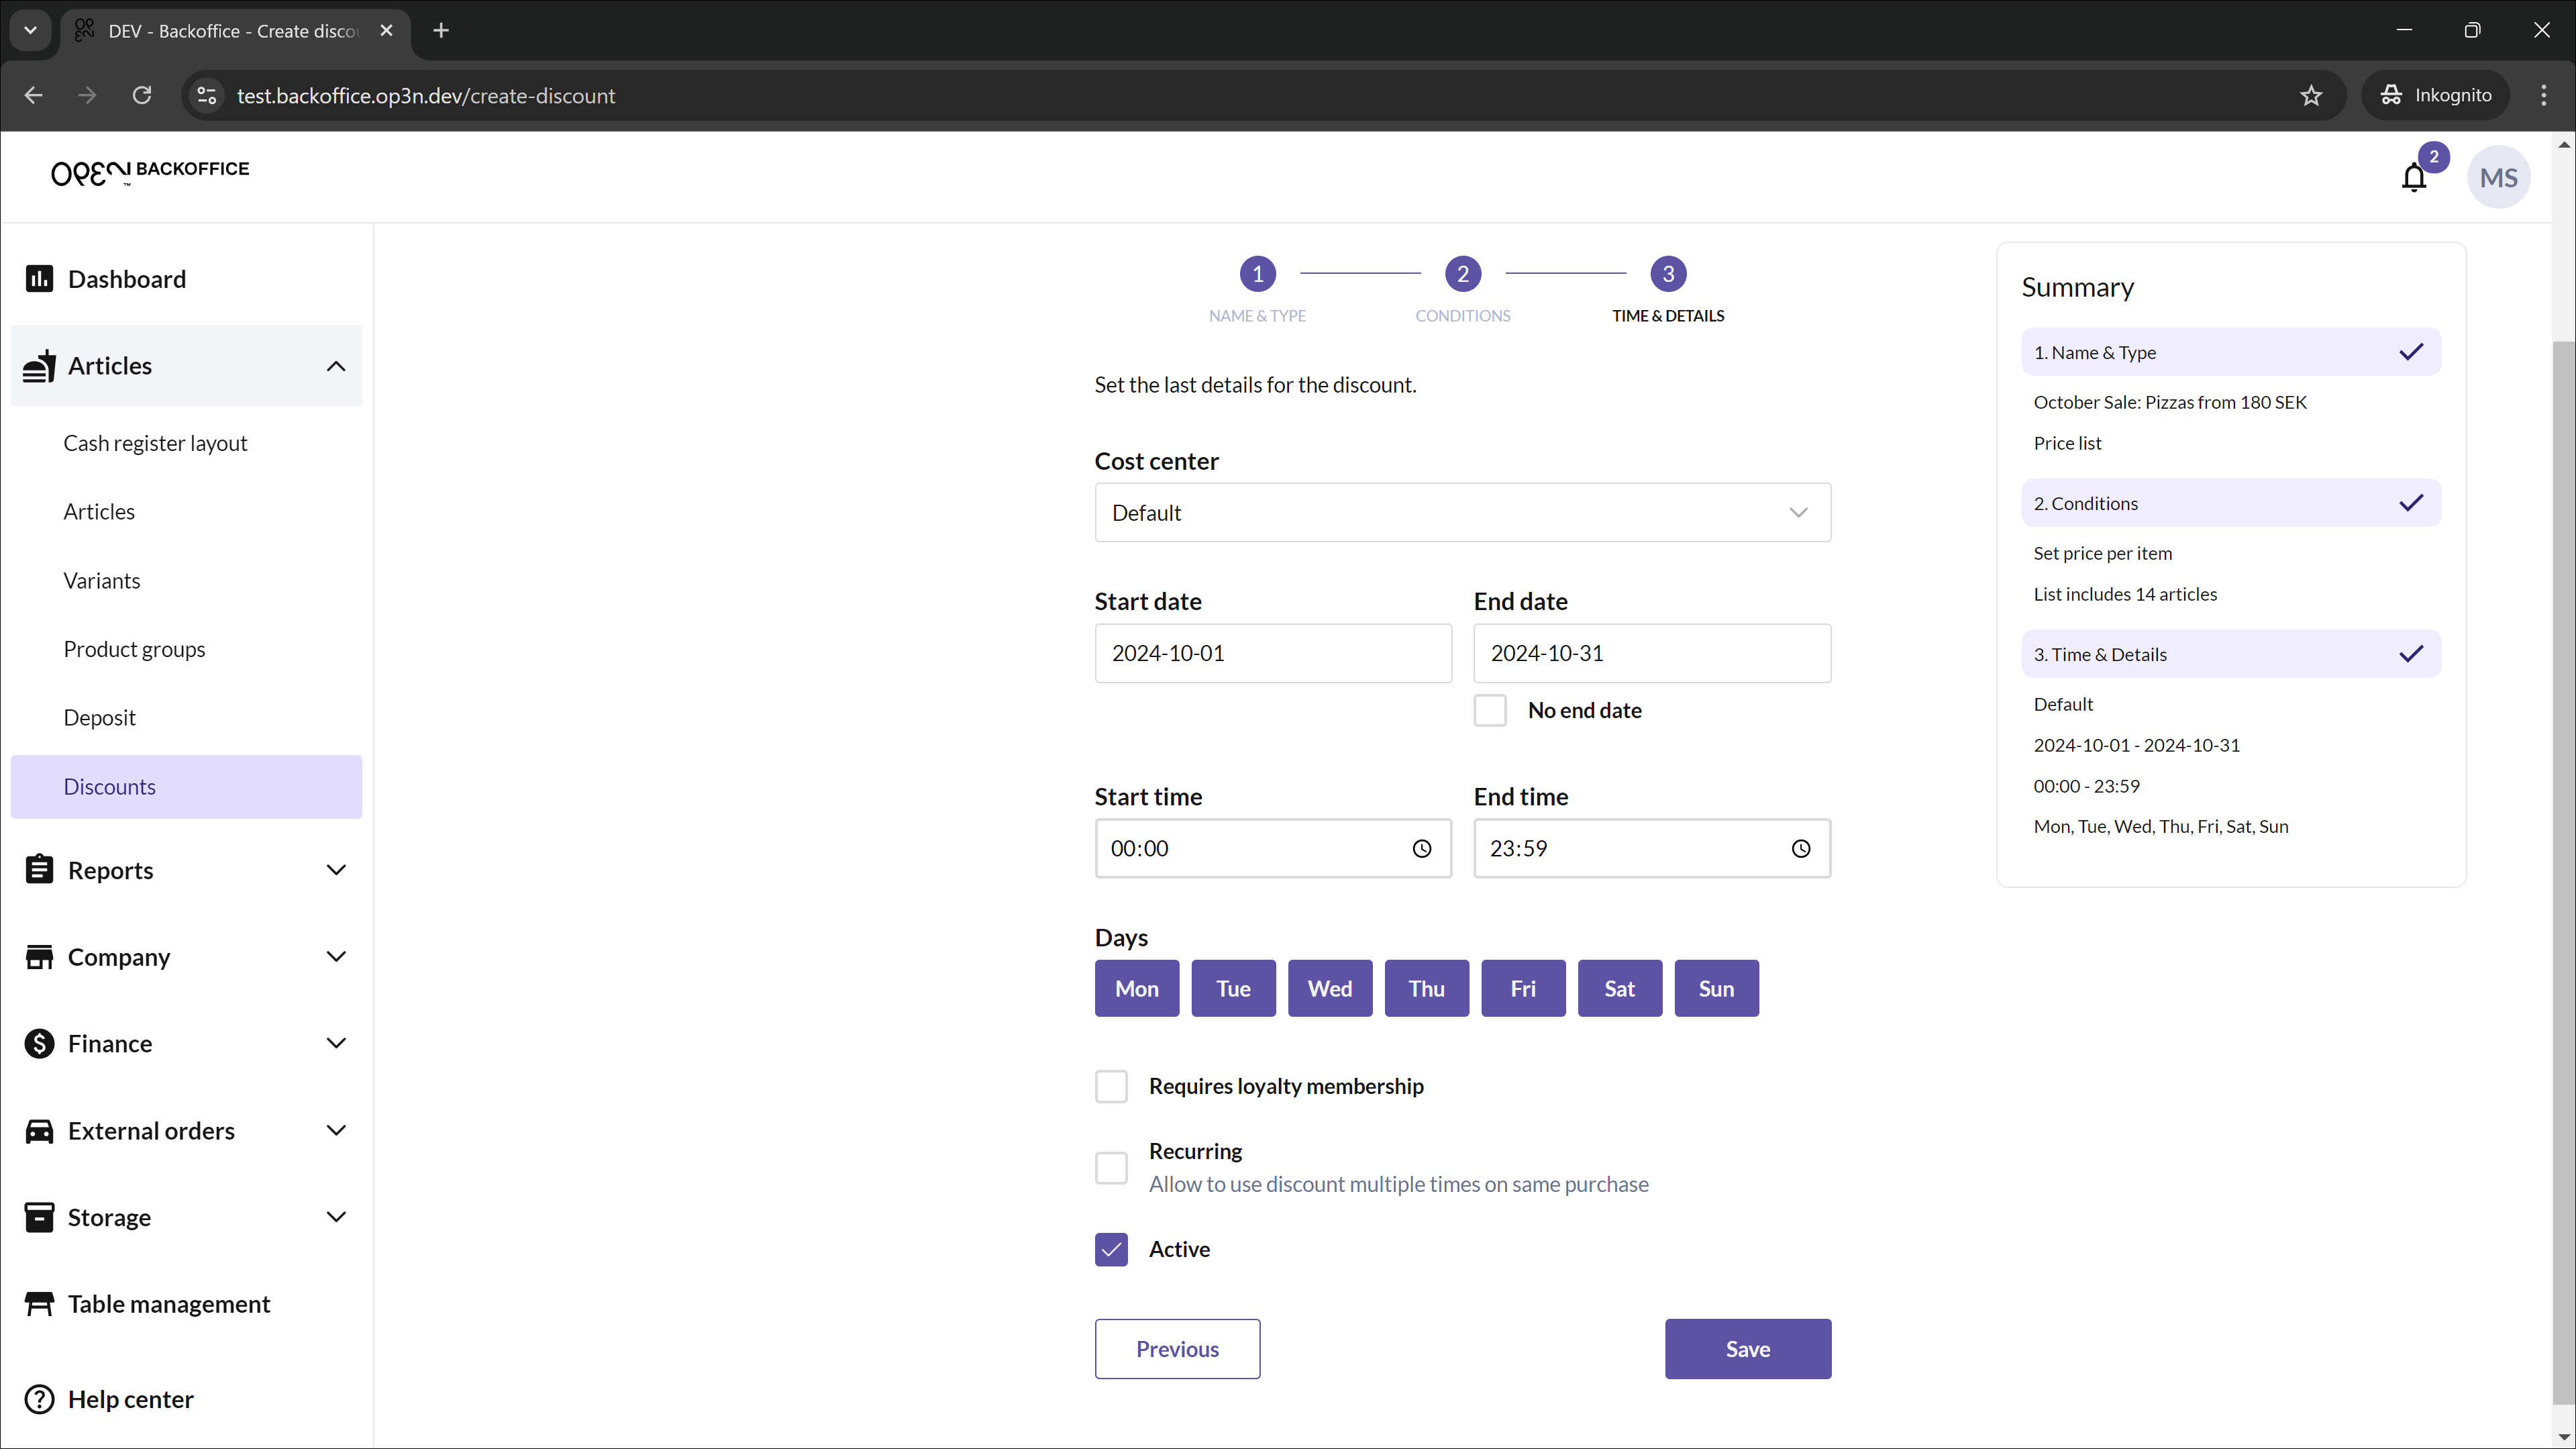
- Time & Details: Define the time period for the discount and any additional settings like loyalty membership requirements.
As you go through each step, a summary of your settings appears on the right side of the page. This updates with each choice you make, helping you keep track of your progress.
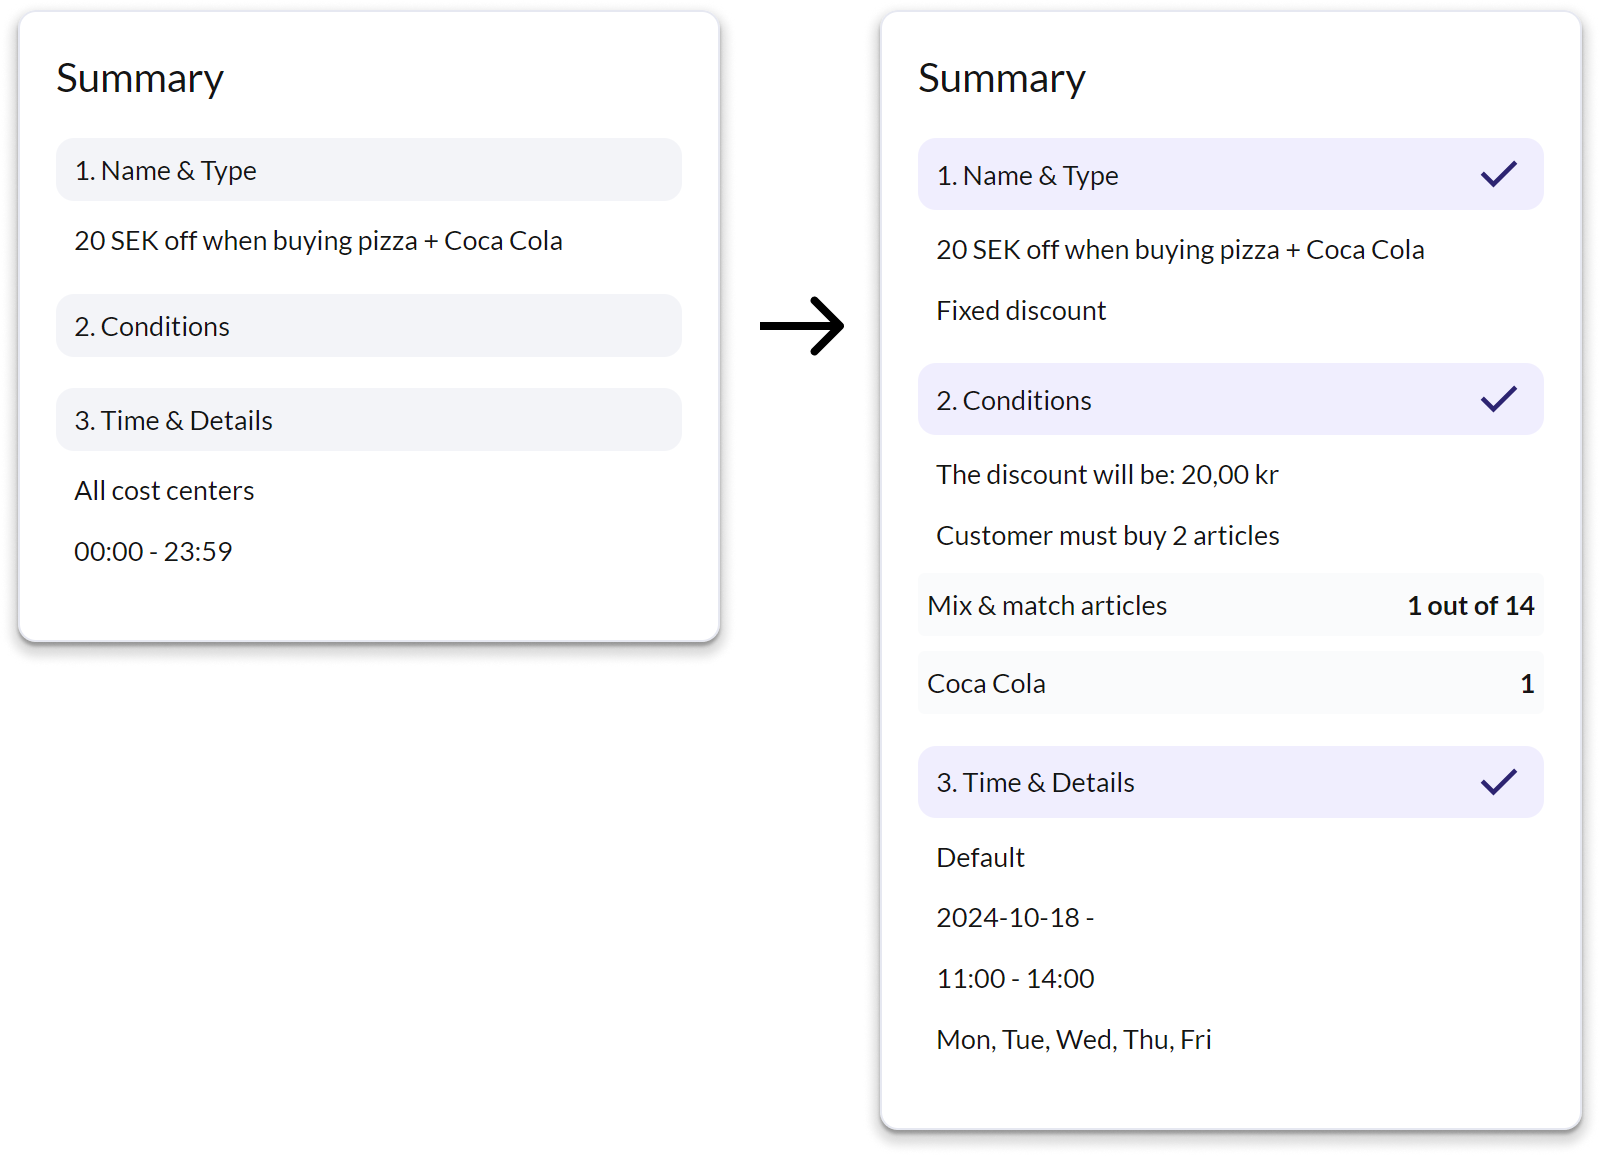
Once your discount is activated, it will be available in the cash register.
Create a 'Fixed discount'
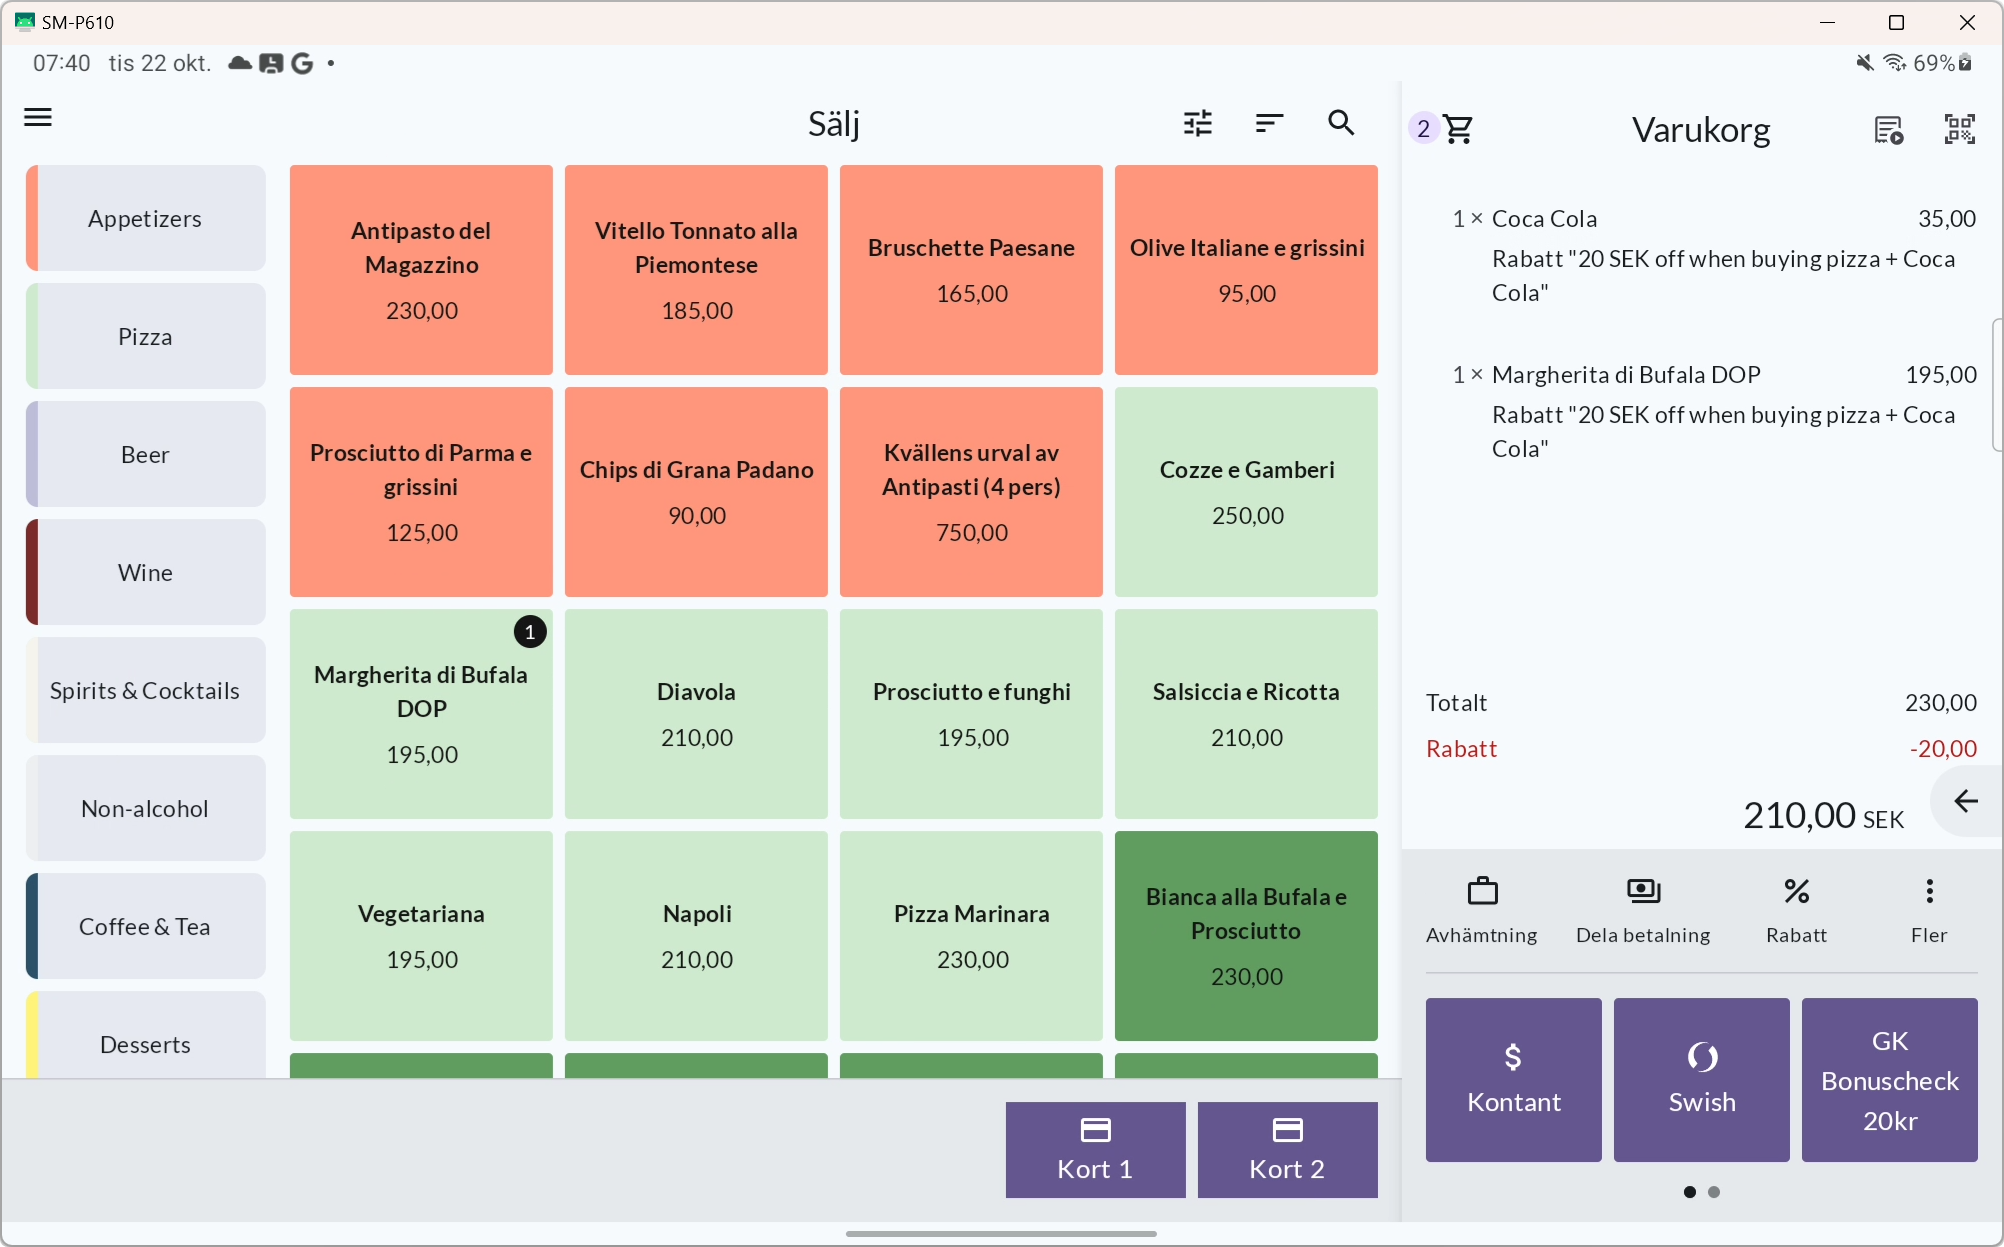
This discount is ideal for promotions like offering 20 SEK off when a customer buys any pizza and a Coca Cola.
Navigate to Discounts
- In the BackOffice, go to Articles and select Discounts.
- Click Create new.
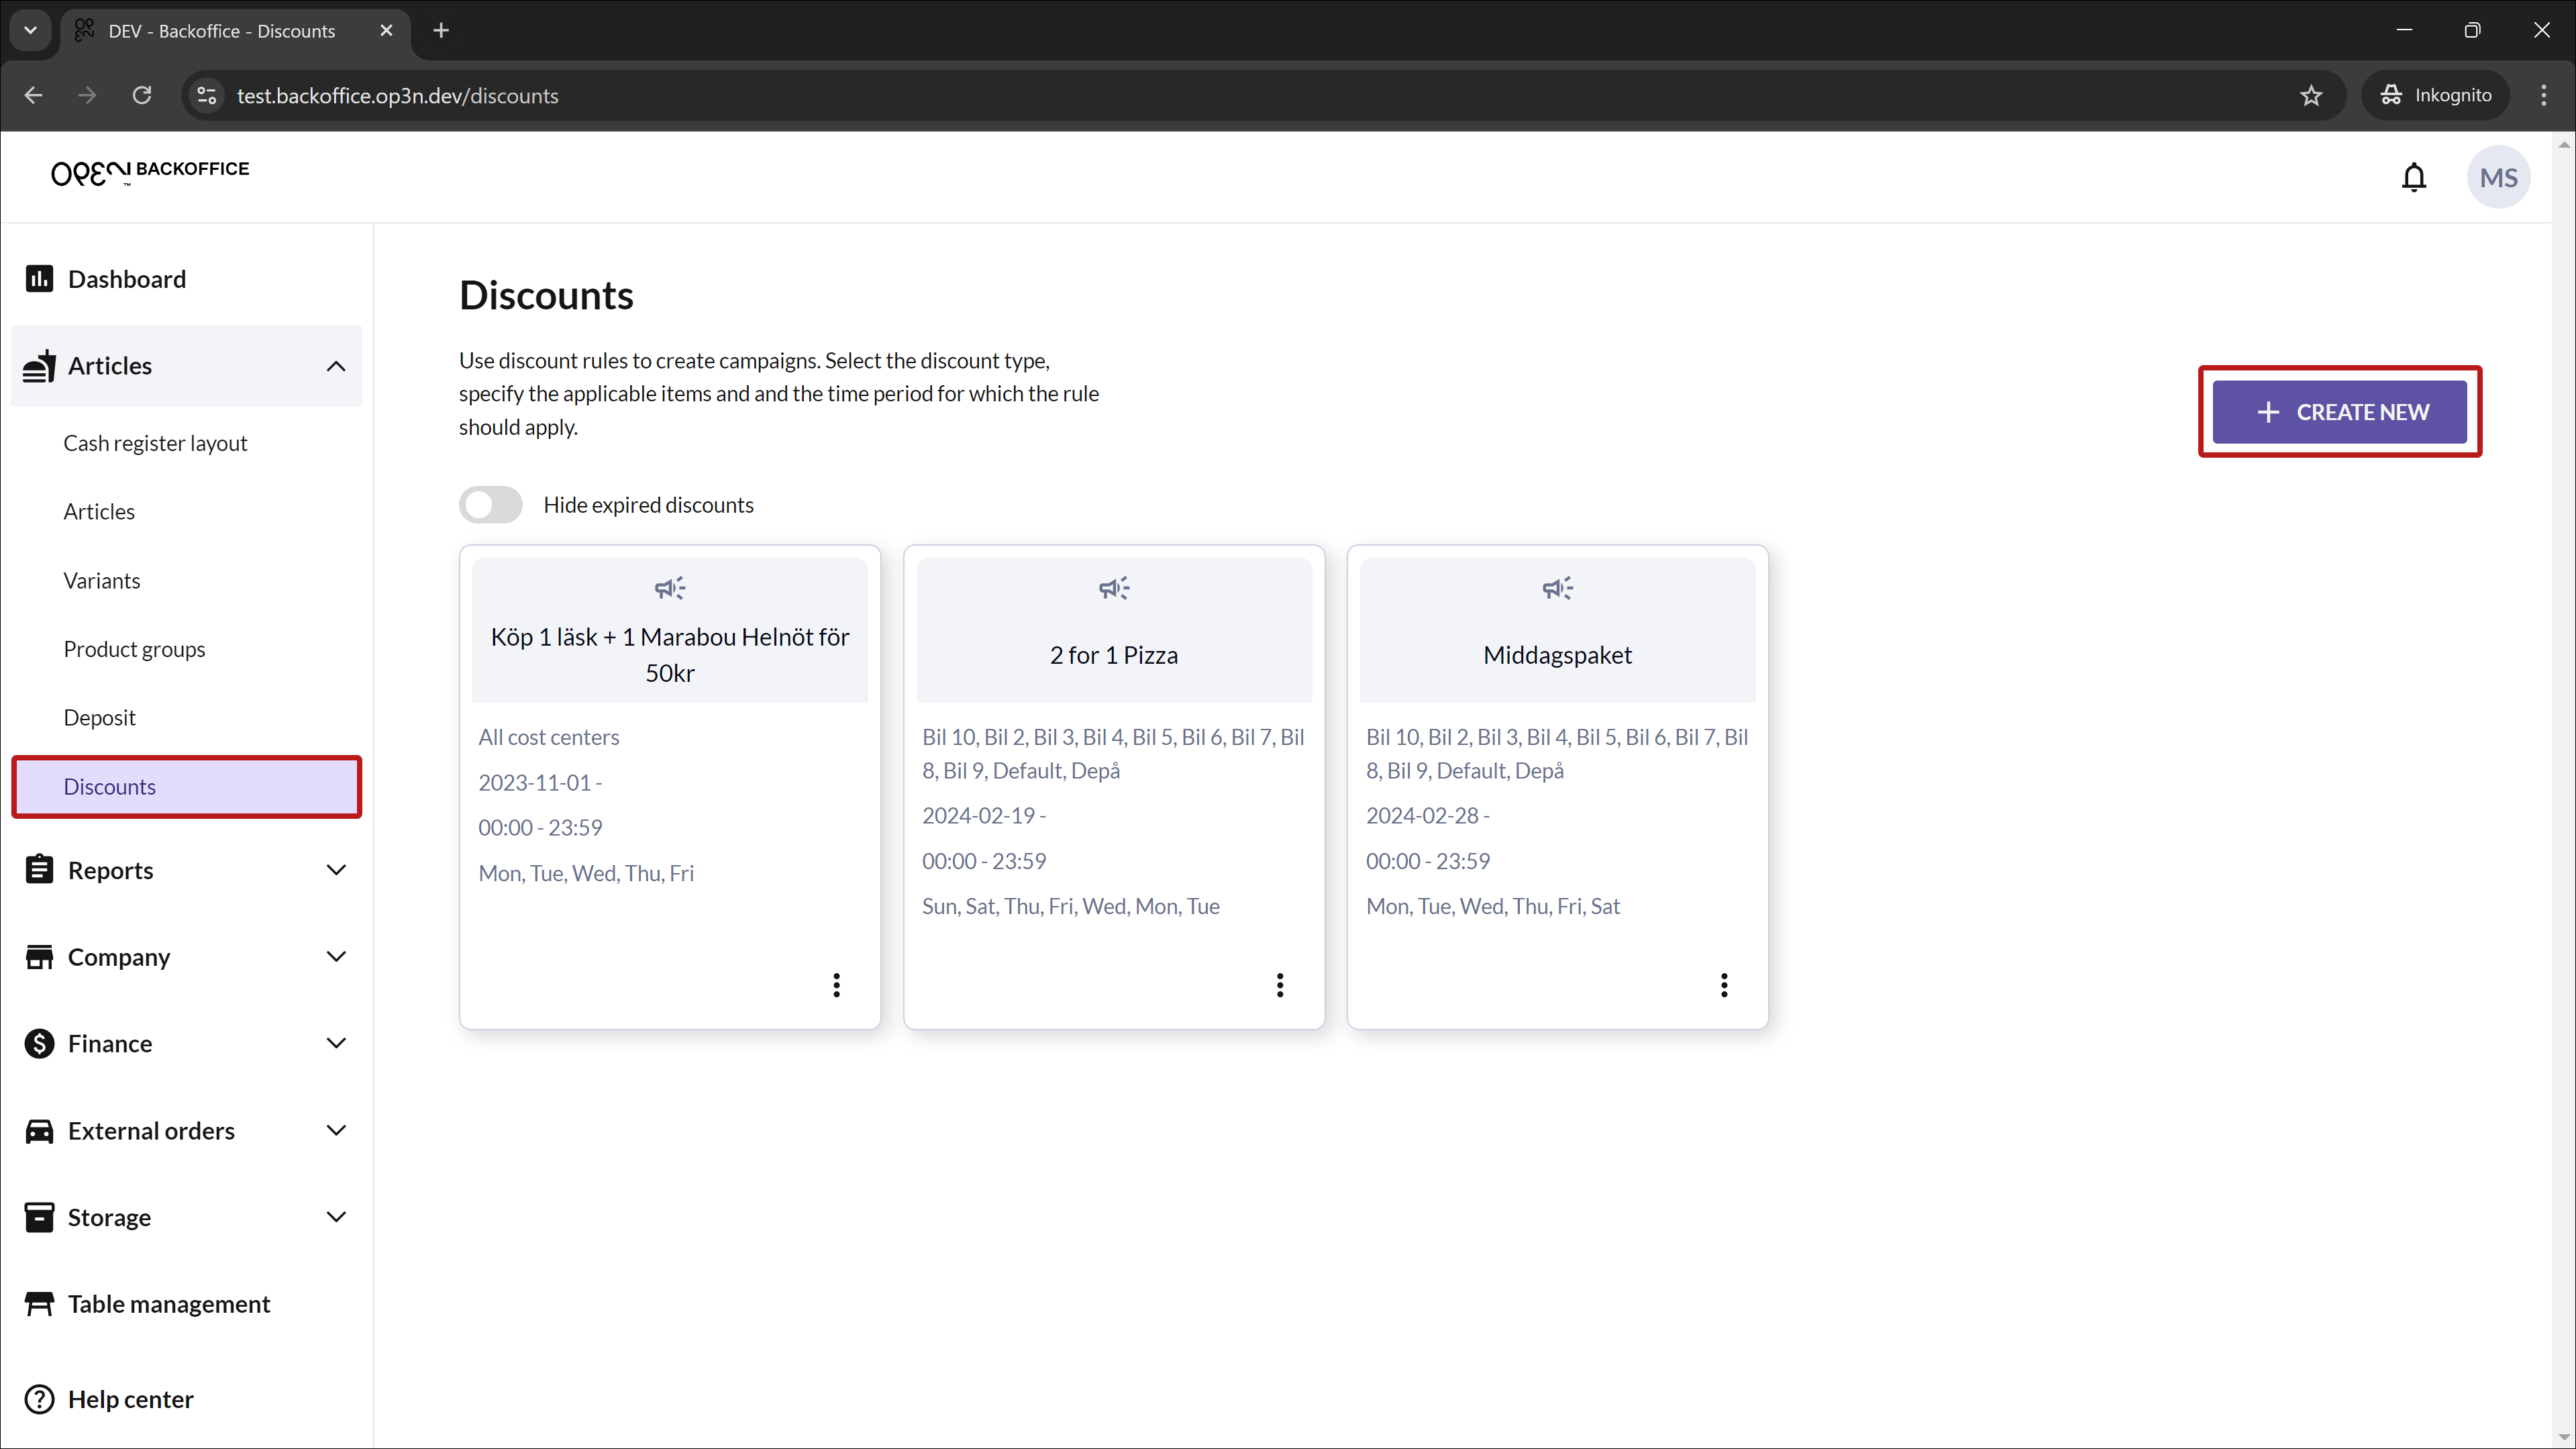
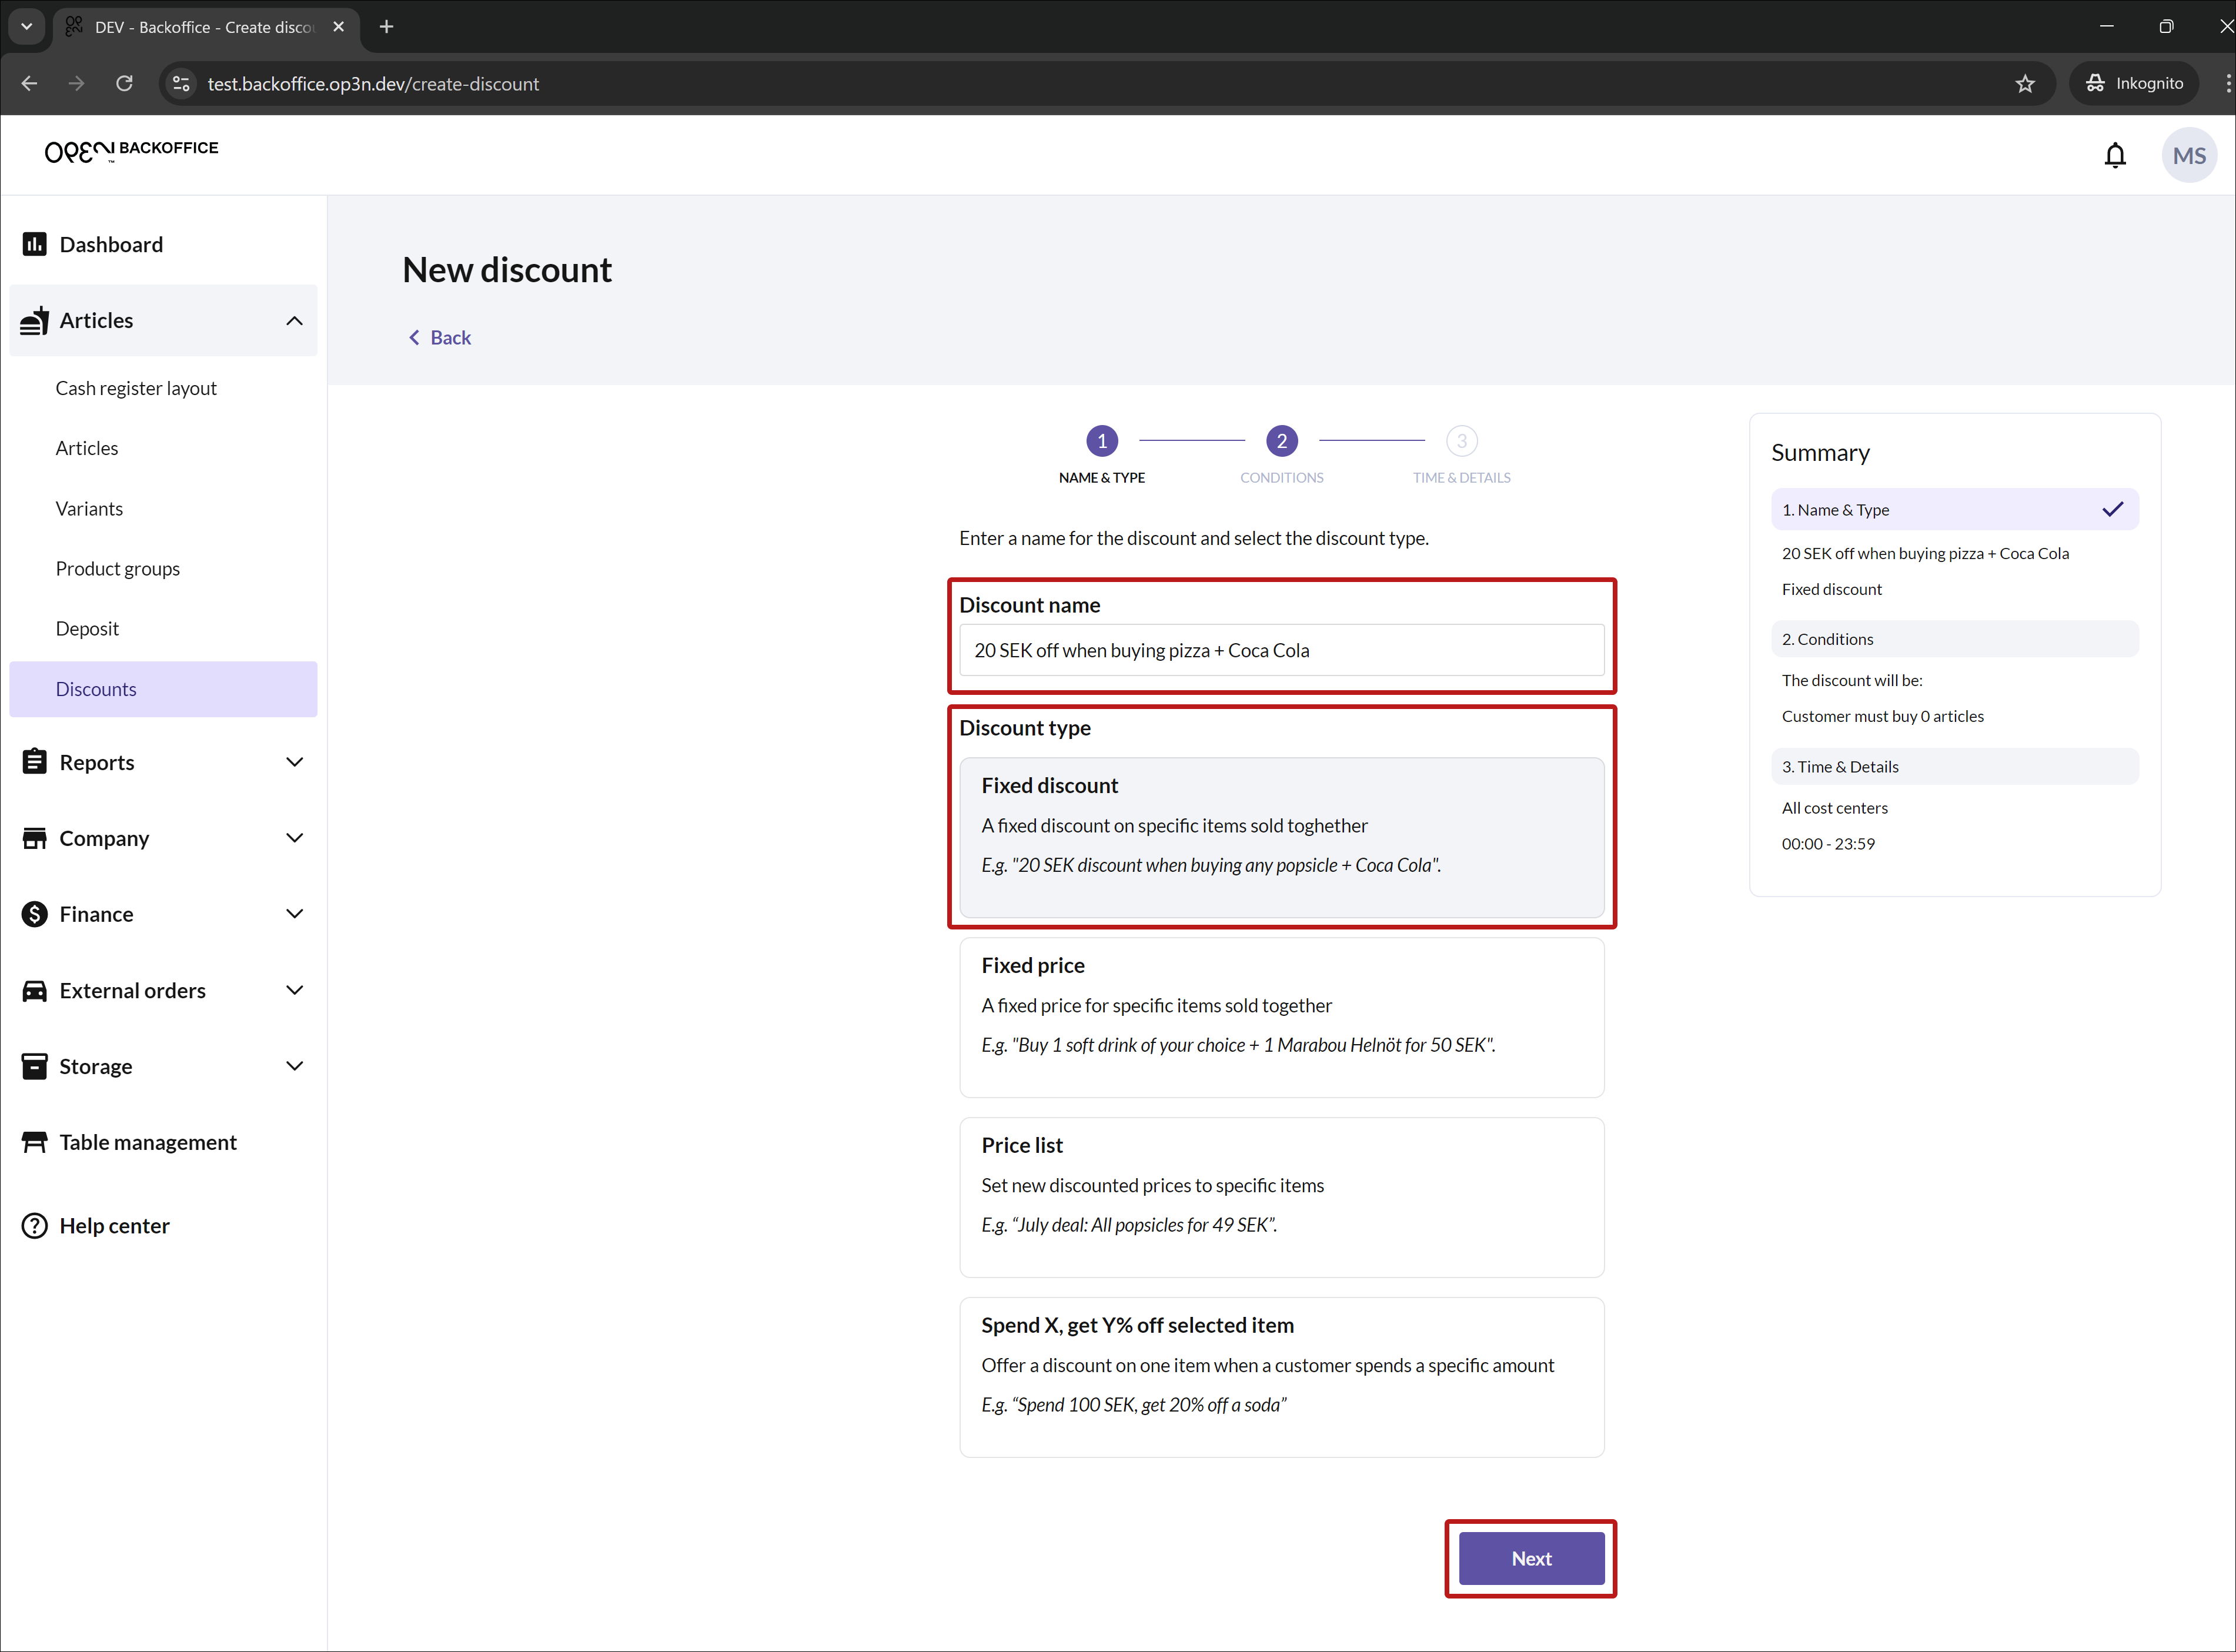
Step 1: Name & Type
- Enter the discount name.
- Select “Fixed discount”.
- Scroll down and click Next.
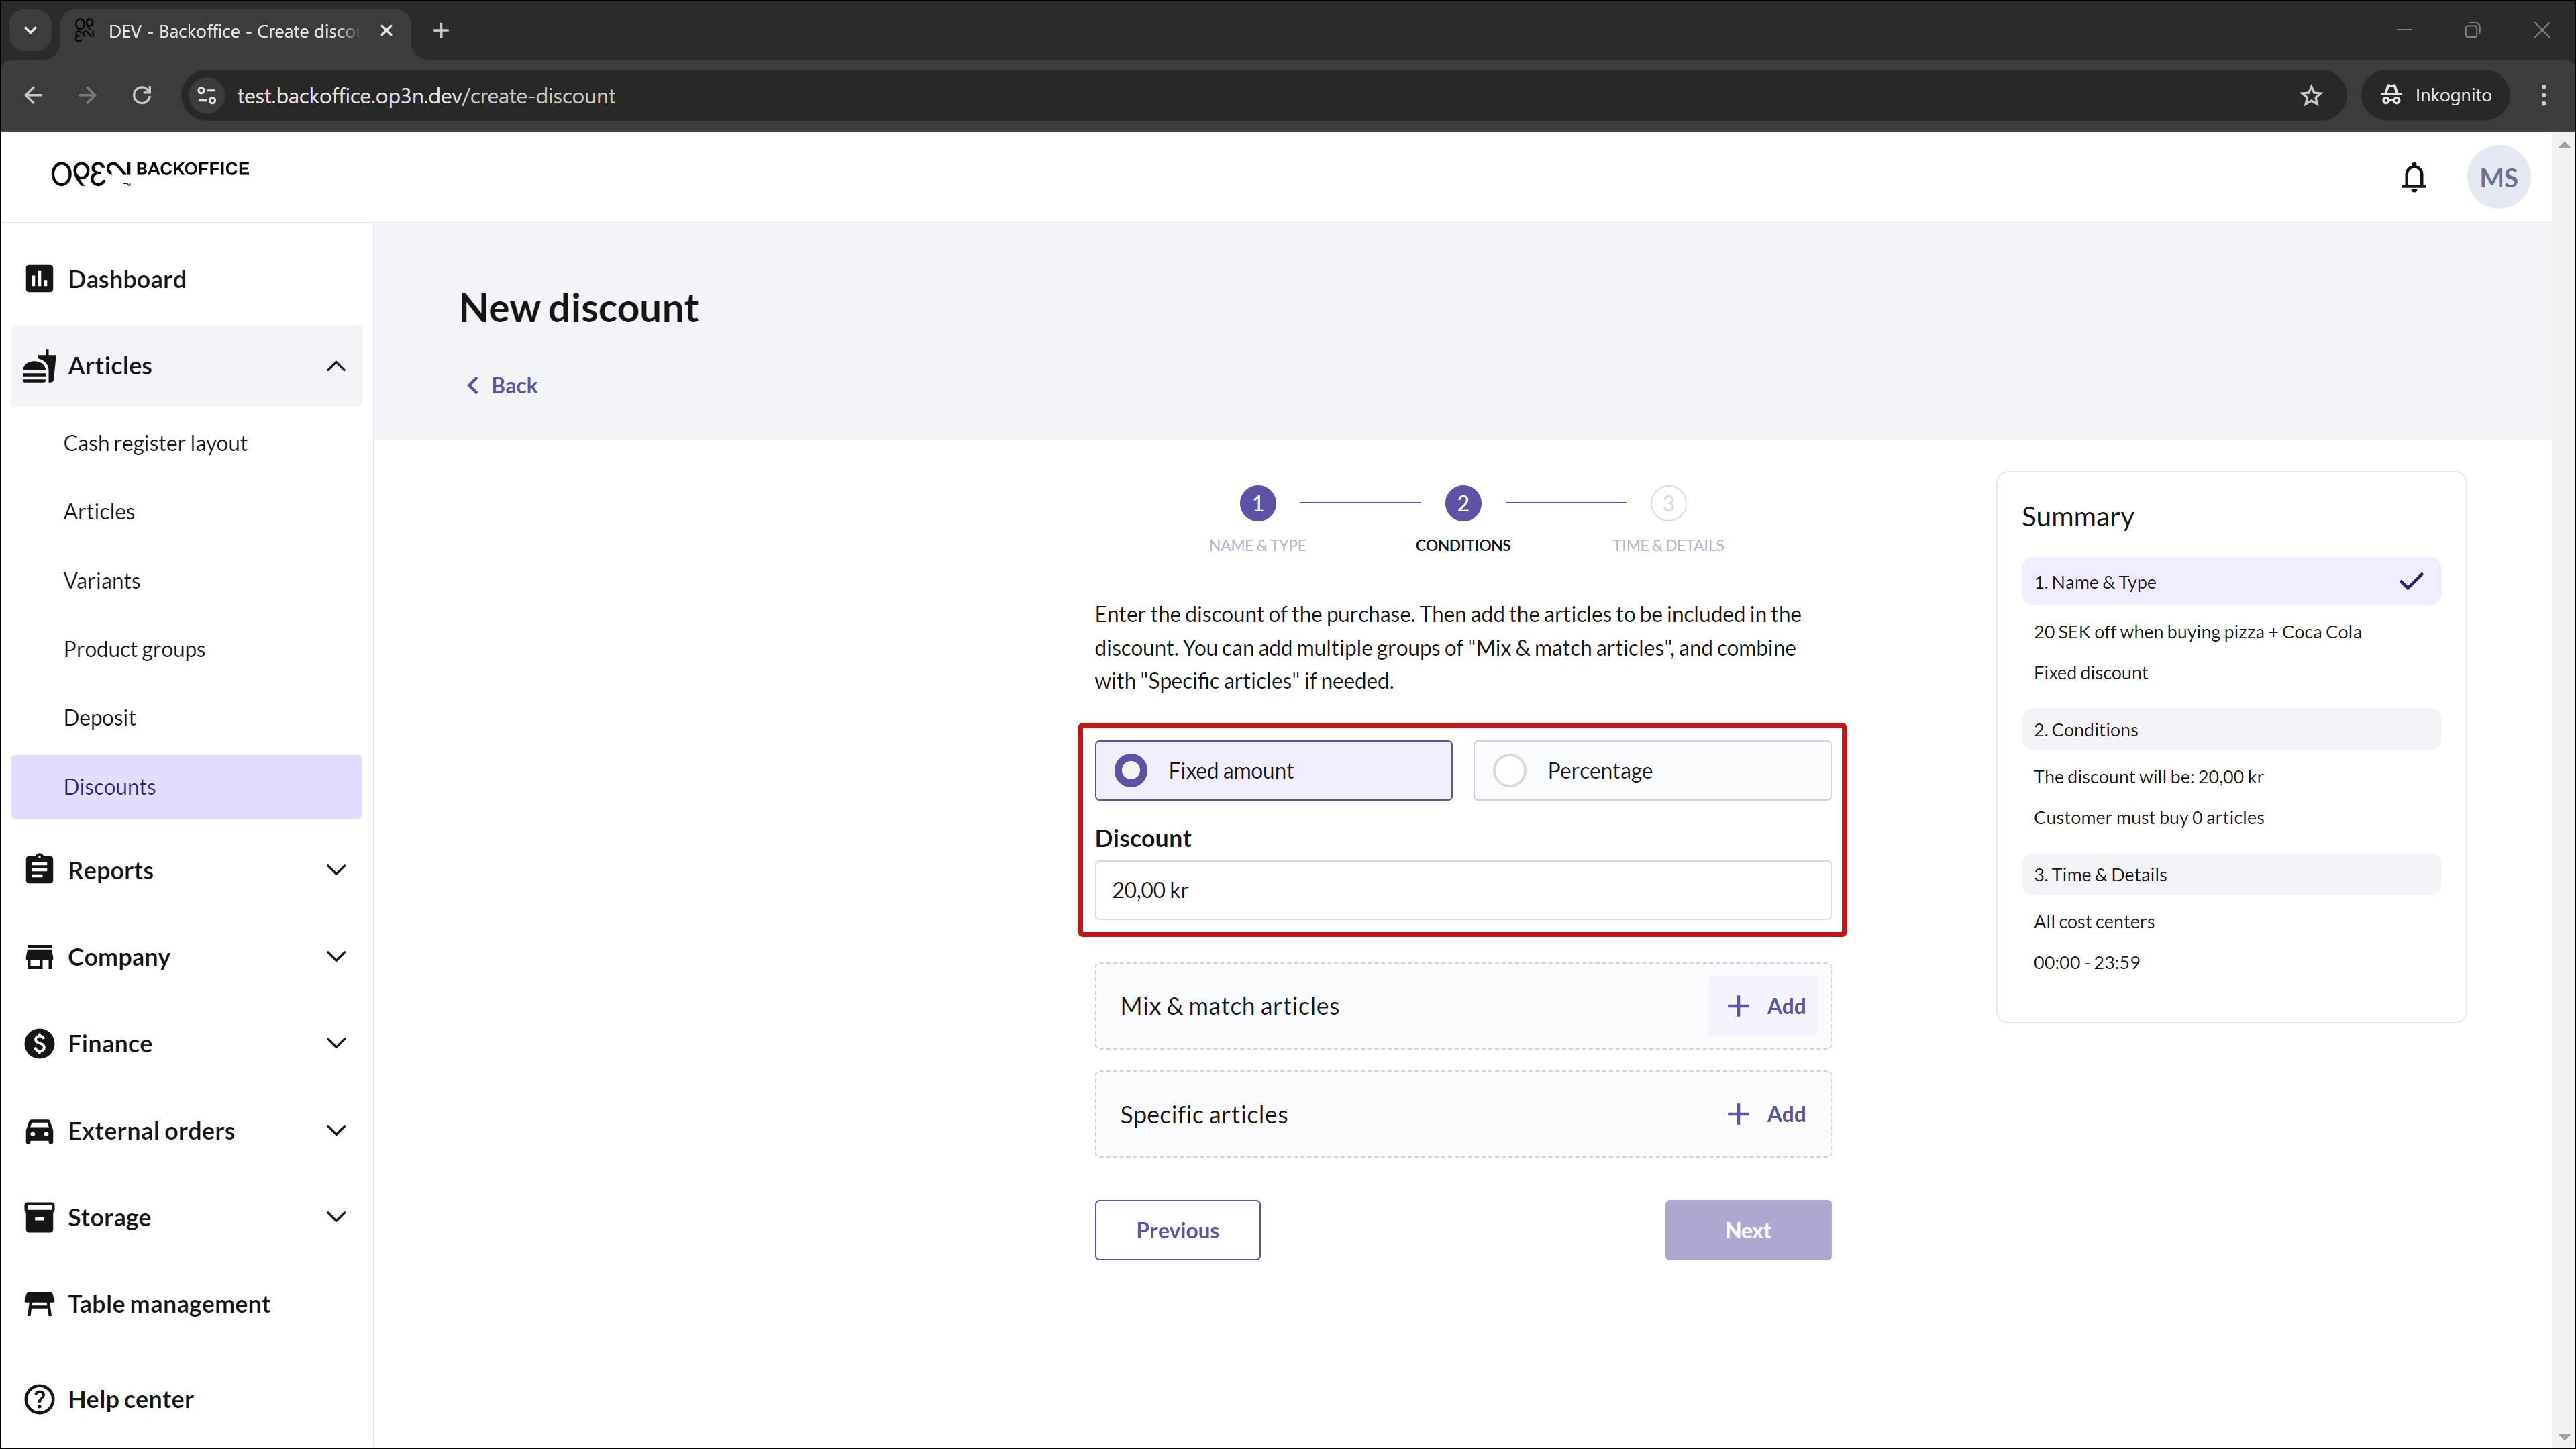
Step 2: Conditions
- Enter discount: Enter the discount amount, either a fixed amount or a percentage.
Select Articles:
To add articles, click Add to access the articles. Articles are grouped by product groups, so expand each group to select items. Use the arrow to expand/collapse groups.
You can choose between:
Mix & Match articles: The customer can choose from multiple articles. Set the quantity the customer has to buy to get the discount (the quantity applies to all included items).
*In this example, the customer has to buy 1 pizza, but can choose between 15 different flavors.*Specific articles: The customer must buy certain items to get the discount. Select which articles are included, and set the quantity the customer must buy individually for each article. In this example, the customer has to buy 1 Coca Cola.
Click Next.
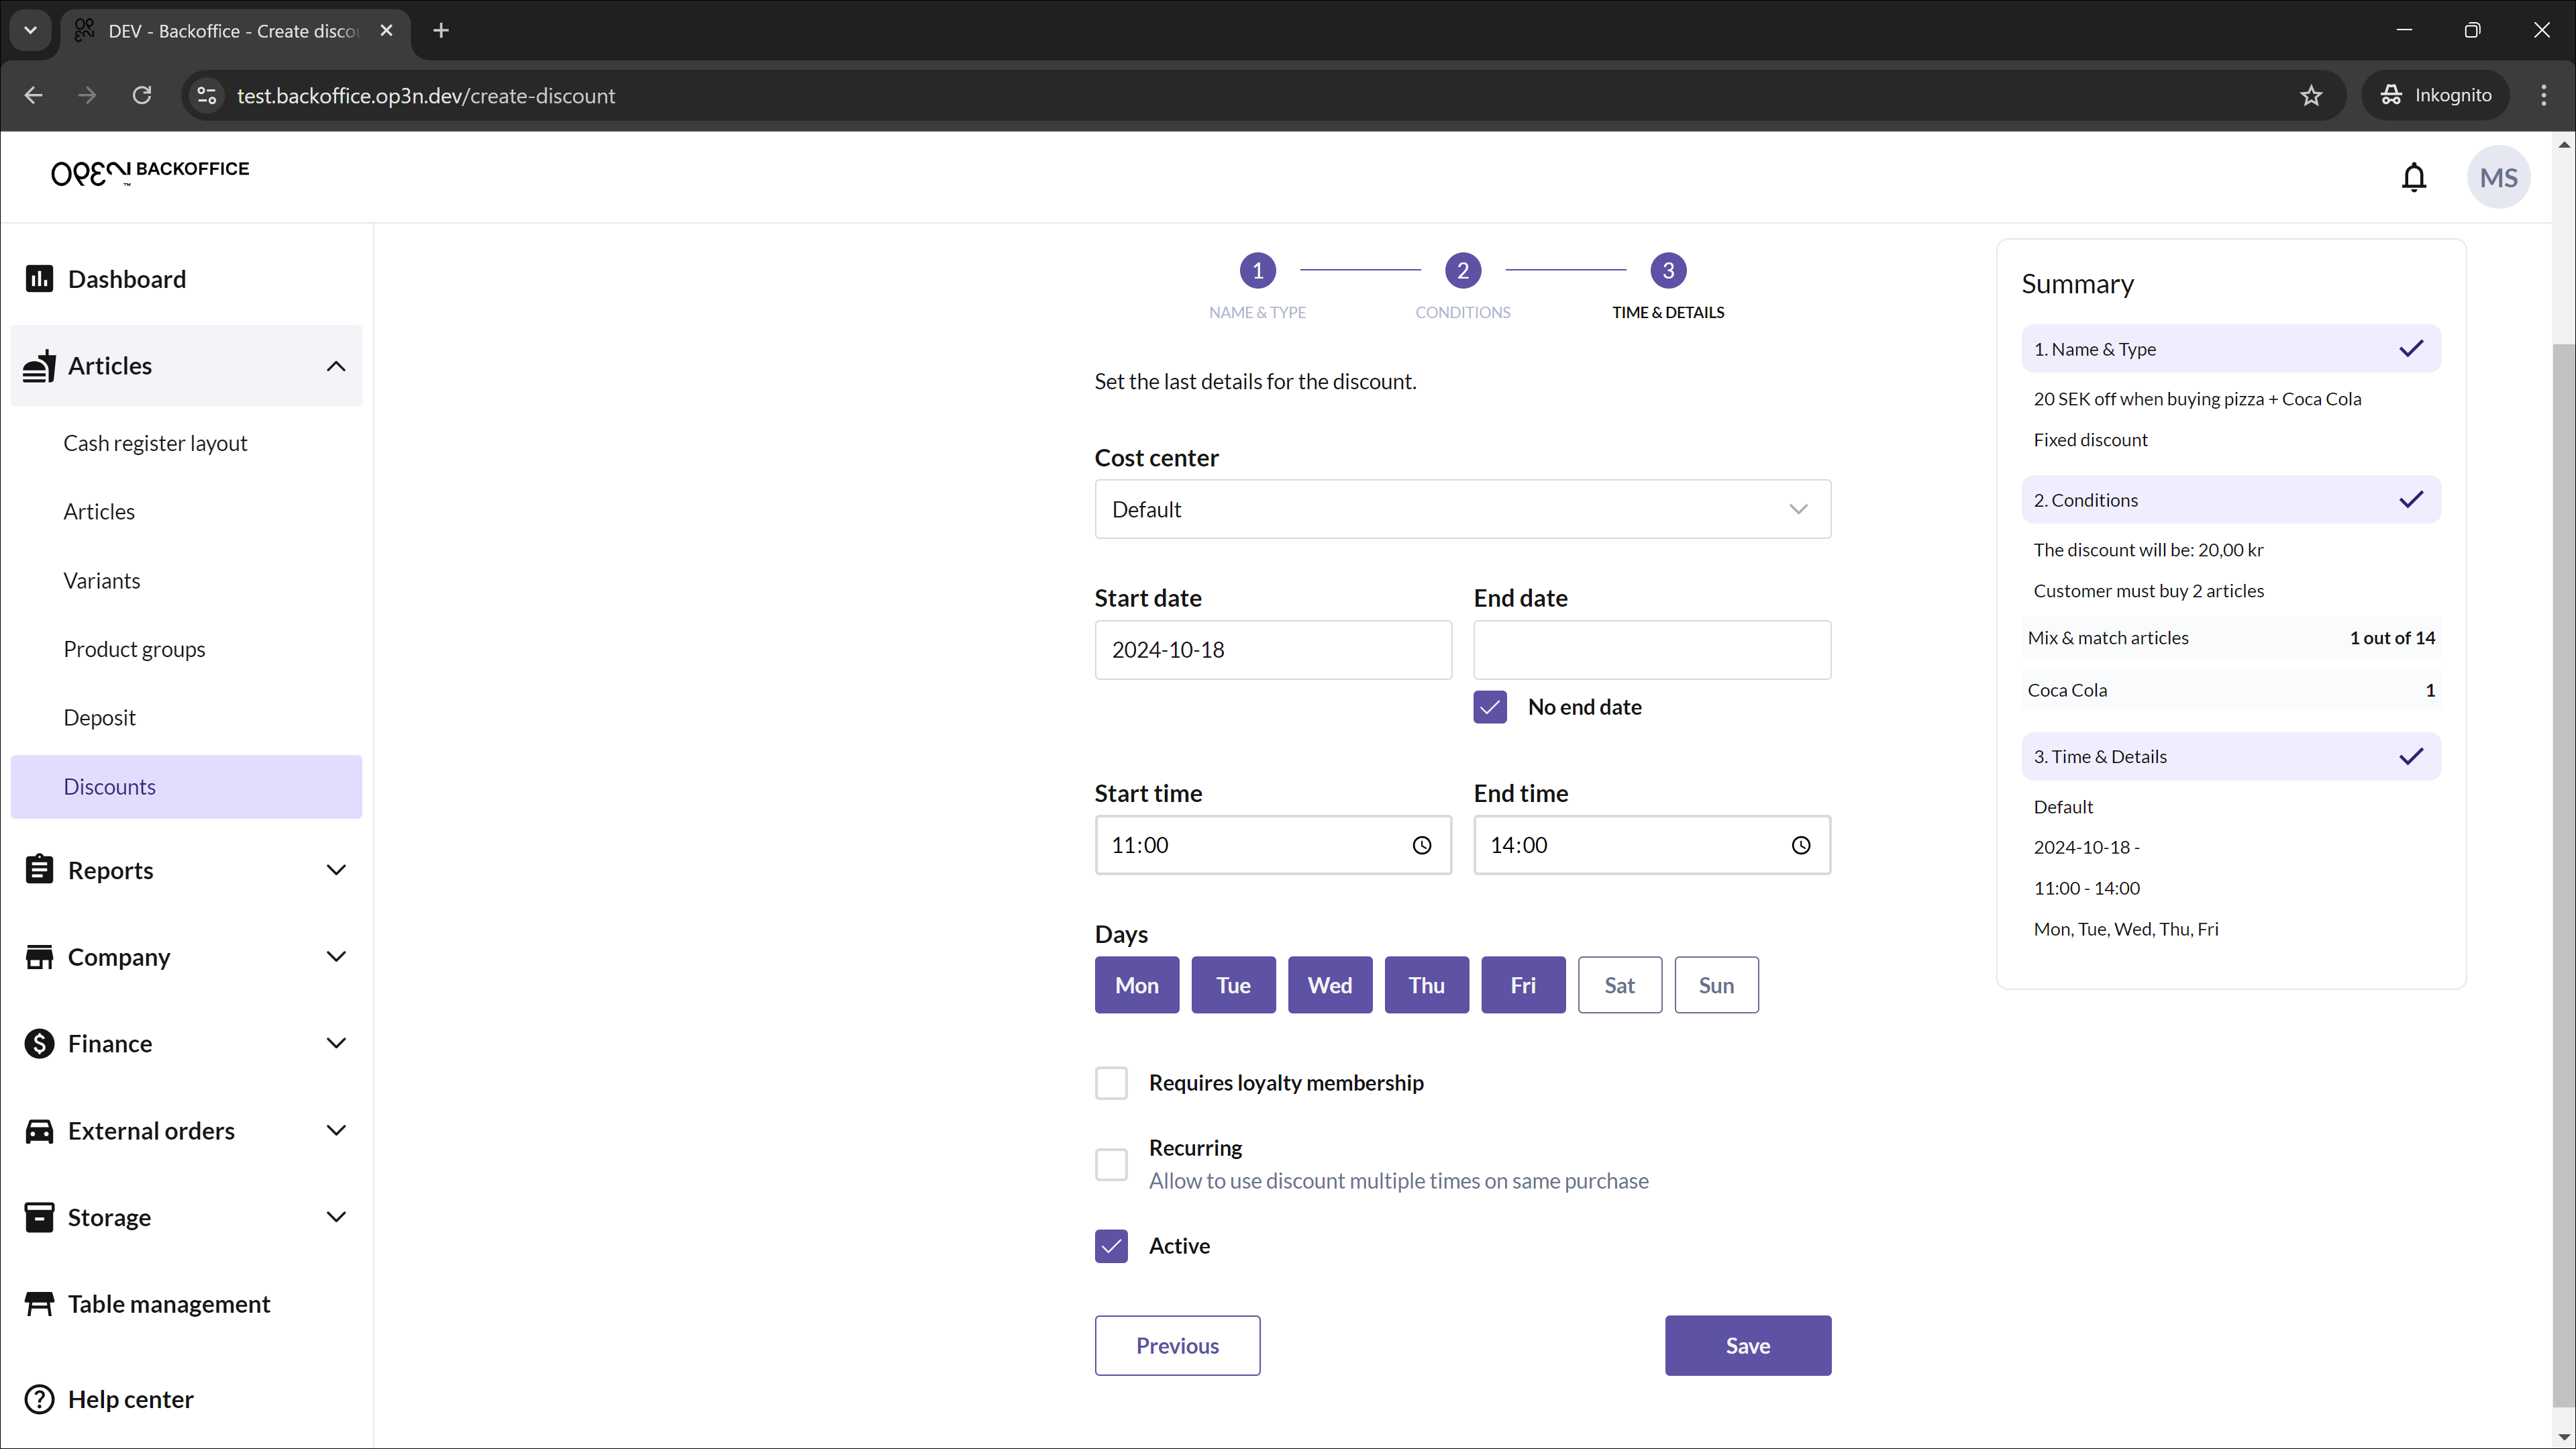
Step 3: Time & Details
- Set the cost center, dates, times, and days for the discount.
- Optional: Mark if it requires loyalty membership or if it can be used multiple times.
- Ensure the discount is active (default setting). You can disable it later if needed.
- Click Save.
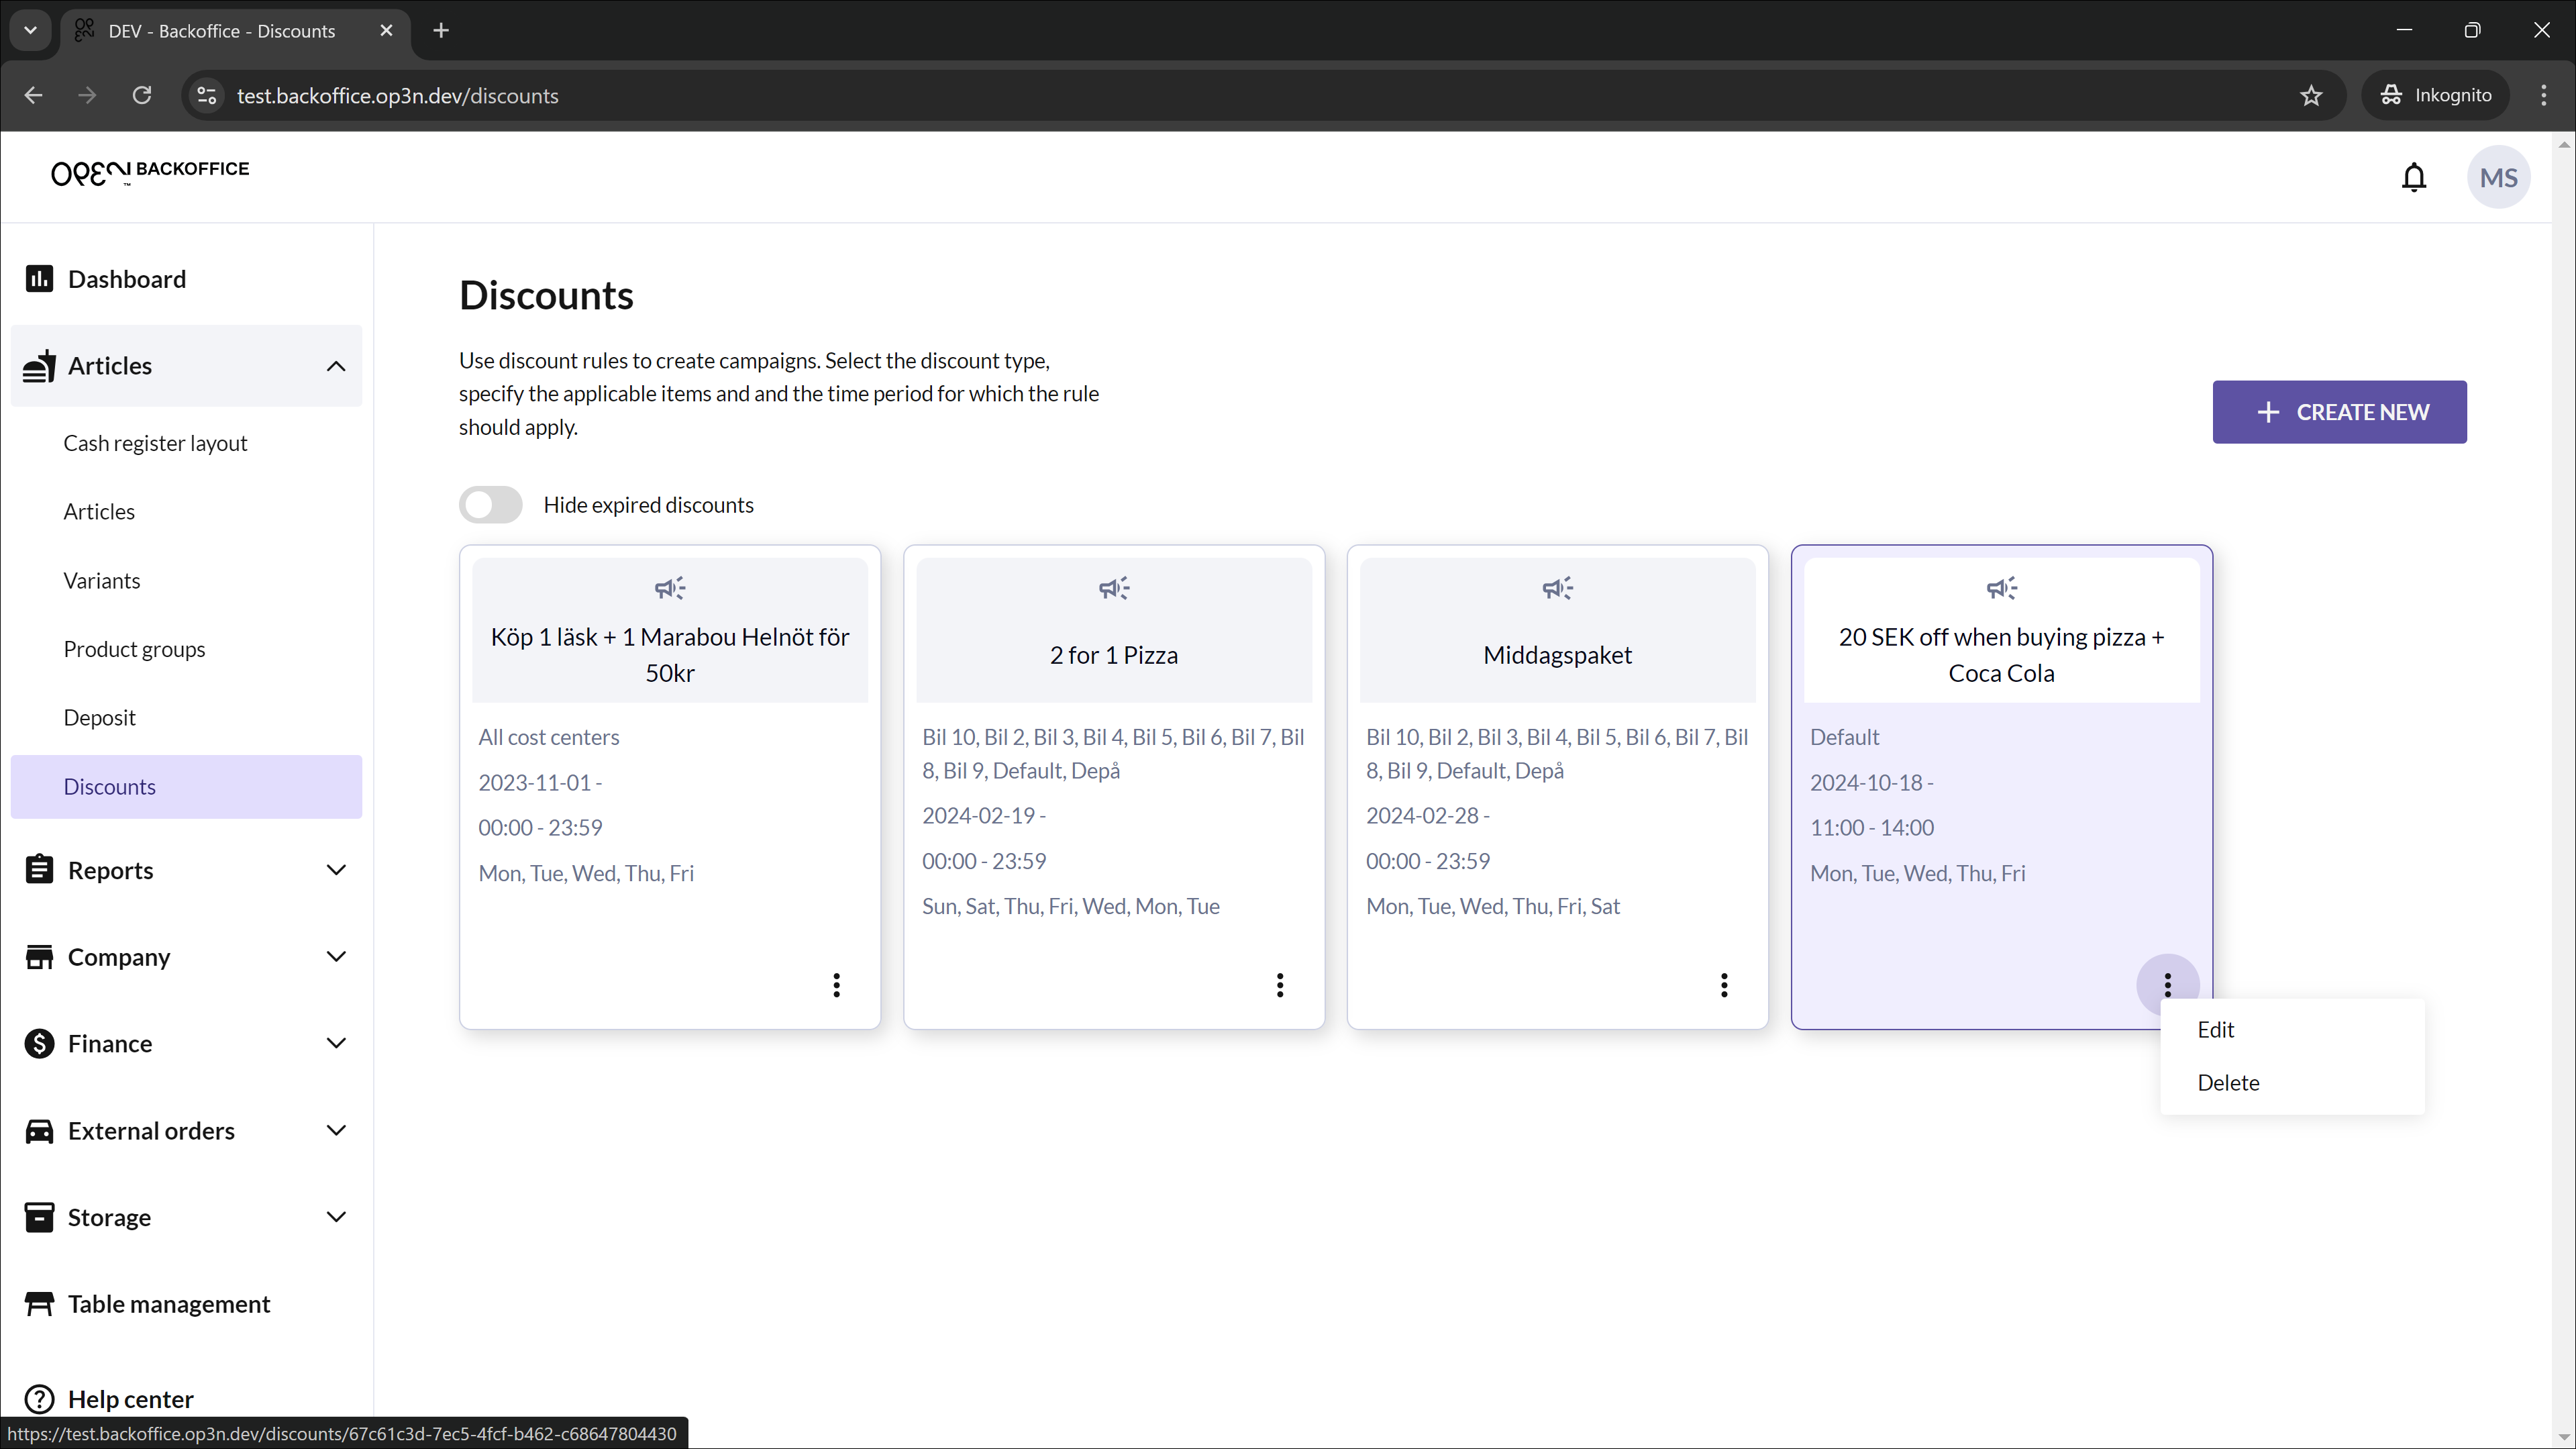
Your discount will appear on the overview page. Use the 3-dot “More” button to edit or delete it. You can also click directly on the discount card to edit the discount.
The discount will be applied automatically when you add the included items at checkout (according to the discount conditions you have set).
Create a 'Fixed price' discount
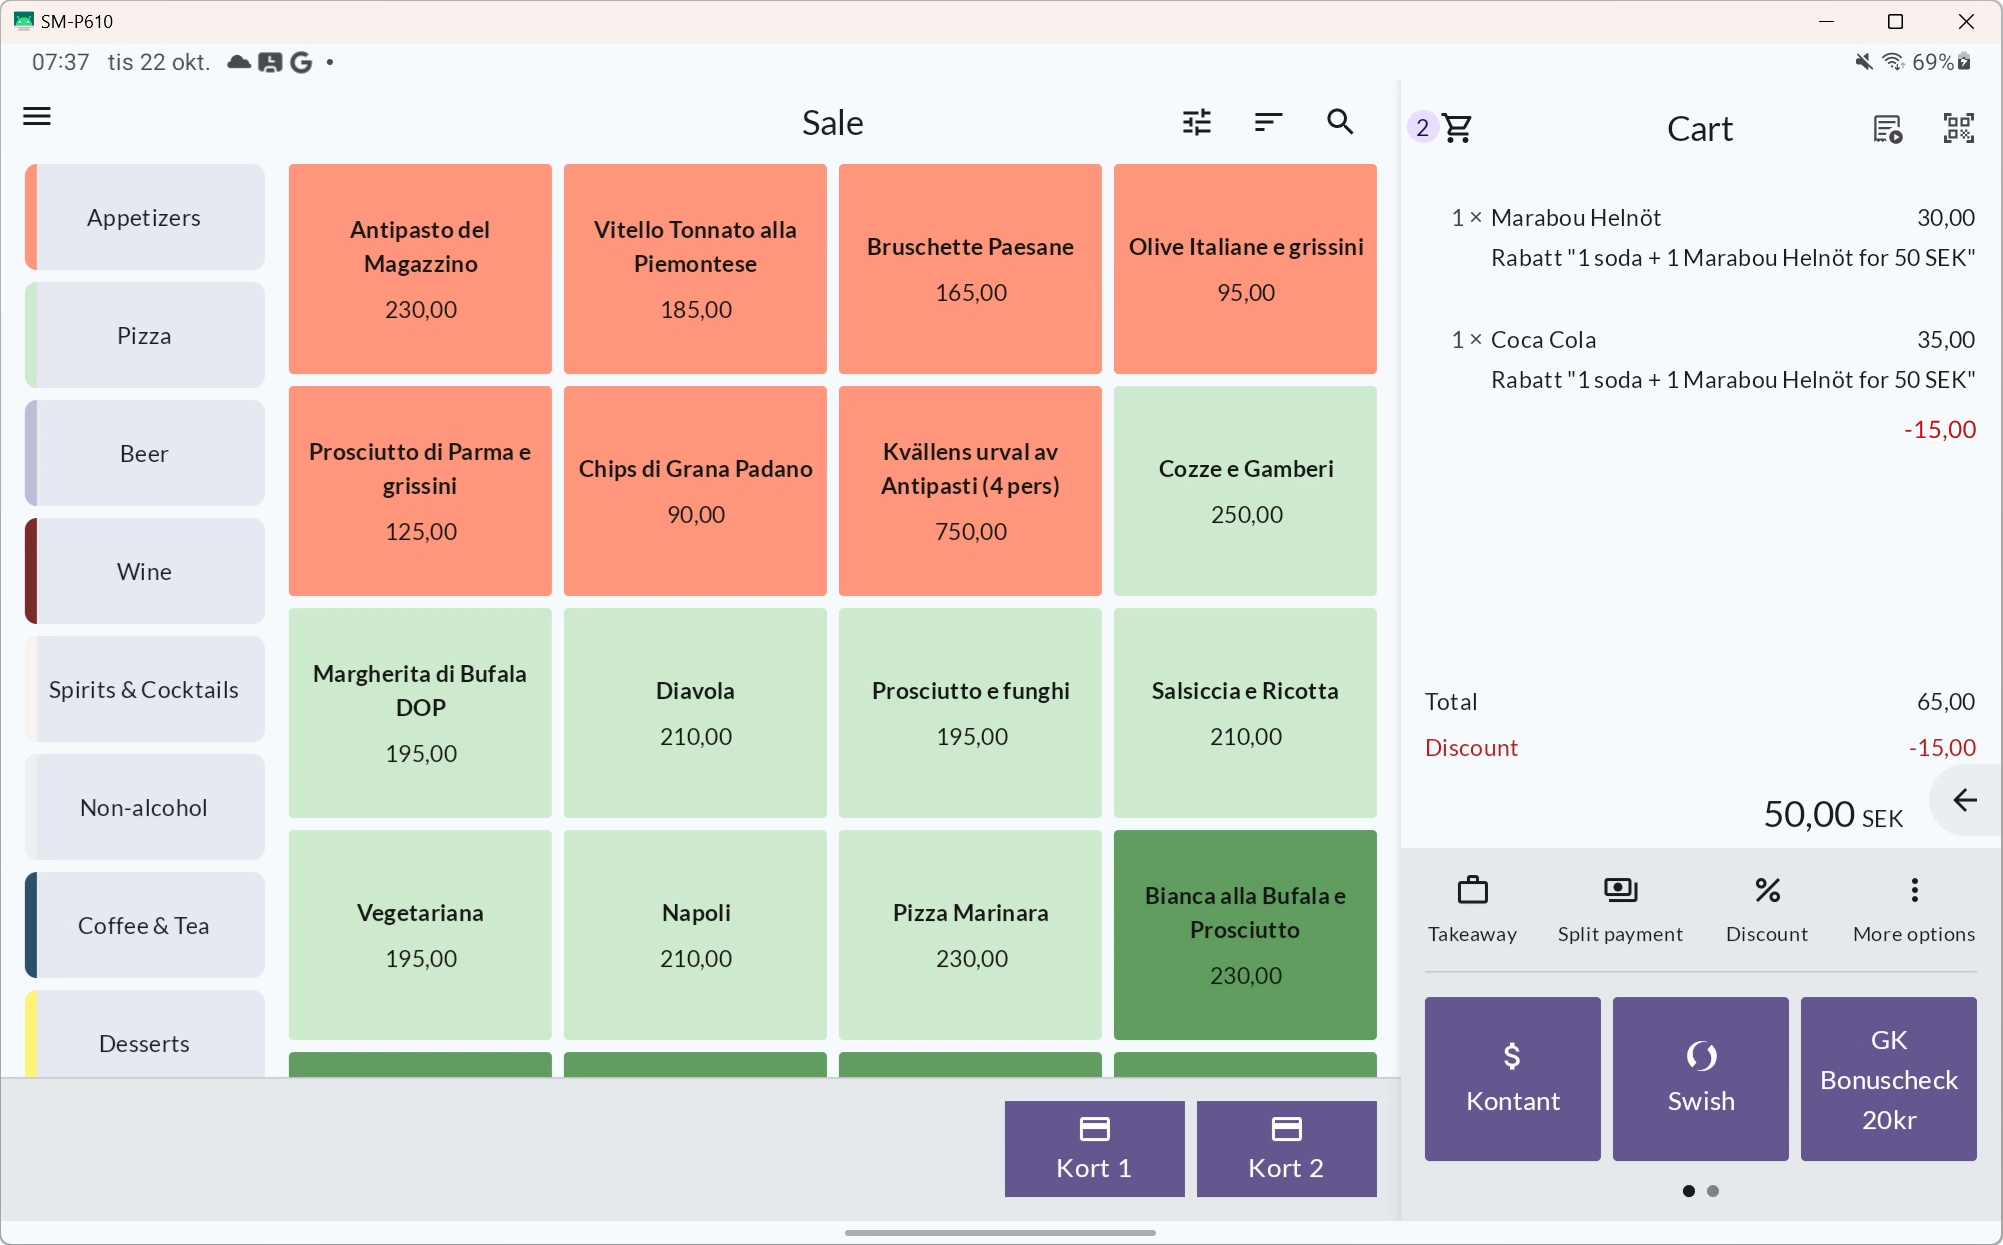
This discount allows you to set a fixed price for a combination of items, like "1 soft drink + 1 Marabou Helnöt for 50 SEK."
Navigate to Discounts
- In the BackOffice, go to Articles and select Discounts.
- Click Create new.

Step 1: Name & Type
- Enter the discount name.
- Select “Fixed price".
- Scroll down and click Next.

Step 2: Conditions
- Set Total Price: Enter the total price (e.g., 50 SEK) for the deal.

Select Articles: Choose which articles the deal should apply to.
To add articles, click Add to access the articles. Articles are grouped by product groups, so expand each group to select items. Use the arrow to expand/collapse groups.
You can choose between:
Mix & Match articles: The customer can choose from multiple articles. Set the quantity the customer has to buy to get the discount (the quantity applies to all included items).
*In this example, the customer has to buy 1 soda, but can choose between 4 different flavors.*Specific articles: The customer must buy certain items to get the discount. Select which articles are included, and set the quantity the customer must buy individually for each article. In this example, the customer has to buy 1 Marabou Helnöt.
Click Next.
Step 3: Time & Details
- Set the cost center, dates, times, and days for the discount.
- Optional: Mark if it requires loyalty membership or if it can be used multiple times.
- Ensure the discount is active (default setting). You can disable it later if needed.
- Click Save.

Your discount will appear on the overview page. Use the 3-dot “More” button to edit or delete it. You can also click directly on the discount card to edit the discount.

The discount will be applied automatically when you add the included items at checkout (according to the discount conditions you have set).
Create a 'Pricelist' discount
This discount type is ideal for lowering the prices of items during a specific time period, such as an "October Sale: Pizzas from 180 SEK".
Navigate to Discounts
- In the BackOffice, go to Articles and select Discounts.
- Click Create new.

Step 1: Name & Type
- Enter the discount name.
- Select "Pricelist".
- Scroll down and click Next.

Step 2: Conditions
Choose how to set the prices:
Set price per item: Select individual items and enter discounted prices for each.

Same price for all items: Enter one price that applies to all selected items.

Select Articles: Expand product groups using the arrow and choose the items to include in the discount.
Click Next.
Step 3: Time & Details
- Set the cost center, dates, times, and days for the discount.
- Optional: Mark if it requires loyalty membership or if it can be used multiple times.
- Ensure the discount is active (default setting). You can disable it later if needed.
- Click Save.
Your discount will appear on the overview page. Use the 3-dot “More” button to edit or delete it. You can also click directly on the discount card to edit the discount.
The discount will be applied automatically when you add the included items at checkout (according to the discount conditions you have set).
