Create Table Maps in BackOffice
Here’s how to easily create table maps that represent your premises:
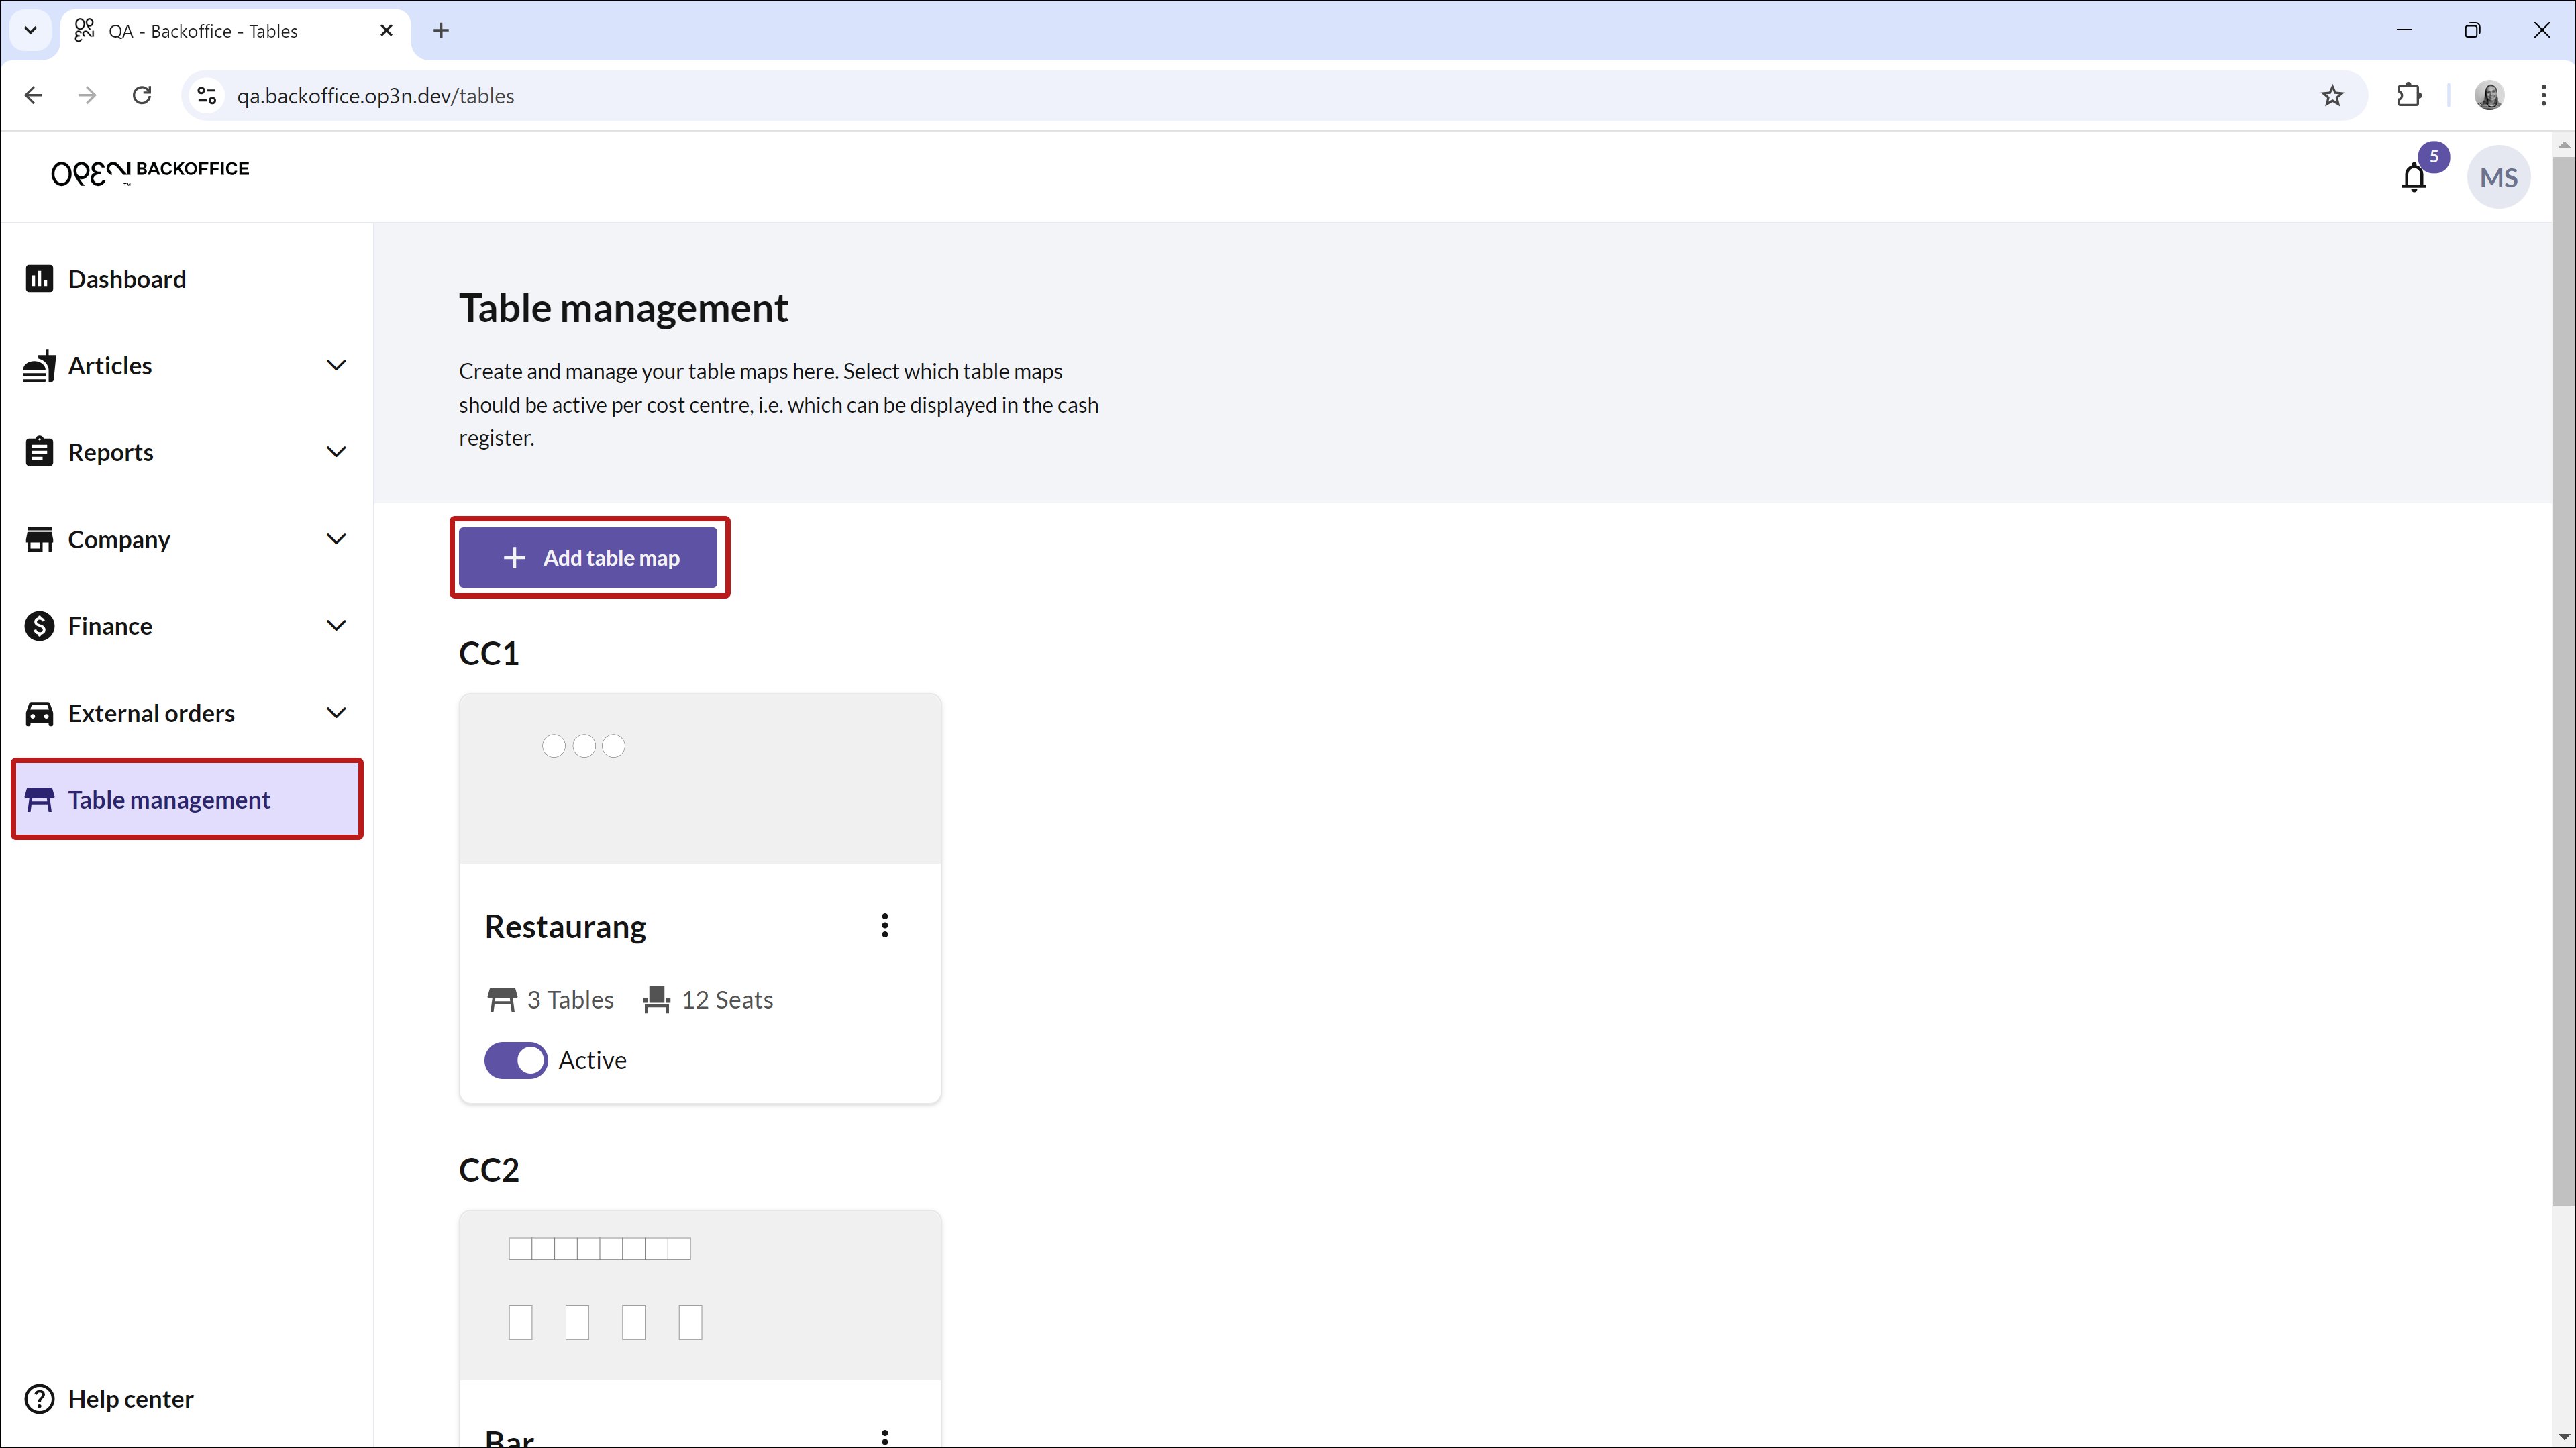
- Go to Table Management: Open the BackOffice main menu and select Table Management.
- Create a new table map: Click on Add Table Map.
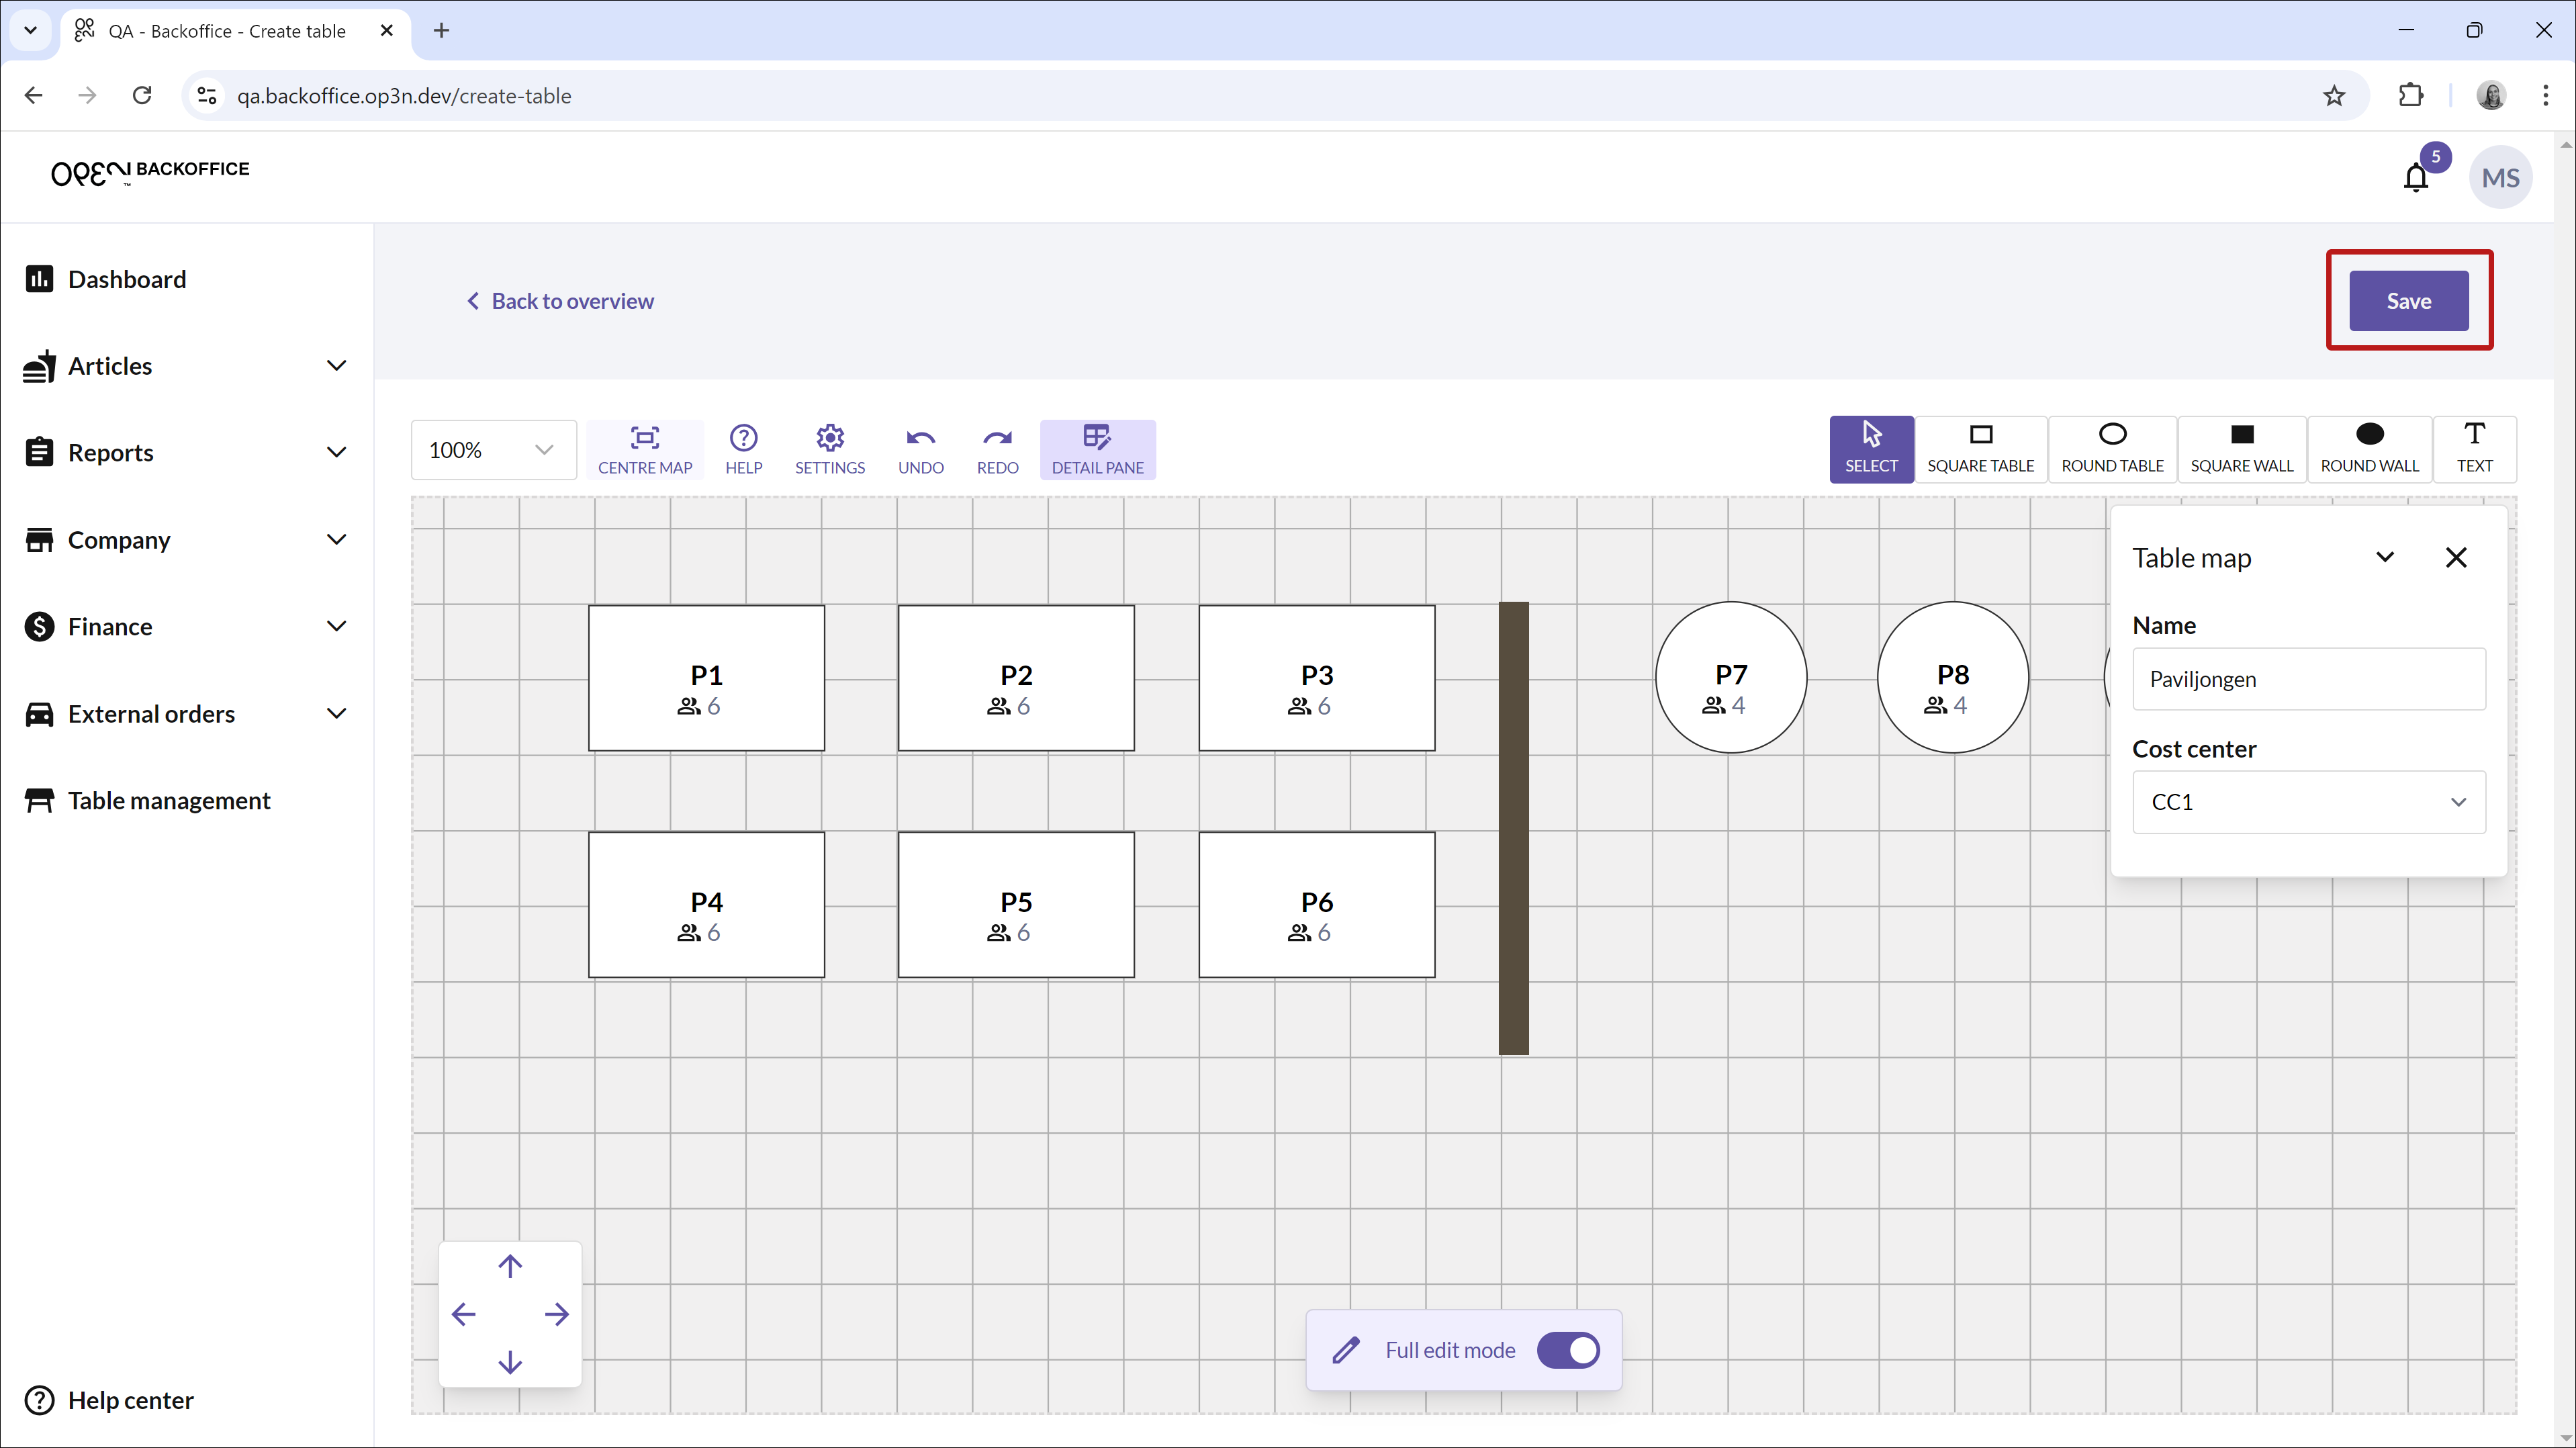
- Enter cost center and name: Fill in a cost center and give the table map a name in the window that appears to the right.
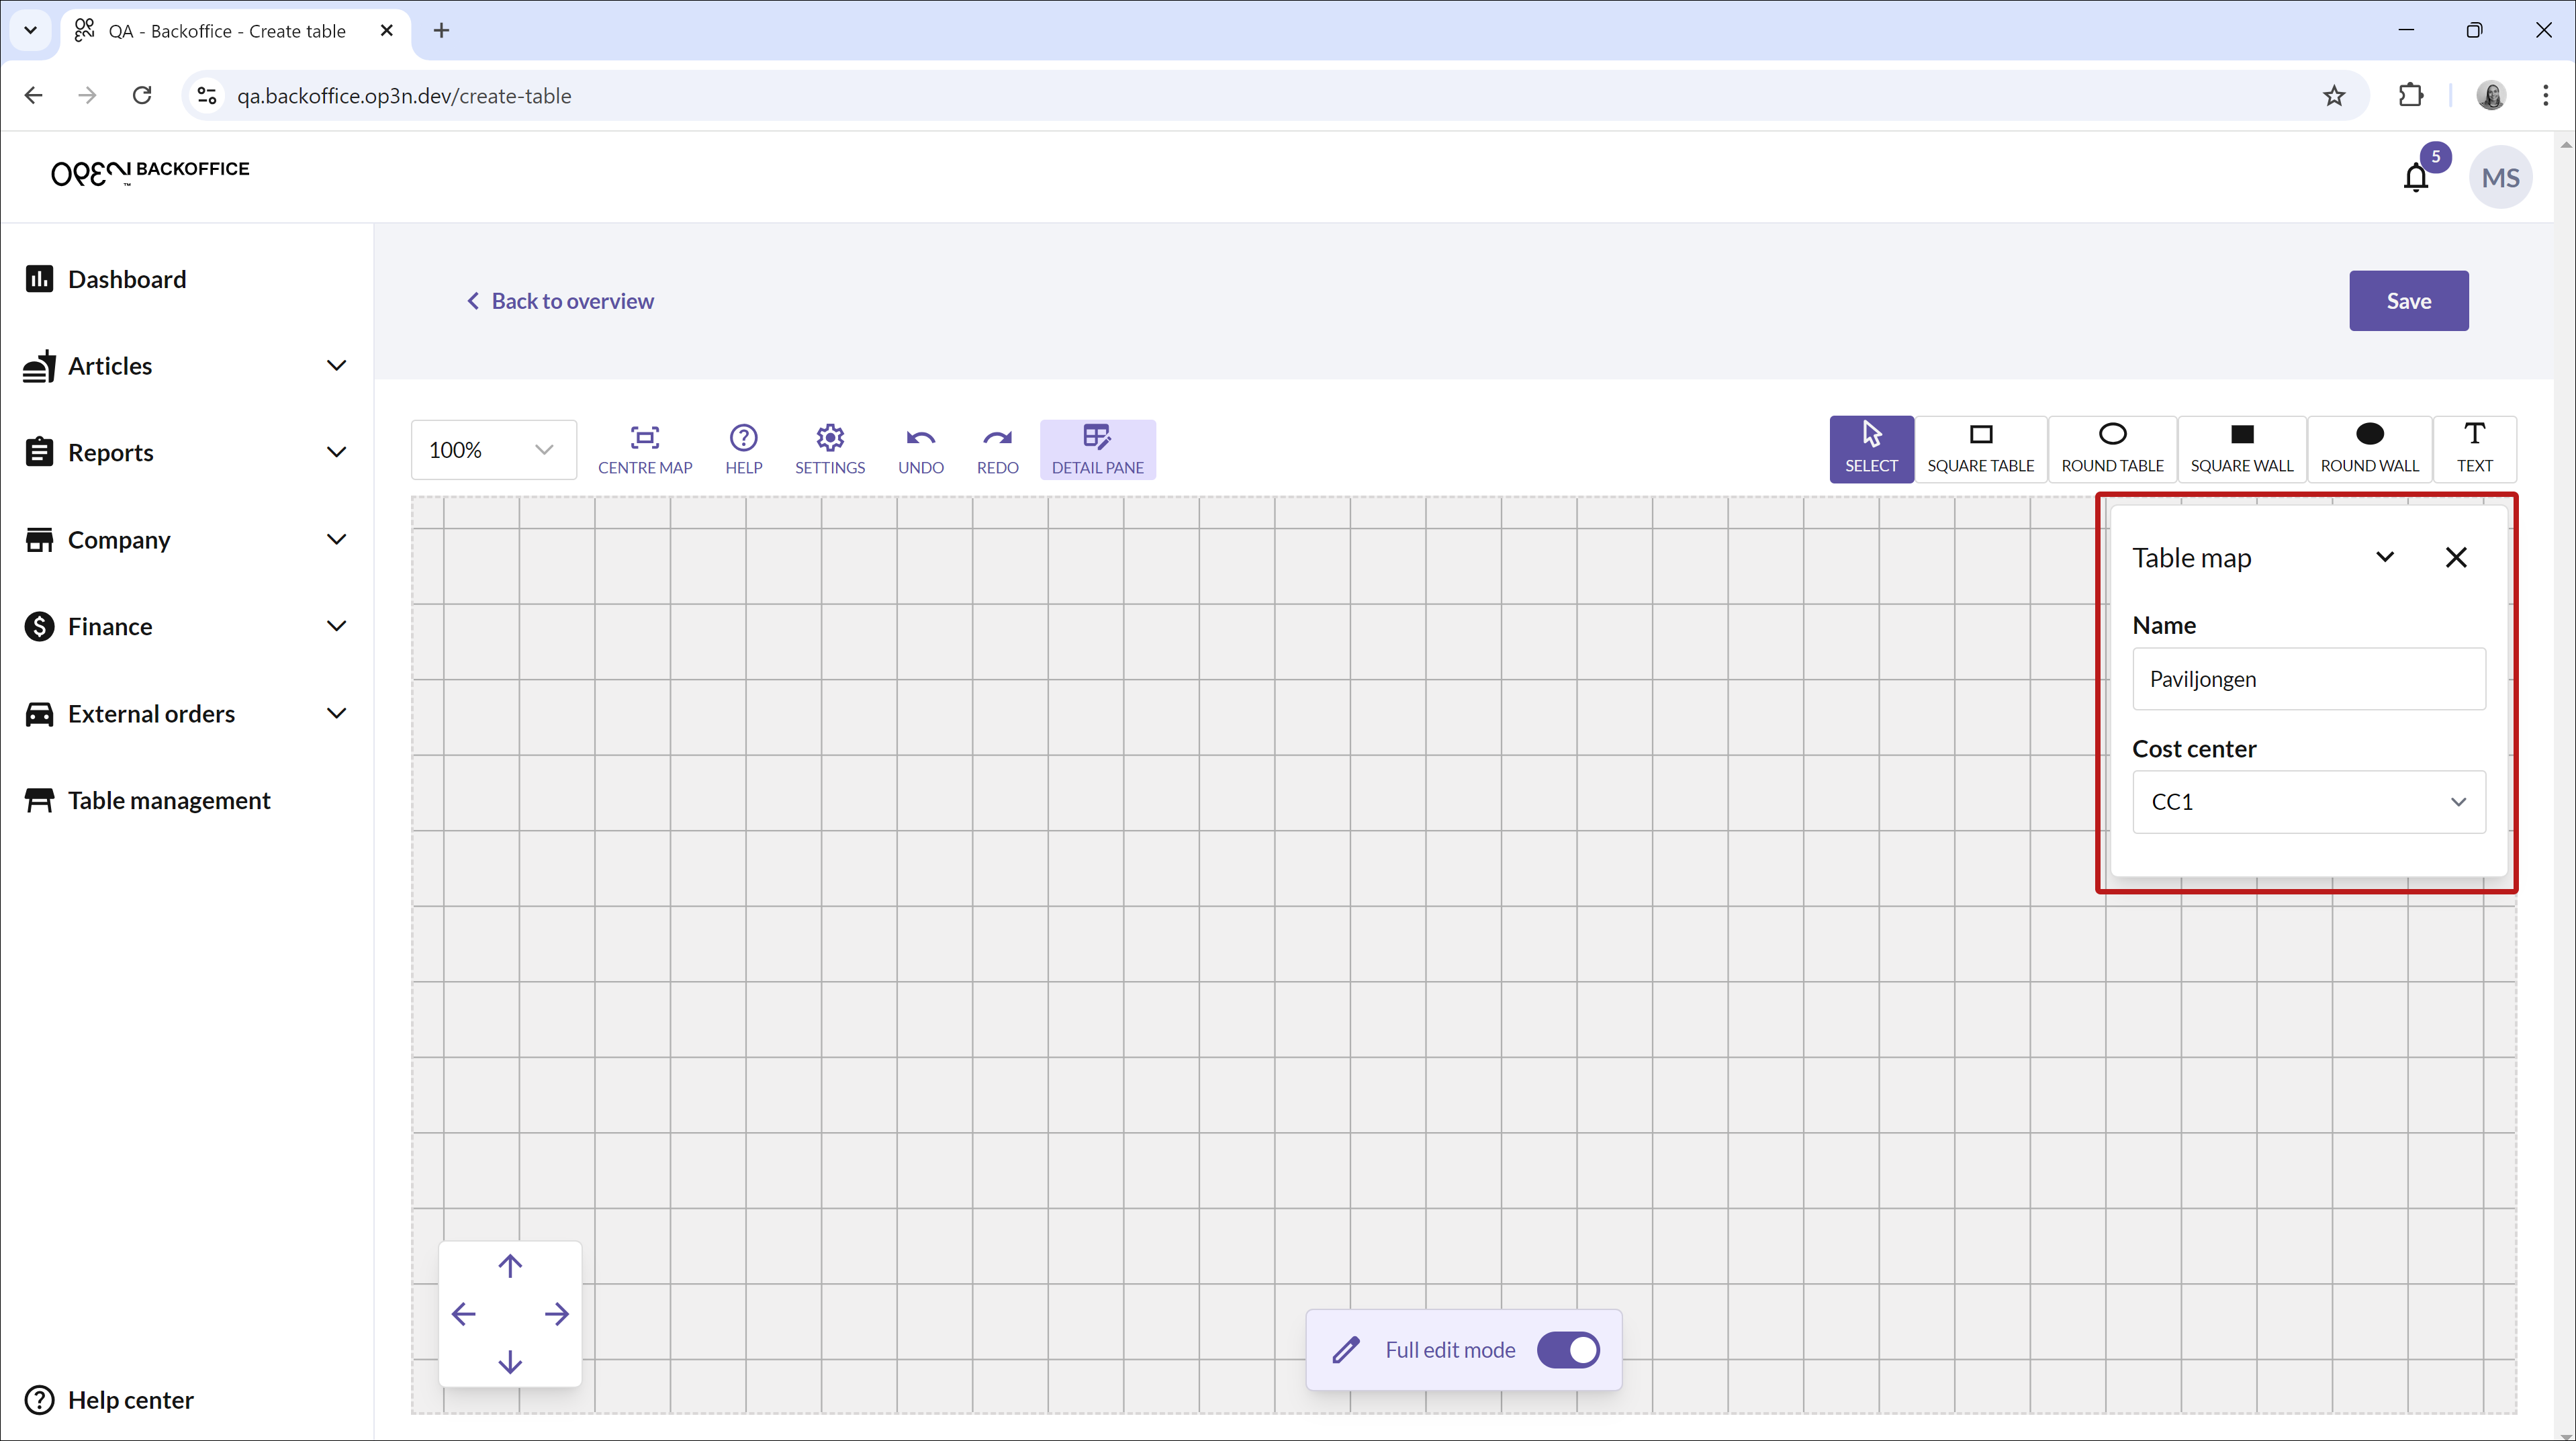
If you later want to change these, click on Detail Window and press on the table map itself (not a single table). If you click on a table, the window will instead show details for that specific table.
- Place tables and walls: Select a table or wall shape and click on the map where you want to place it. Click on the object to adjust its size or move it to the desired location.
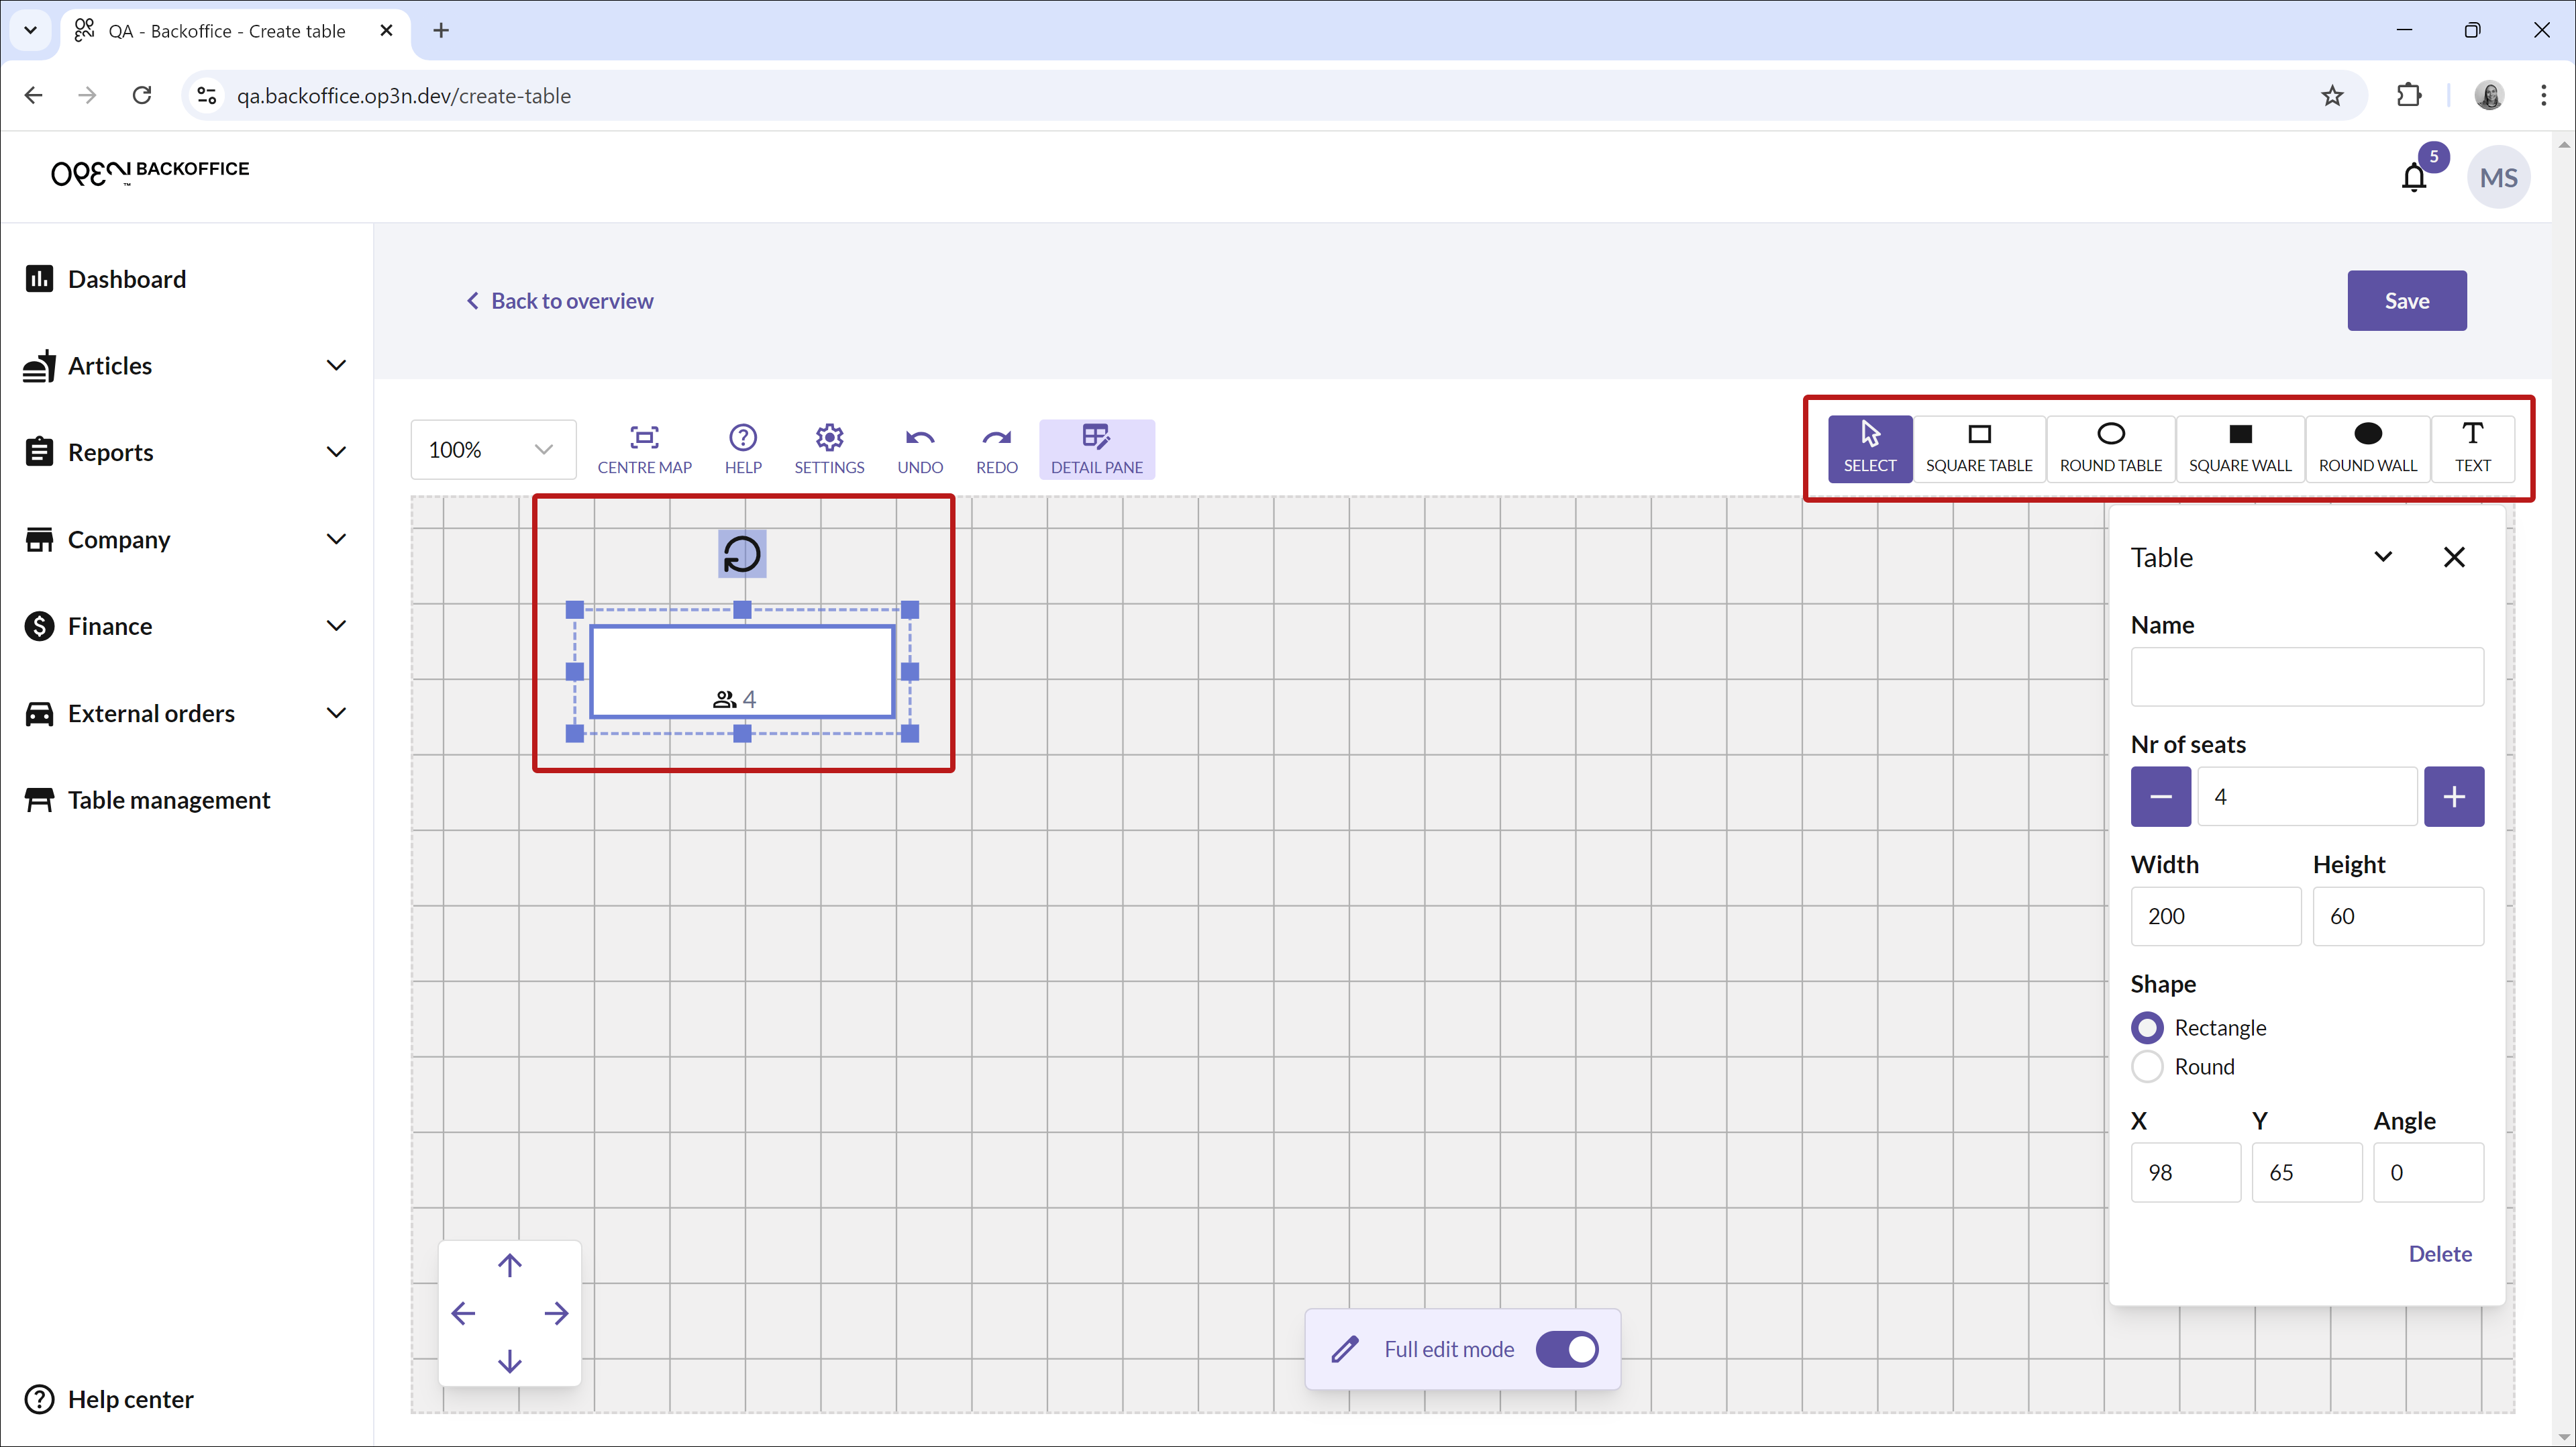
- Name tables and seats: Click on a table to name it and specify the number of seats in the Detail Window.
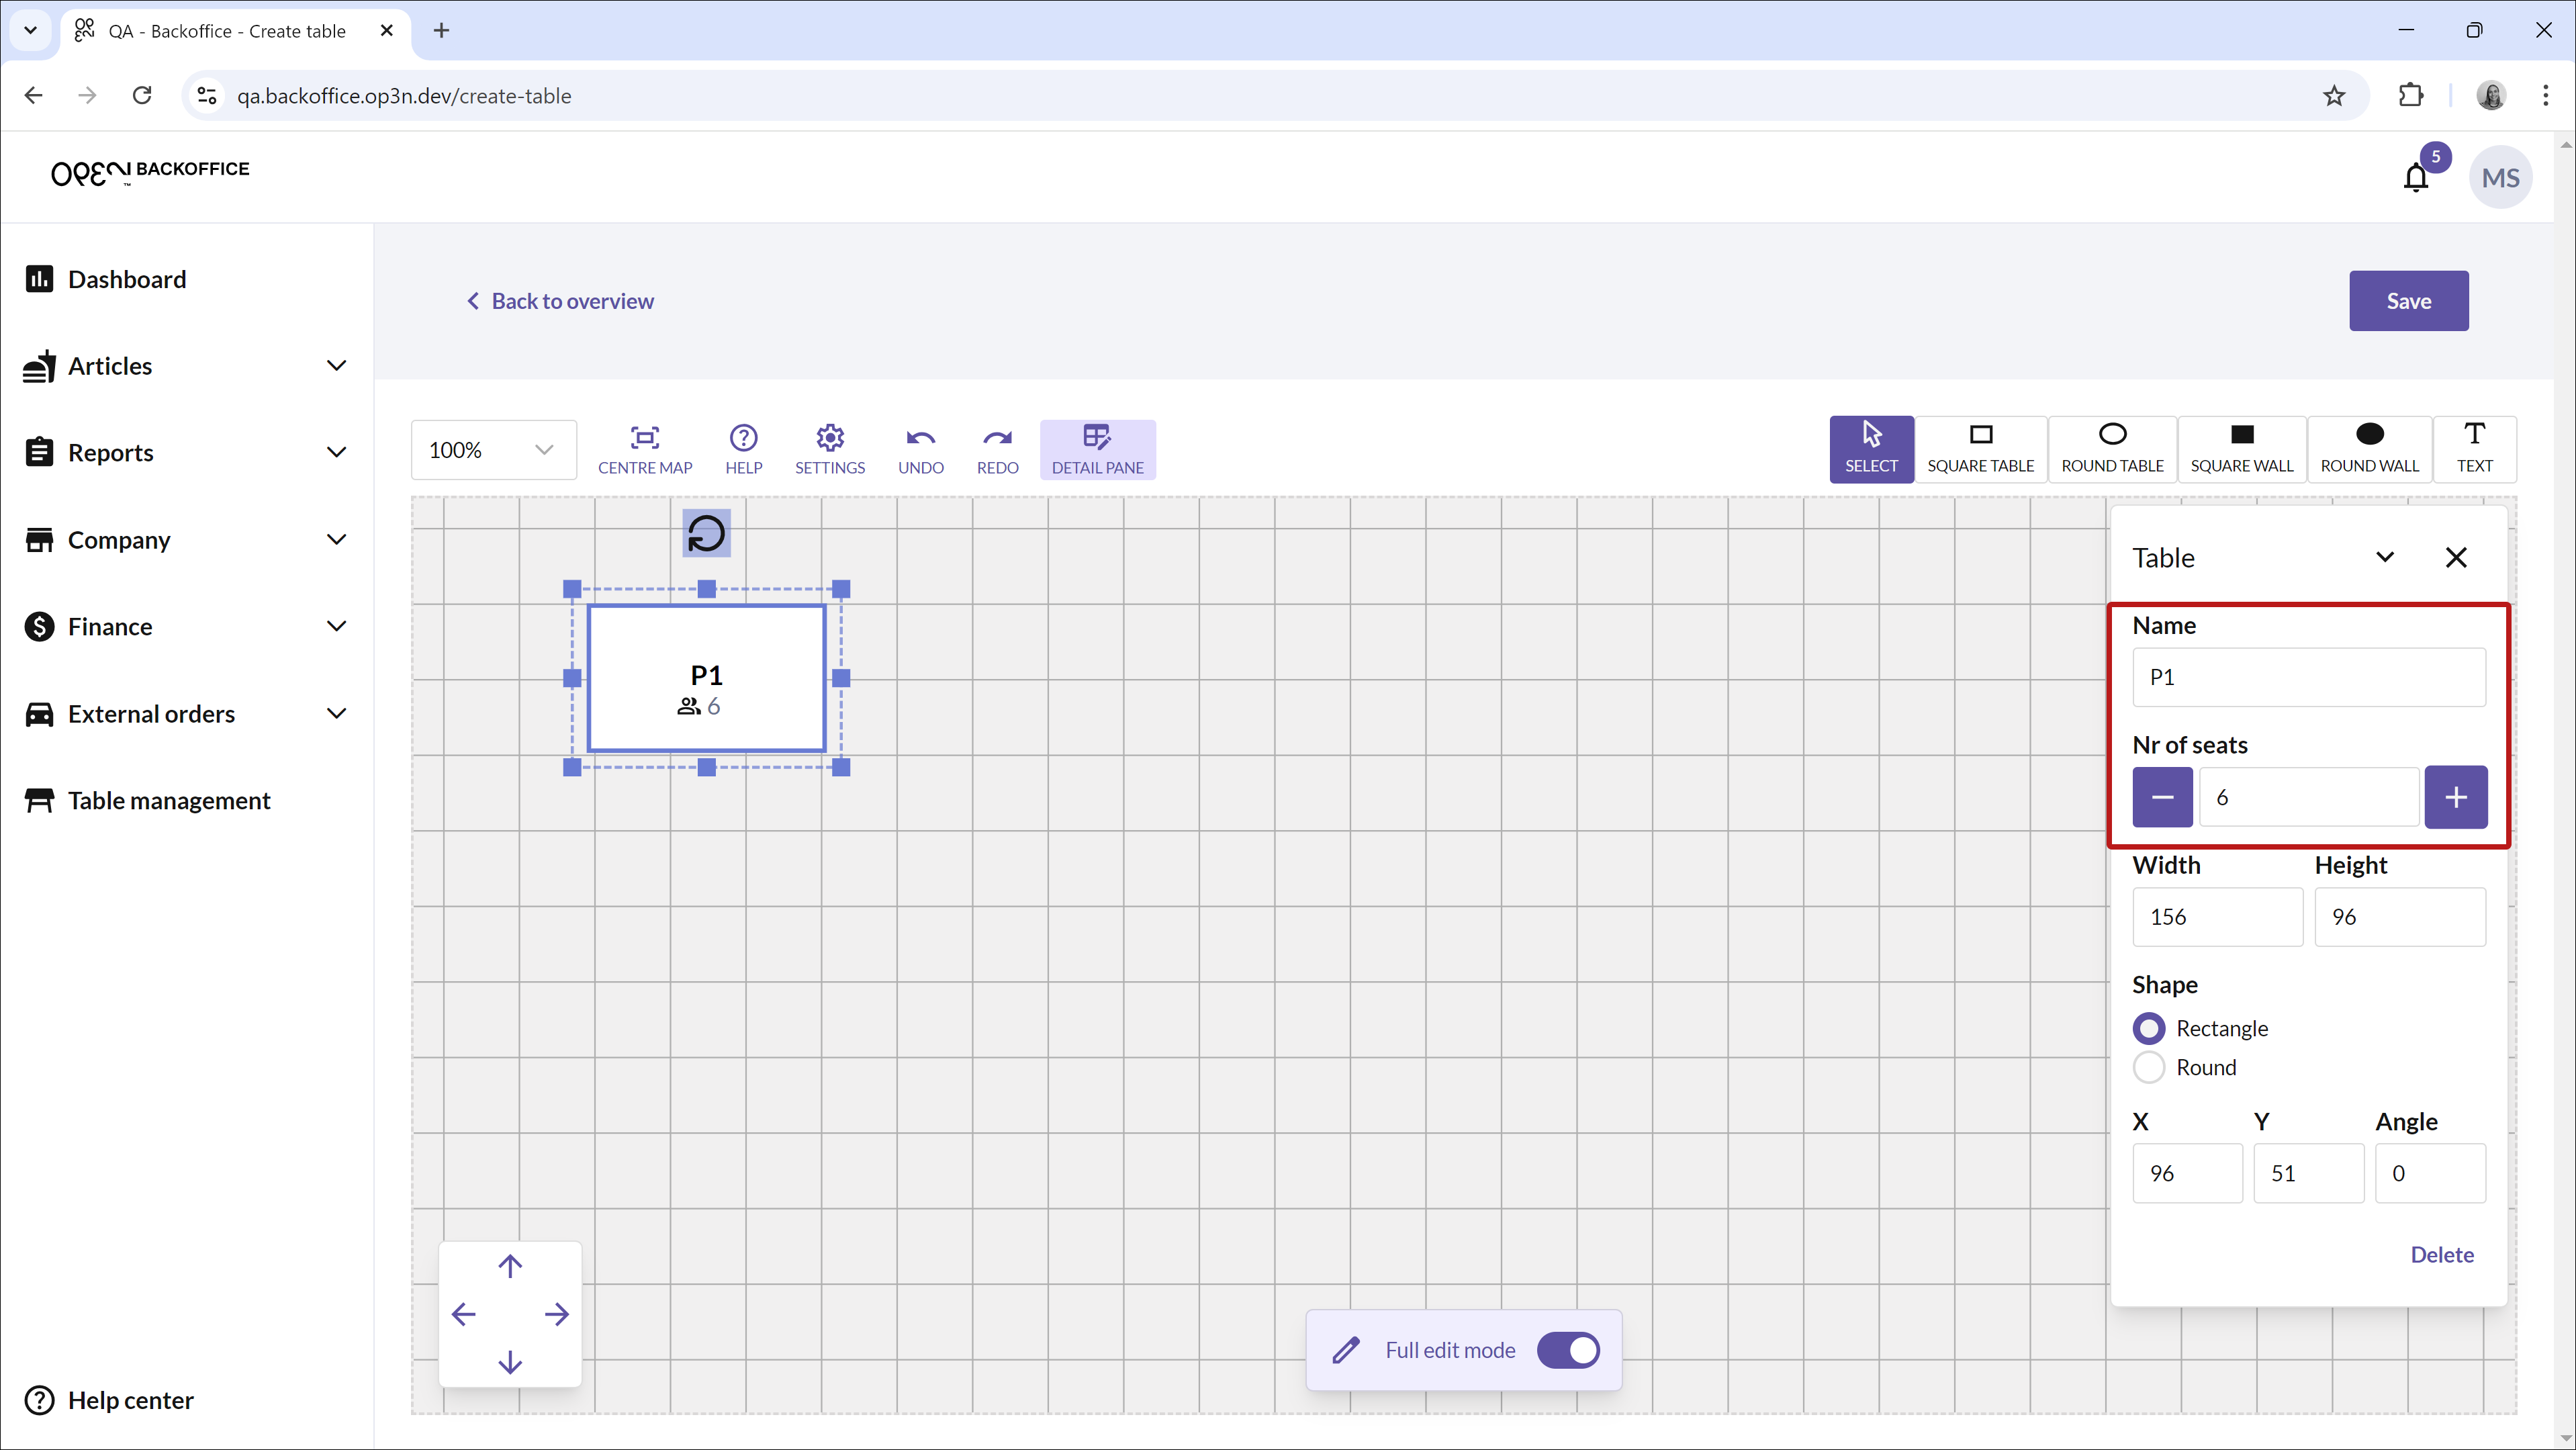 If the Detail Window does not appear, click on Detail Window and select the table again.
 - Save: When you are satisfied with your table map, remember to save your changes.


Tips and Features
- Copy Tables: Use keyboard shortcuts to copy and paste a table (Ctrl+C, Ctrl+V for Windows, Command+C, Command+V for Mac).
- Settings: Manage tool settings, such as showing or hiding the grid in the background, by clicking on Settings.
- Help: Get explanations for all buttons and shortcuts by clicking on Help.
- Undo/Redo: Use the arrows to undo or redo an action.
- Zoom and Navigation: Zoom in and out on the map with your mouse or touchpad. Move the map left or right by holding down the mouse wheel, or use the arrow keys.
- Center the Map: To return to the original zoom and position, use the button to center the map.