Credit vouchers Preloaded with Articles
Credit vouchers are a great solution for events, allowing customers to redeem them for specific items you've pre-selected. Unlike standard vouchers, credit vouchers are not sold at the cash register. Instead, you can invoice customers (such as companies) based on the amount spent during the event.
These vouchers work seamlessly with RFID cards or bracelets, enabling quick and easy transactions. Customers can simply scan their card or bracelet at the register.
Note
This feature requires a specific license. Please contact your sales representative if you're interested in using credit vouchers.
Setting up credit vouchers in BackOffice
Step 1: Add 'Voucher' as a payment method
Ensure the payment method "Voucher" is added to the relevant cost centers that will accept these payments.
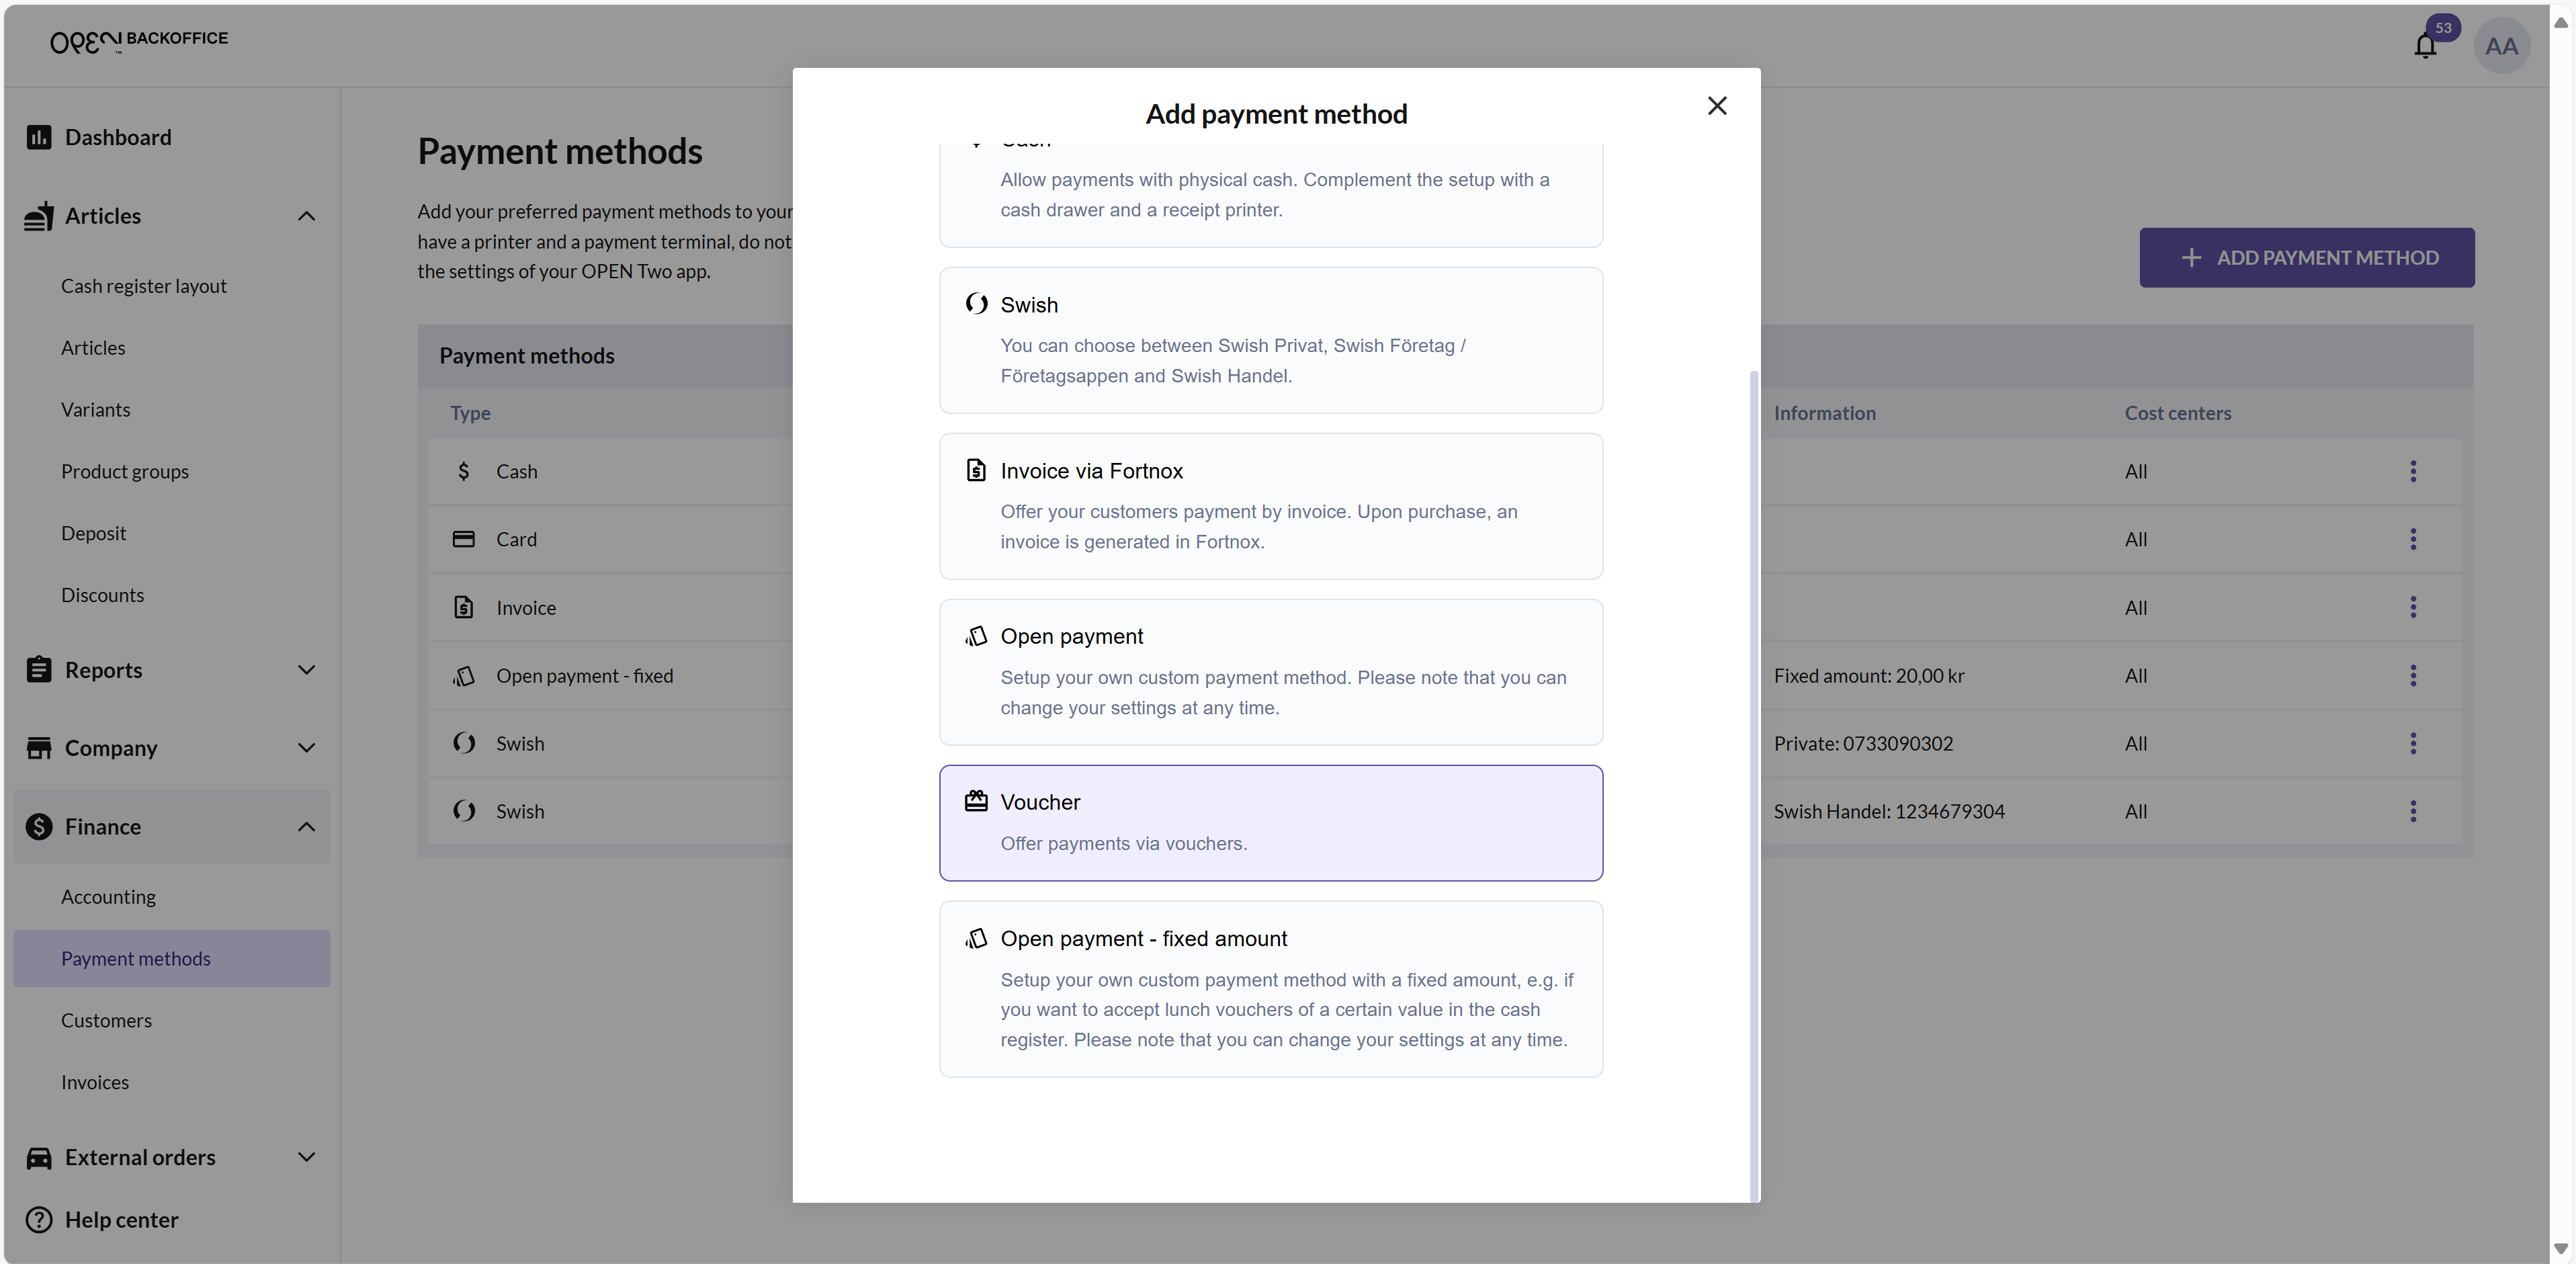
Go to Finance > Payment methods, click Add payment method and select Voucher.
Step 2: Create a credit voucher
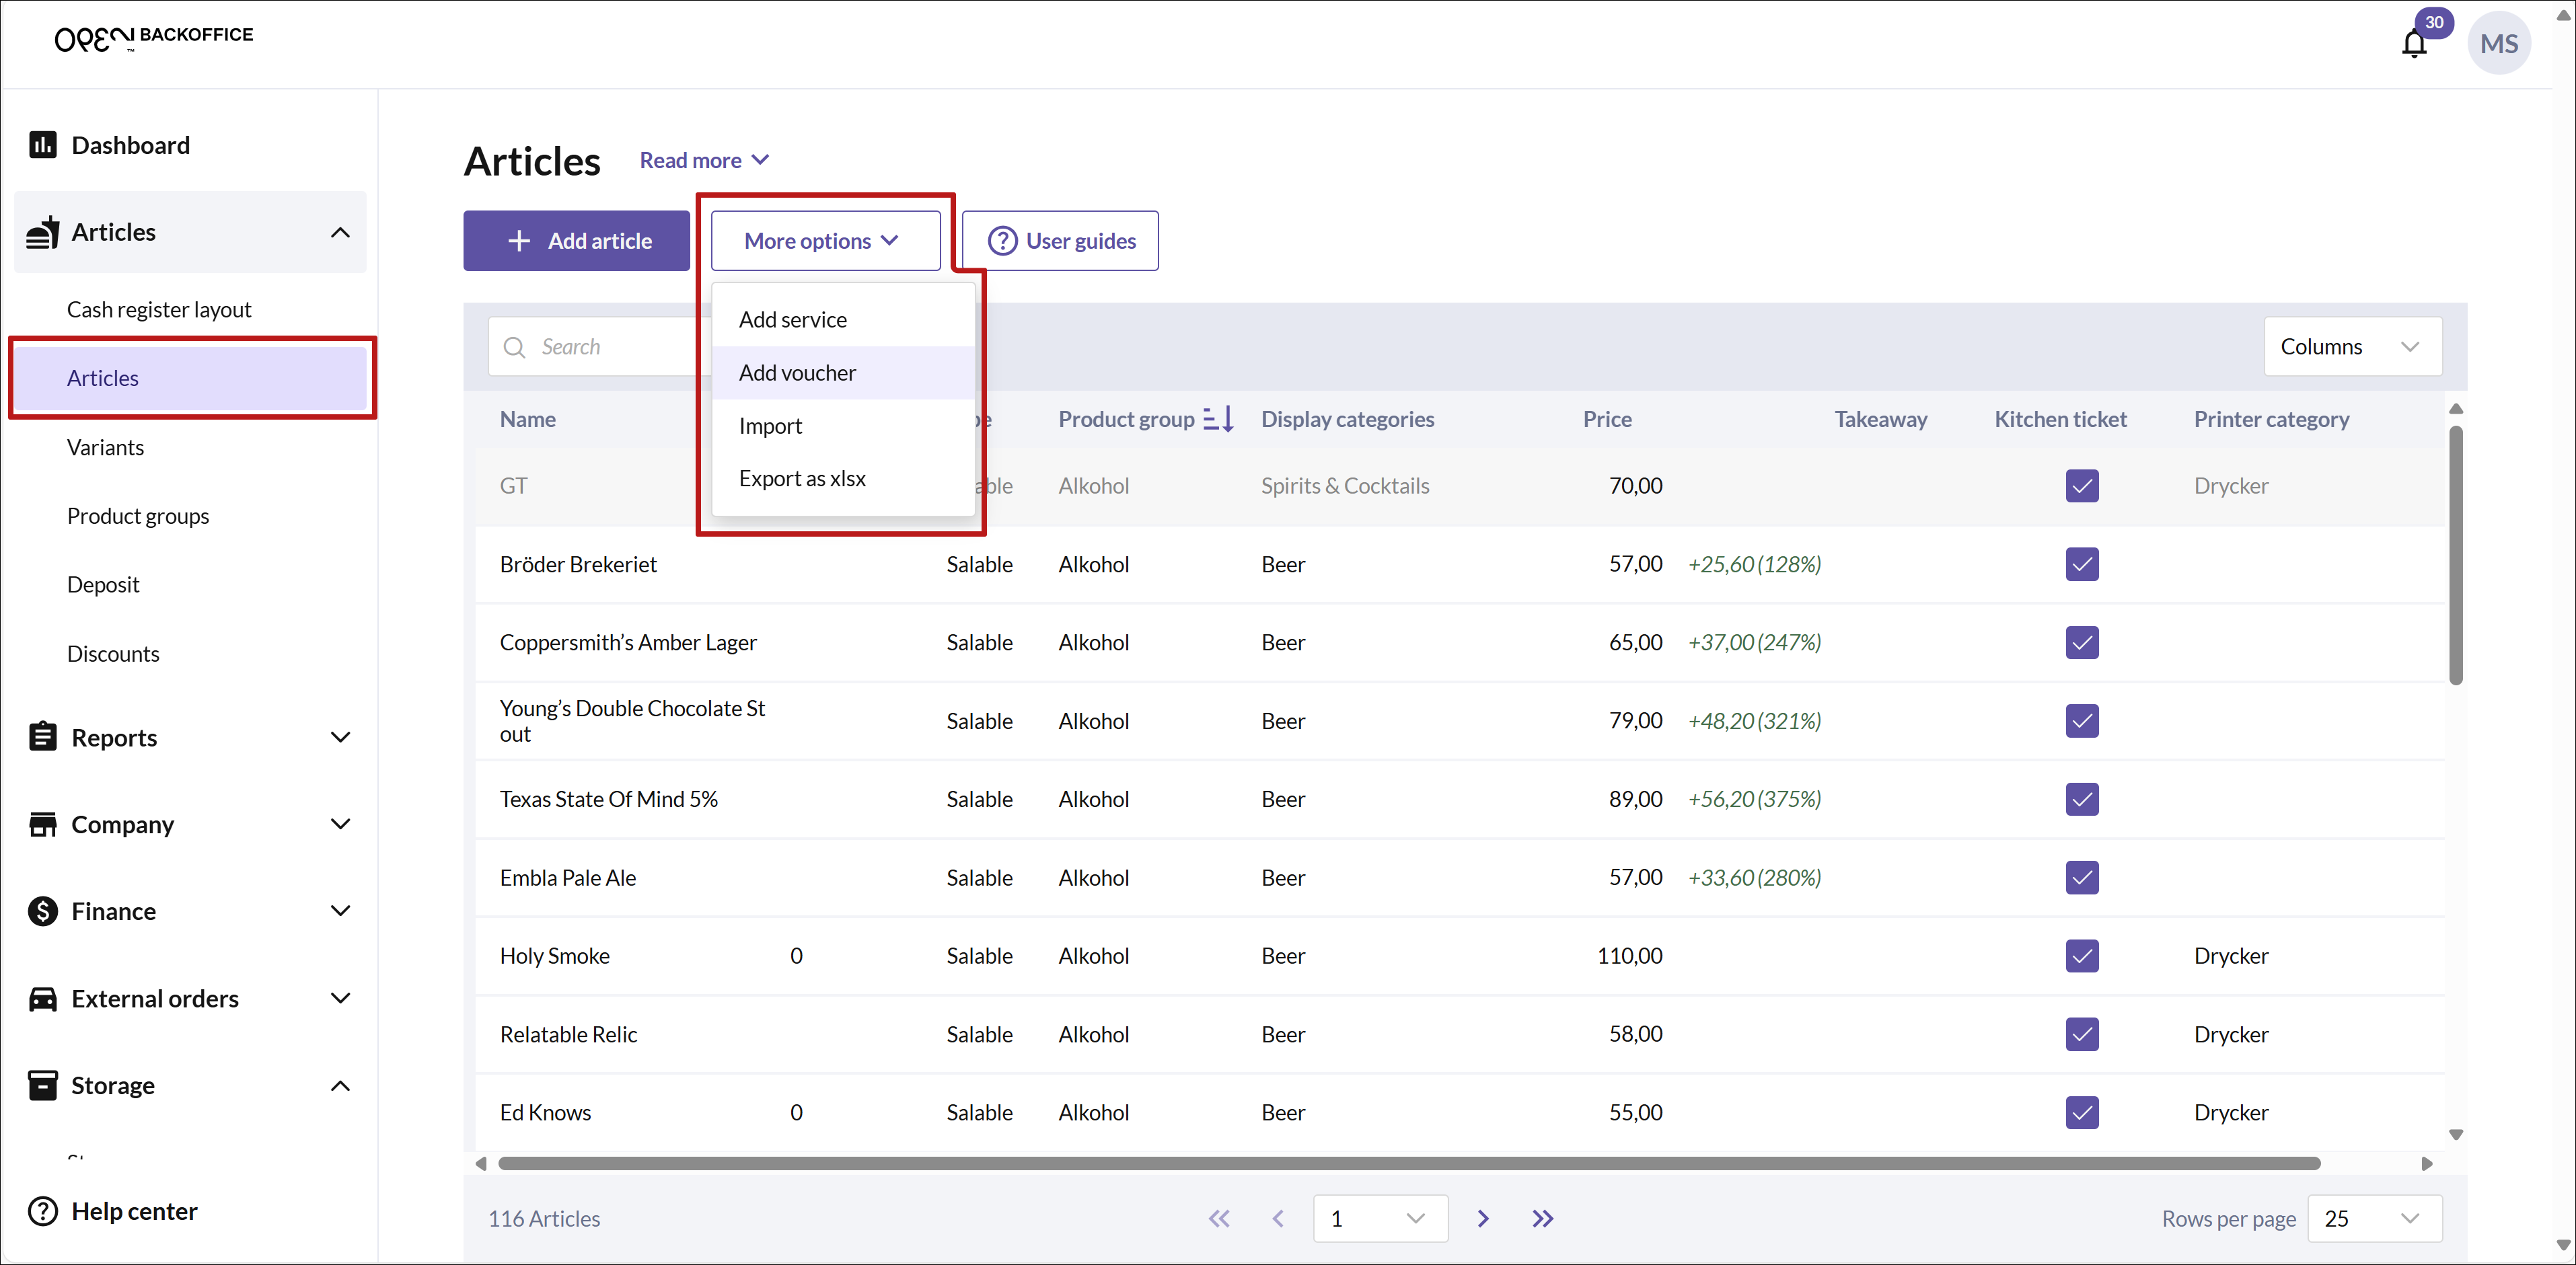
Navigate to Articles
Select ARTICLES in the menu and go to the ARTICLES page.
Click the MORE OPTIONS button and select ADD VOUCEHER.
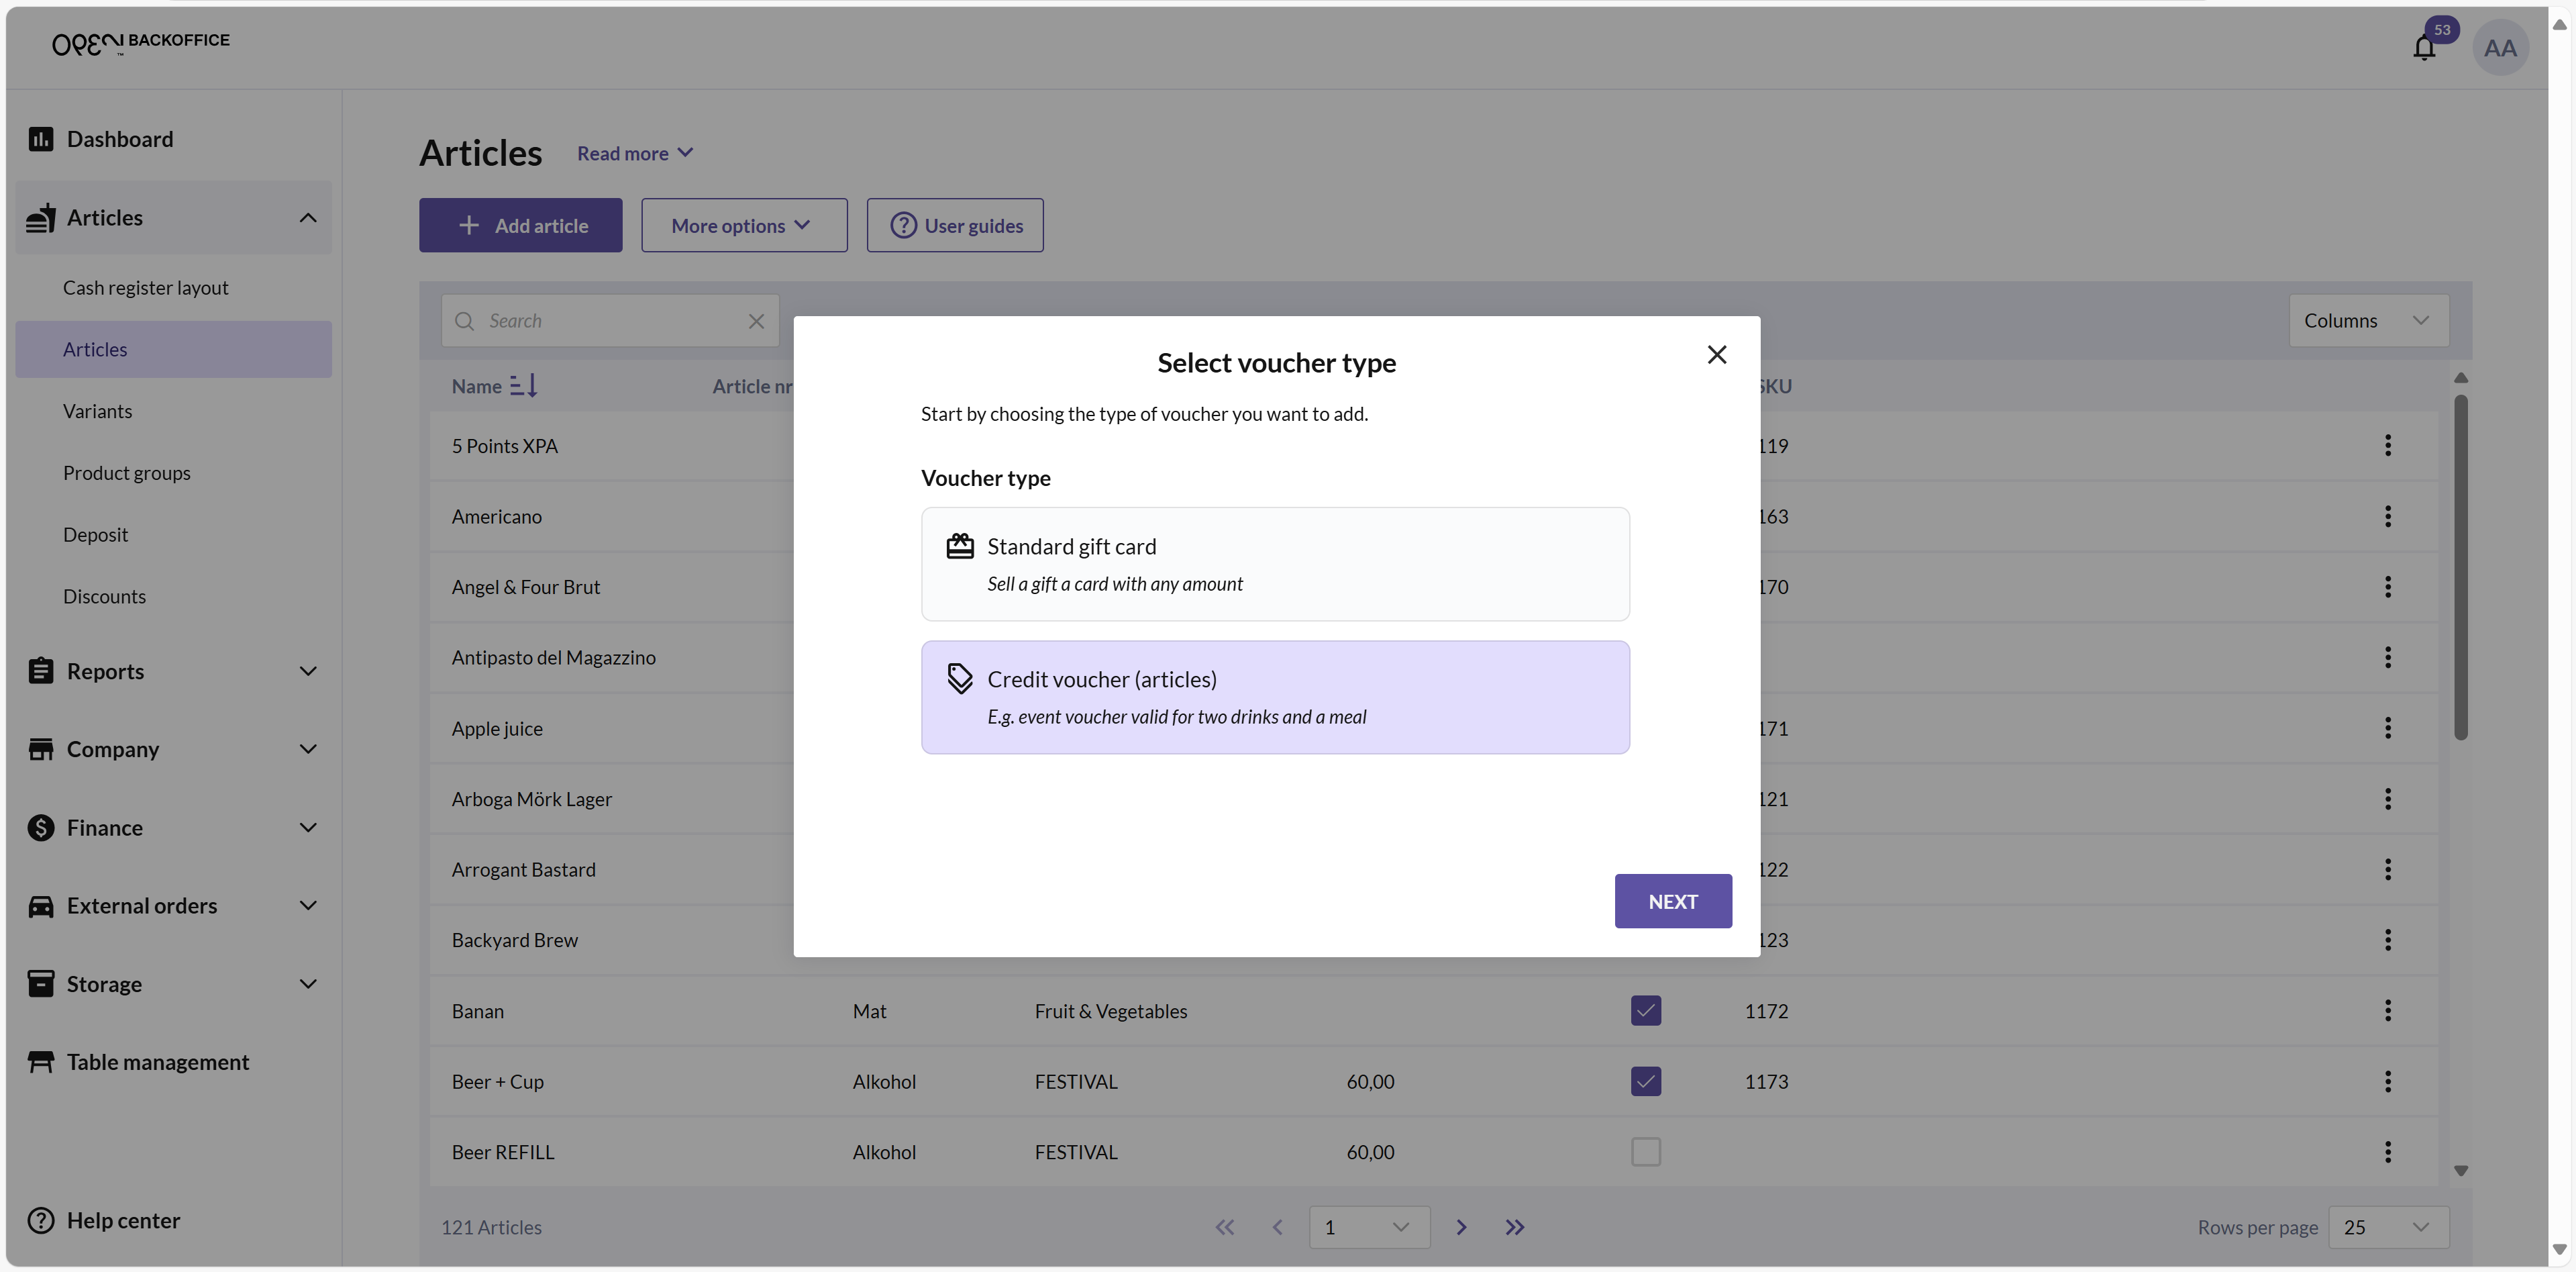
Select voucher type
In the dialog that opens, choose Credit voucher (Articles) and click Next.
Define article groups
Article groups specify what articles the voucher covers and how many articles can be redeemed.

For example, if you want the voucher to include one meal and two drinks, you can create the groups "Food" and "Drinks". For each group, you specify which and how many articles the customer buy with the voucher.
Steps to define groups:
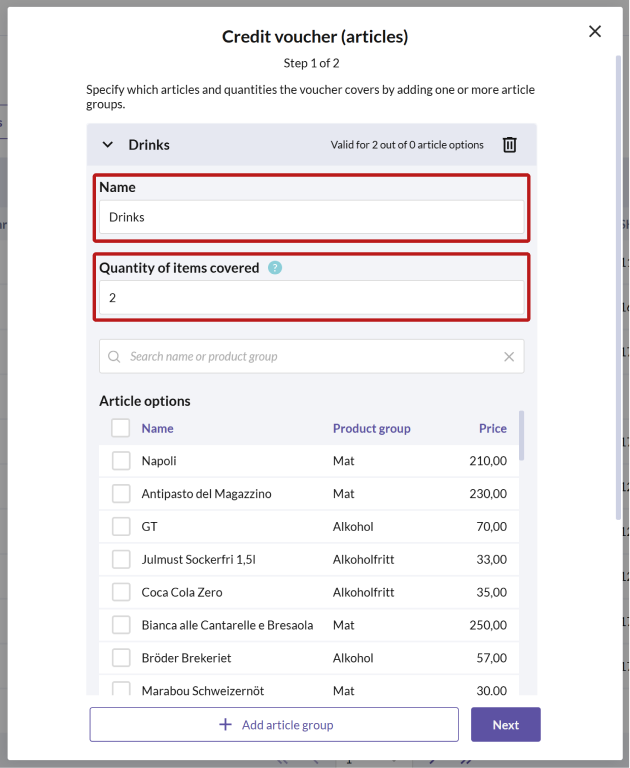
- Enter a name for the group (optional).
- Set the quantity of articles covered per group (e.g. 1 meal, 2 drinks).
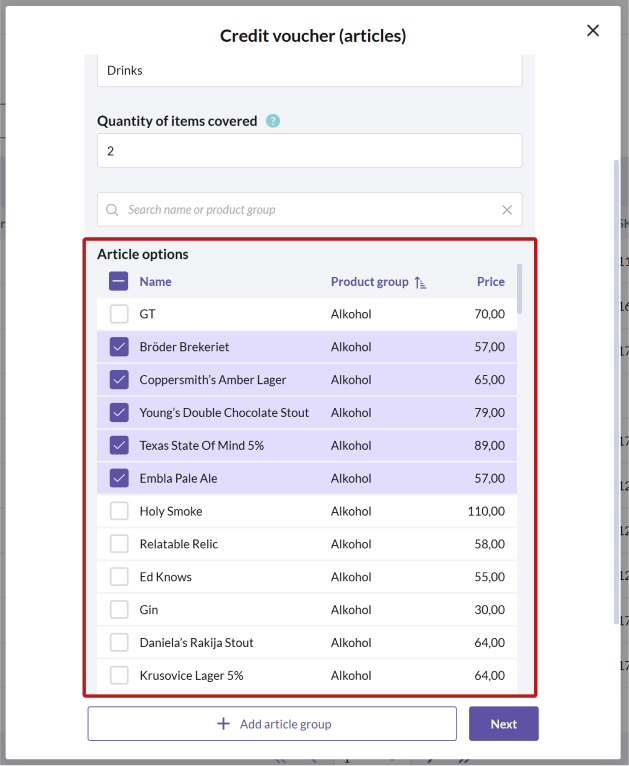
- Select article options, i.e. which articles the customer can choose from.
TIP
To find your articles, use the search bar or sort the articles on the 'Product group column'.
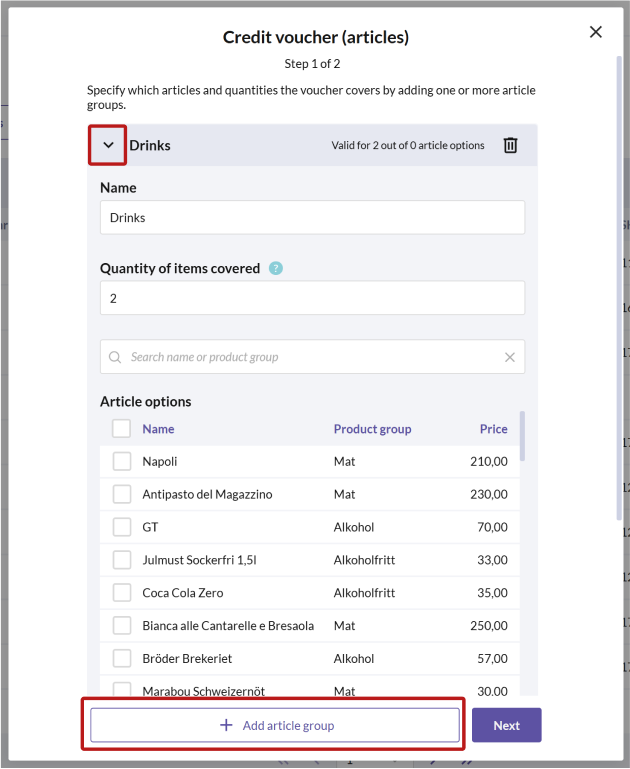
To add more groups: click Add another group. Use the arrows icon in the top left corner to collaps or expand groups.
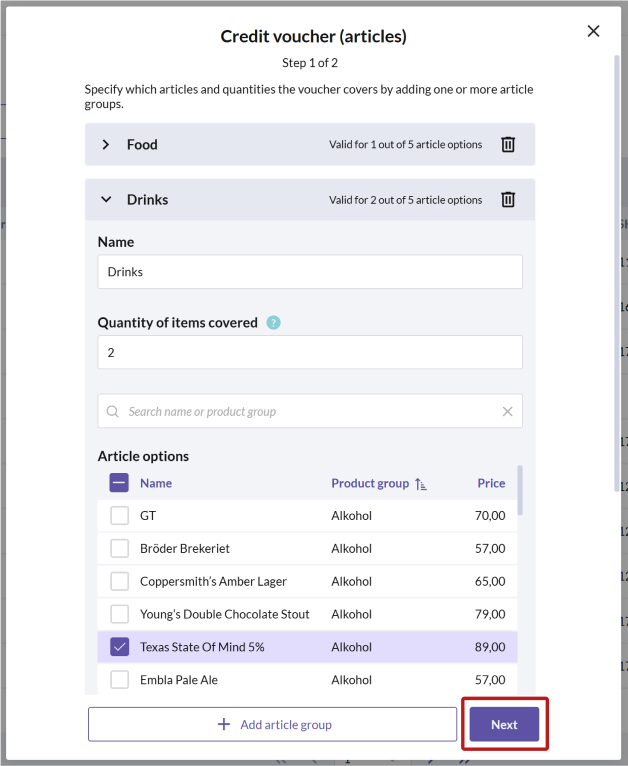
When done, click Next. If something is missing, the system will show error messages for corrections.
Final settings
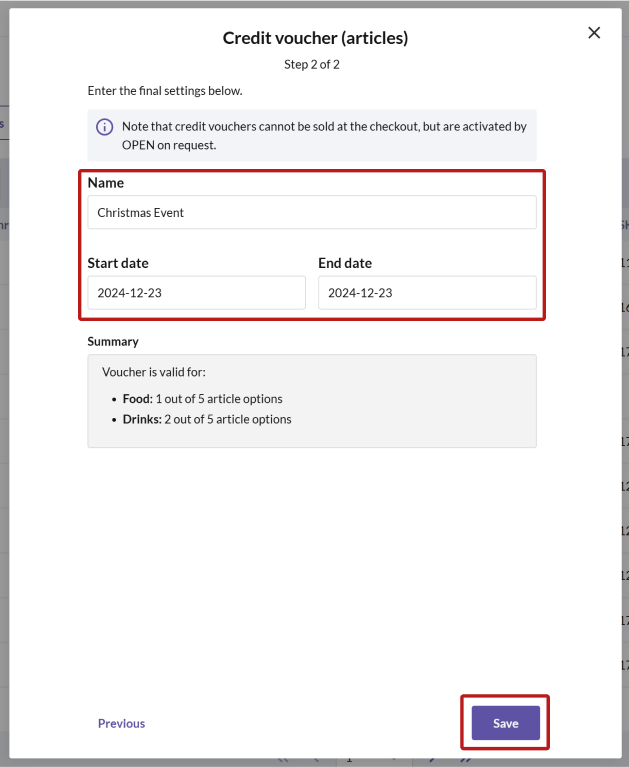
Set the following details:
- Voucher name
- Start & End dates
Click Save once you're done.
Activating credit vouchers
Activating your credit vouchers and connecting them to physical RFID cards or wristbands is done by OPEN on request. Talk to your sales representative for more information.
Redeem credit vouchers at the register
Add products to the cart
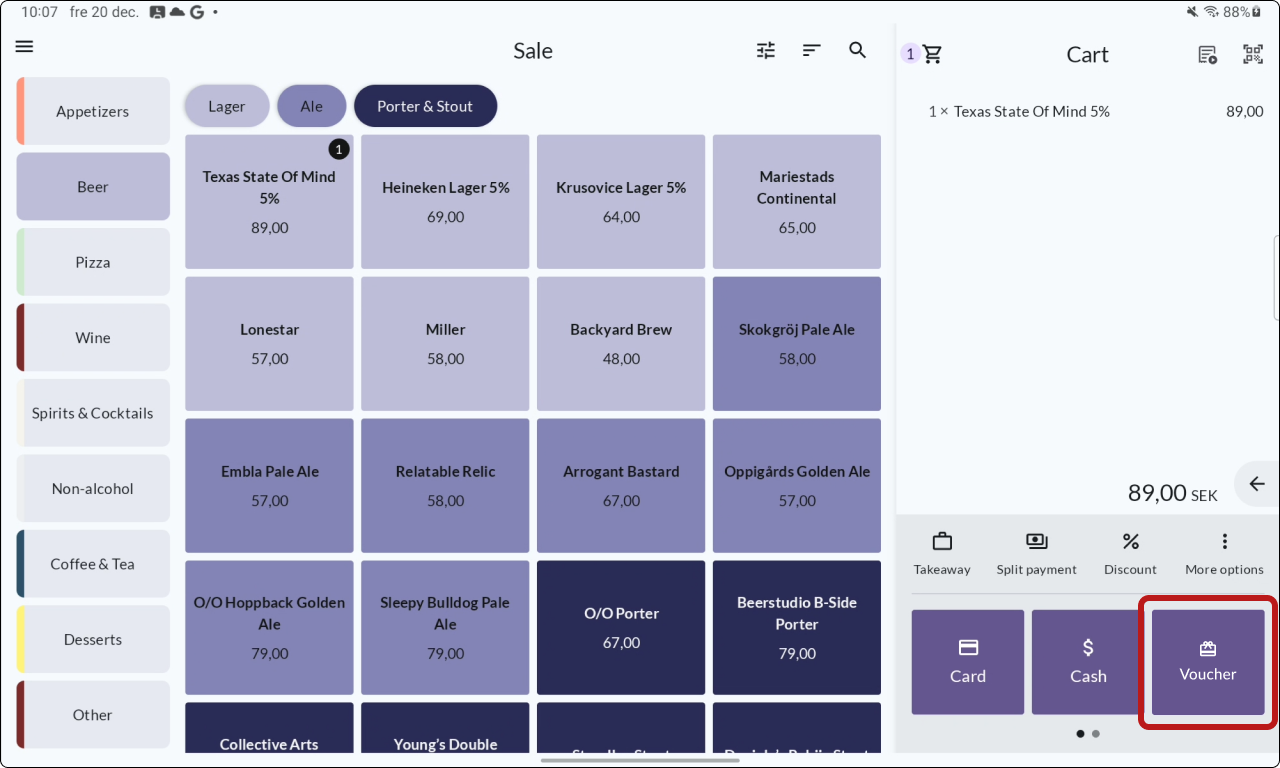
Add the desired product(s) to the cart and select Voucher as the payment method.
Scan the card or bracelet
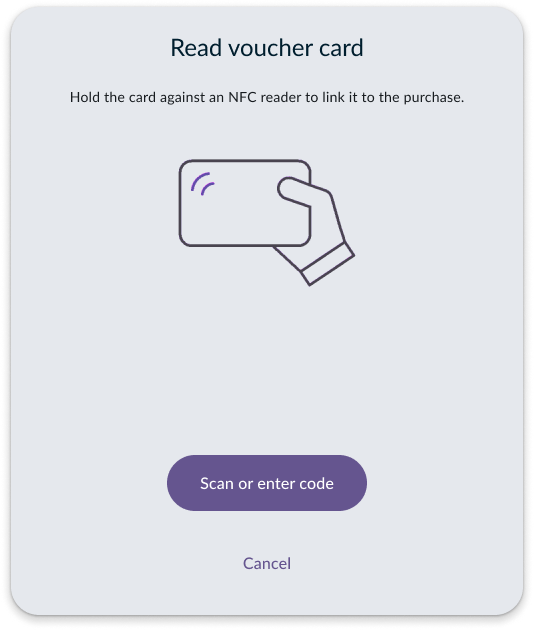
Hold the customer's card or bracelet near the cash register's NFC reader.
Confirm payment
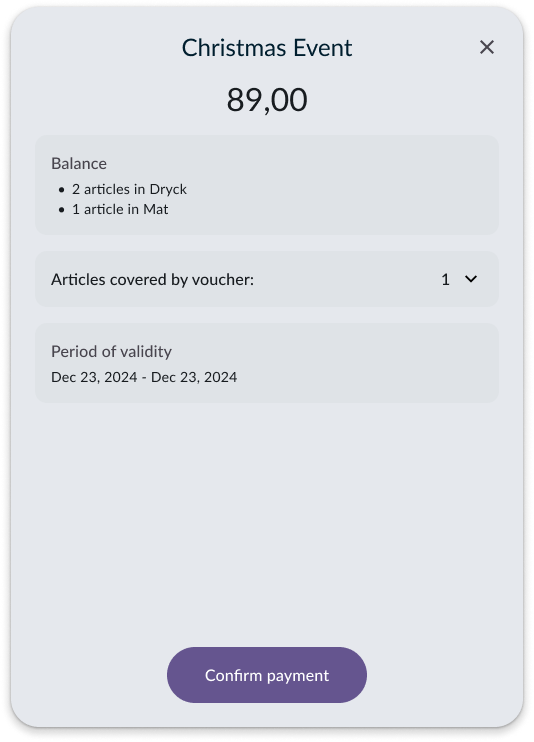
- If balance is sufficient: Click CONFIRM PAYMENT to complete the transaction.
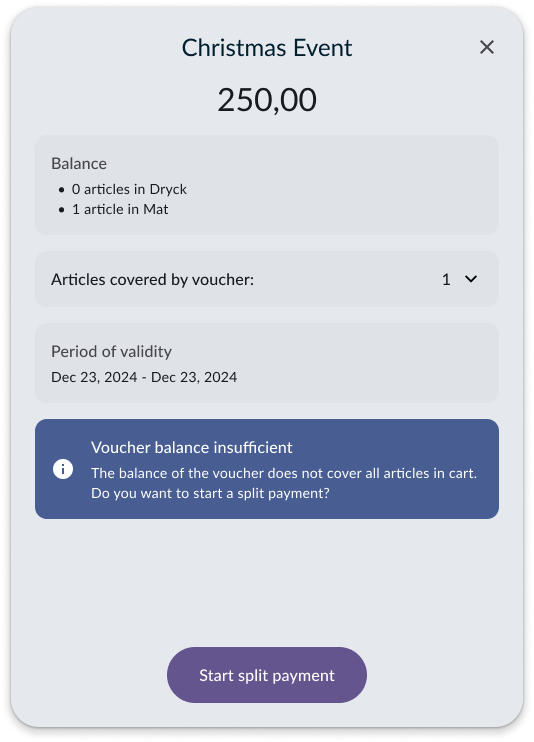
- If balance is insufficient: Initiate a split payment, where the customer can complete the purchase with another payment method.
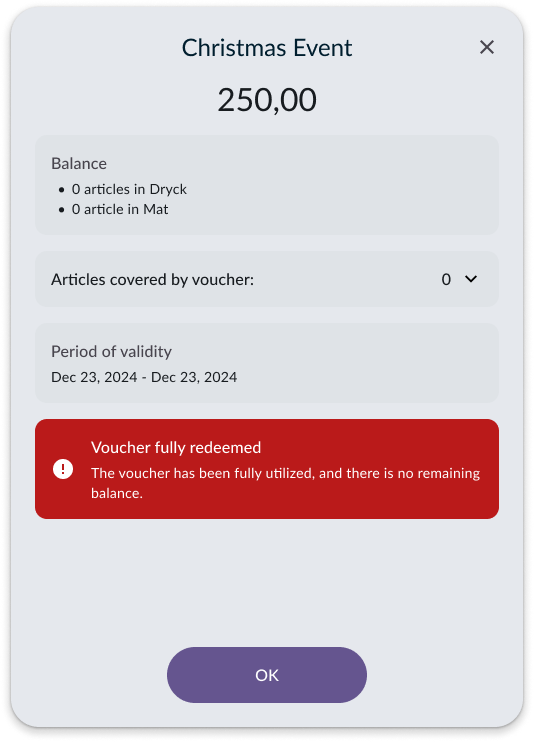
- If voucher is expired or fully consumed: Click OK and choose an alternative payment method.
Offer receipt
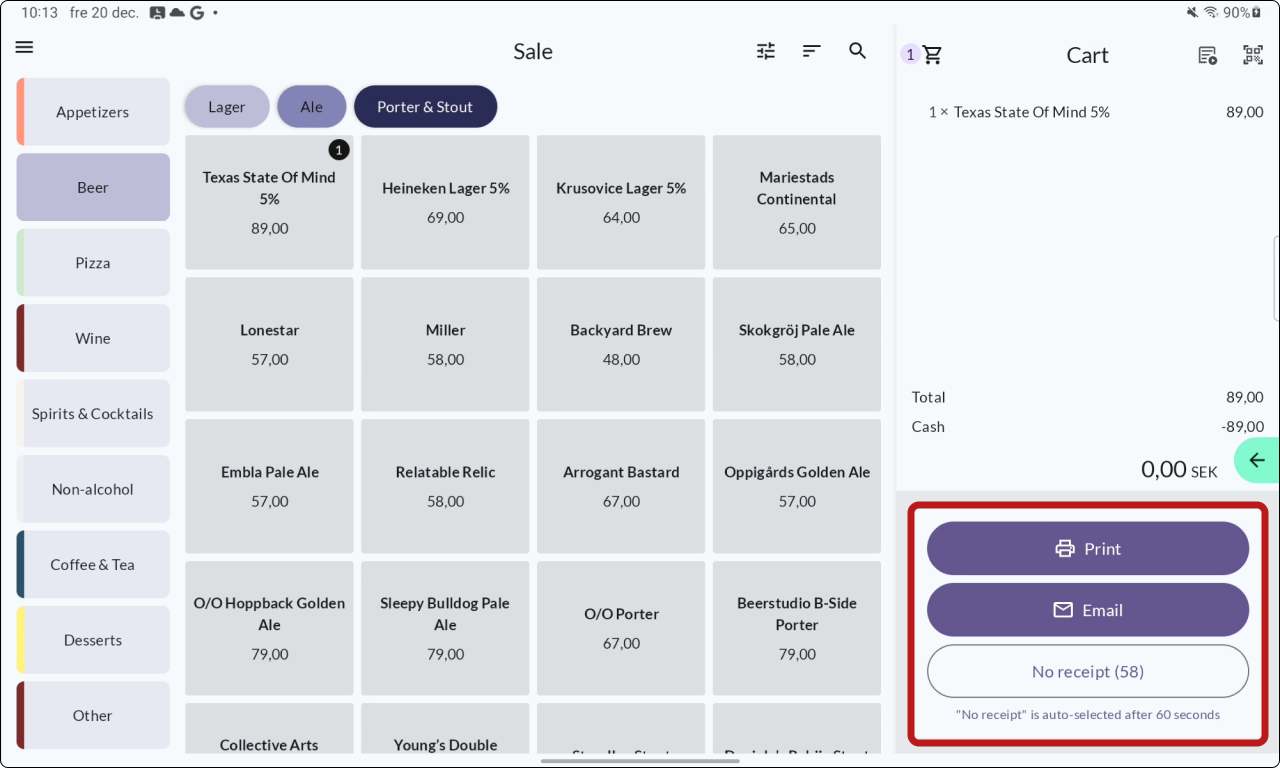
Choose receipt options.
Checking voucher balance
You can check a voucher’s balance at any time without initiating a payment.
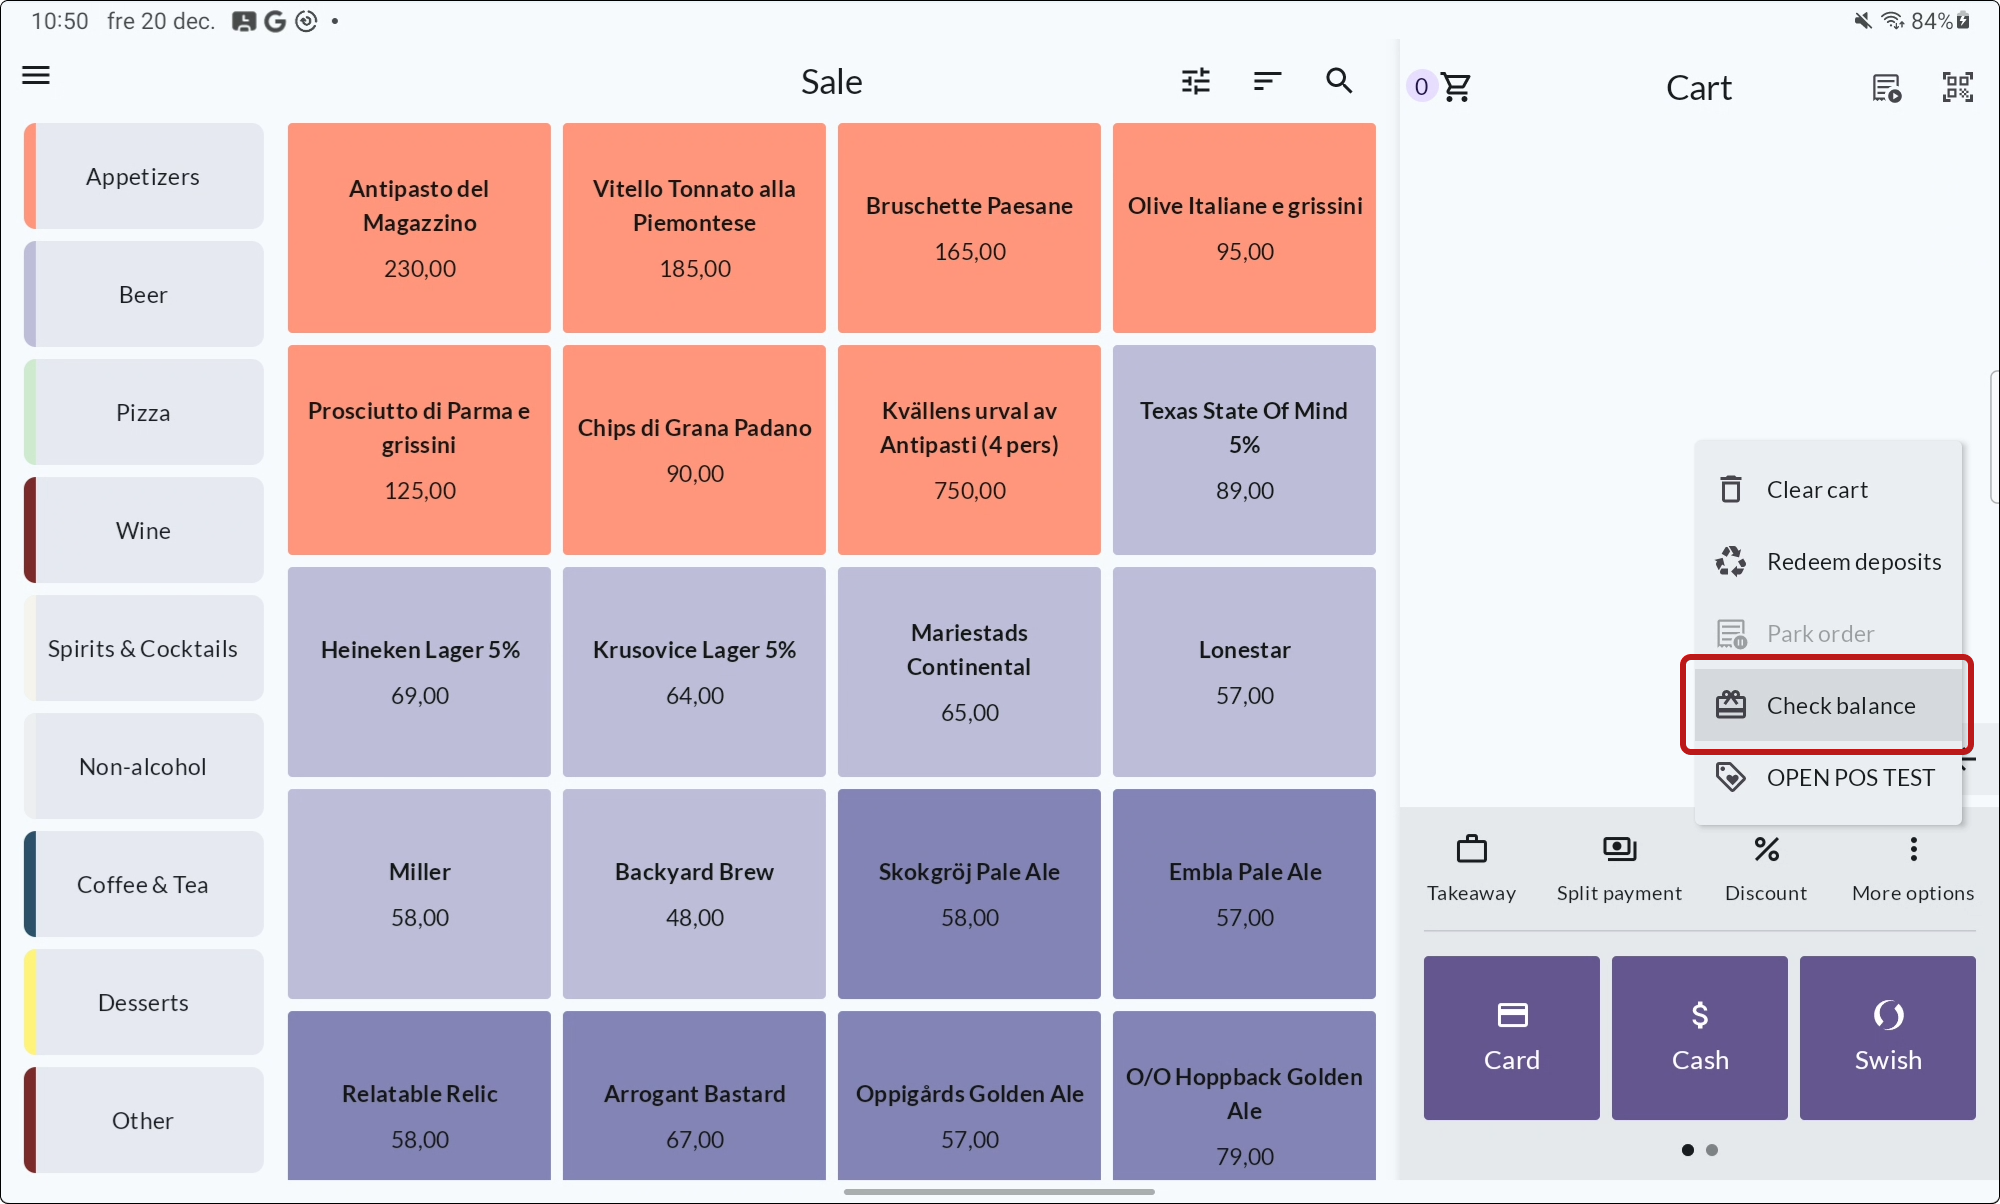
- In the cart, click MORE OPTIONS and select CHECK BALANCE.
Scan the card or bracelet
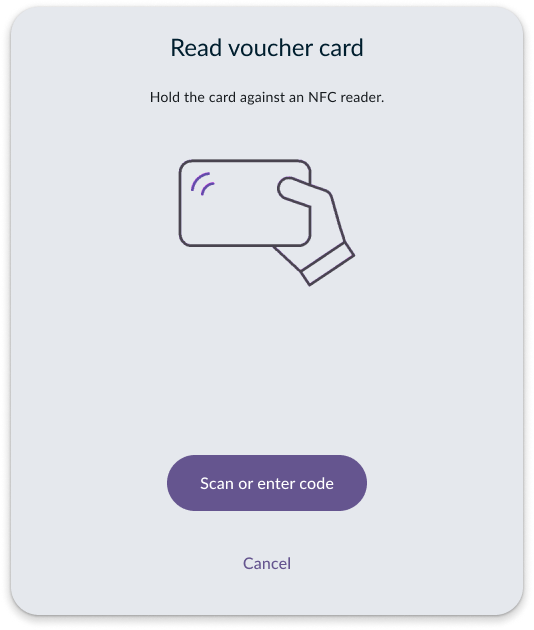
Hold the card or bracelet near the NFC reader.
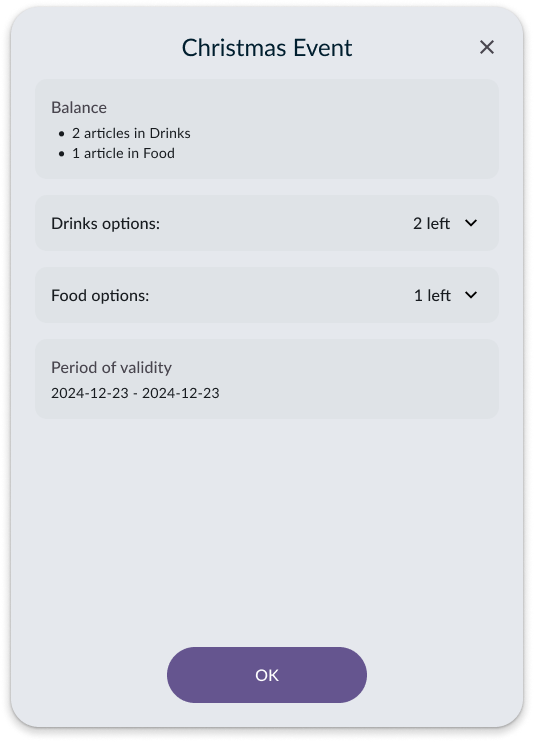
View balance
A status dialog will appear, displaying the voucher's current balance and expiration date.
Invoicing customers after the event
Generate a payment method report for the event day
In BackOffice, go to Reports > Payment method report. Select a date and print or download the report.

Use this report as a basis for invoicing the customer based on the amount spent with these vouchers.