Receipt Countdown Timer
To streamline the payment process, you can set up an automatic handling of the receipt option. This means that after a purchase is completed, the option "No receipt" can be automatically selected after a certain time if the cashier has not already made another selection.
INFO
Note that rules regarding offering receipts still apply, meaning you must always ask the customer if they want a receipt. This feature is simply meant to create a faster workflow at the register.
How it works at the register
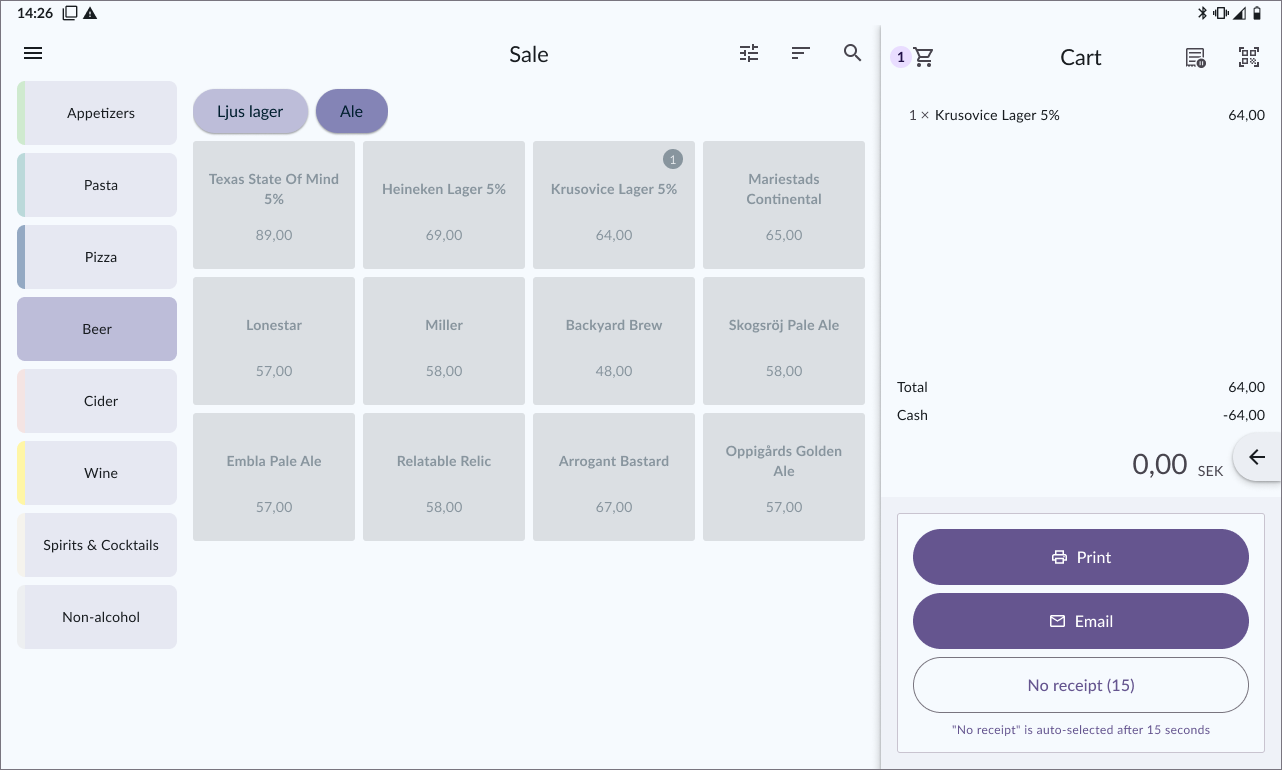
If you have enabled the receipt countdown timer setting, you will see a timer counting down until "No receipt" is automatically selected.

You can choose how long the countdown should be, from 15 seconds to 5 minutes. Of course, it's also possible to disable the timer entirely.
How to manage the setting in BackOffice
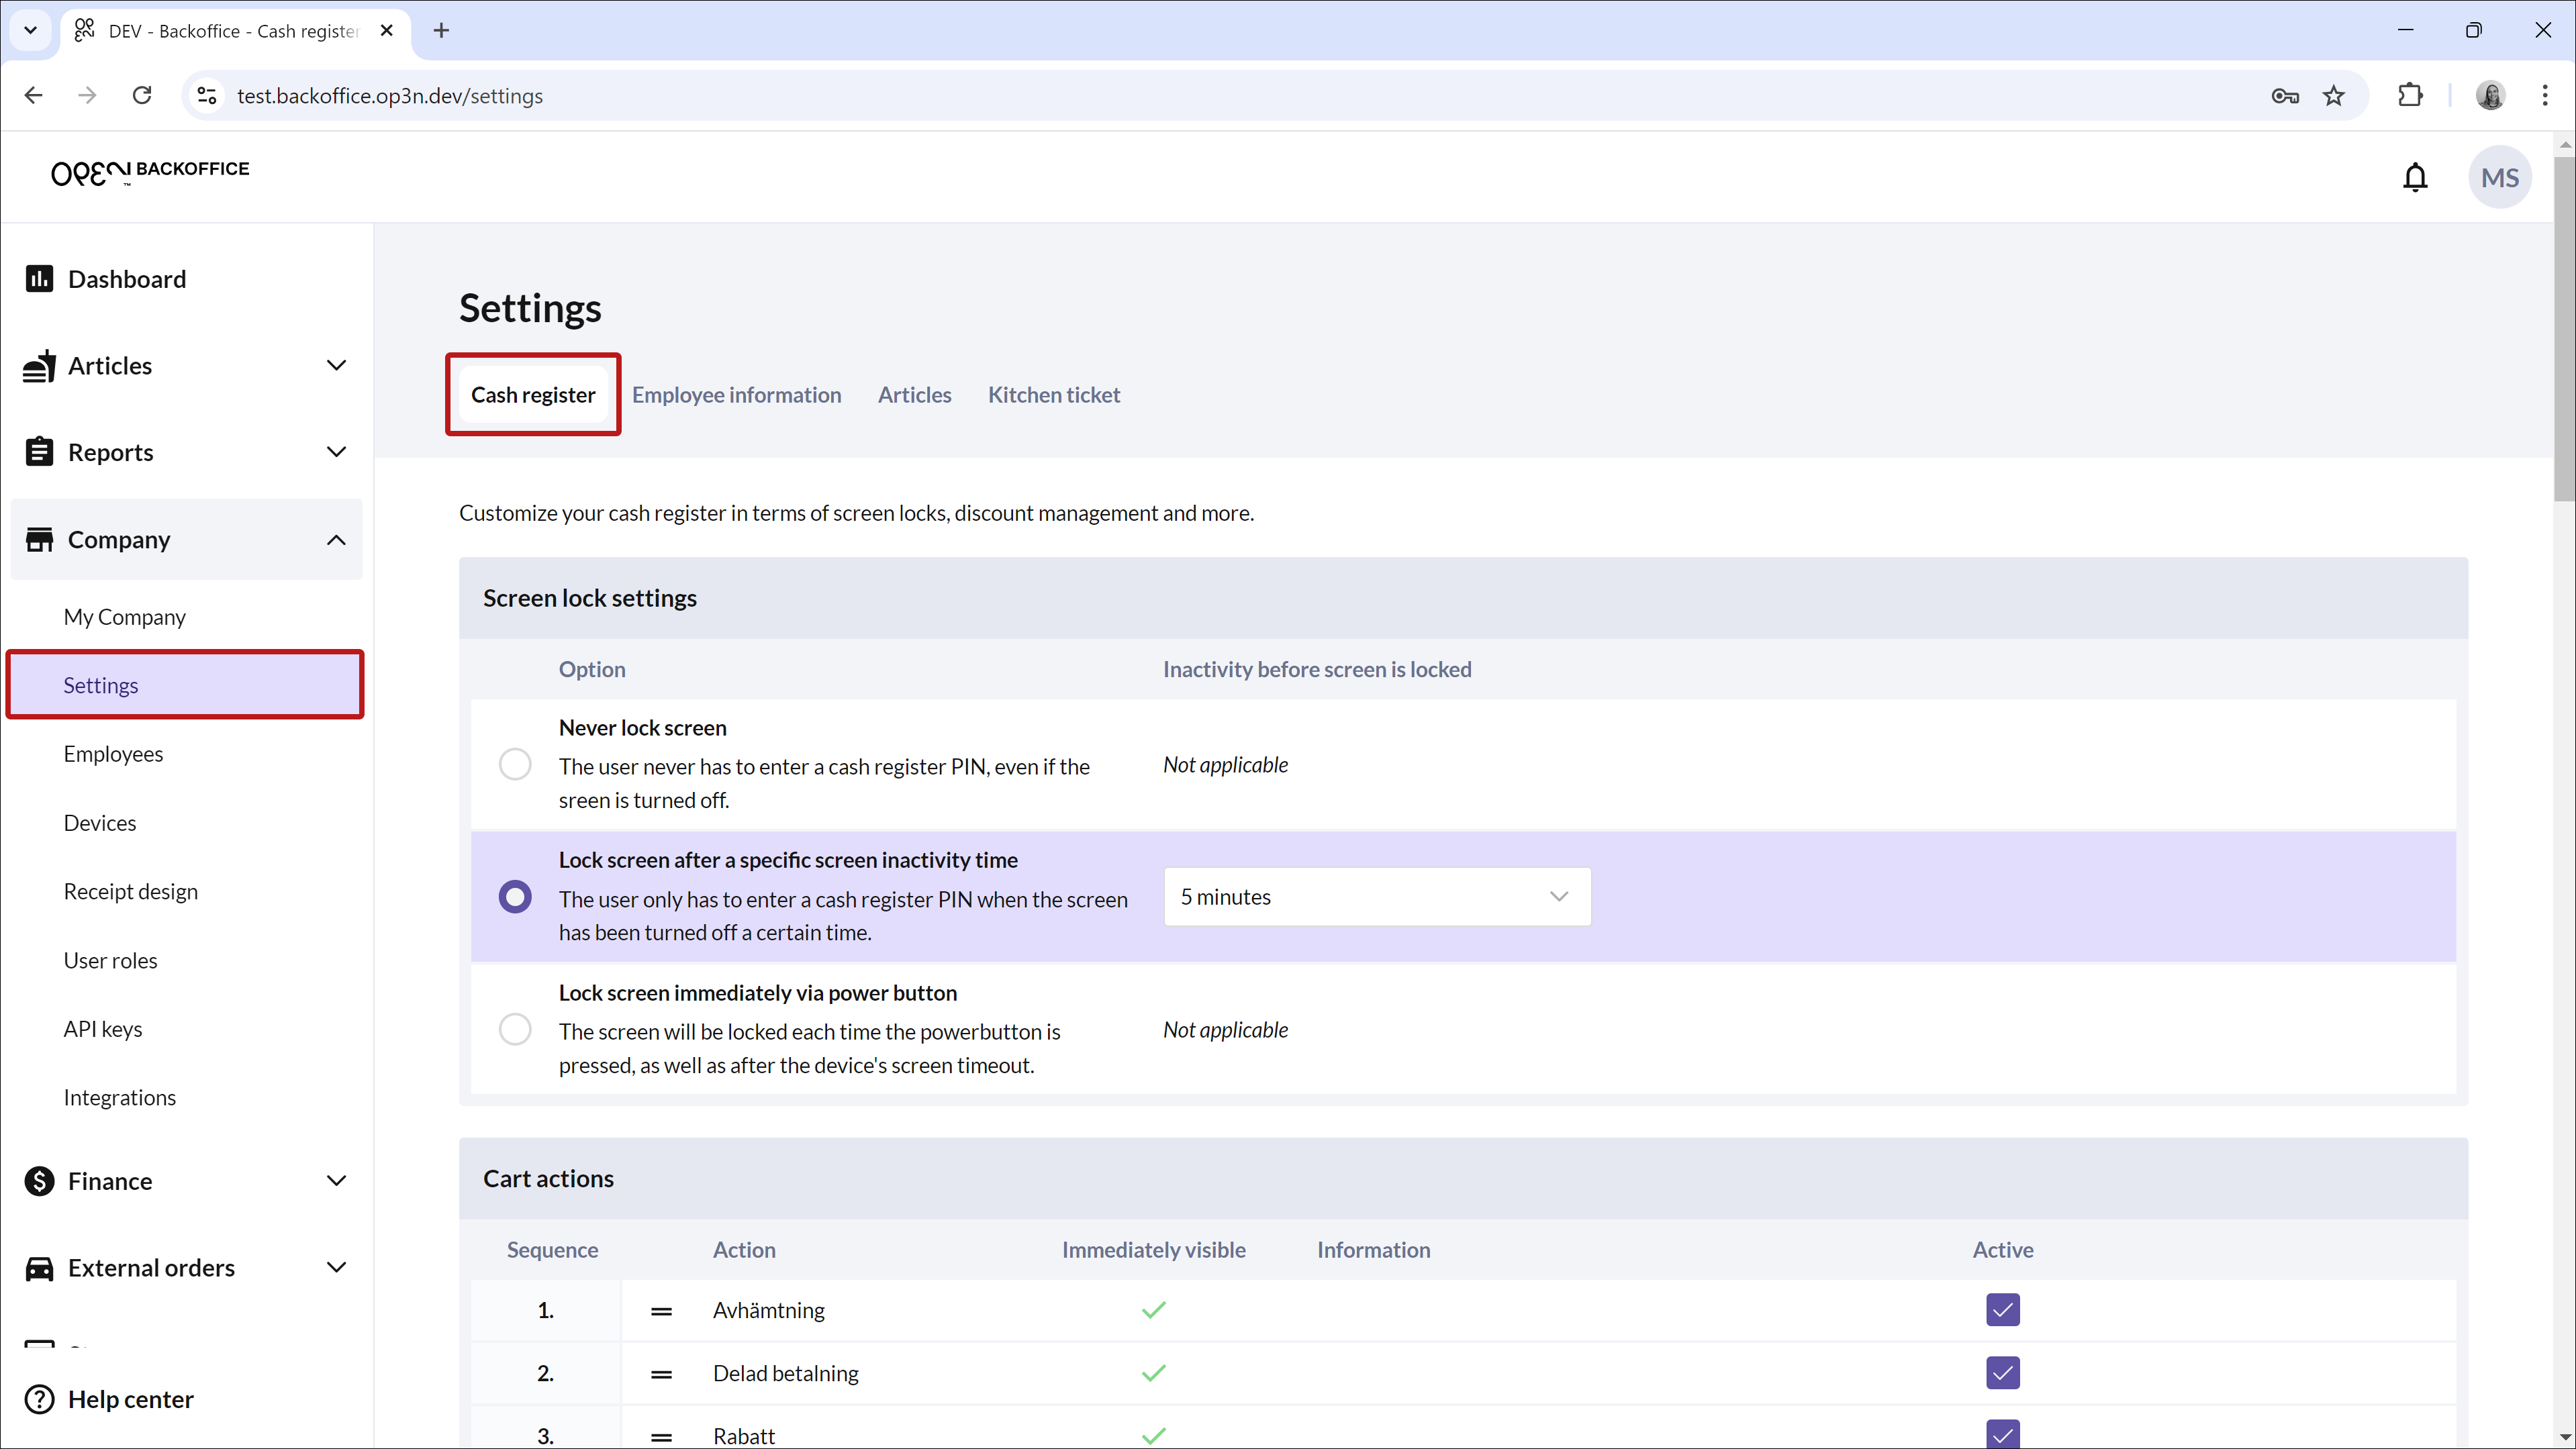
- In the main menu of BackOffice, select Company and go to Settings.
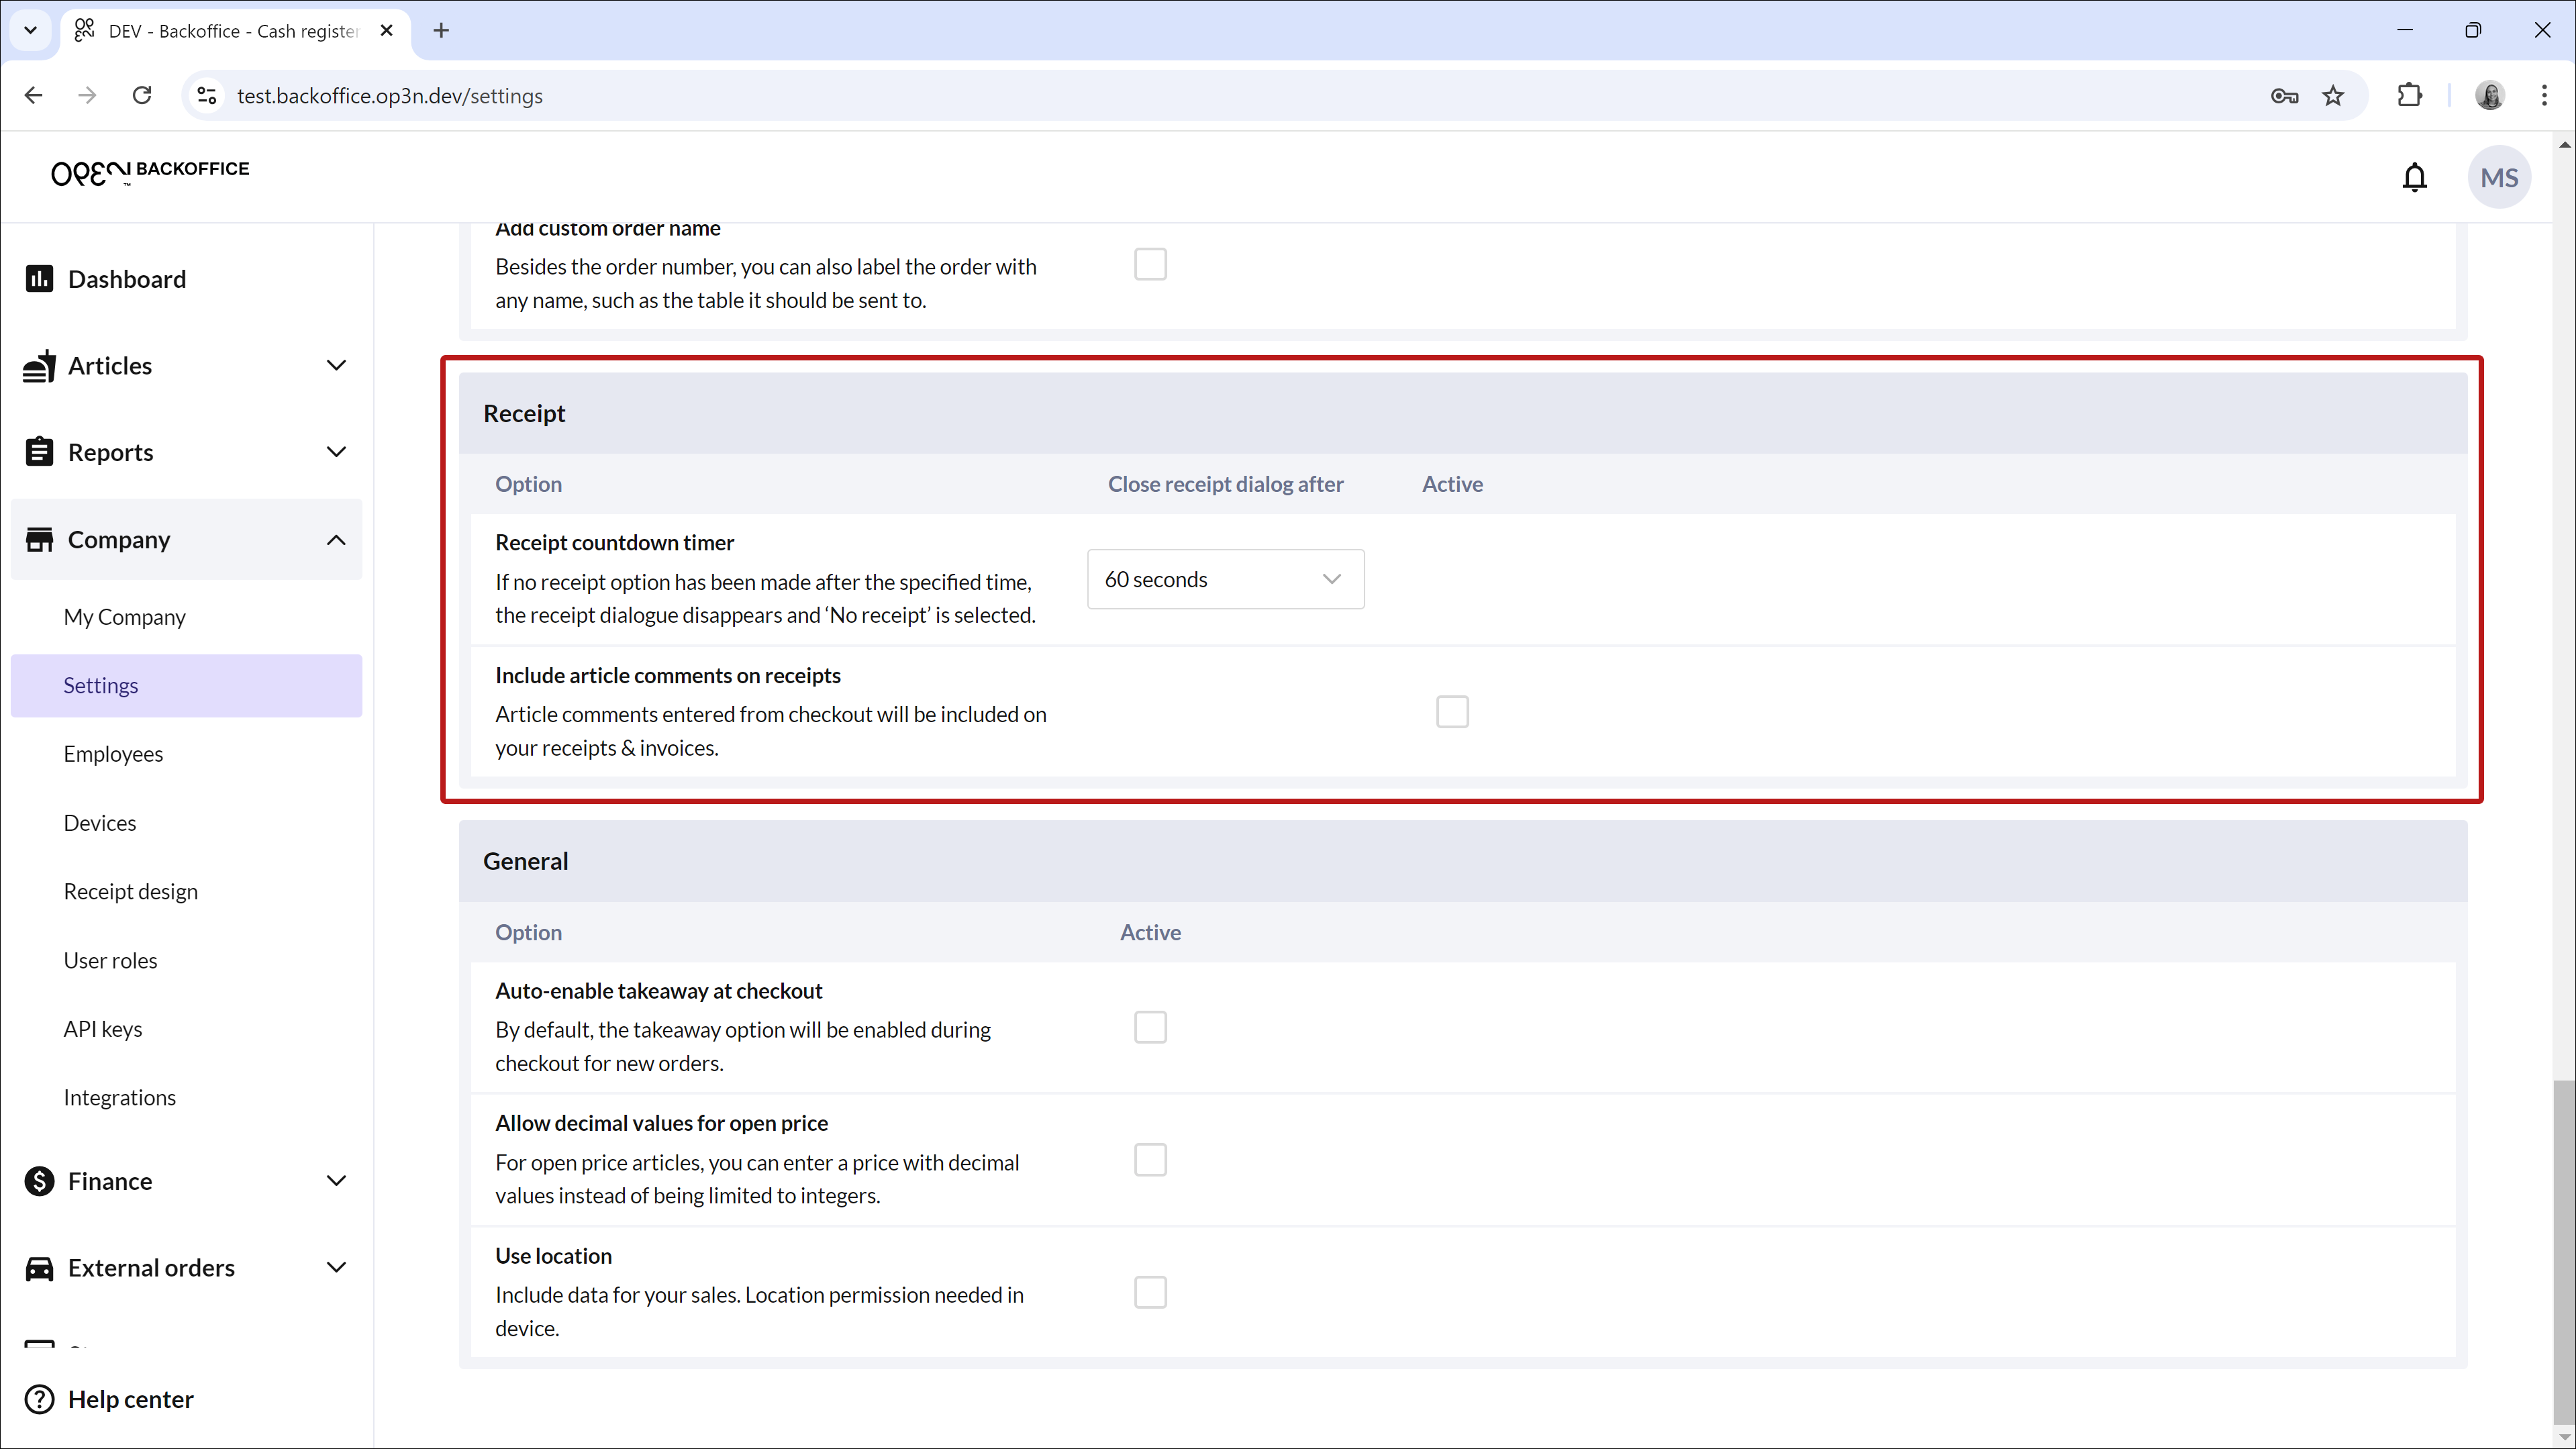
- On the first tab, cash register settings, scroll down to the receipt settings.
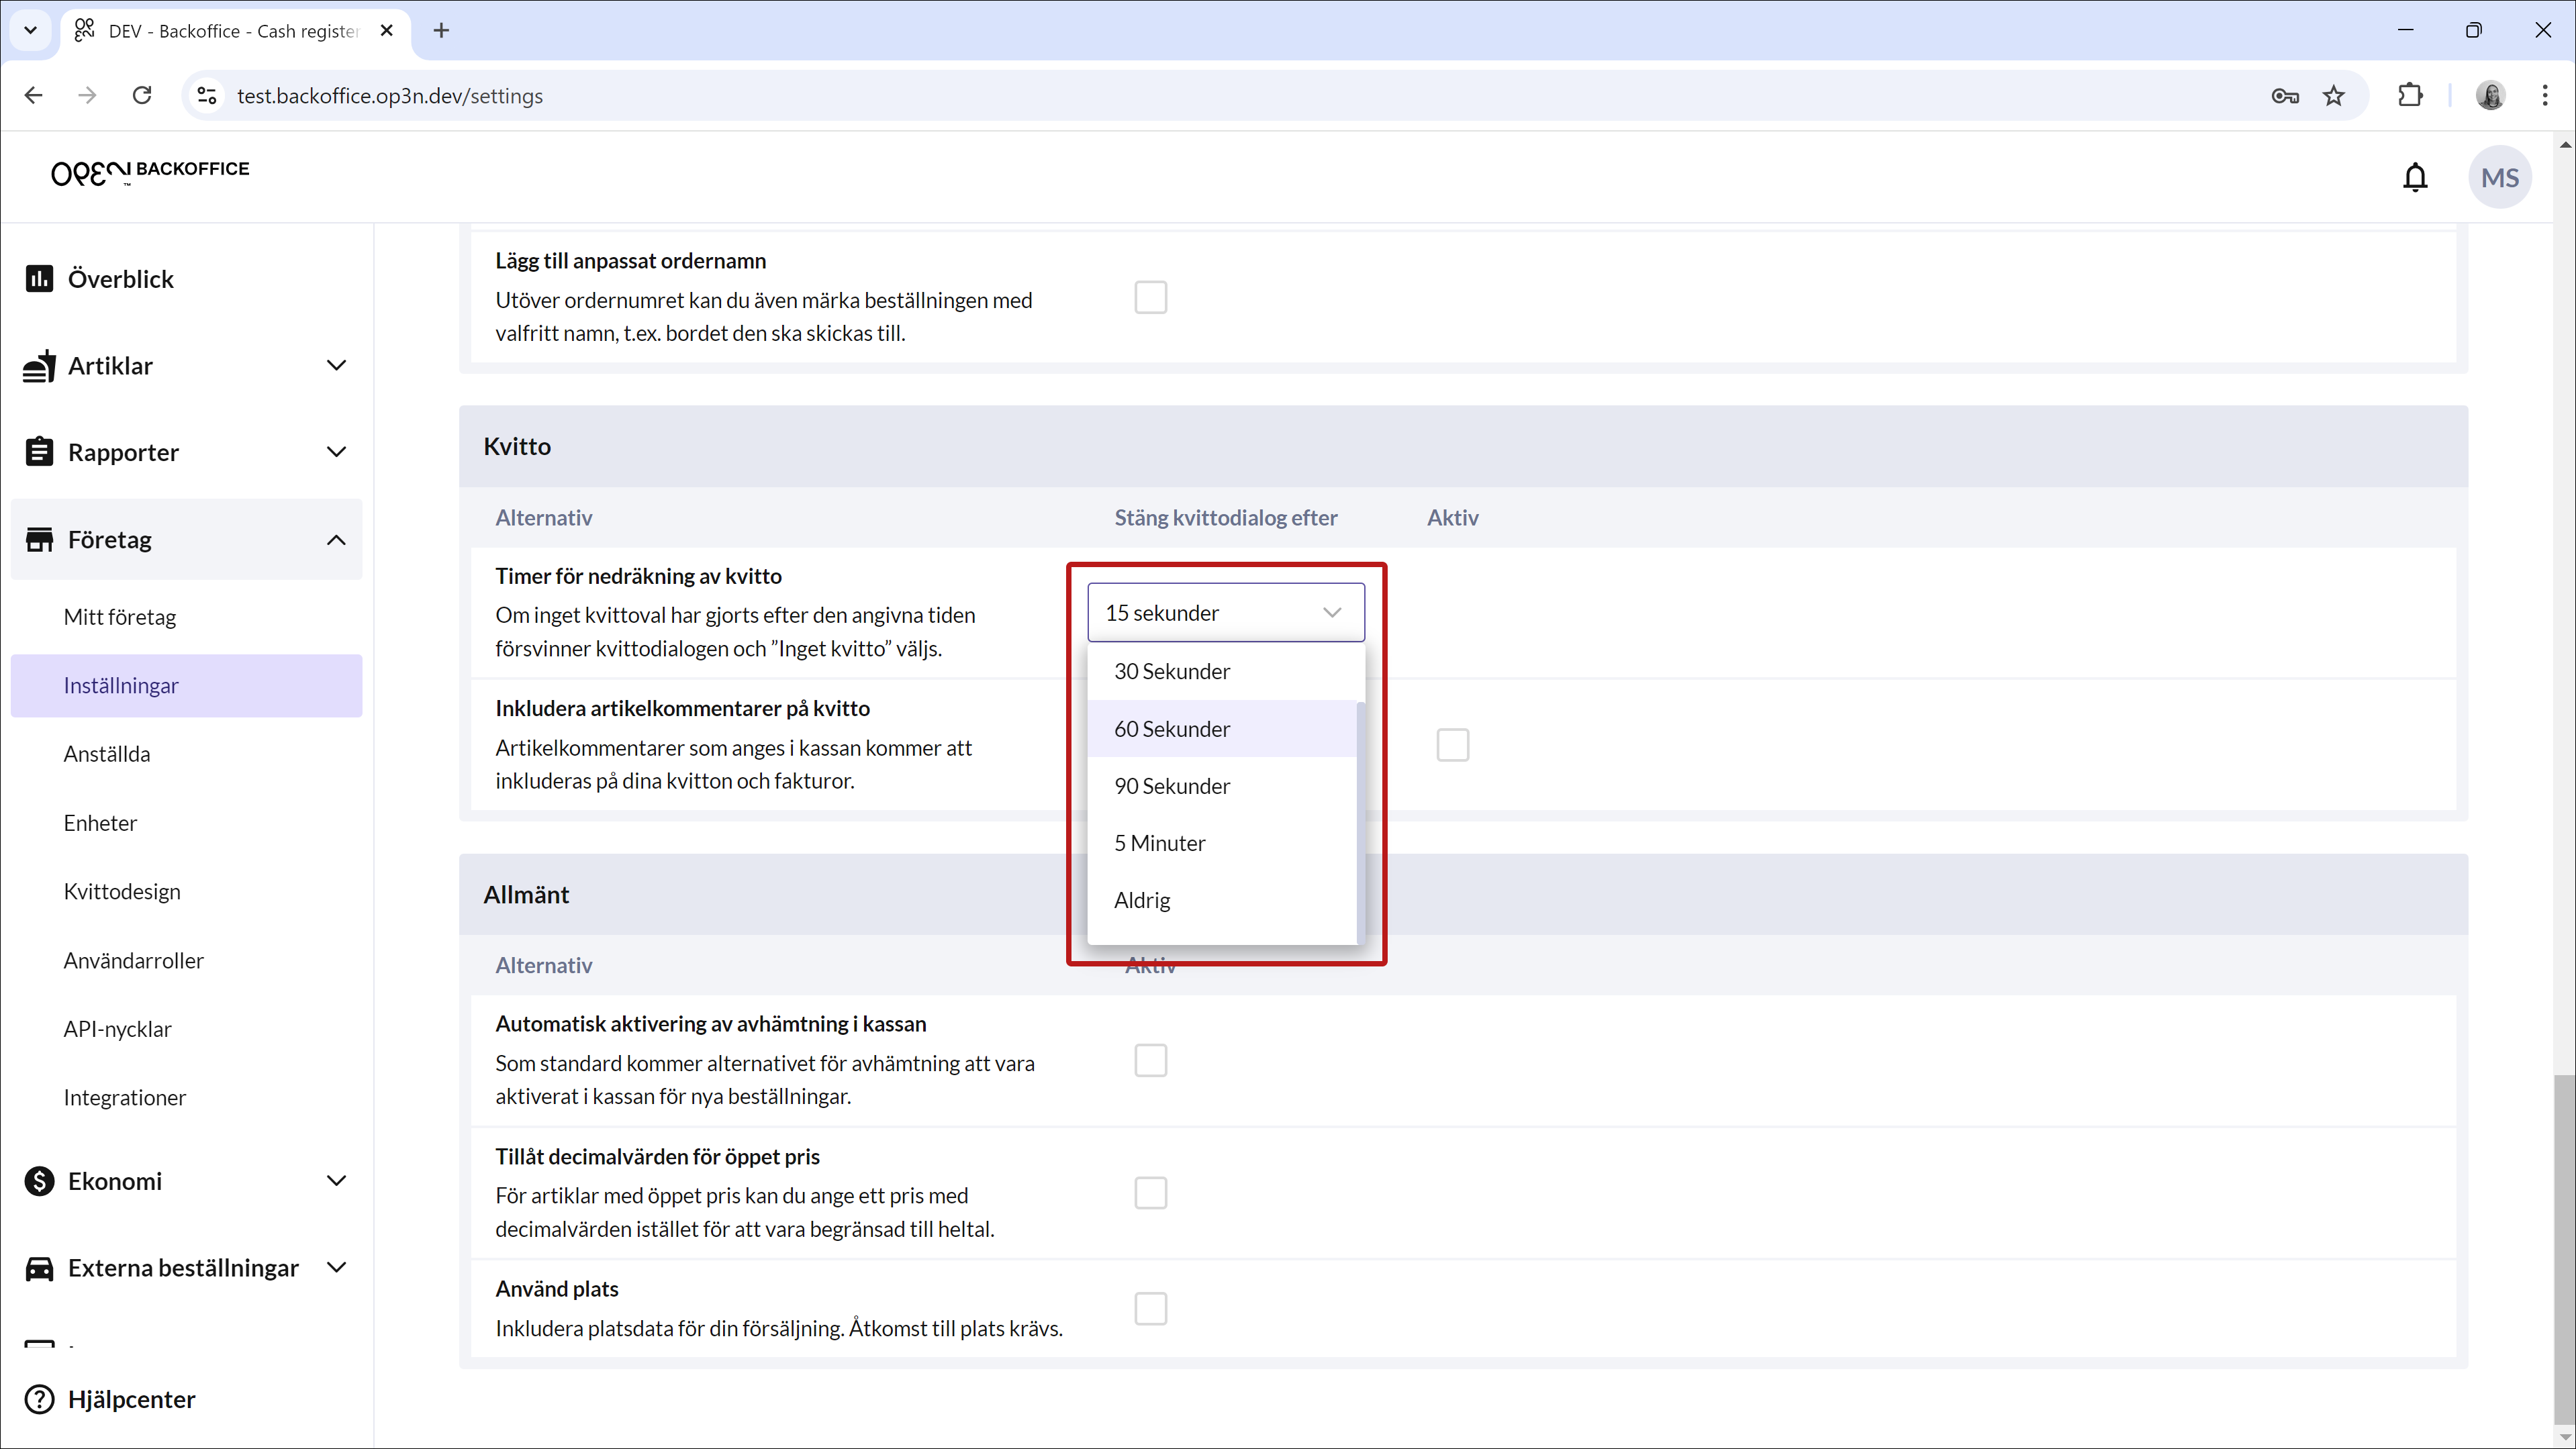
- Under the Receipt Countdown Timer setting, you can select how long it takes for the receipt dialog to close automatically by choosing "No receipt." Choose a suitable option from the list, ranging from 15 seconds to 5 minutes.


TIP If you prefer to handle receipts manually, without a timer, select the last option, "Never".