Cash register layout
How to use the editing mode
In the editing mode, you can change the color and rearrange your article cards. You can also rearrange the categories in the menu on the left and create your own menu category page.
To enter the editing mode:
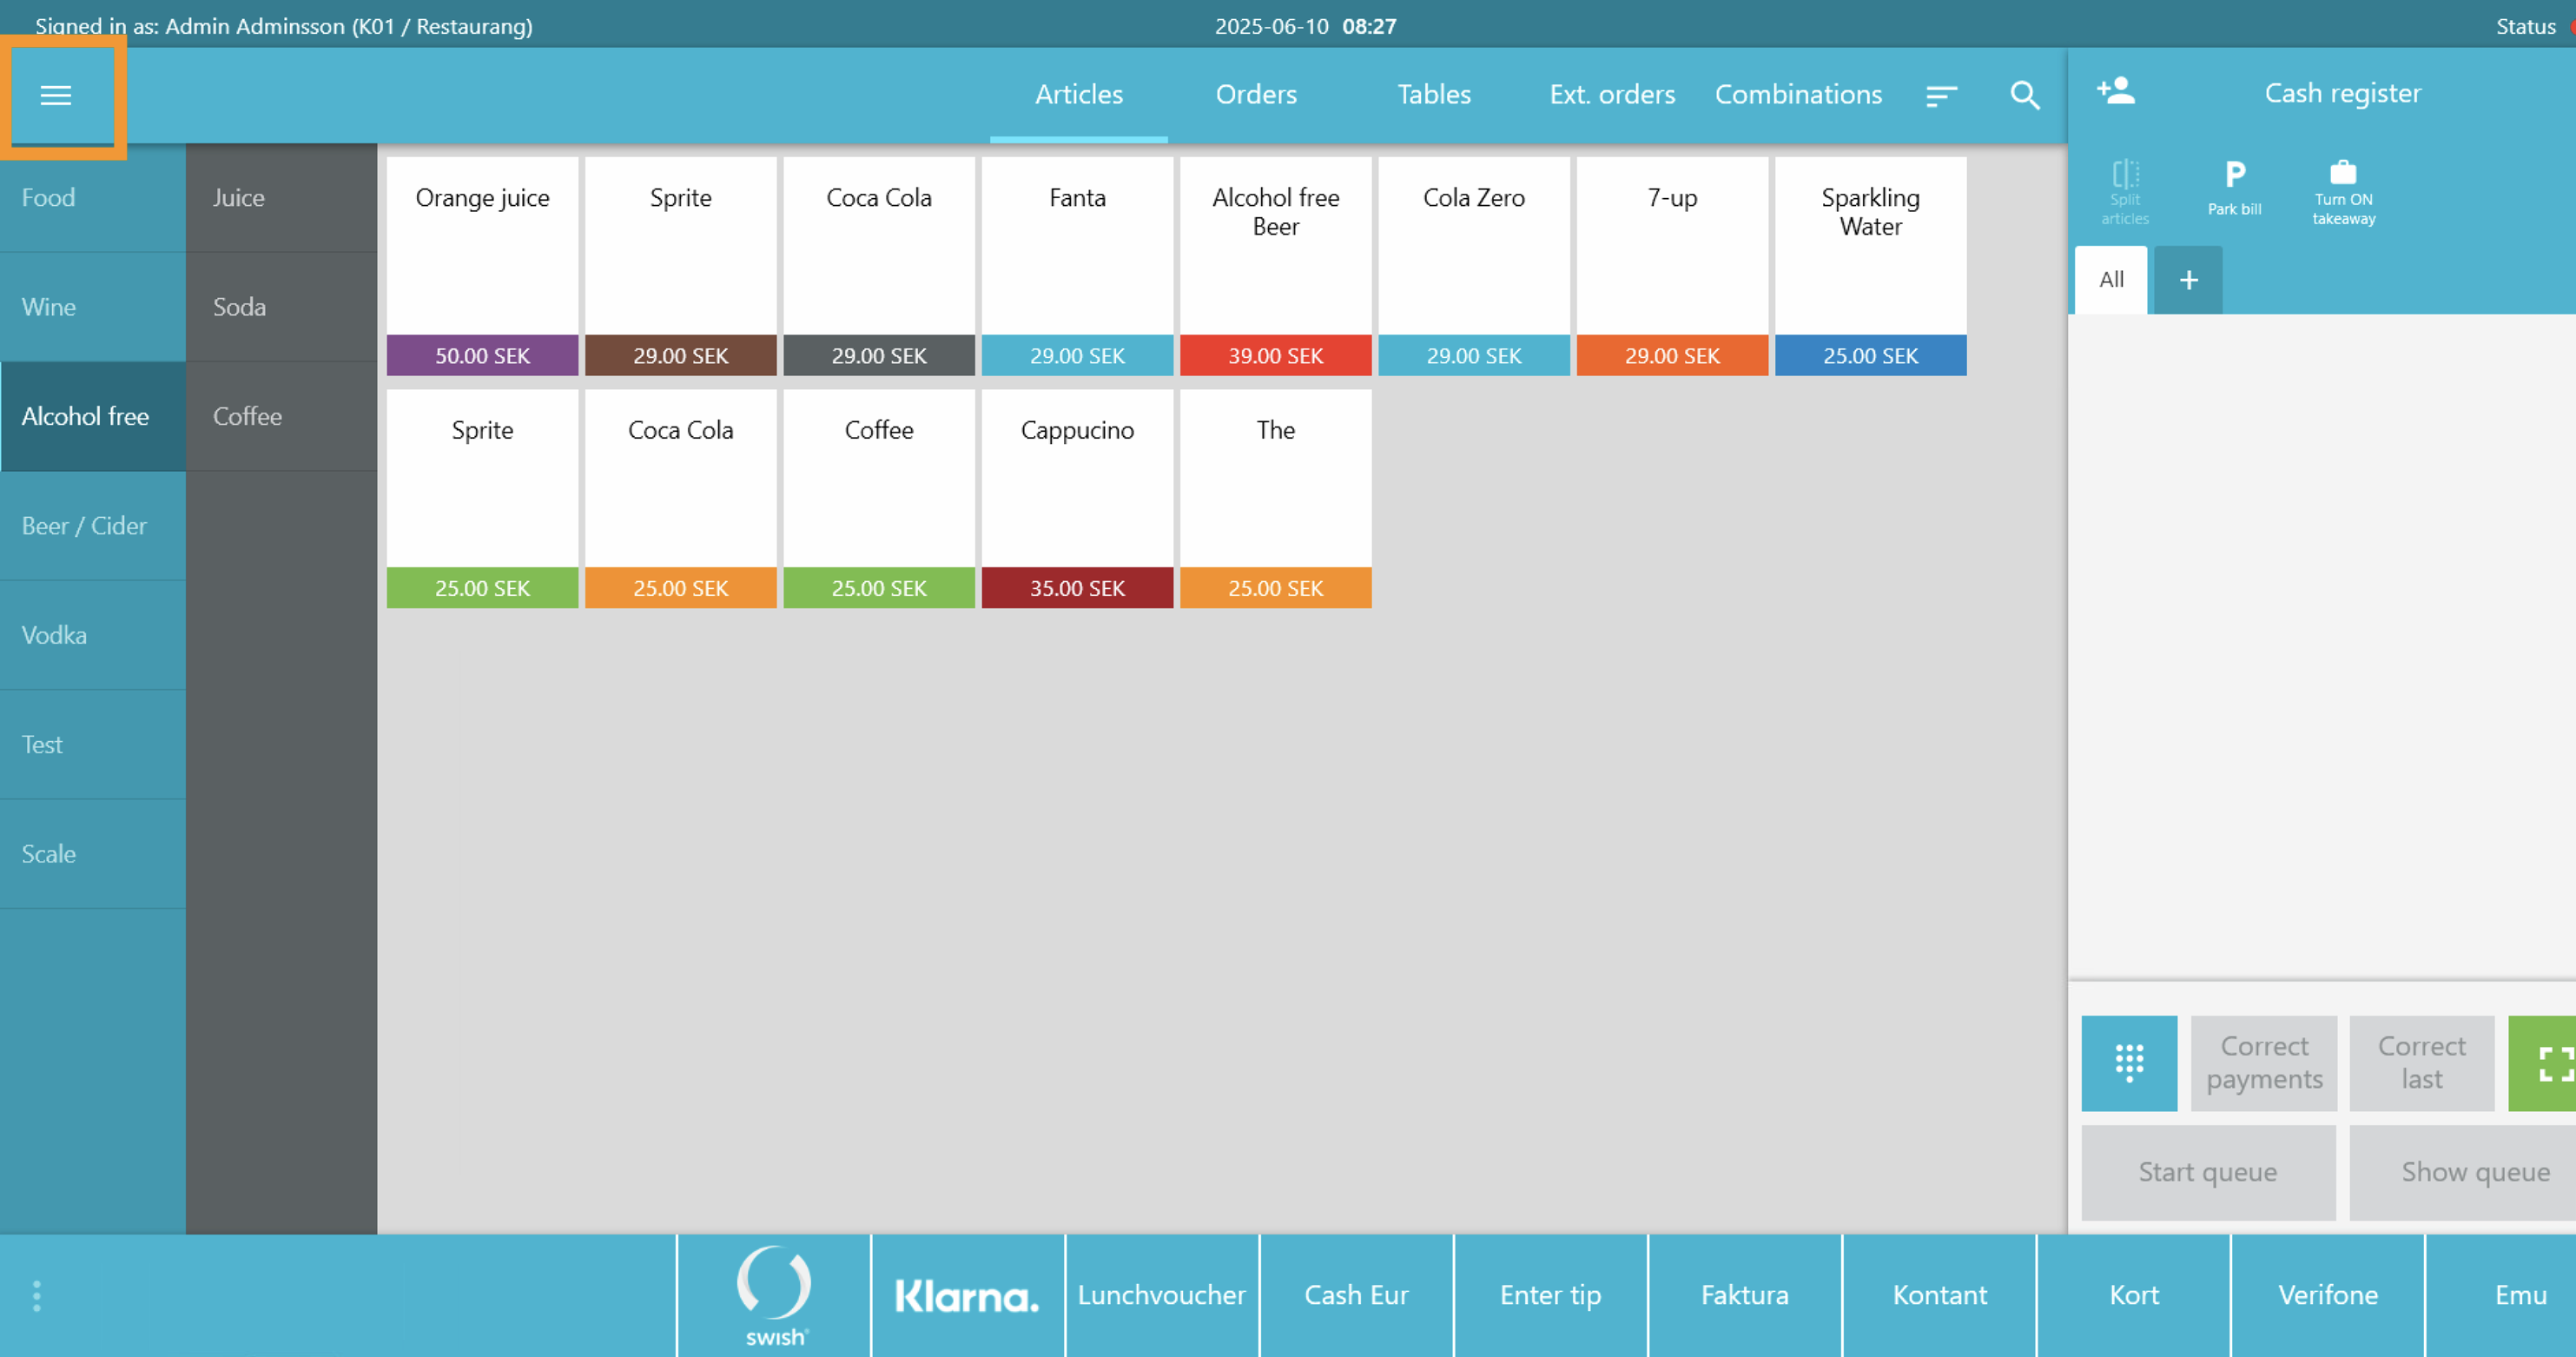
- Click the hamburger menu in the top left corner.
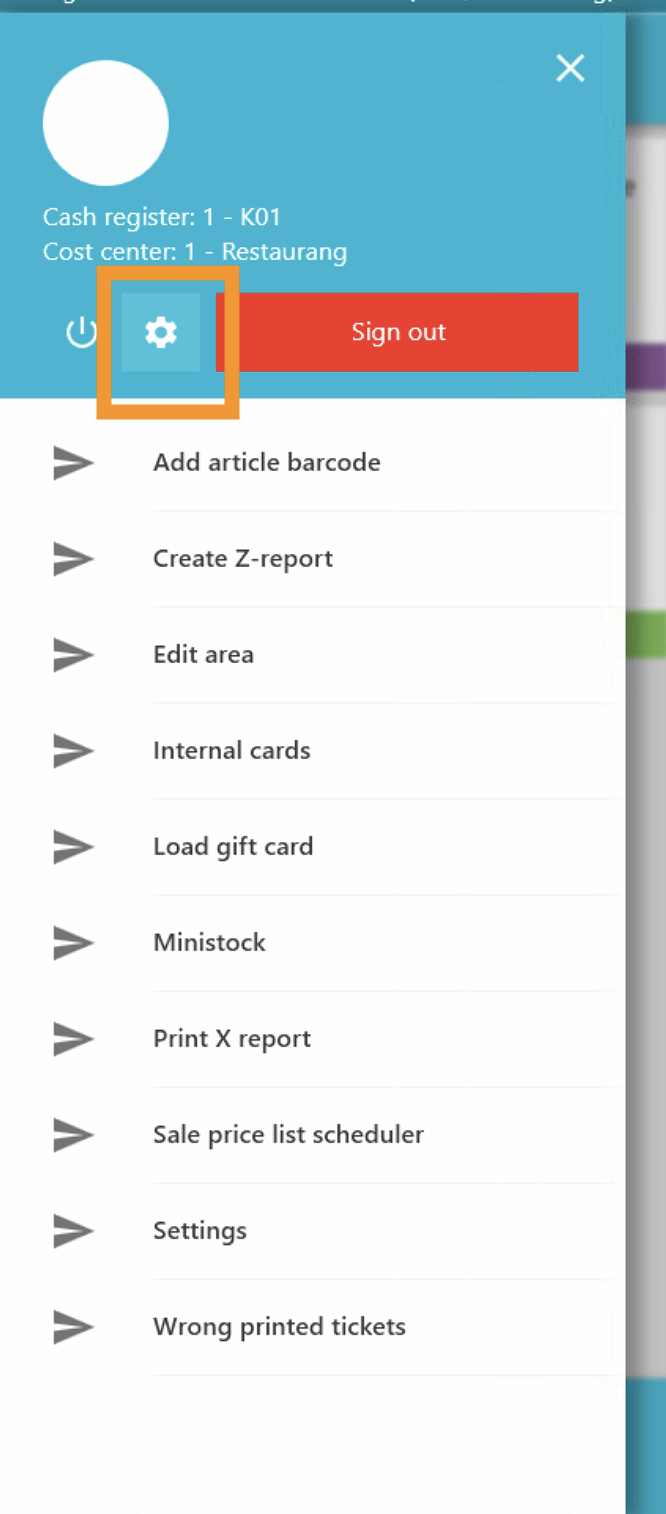
- Click on the gear icon that appears inside the menu.
- You are now in the editing mode.
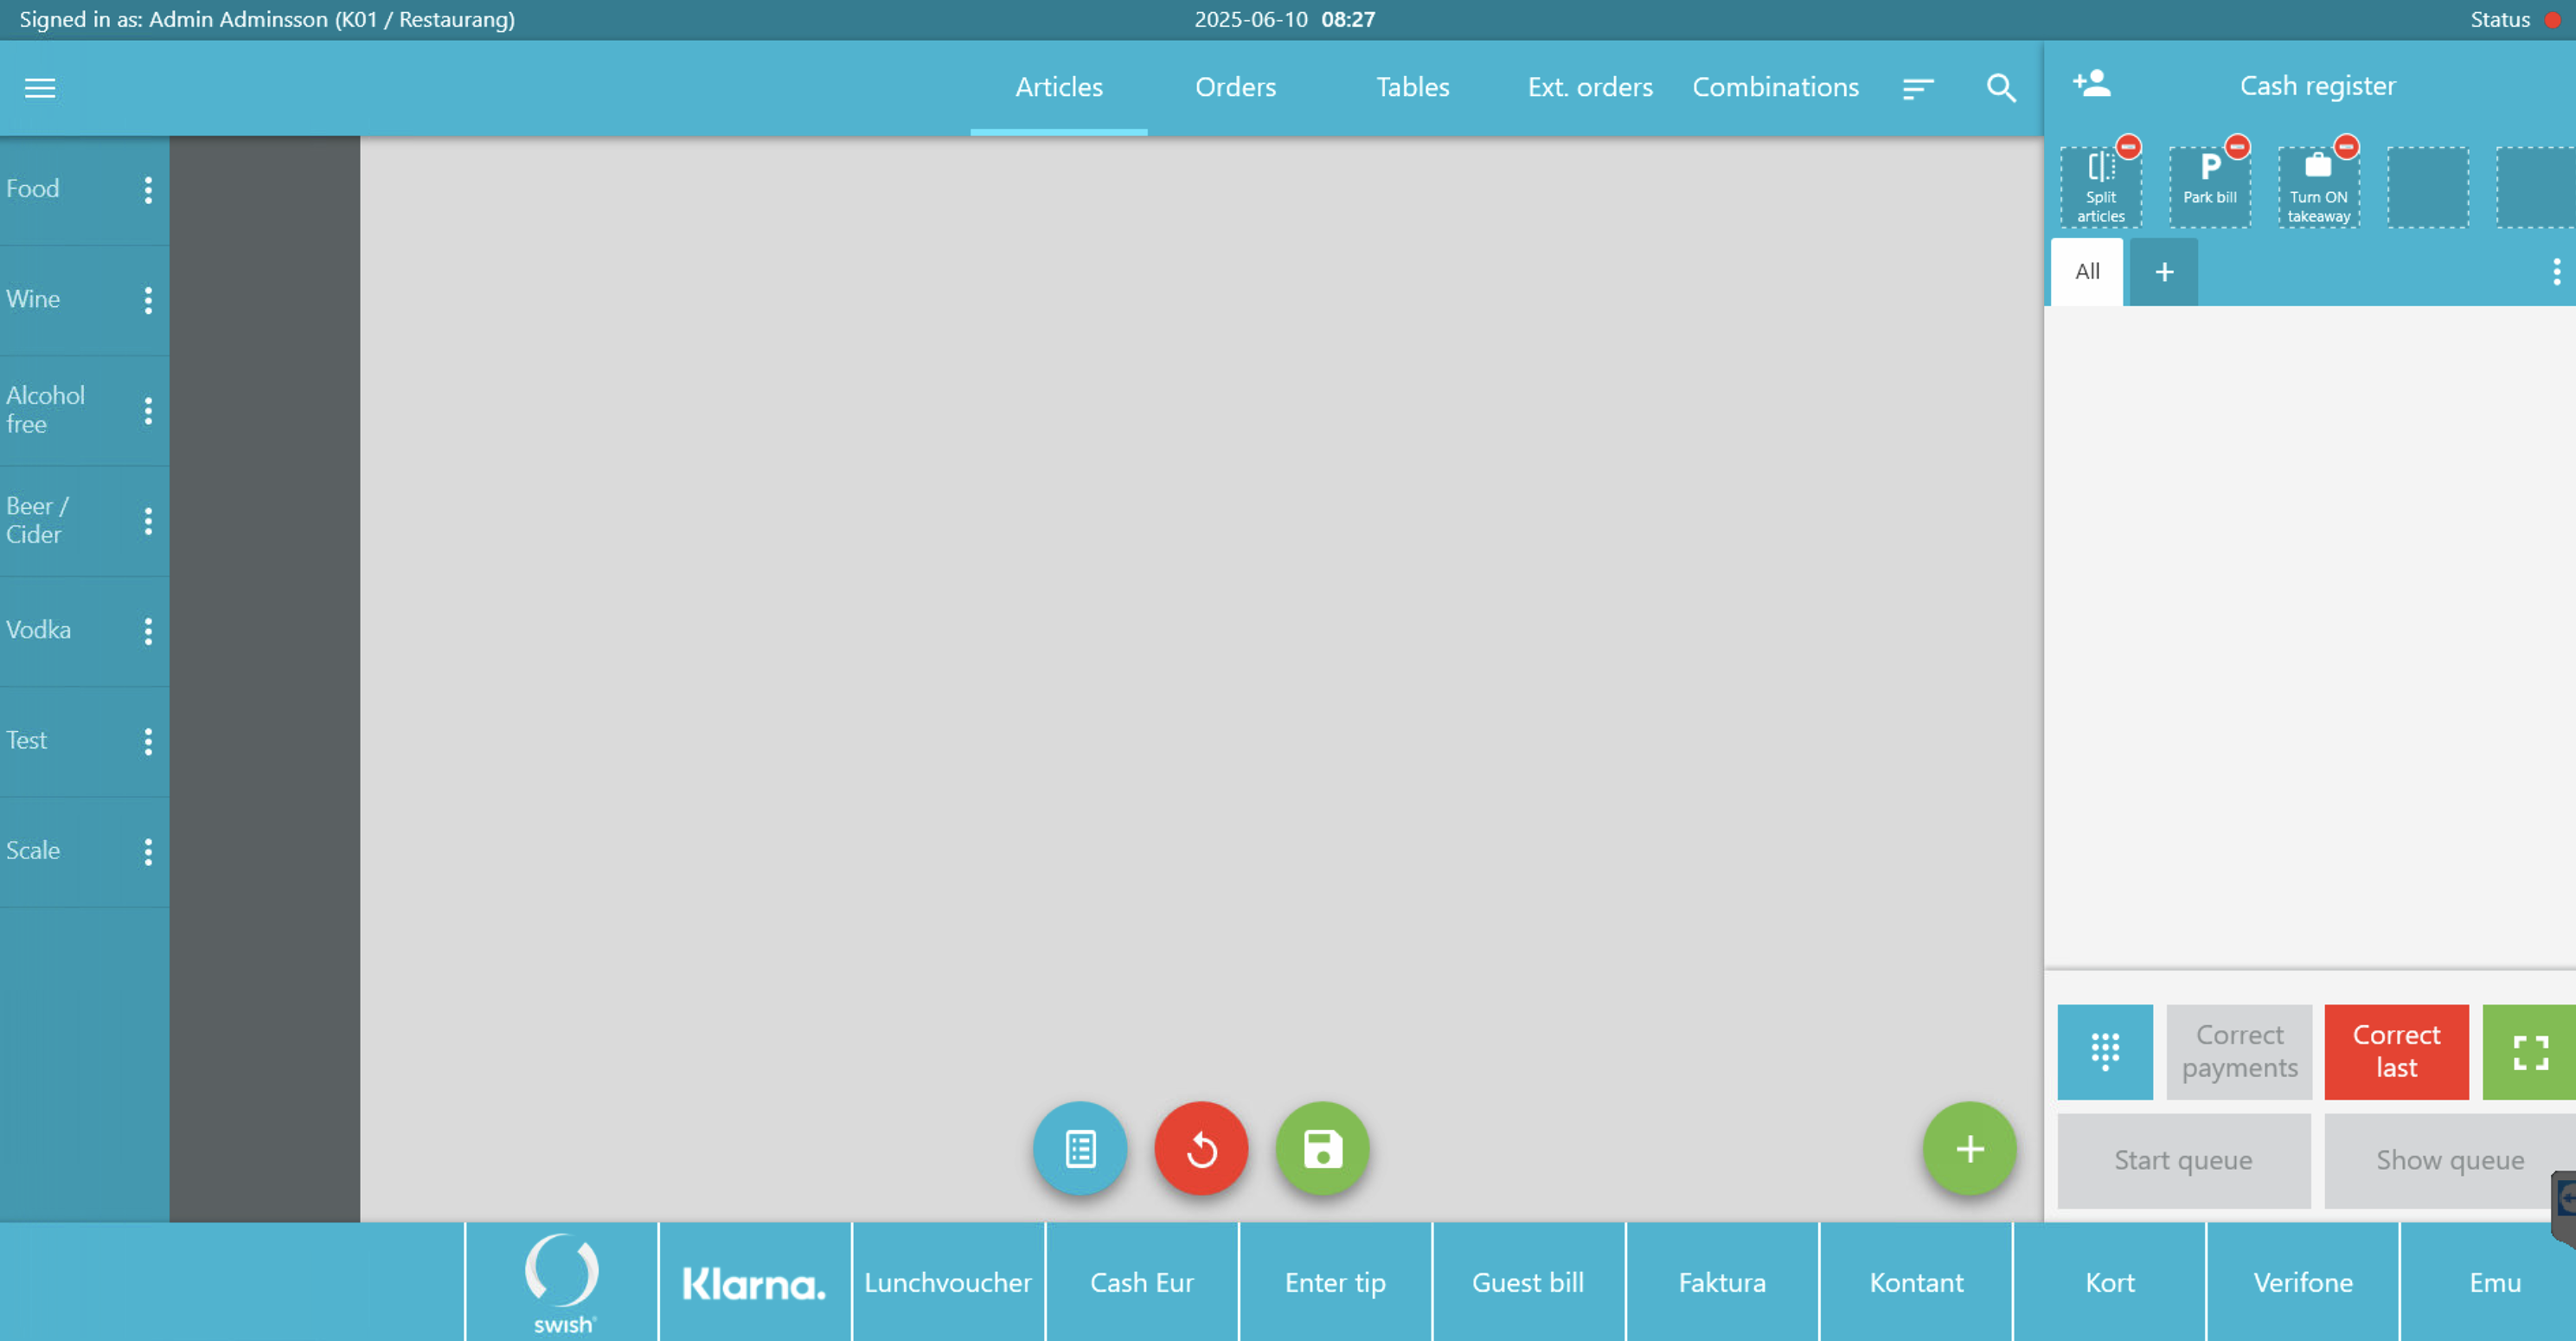
Editing mode
In the editing mode, you can move article cards or menu categories. To move an article card or a category: Click and hold the card or category → drag it to the desired place → drop.
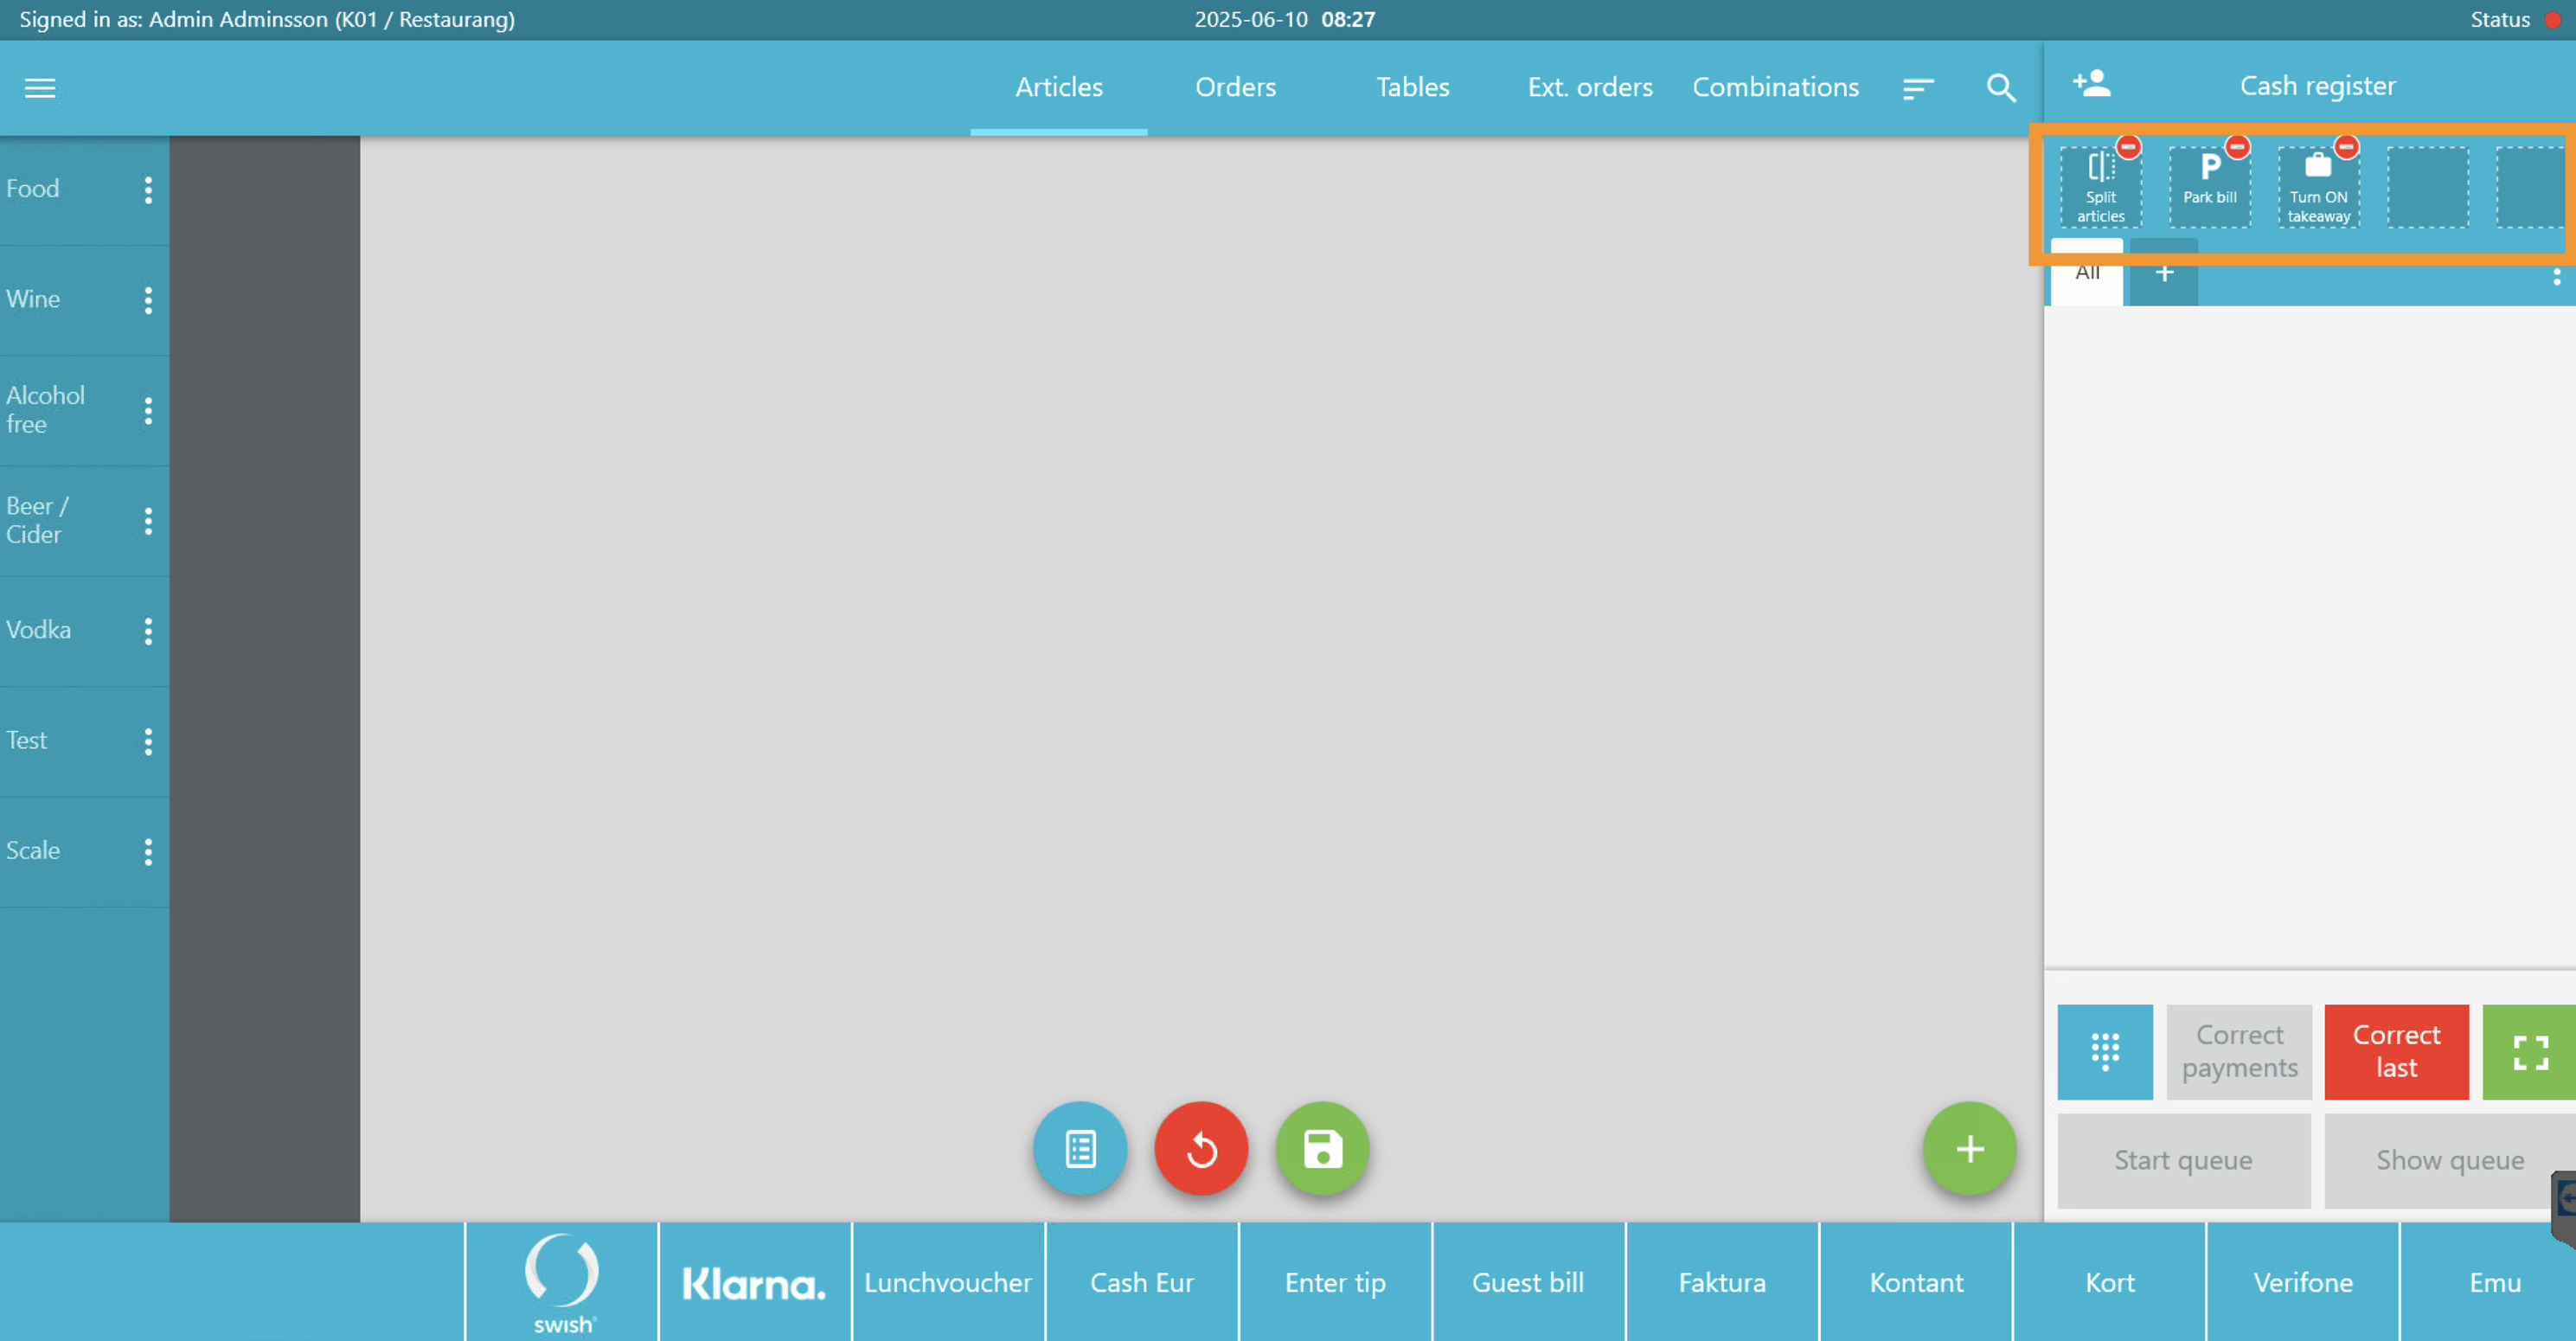
You can also change the position of the buttons above the shopping cart by click, drag and drop the button where you want it.
To change the color of an article card, click on the card. Then options will appear for which colors you can use. Click on the desired color, and it will immediately change to that color. To undo your selection, click the revert button.
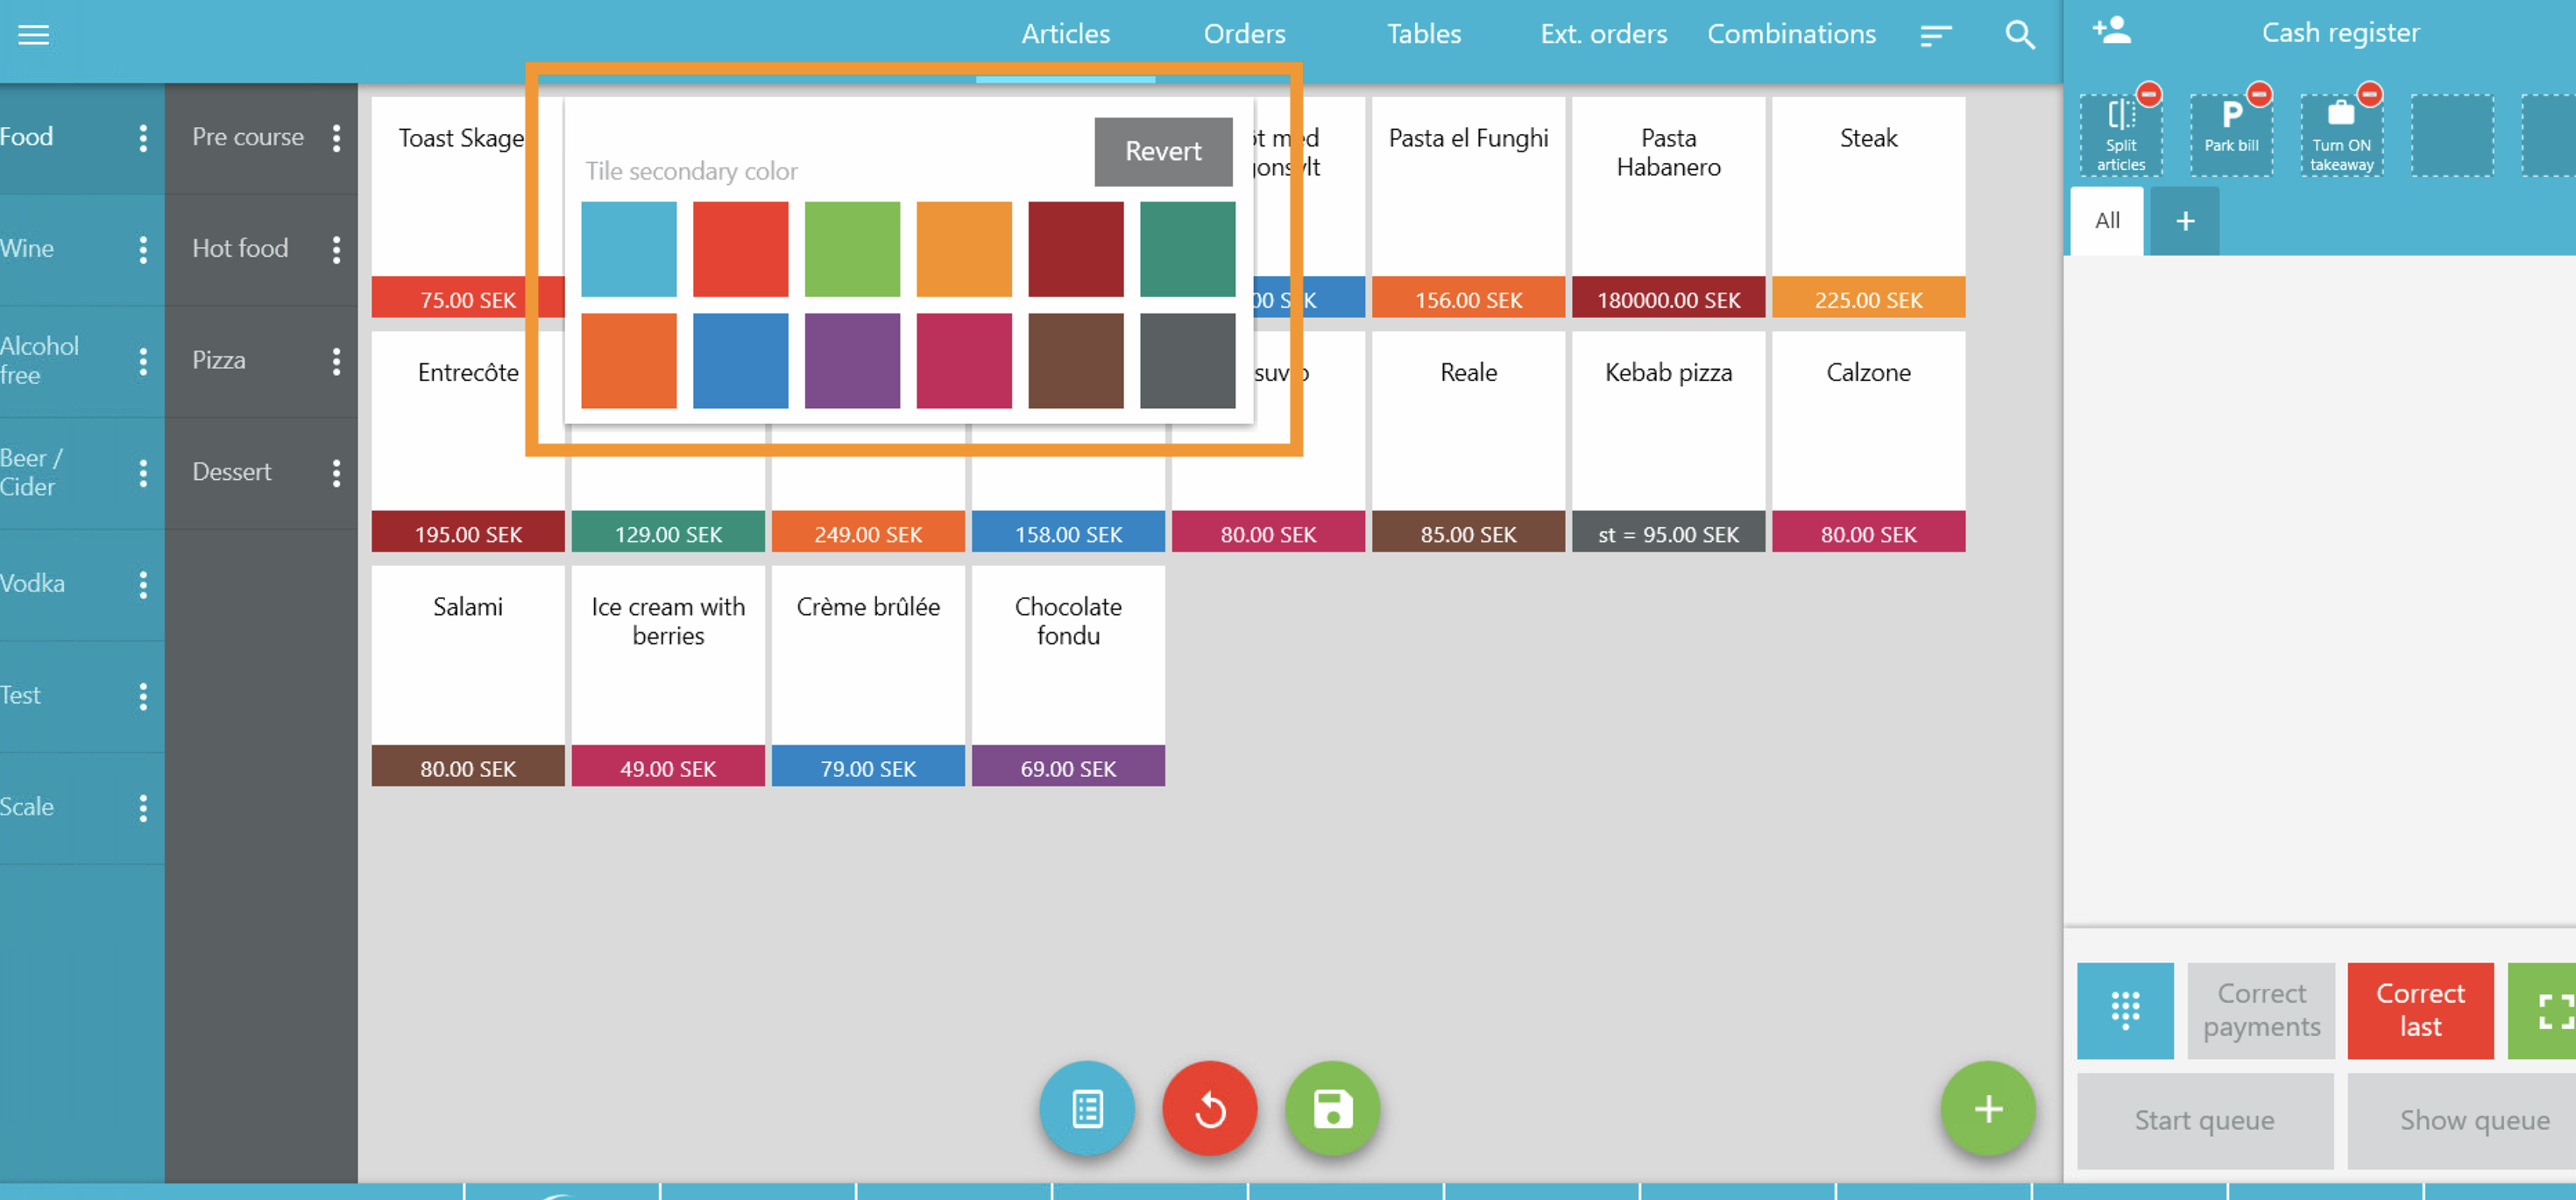
Save by clicking on the green icon button at the bottom of the page. This will exit the editing mode.
Create your own cash register category page
Do you want to, for example, gather your most sold articles on a start page instead of navigating through the menus on the left? Then you can create your own cash register category page. Example of what it might look like:
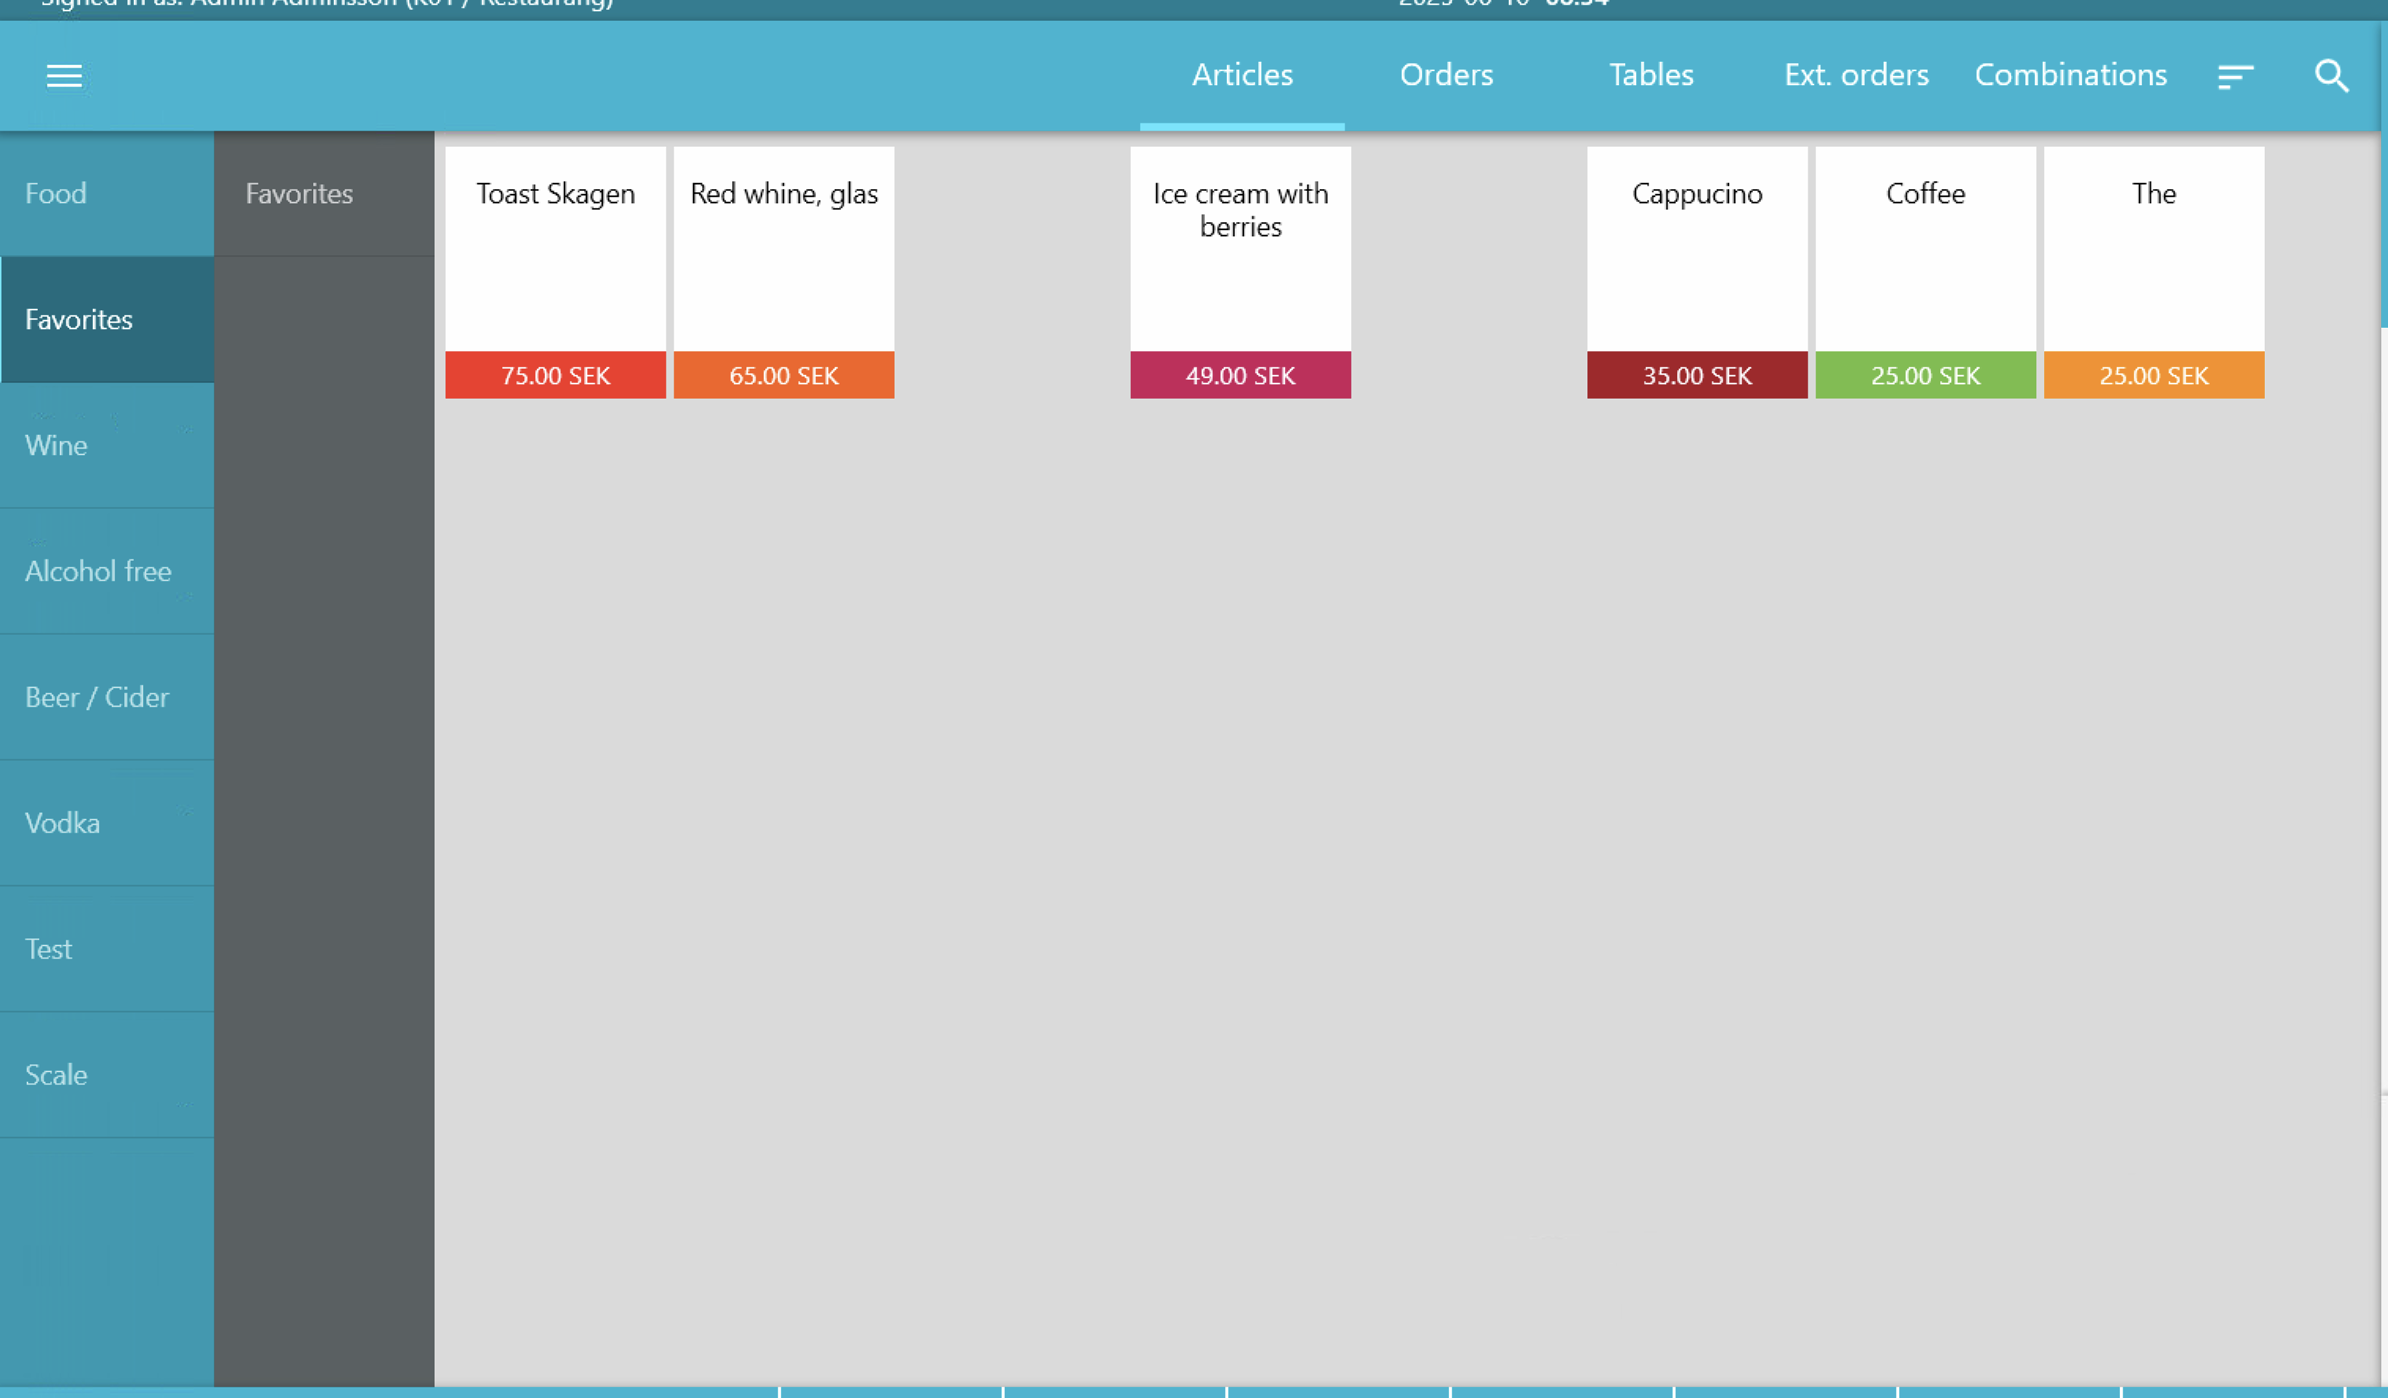
1. Create a new cash register category page
- Make sure you are in editing mode, then a plus sign button appears in the bottom right corner of the screen.
- Click the plus sign button
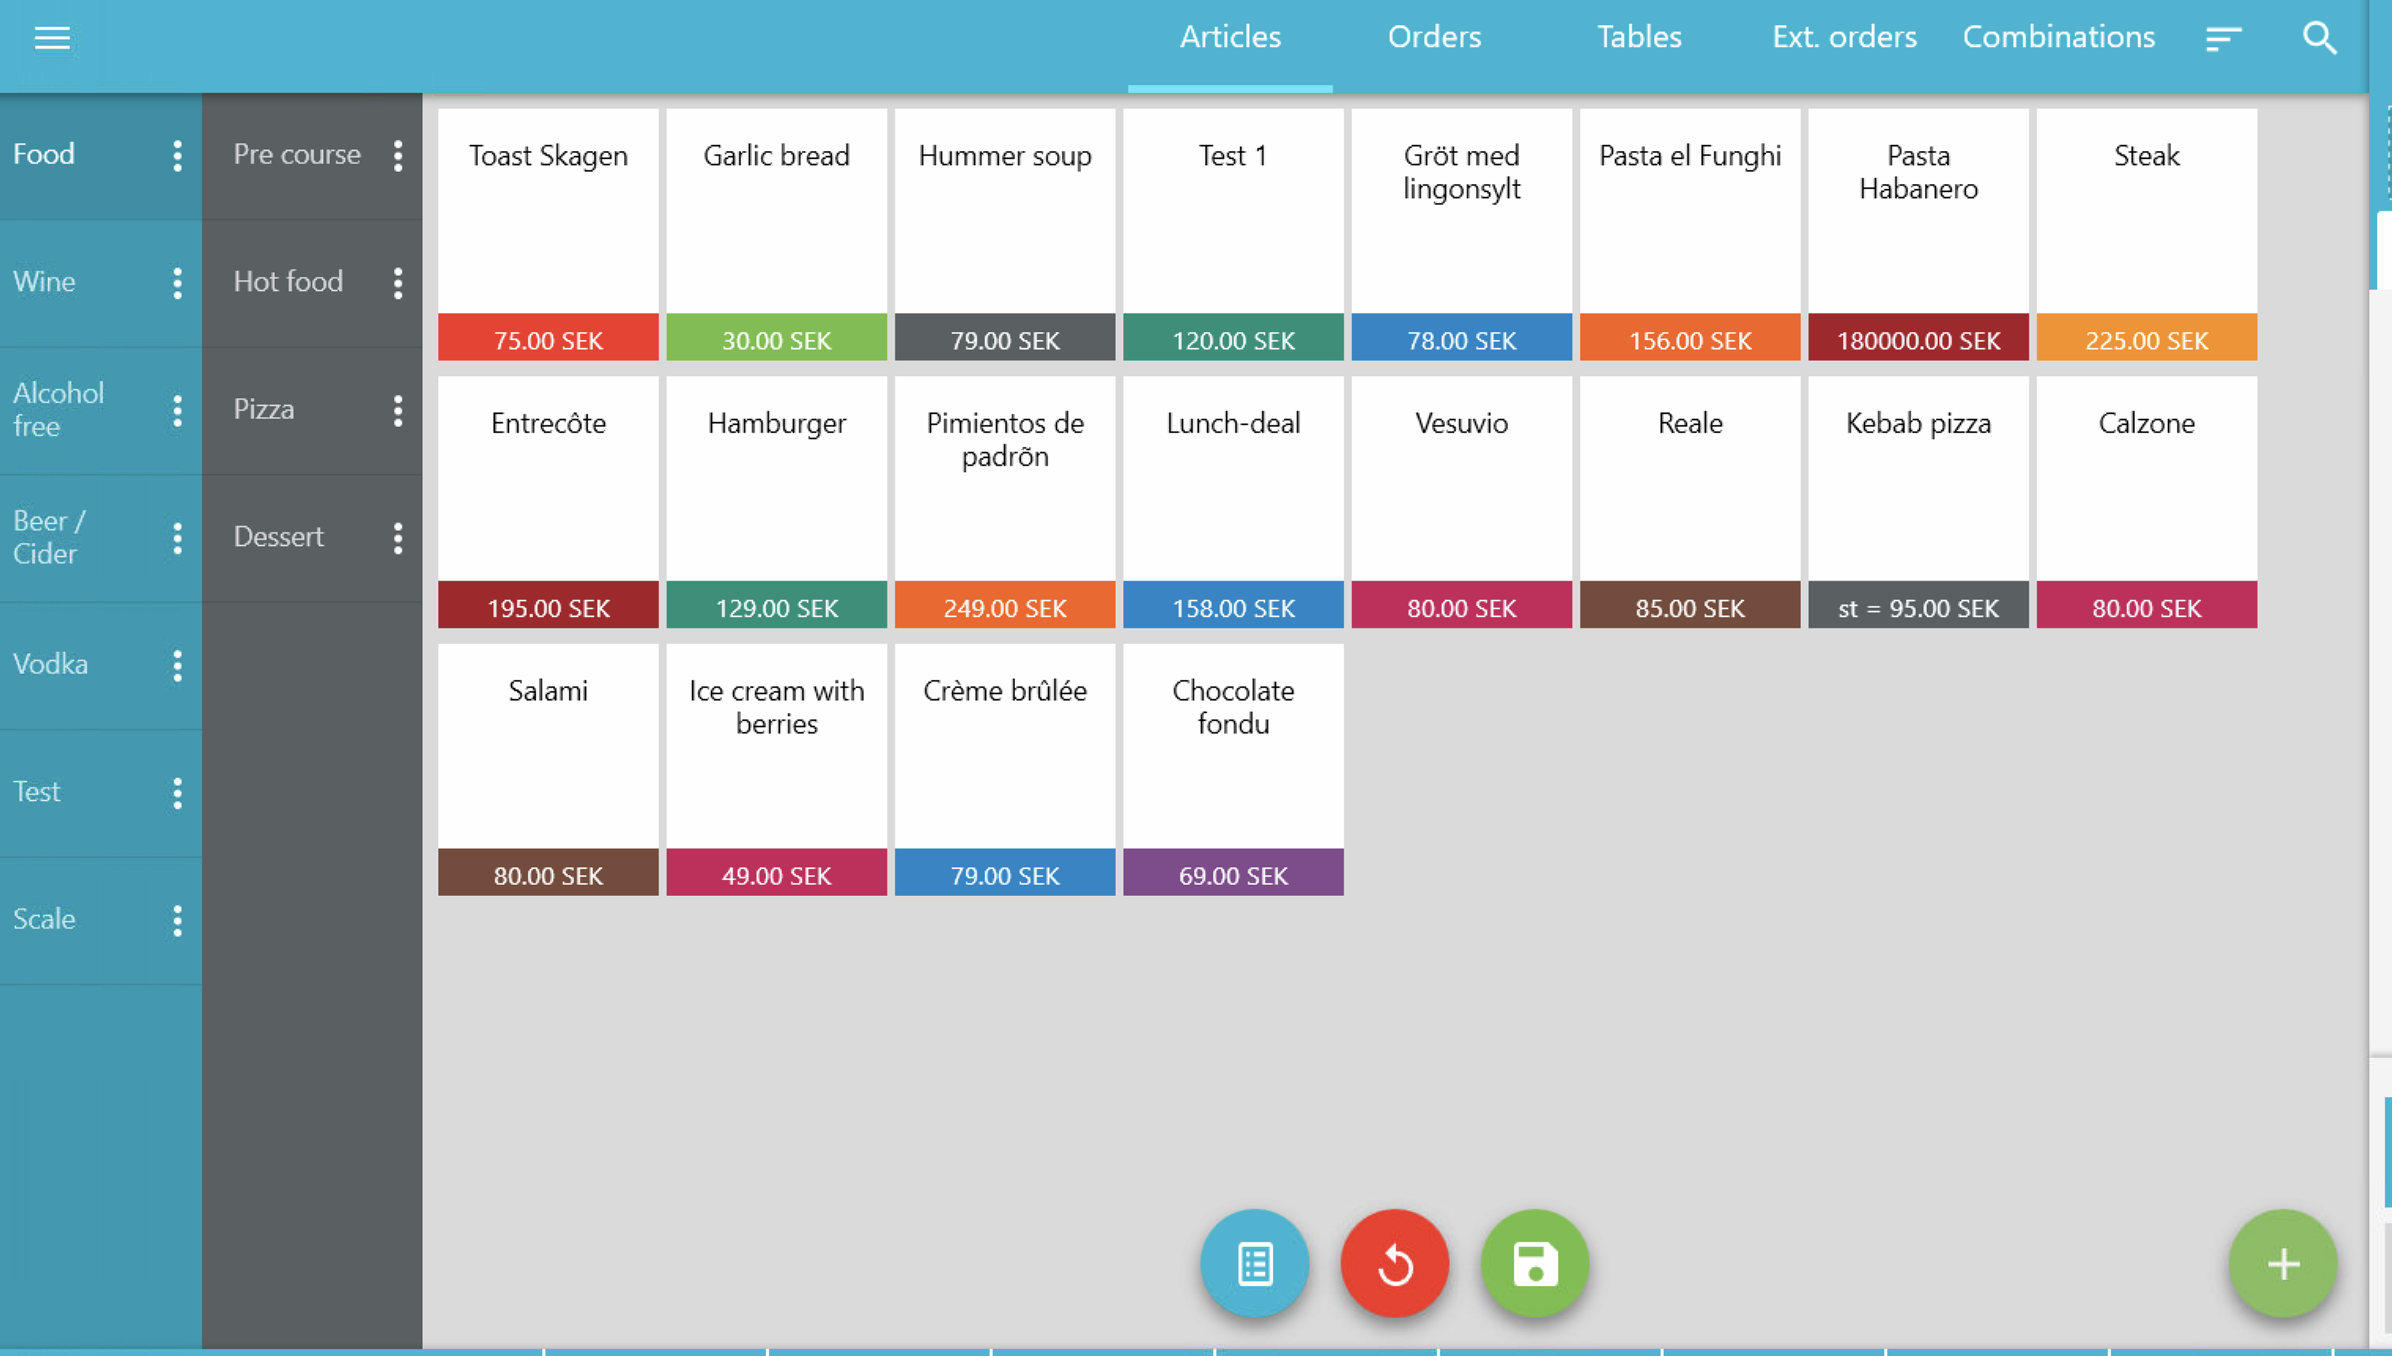
- Choose "Category" in the menu that appears.
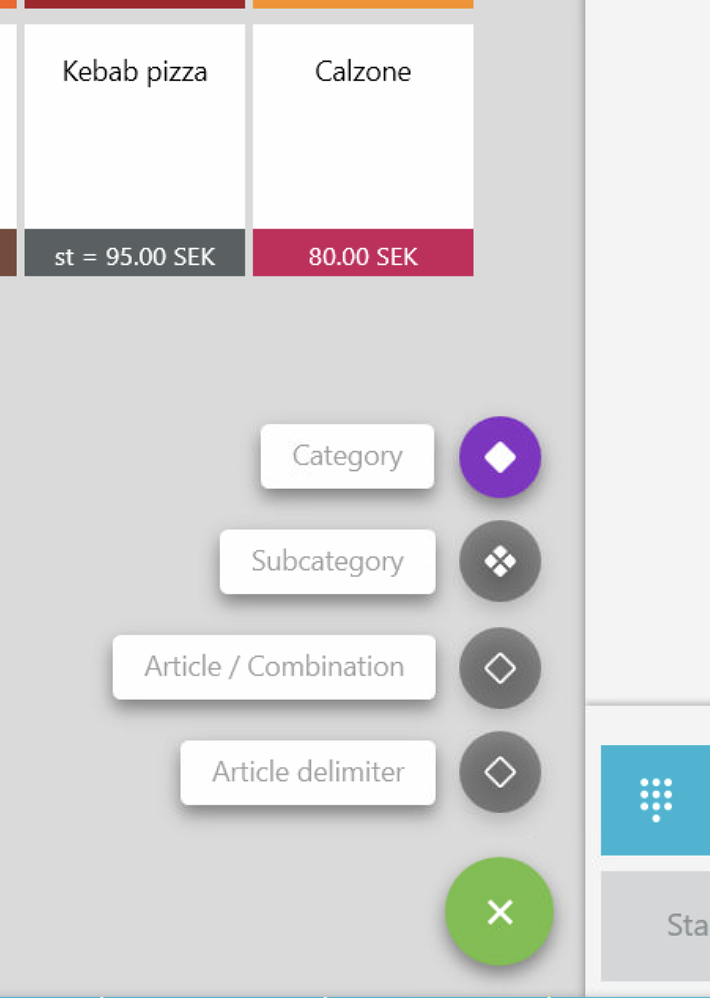
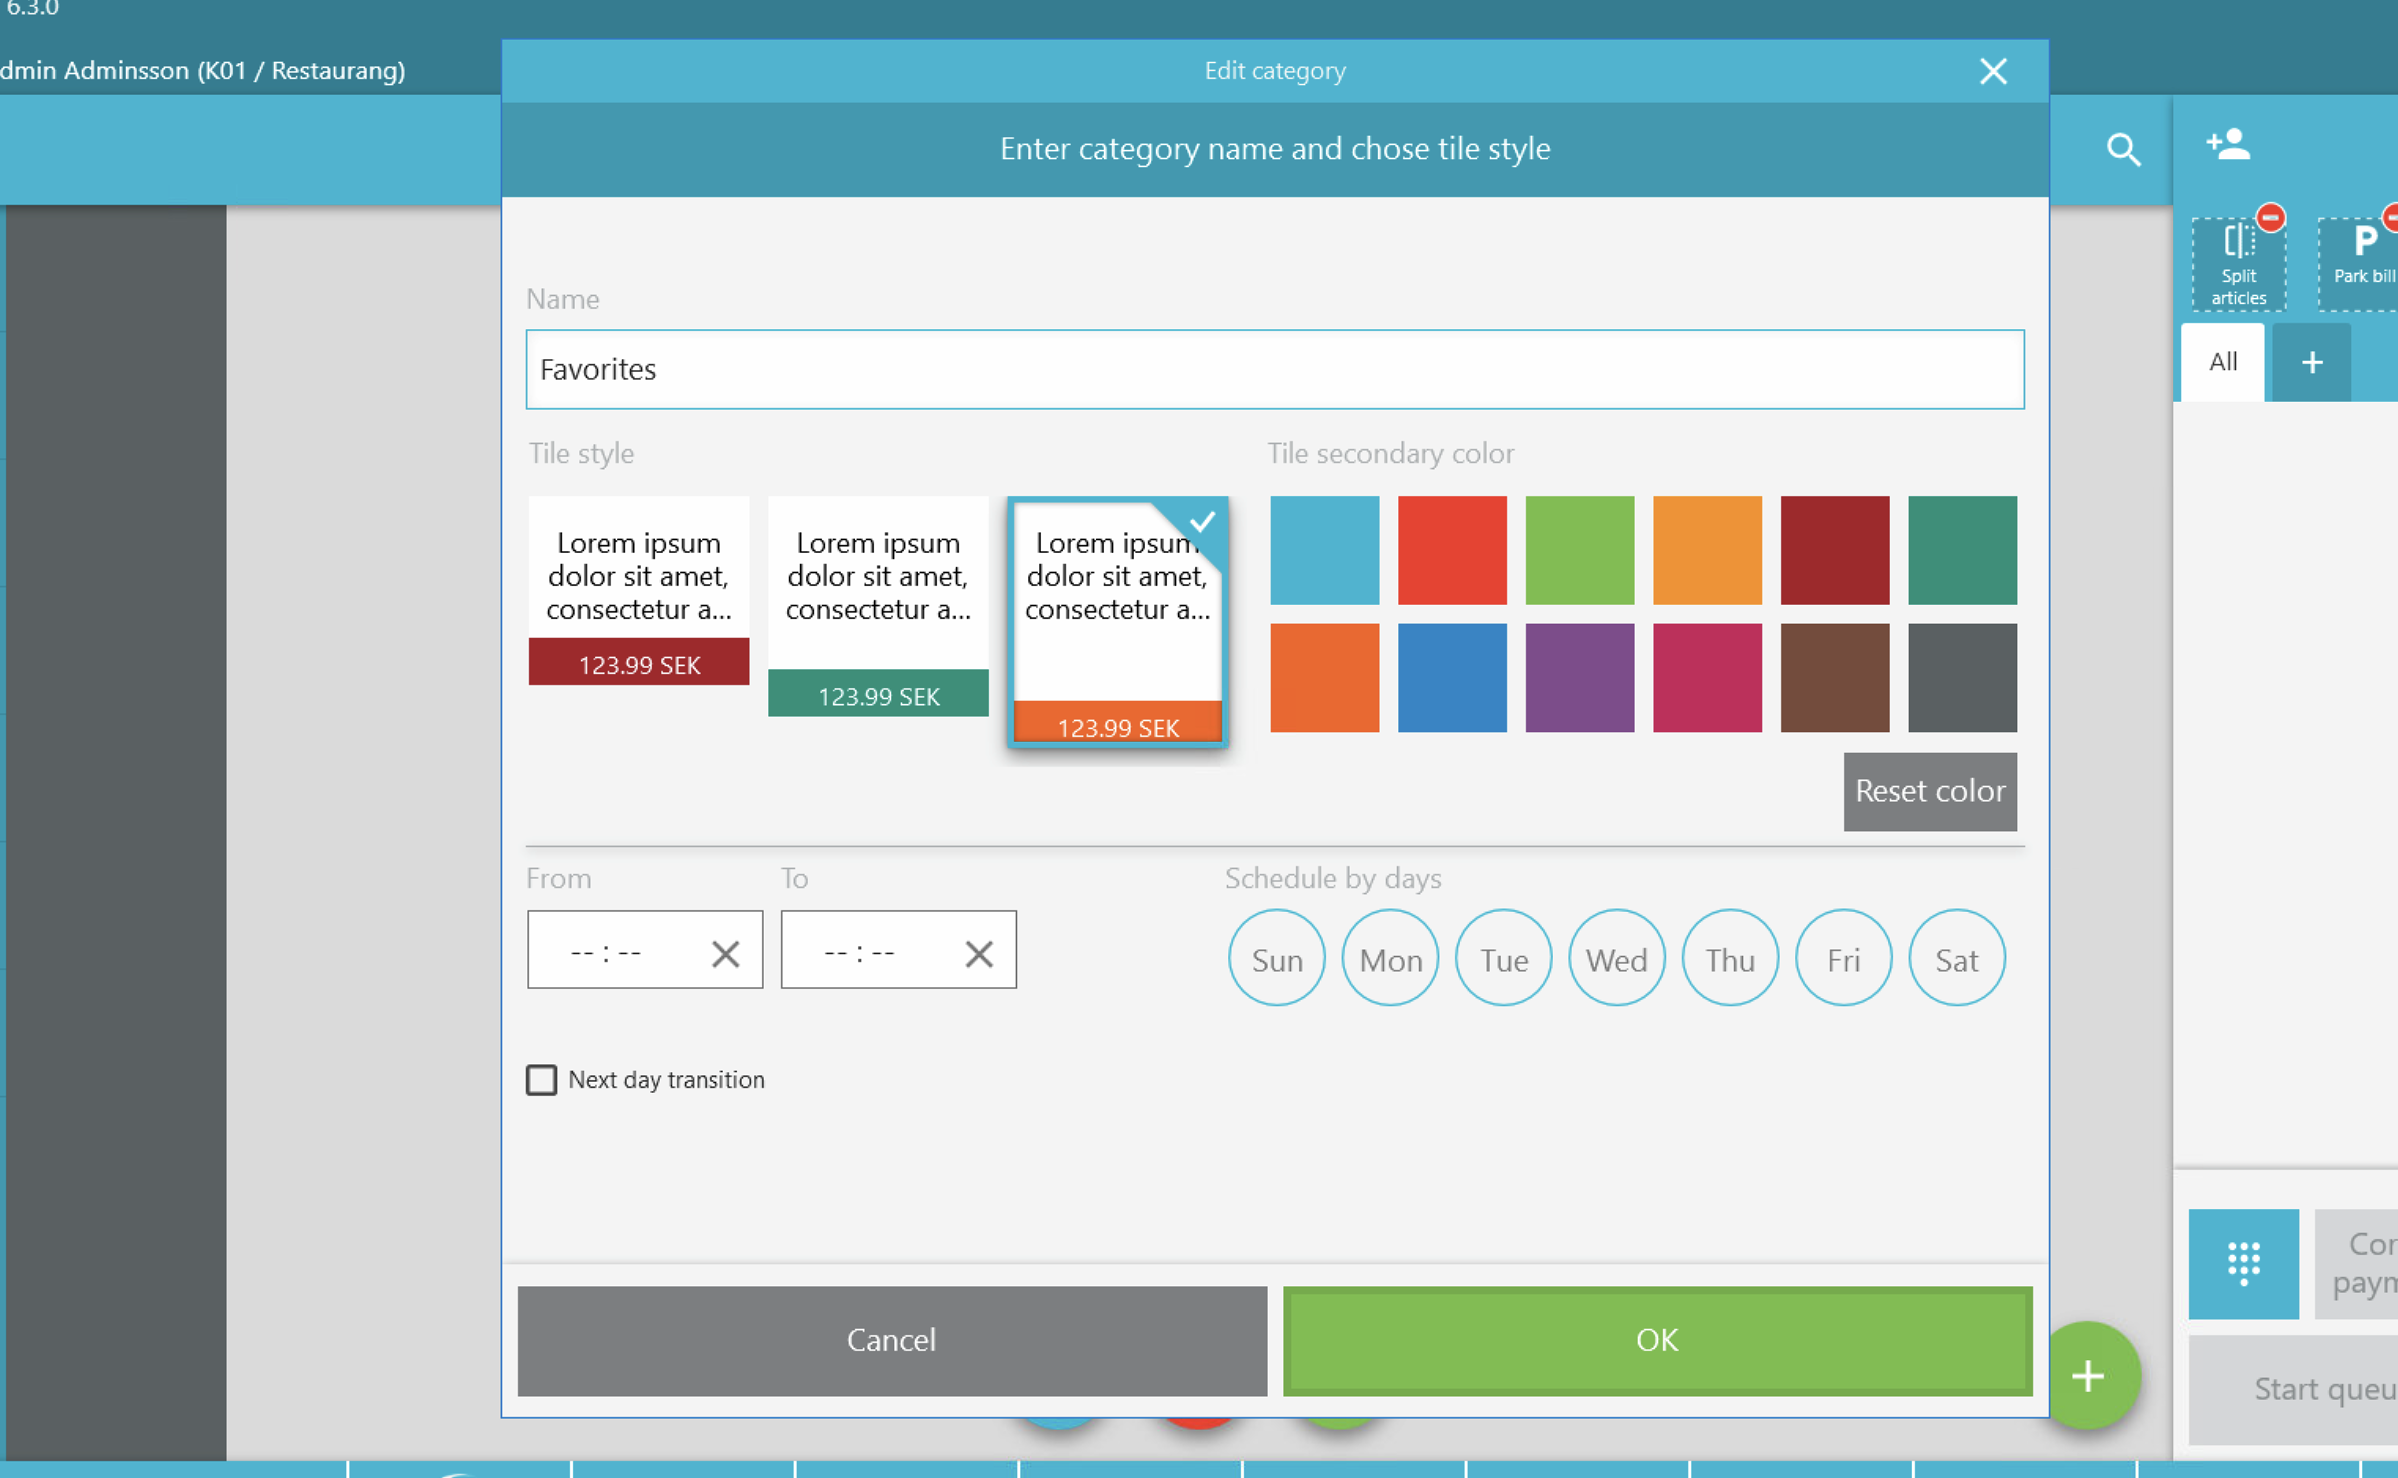
A pop-up window will open, where you fill in:
- Name your cash register category page, e.g. "Favorites"
- Choose color and style for the article cards.
- Set display time. For example, if the category should only be visible during a certain period.
- Click OK to create the category
2. Manage your cash register category page
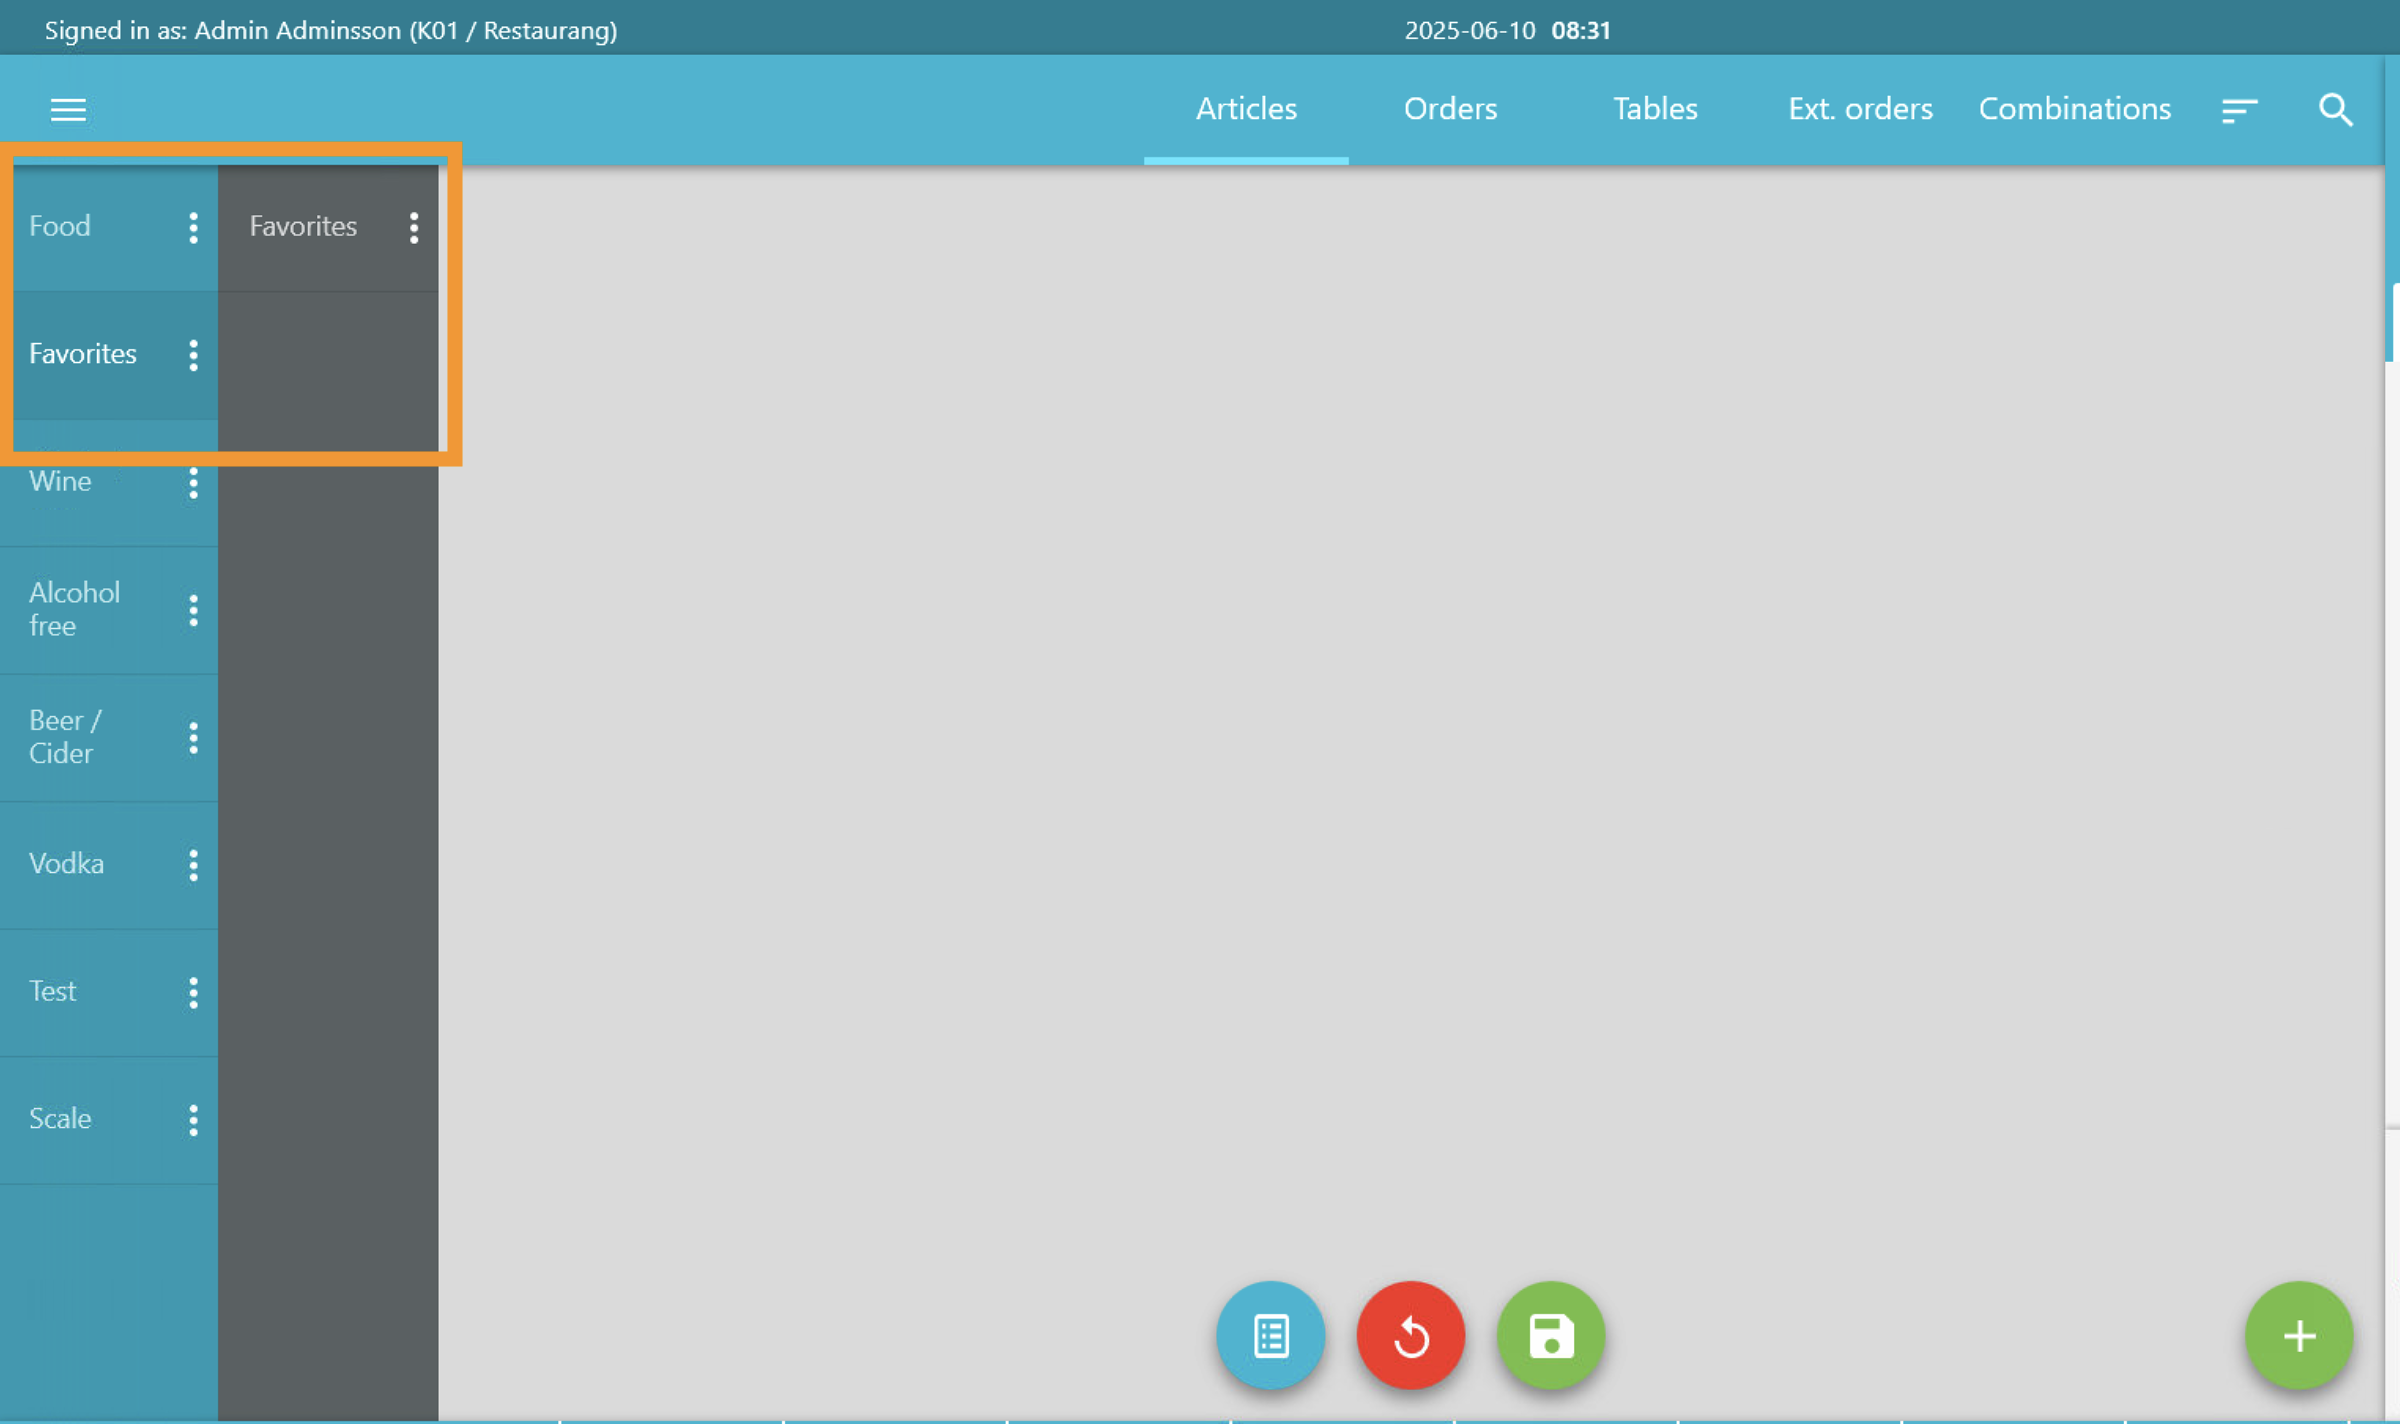
When the category is created, it will appear in the menu on the left.
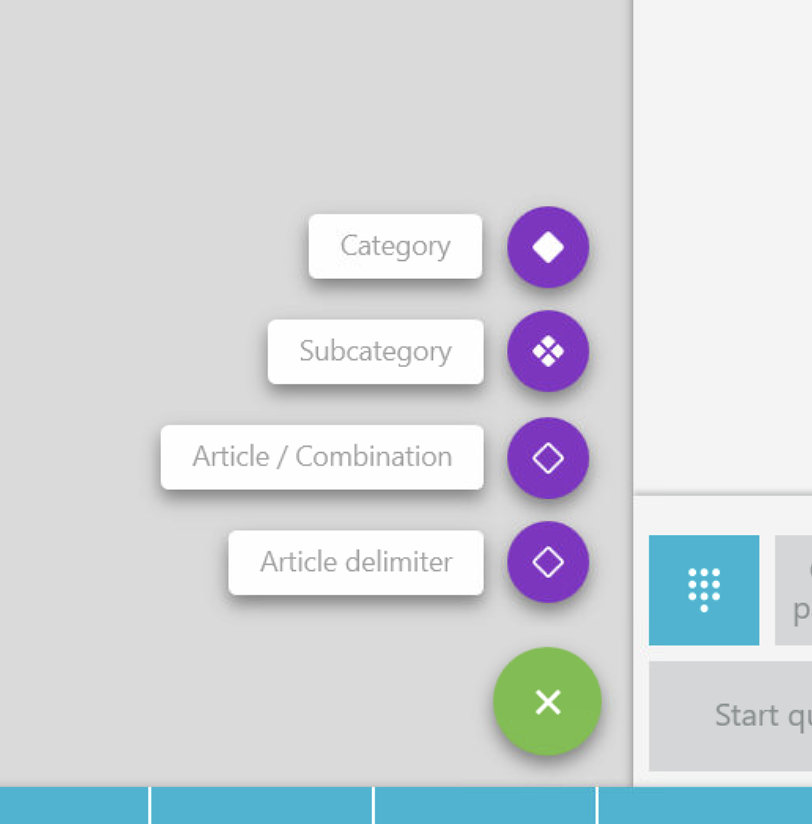
If you click on the plus sign button again, more active options will appear on how to manage the cash register category.
3. Create a subcategory
If you want to divide your category, choose "Subcategory" to add a subcategory.
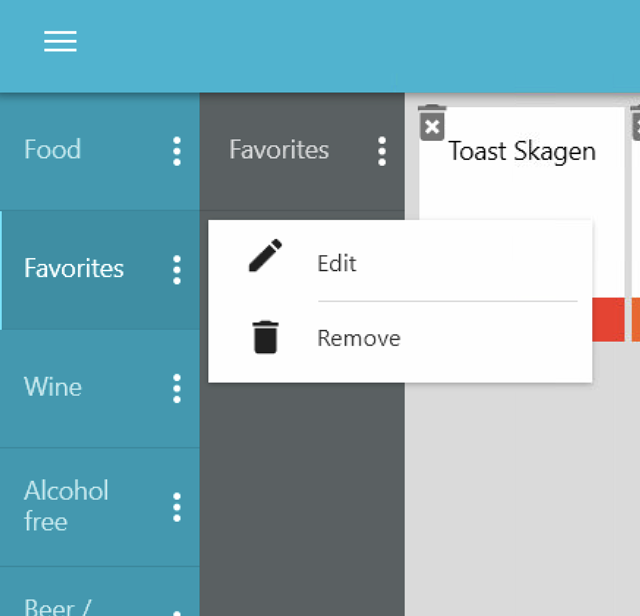
You can at any time edit or delete a category or subcategory. Click the three dots and choose either edit or remove.
4. Add articles
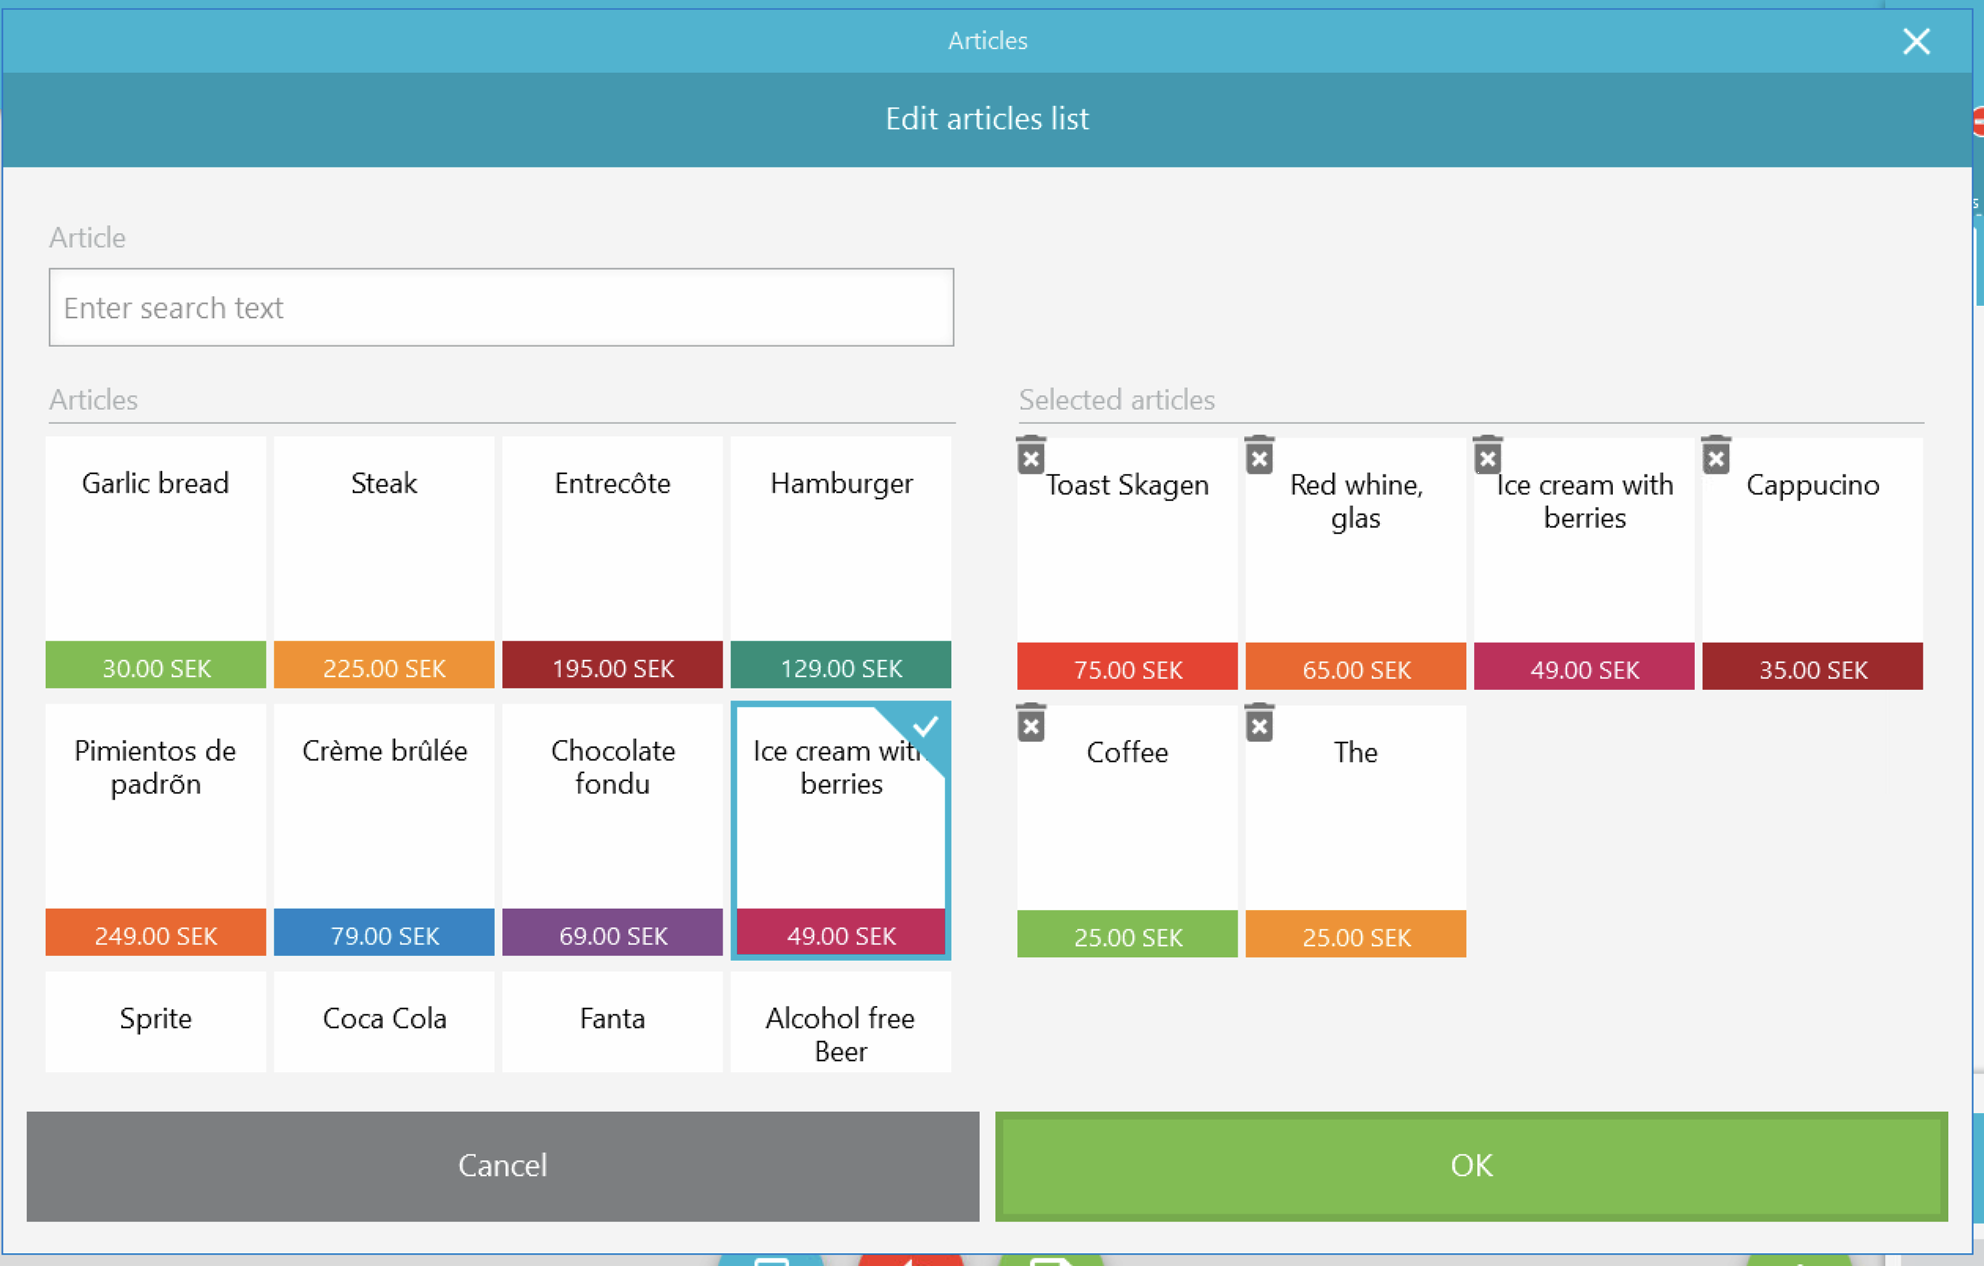
Click on "Article/Combination" in the plus sign menu.
In the pop-up window that appears: Search for the articles you want to add. Select and click on the desired articles. They will appear under "Selected articles" which will be shown in your cash register page. Click OK to confirm.
5. Create space between articles
To make the page more clear, you can add spacing:
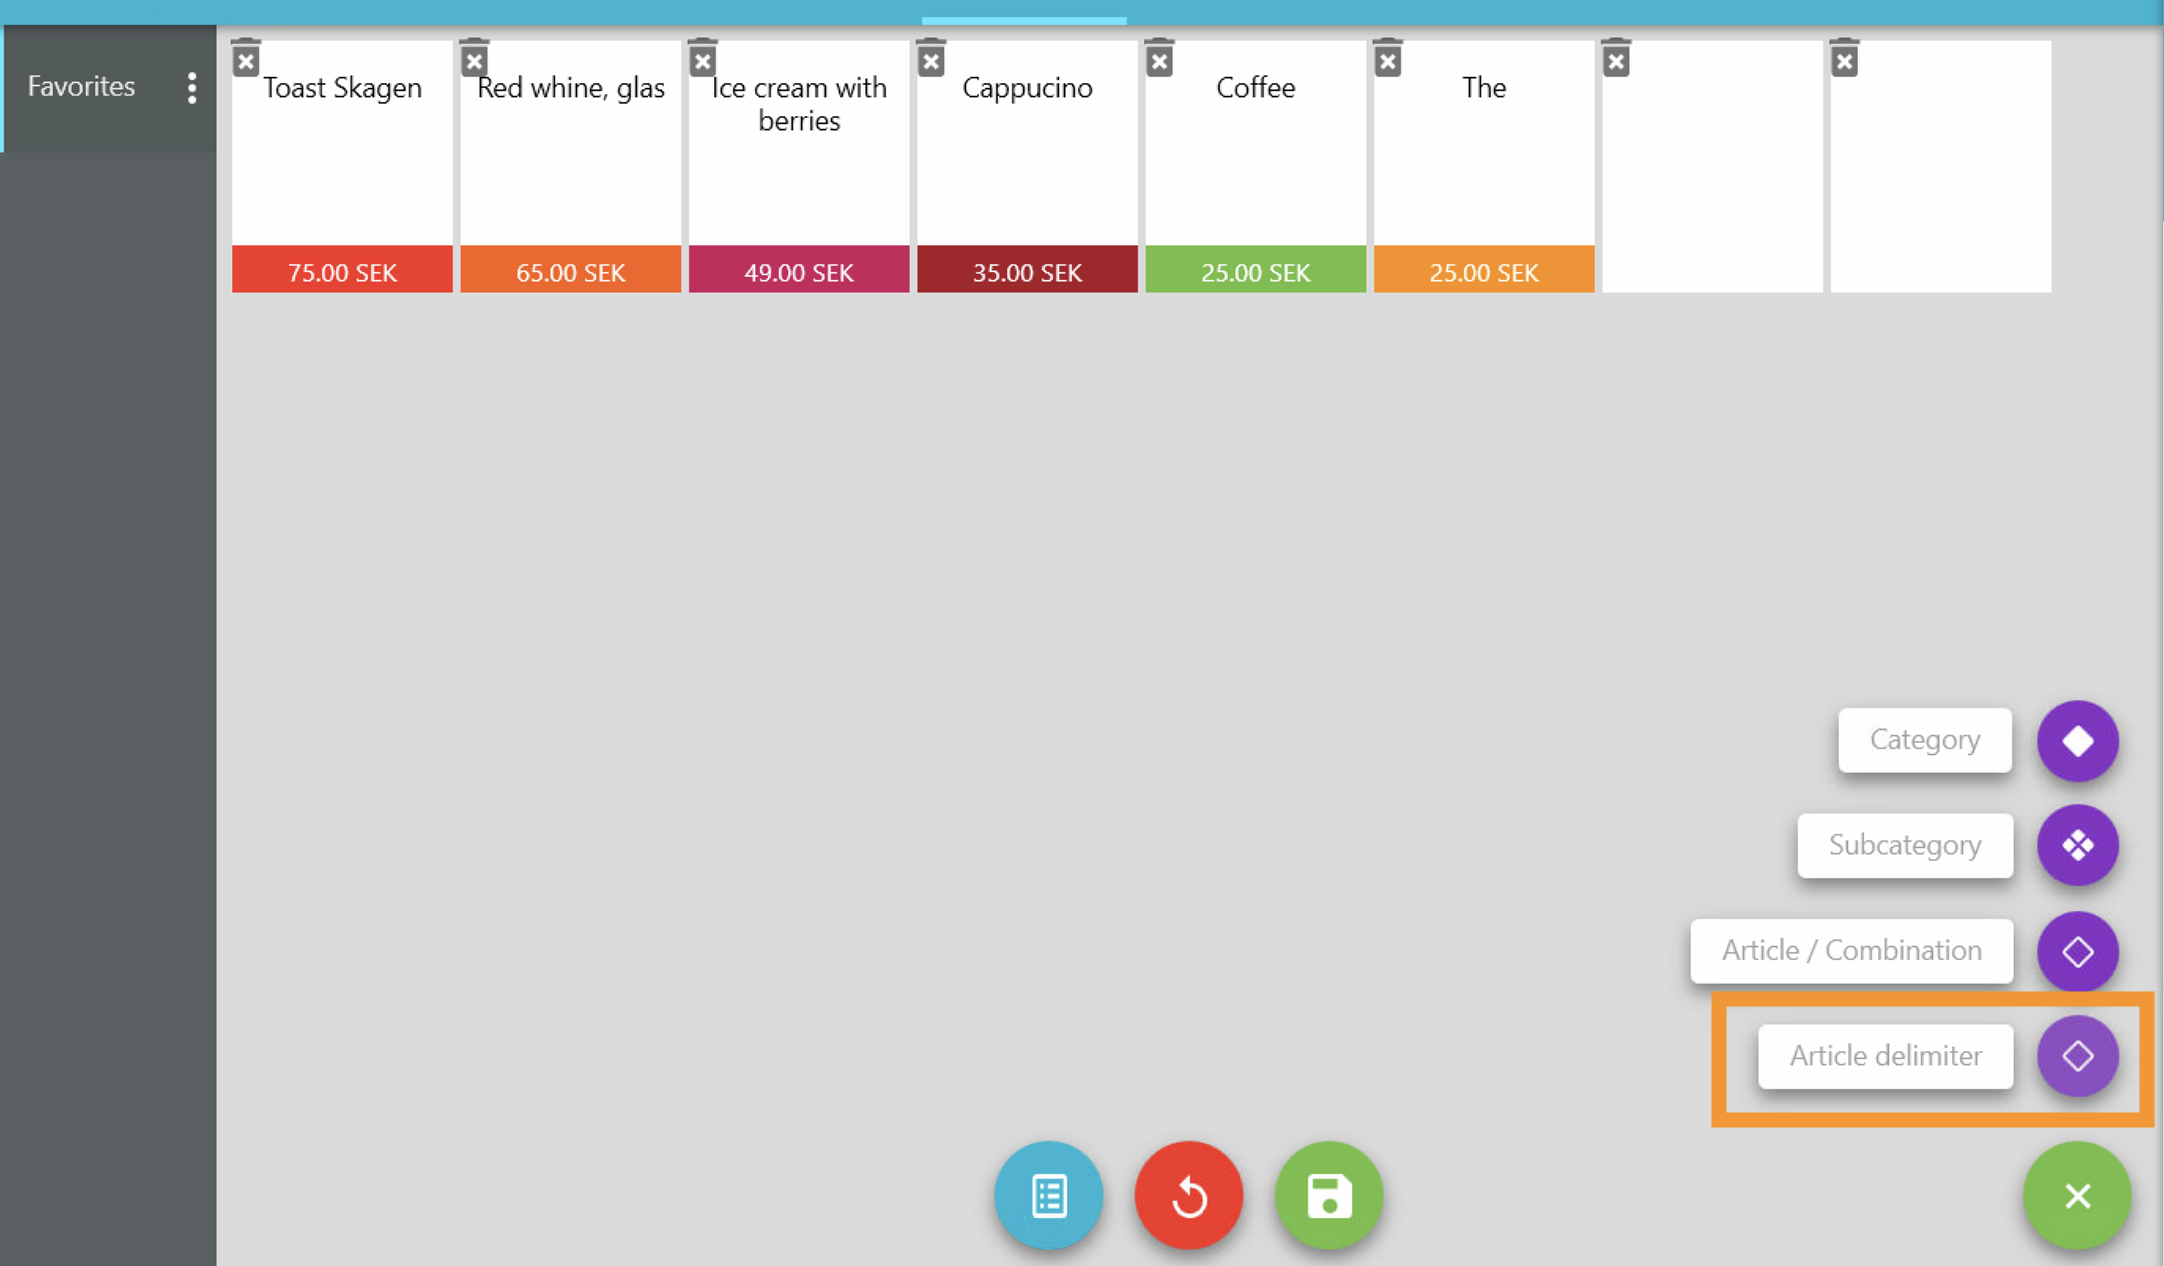
Choose "Article delimiter". This creates an empty article card that you can drag and drop wherever you want.
6. Save your changes
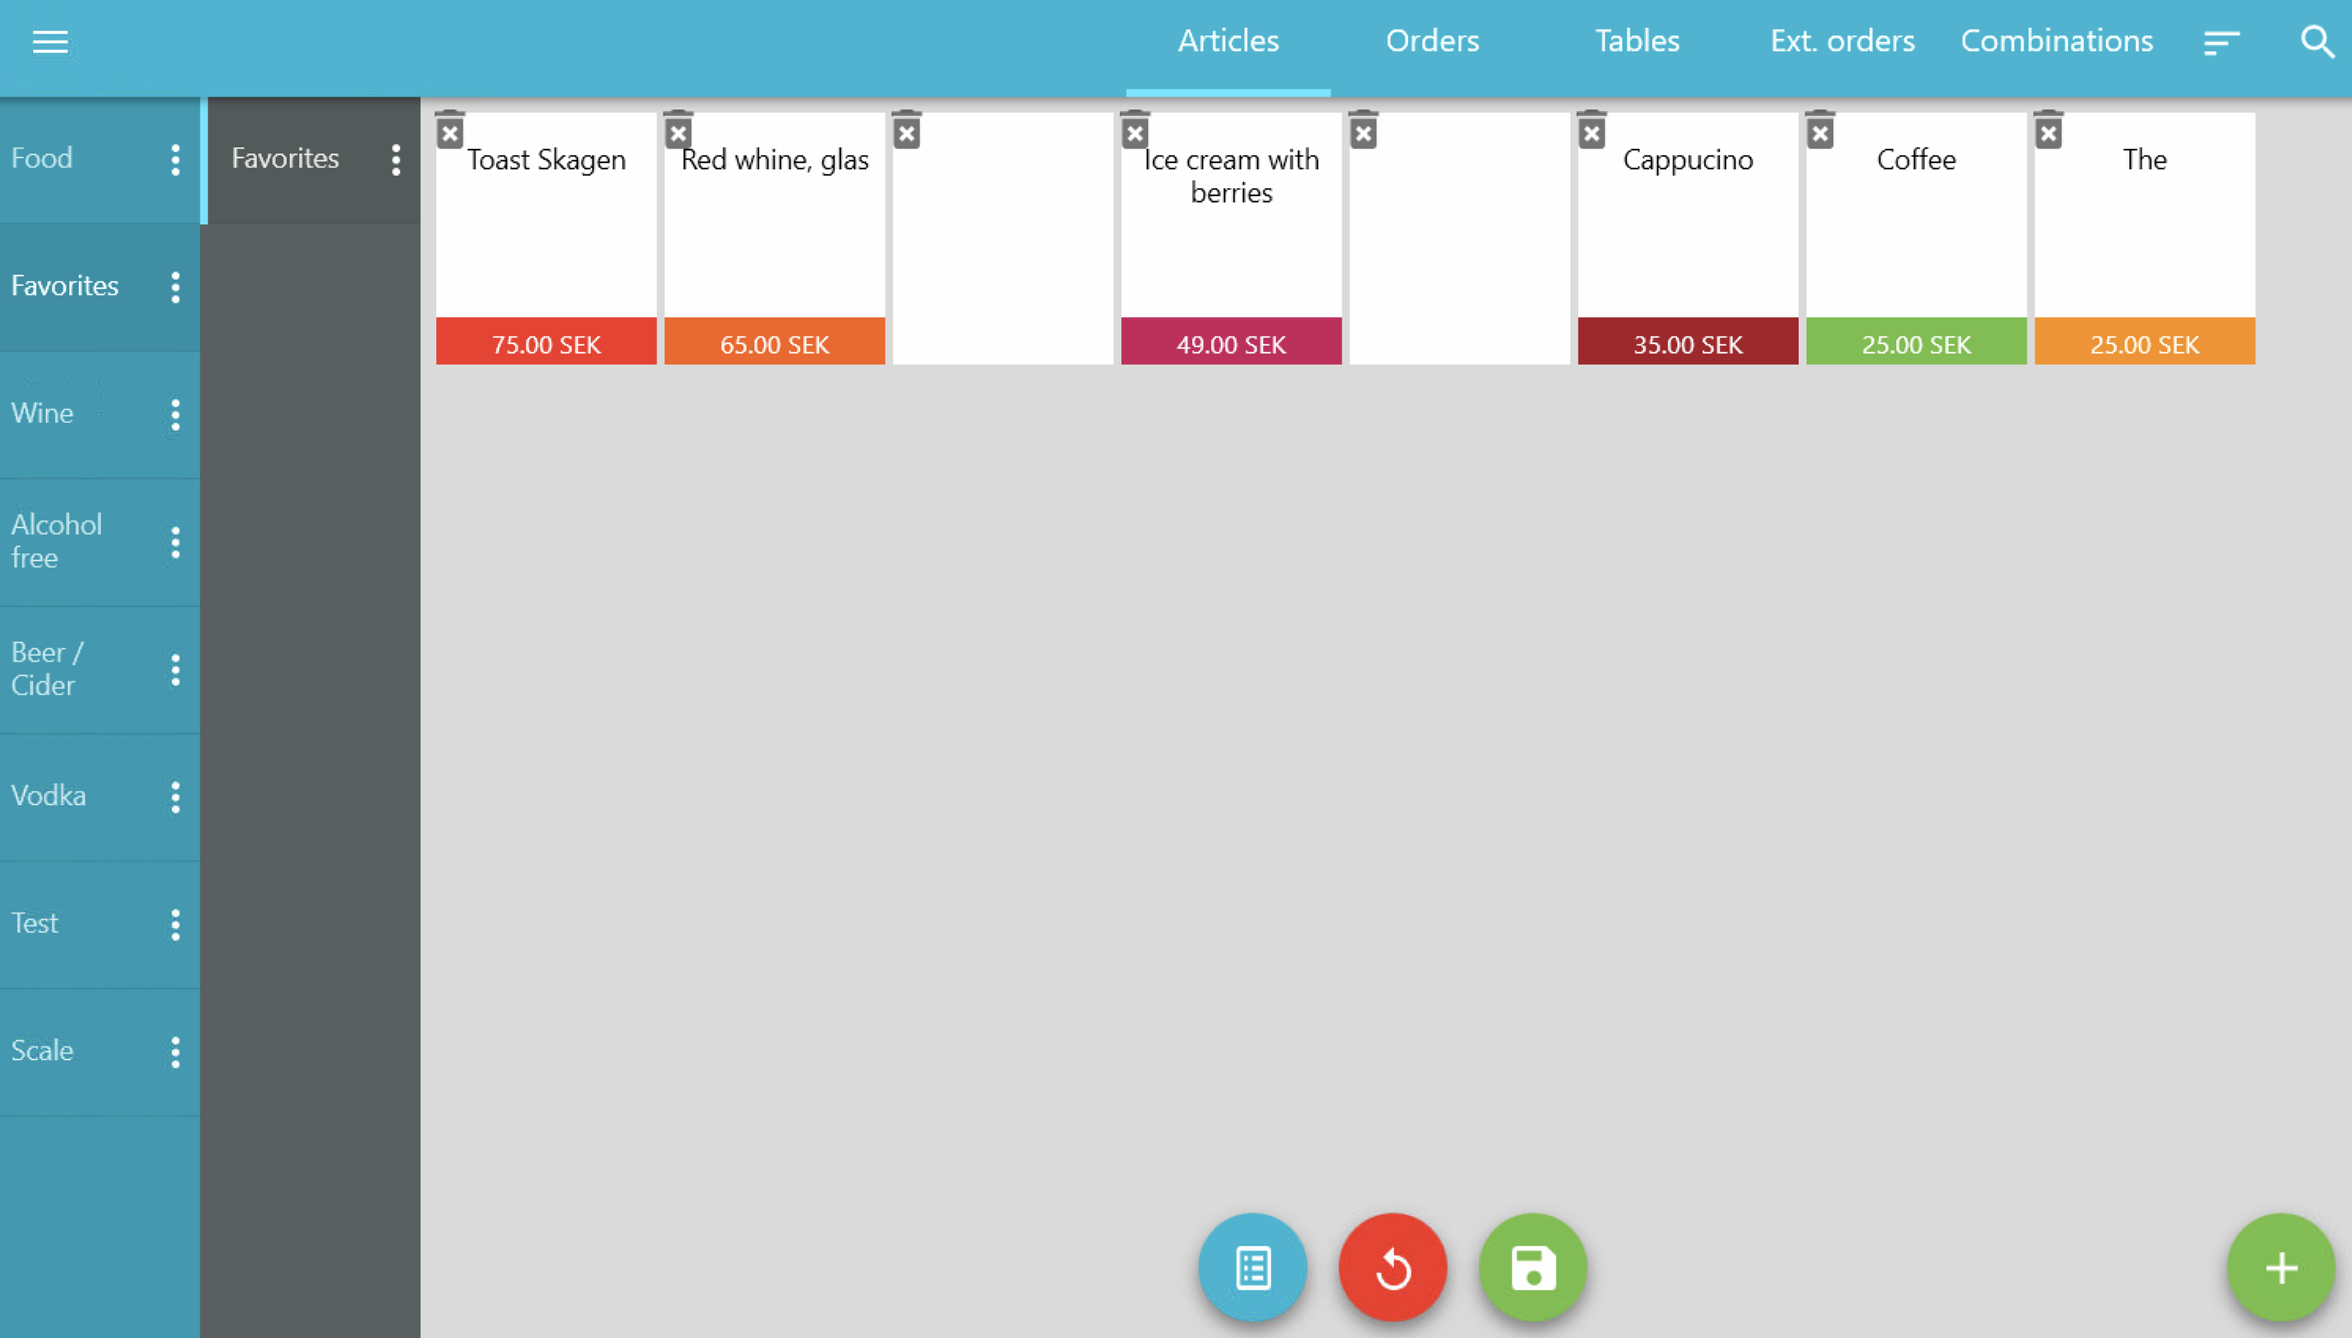
When you're done with your new cash register category page, don’t forget to click Save (right-hand button). This exits the editing mode and saves your changes.

In this example, the checkout display will then look like this:
